Authorized Online Retailers:
This guide will help you to understand how to get started using Cayenne.
Cayenne is the world’s first drag and drop IoT project builder that empowers developers, designers and engineers to quickly prototype and share their connected device projects. Cayenne was designed to help users create Internet of Things prototypes and then bring them to production.
Cayenne was designed to work from Android smartphones and popular browsers.
There are several major components in the platform:
Cayenne Mobile Apps – Remotely monitor and control your IoT projects from the Android Apps.
APP is updating. It can only display data and status. It cannot be operated in real time.
Cayenne Online Dashboard – Use customizable widgets to visualize data, set up rules, schedule events and more.
Download Android APP from Google play:Android APP
Features
1)The Cayenne dashboard (online and mobile) is the main screen where you can setup, customize, monitor, manage and control your connected devices. From the Cayenne dashboard you can add board, sensors and actuators. you can fully customize your dashboard ,view device and sensor data history, set up automatic triggers and receive notification alerts. remote manager device and sensors, create your own IOT projects and so son.
For more informations, you can visit https://mydevices.com/cayenne/docs/#features
Create Cayenne Account
You can create an account from Mobile or online. Mobile is the easiest and fastest way, but instructions for online set up are below:
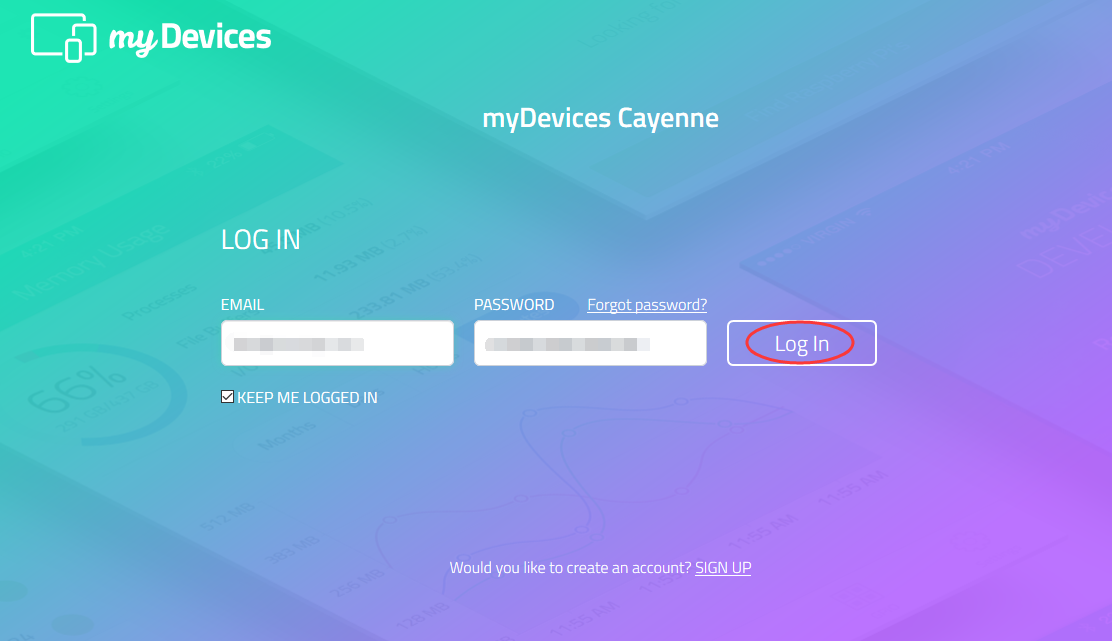
Visi website: https://cayenne.mydevices.com/cayenne/login, On the Sign Up page, enter your Name, Email and create a Password.

Once you create an account, you then add your device so it can be seen in the online dashboard. Through the dashboard, everything on your Board is accessible. You can remotely monitor and control your IOT devices, for example, you can turn off /on a LED, Monitor temperature.
Cayenne can support multiple devices as well. Beyond adding as many Raspberry Pi/Arduino as you want, you can select from a range of sensors, extensions and actuators that will be wired to your Board. Once the device is wired, you can then assign it to the GPIO pins. With your GPIO pins registered to certain devices, you can now set alerts or triggers to occur on schedules that you create through the dashboard.
Not only can you do all of this on a laptop or desktop, but they also have an easy-to-use phone app available for Android.Using the app.
Before you can manage your Arduino device using the online dashboard, you must setup your device and install the Cayenne Arduino Library onto the device.
Preparation:
Hardware:
1x Osoyoo basic Board with USB Cable
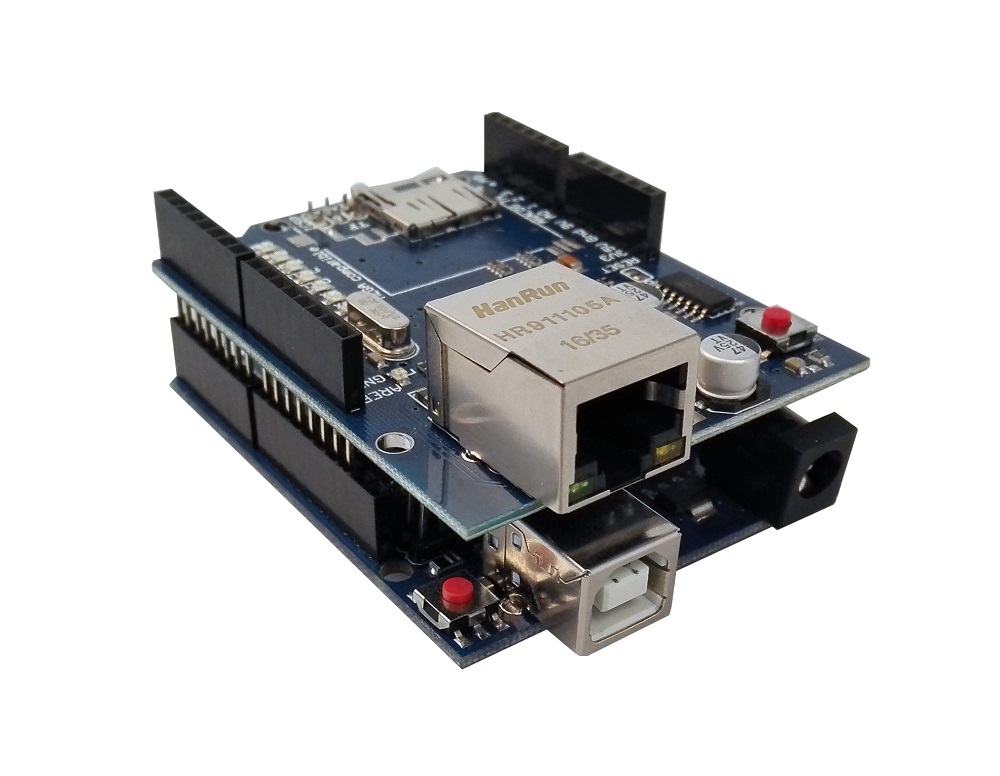
1x Ethernet Shield W5100
Software:
Arduino IDE 1.8.5(Please download IDE from: www.arduino.cc)
CayenneMQTT Library
Step 1: Choose Arduino to start our IOT project
Please visit: https://cayenne.mydevices.com/cayenne/login enter your user name and password to login.
You will see the interface as followed picture, then select Arduino to start our IOT project.

Step 2: Set up your Arduino
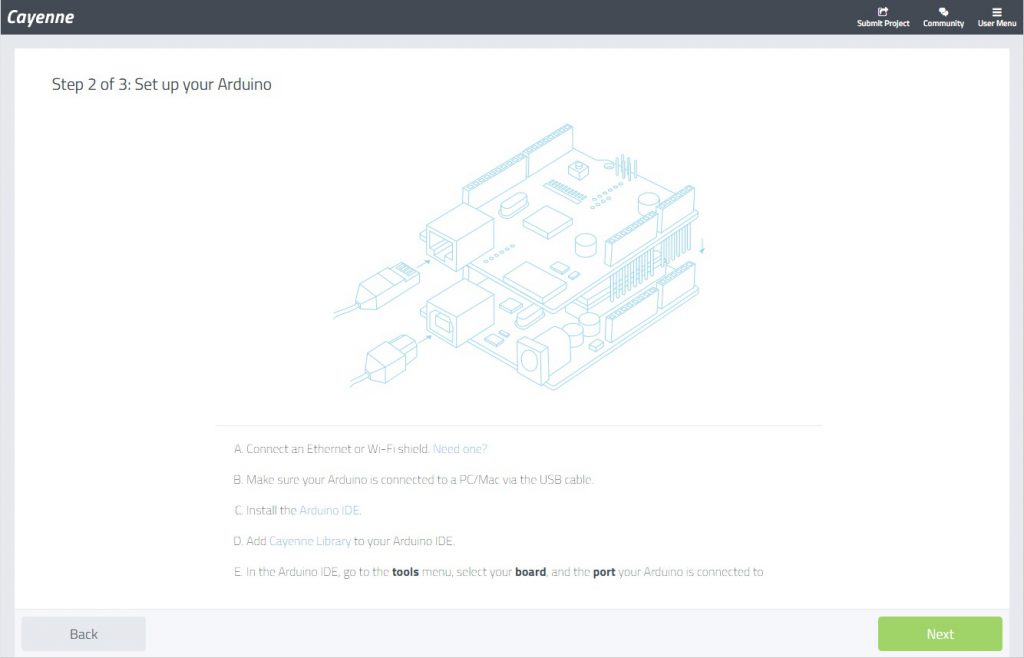
Firstly, connect Ethernet Shield W5100 to OSOYOO Basic board
Power on your mainboard by connecting your Uno board with a USB cable . You should see the power LED lit on your board.
Add CayenneMQTT Library to your IDE
The CayenneMQTT Library is a collection of code, known as sketch files, that makes it easy for you to connect and send data to and from sensors, actuators and devices connected to boards. Cayenne sketch files can be combined with other sketch files for your IoT projects.
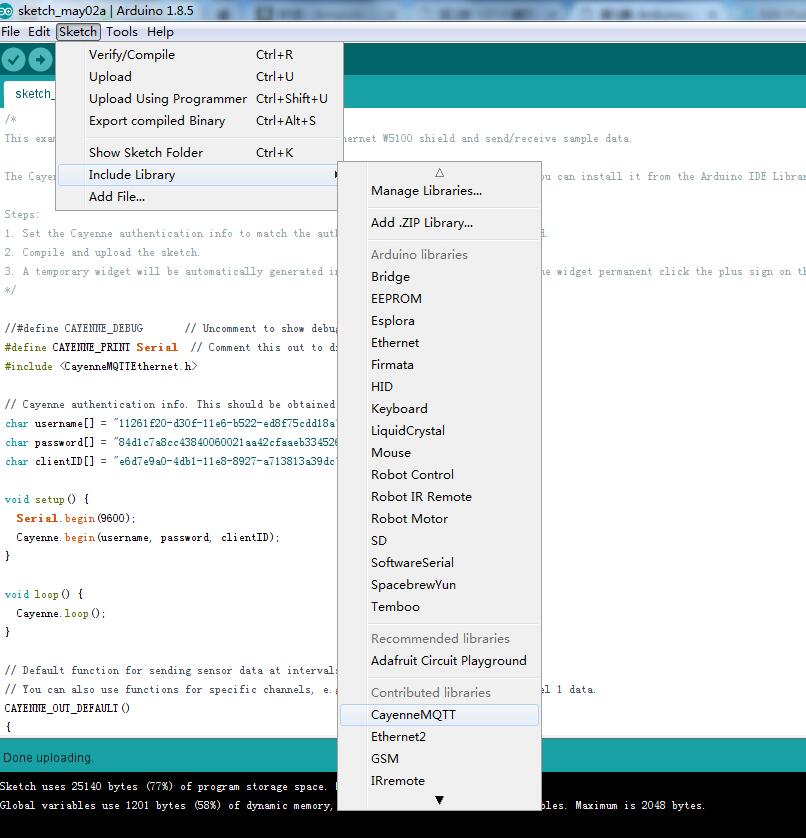
The CayenneMQTT Library is available directly from the IDE Libraries list. To install the library, select Sketch > Include library > Manage Libraries. The Library Manager dialog will appear. From here, search for the CayenneMQTT library and install it.


The CayenneMQTT library has now been expanded in the libraries folder in your sketches directory. You can verify this by going to the
Sketch >
Include Library menu where you should now see the CayenneMQTT library at the bottom of the drop-down menu under
Contributed Libraries. The CayenneMQTT library is now ready to be used in your project.
In order to successfully program your board, you will need to verify that the appropriate Board and Port are selected in the IDE.
First, verify that the correct Board is selected in the Tools > Board menu. Be sure to select the board type that you will be programming.
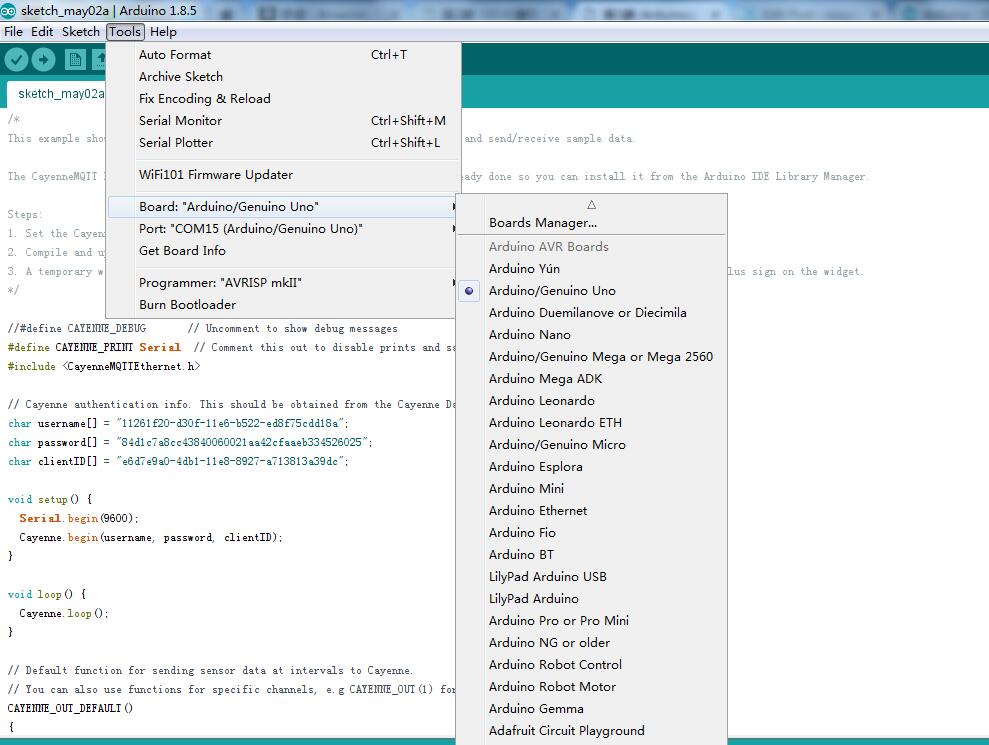
Then, verify that you have the correct
Port selected for communicating with your mainboard. Pick the correct port based upon how you are connecting your IDE to your PC/Mac.

Step 3: Connect your Arduino
After setting up your PC/Mac computer with the Arduino IDE and the Cayenne Library, you are ready to install Cayenne onto your device. Continue to Step 3 of the Arduino installation, where you will connect your board with Cayenne.
On this screen, when select your mainboard, a list of connections appears below the board name. Select the Arduino Uno, and select Ethernet shield W5100.
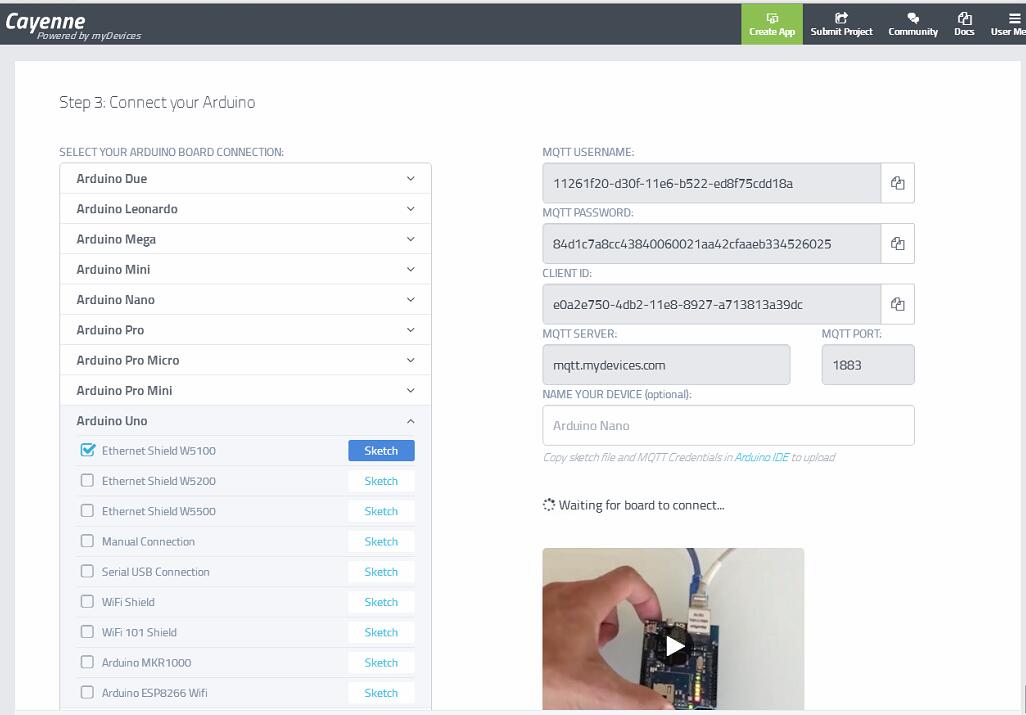
Click on the Sketch button next to “Ethernet Shield W5100”, you will get a pop-up window which has Sketch code as following picture:
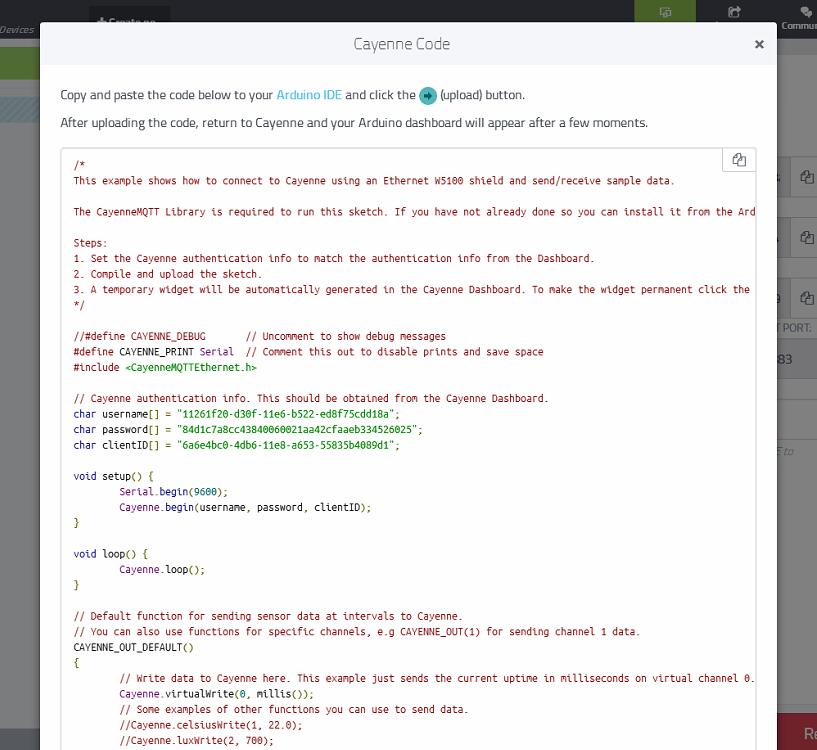
Copy & paste the sketch code into IDE and select Sketch > Upload to compile and upload the sketch into Arduino UNO board.As soon as your device comes online and connects to Cayenne, you will see your Arduino Board in the online dashboard.