

-
- BBC micro:bit board x 1
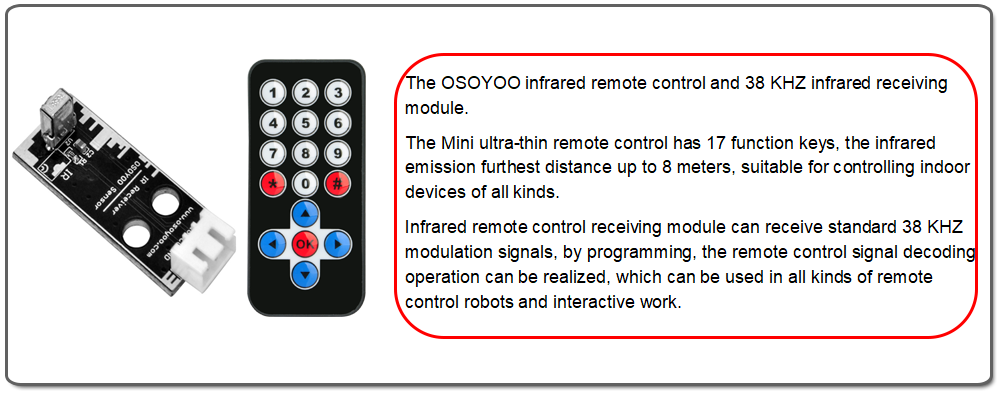
- OSOYOO infrared receiver module x 1
- OSOYOO infrared remote control x 1
- OSOYOO 3-pin PnP cable x 1
- OSOYOO Plug&Play( PnP ) board for micro:bit x 1


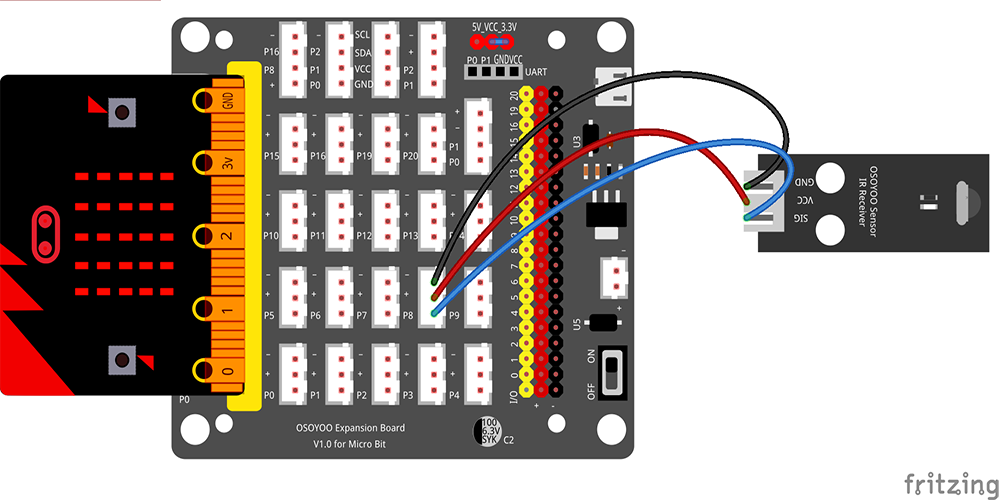
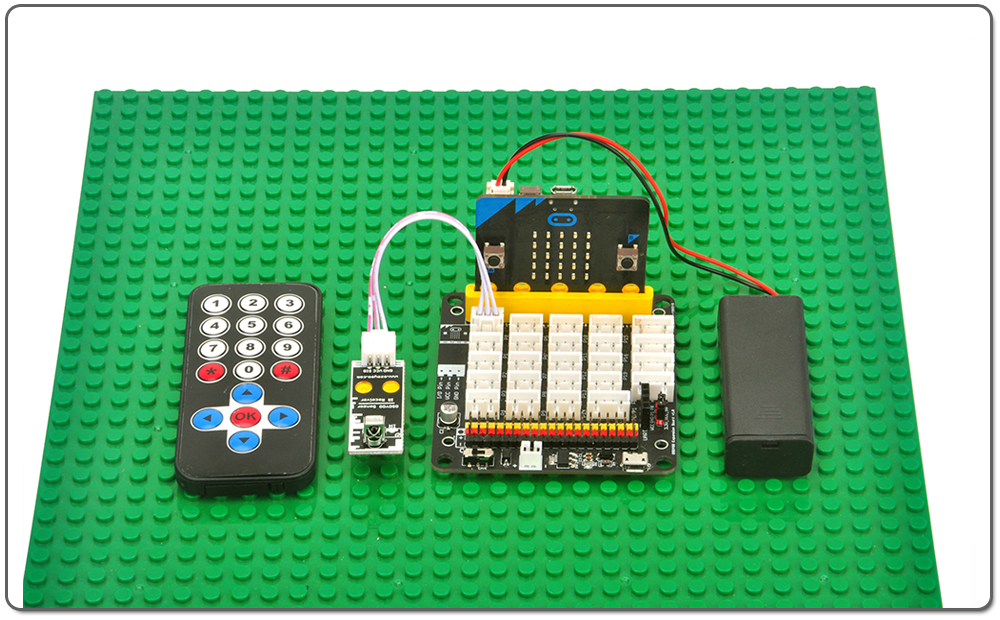
Connect IR receiver module to OSOYOO PnP board P8 port with OSOYOO 3-pin PnP cable as below;
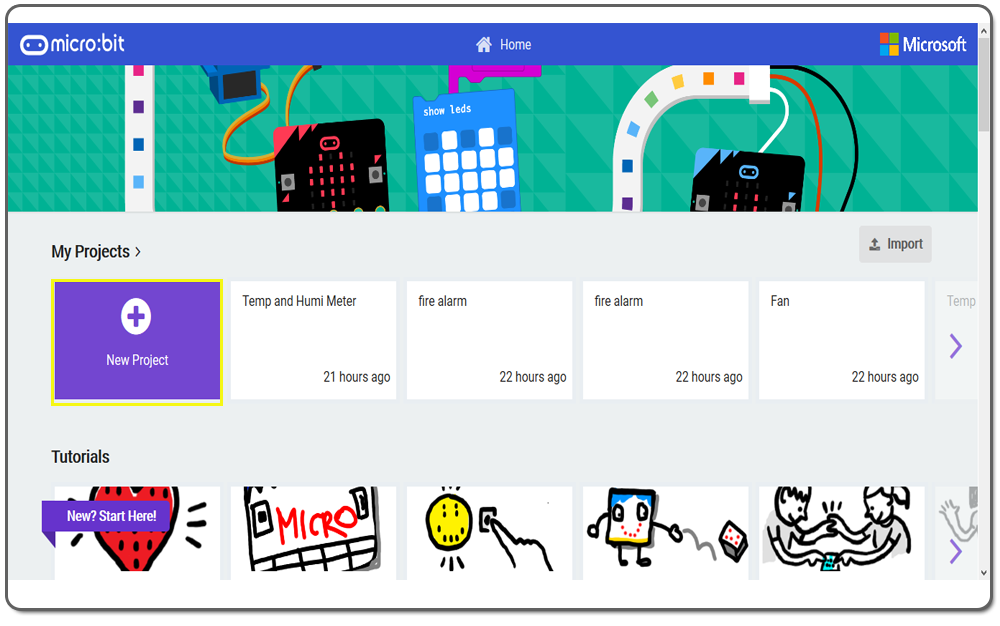
.png) Step 0: Go to url: https://makecode.microbit.org, click New Project
Step 0: Go to url: https://makecode.microbit.org, click New Project
Step 1. In the Editor controls, click on the Advanced button and then Extensions as following figure.
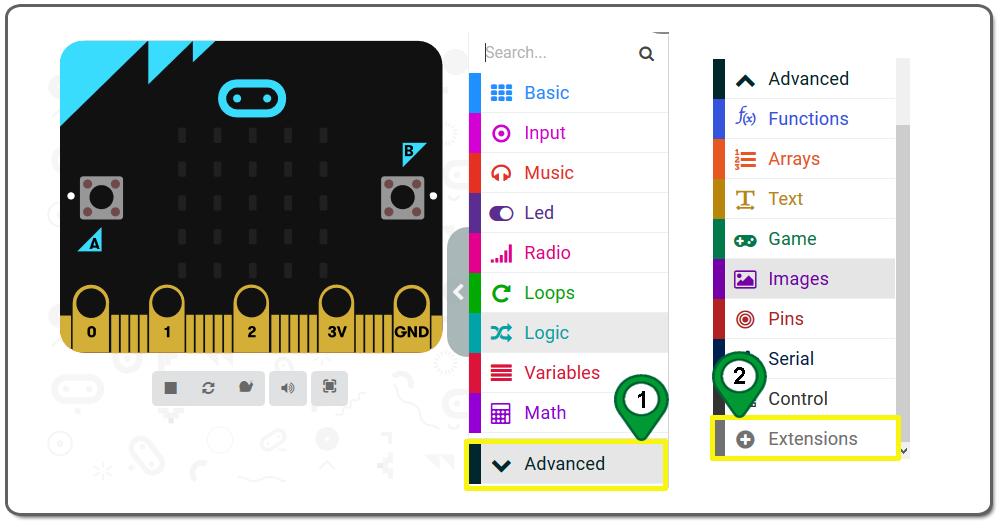
Step 2. In the Extensions page , enter project URL “https://github.com/osoyoo/OSOYOO_IR_BLACK_V2.0 ” in the Search textbox and click on the Search button. The page will show you all the matching extensions based on your search string. Now, click on OSYOO IR BLACK V2.0 to add it into your project .

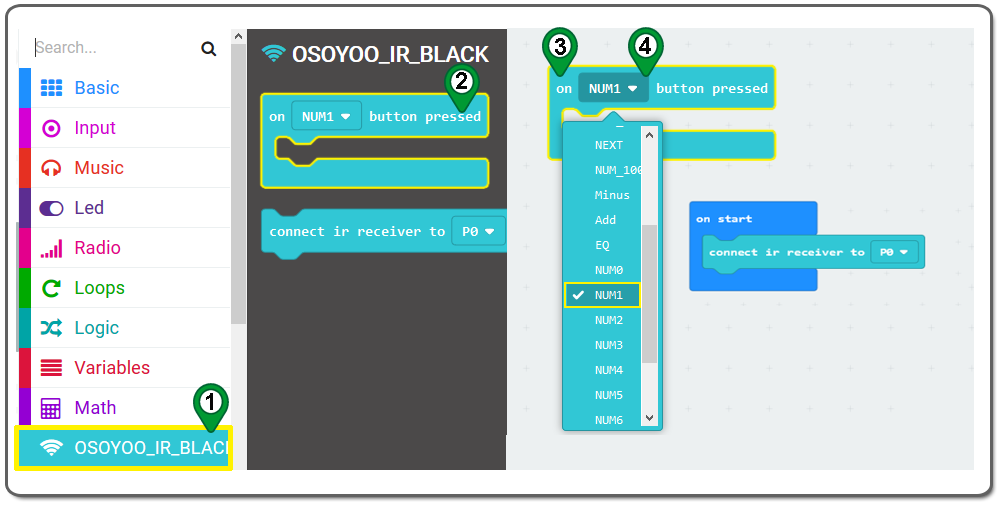
Step 3. Click on the OSOYOO IR BALCK category under Advanced. Drag a connect ir receiver to block and place it inside the on start block.

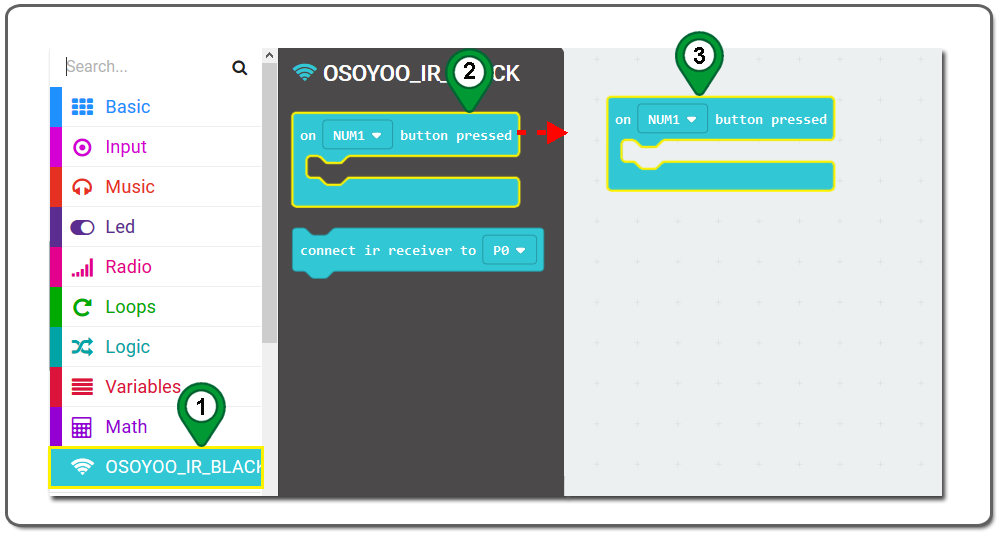
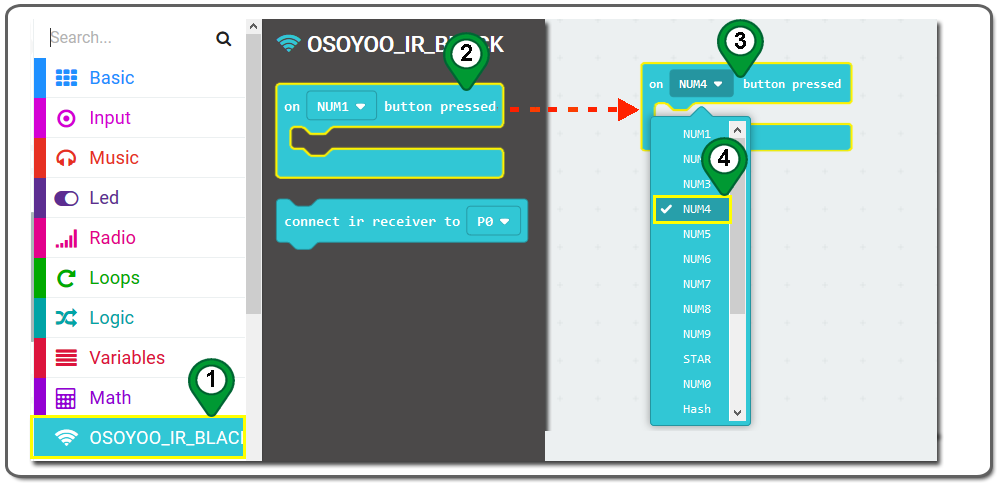
Step 4. From OSOYOO_IR BLACK category, drag and drop an on button pressed block to blank area, set NUM1 from drop-down menu.
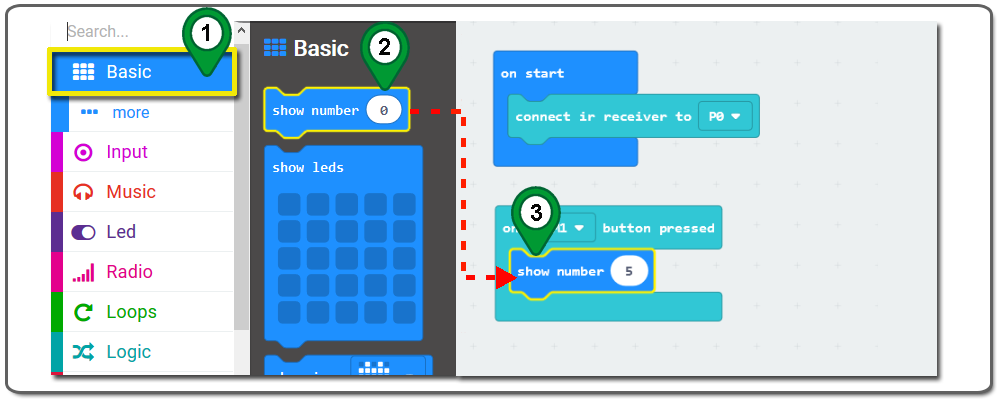
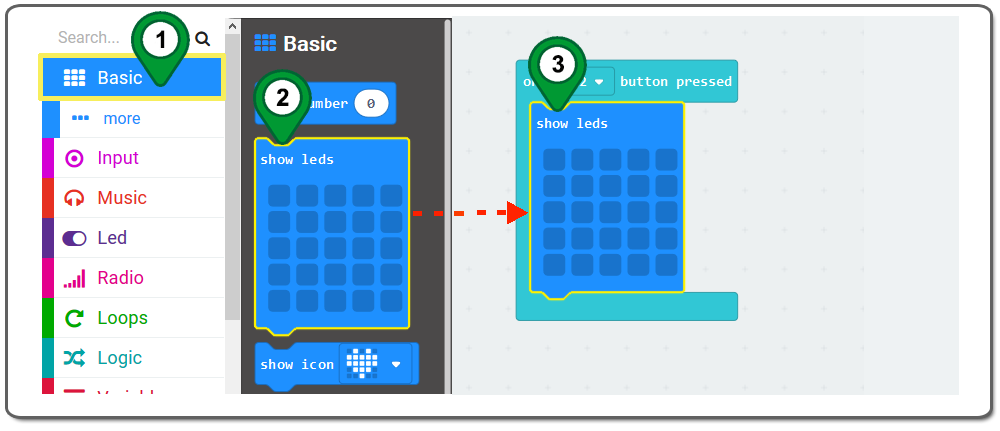
Step 5. In the Toolbox, click on the Basic category and Click and drag the show number block over and place it inside the ON BUTTON PRESSED block. Then changed the 0 to 5 .
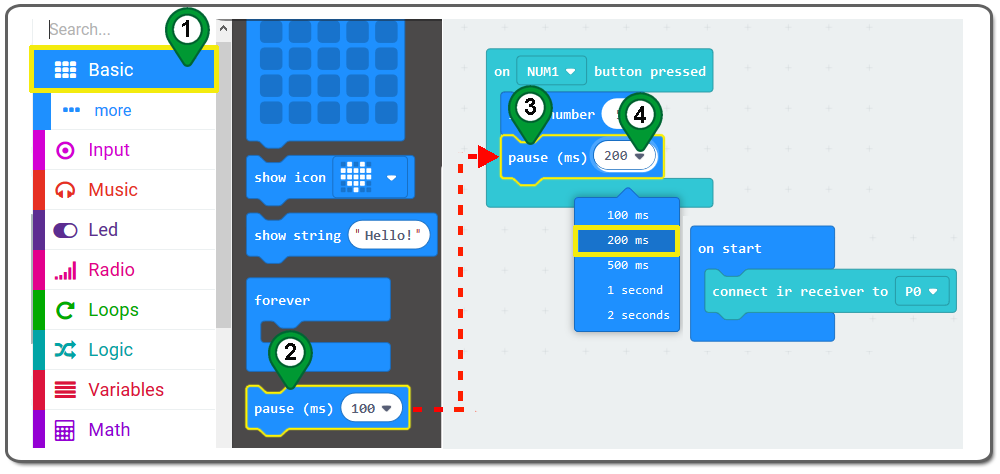
Step 6. Click on the Basic category again,Drag and drop a pause (ms) block , and place it below show number 5 block (inside the ON BUTTON PRESSED block) , and choose 200 ms from the drop-down menu .
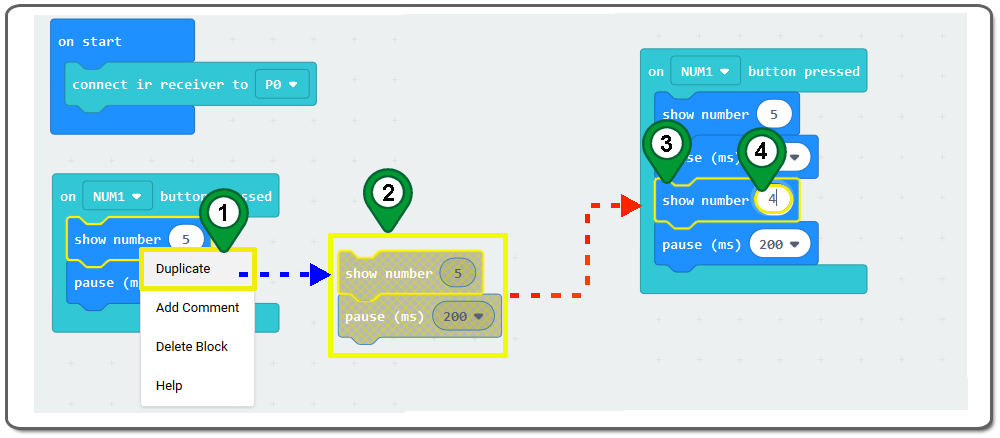
Step 7. make another show number block and pause(ms) 200 block same as Step 6 . place them below previous PAUSE 200block .change the show number block value from 5 to 4 as following figure:
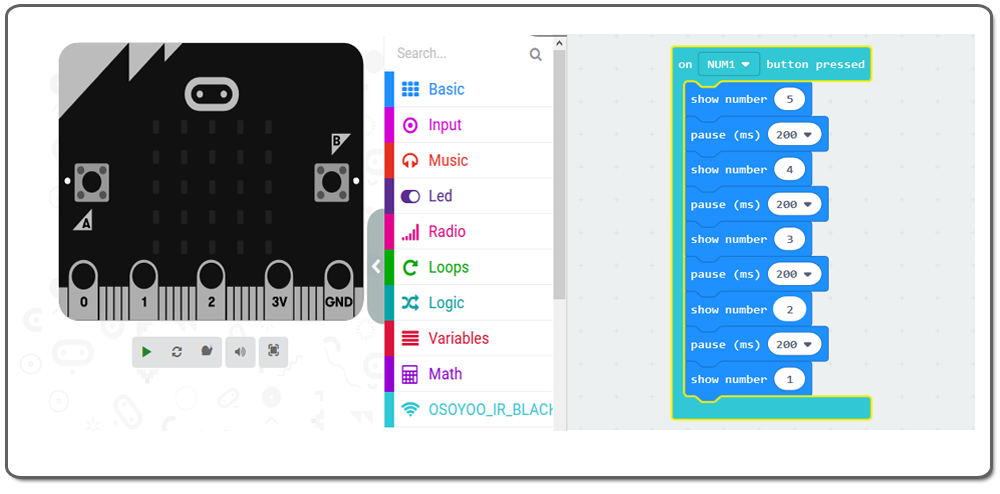
Step 8. Repeat Step 7 and make three additional show number blocks and another two pause (ms) blocks. Set their value and position as per following figure:
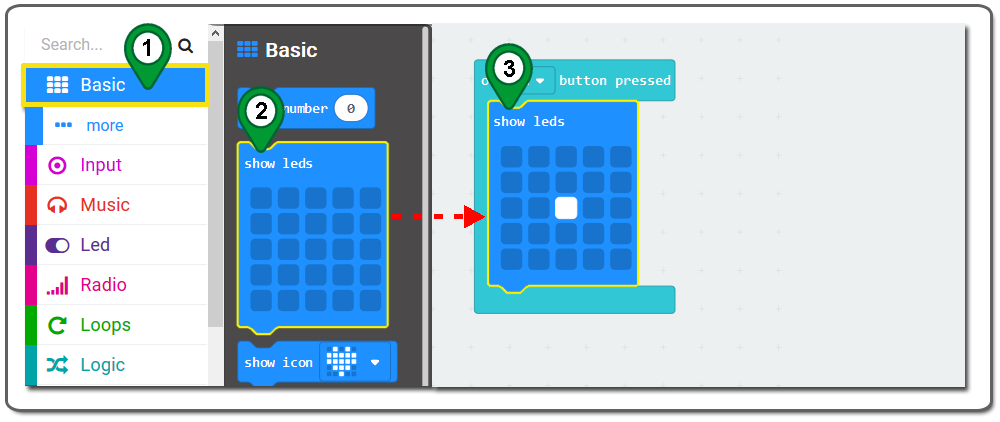
Step 9. Click on the Basic category again,Drag and drop a showed leds block , and place it inside the ON BUTTON PRESSED block , and draw a “crying face” by clicking the dots in the 5×5 matrix as following figure.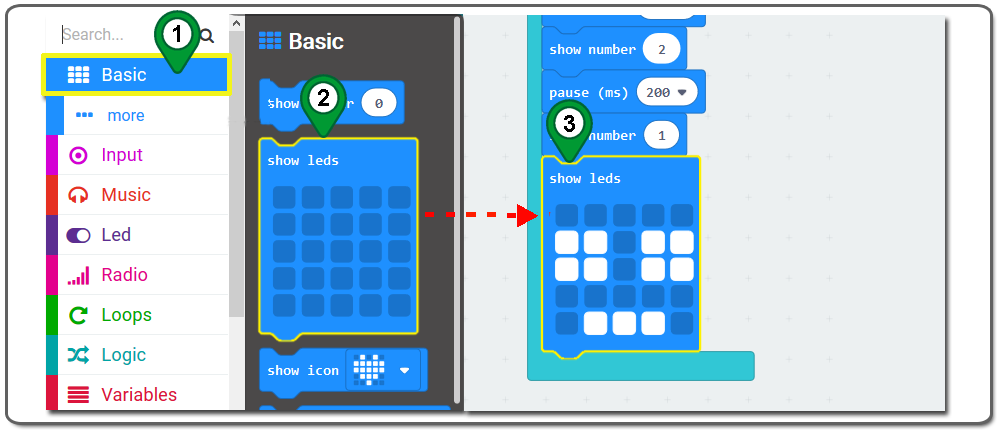
Step 10. Click on the OSOYOO IR BLACK category again.Drag and drop an on MUN 1 button pressed block to blank area.
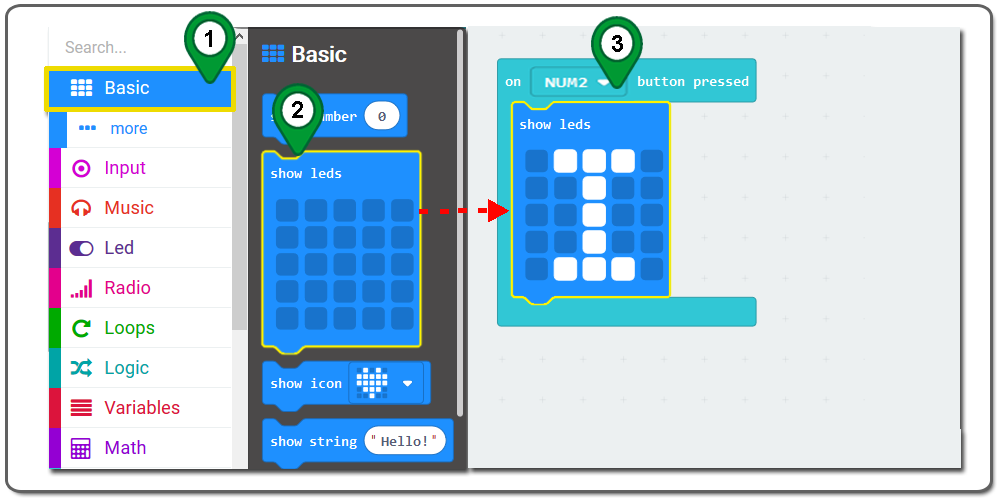
Step 11. Click on the Basic category again,Drag and drop a showed leds block and place it inside the on NUM2 button pressed block , and draw a “I” letter by clicking the dots in the 5×5 square as following figure.
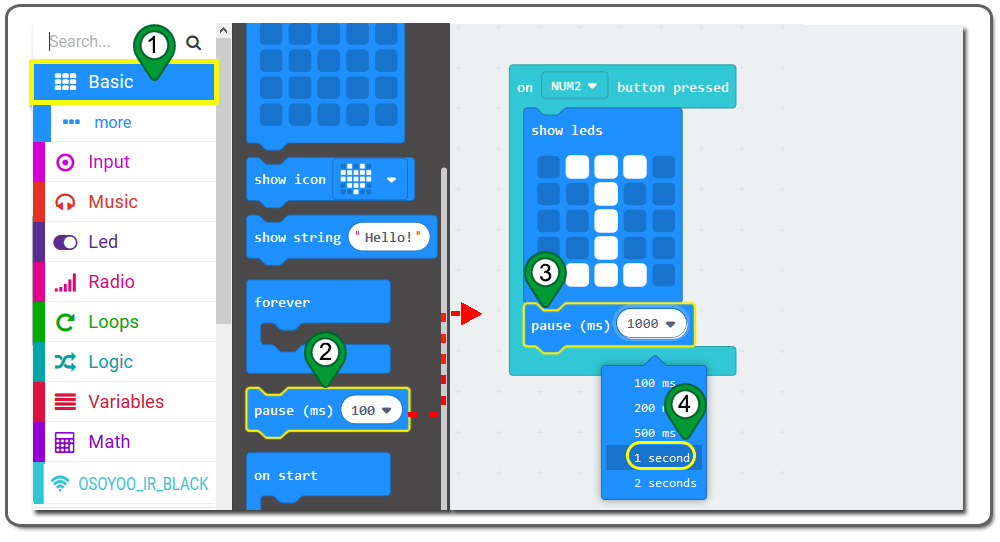
Step 12. Click on the Basic category and drag a pause(ms) block and place it below Show “I” LED block . Then choose 1 second from the drop-down menu as following figure:
Step 13. Repeat Step 12 and make another show leds block and Pause (ms) block. use mouse to draw a “love heart” in the 5×5 square and set pause time to 1 second. Put these two blocks inside the on NUM2 button pressed block(see following figure).

Step 14. Repeat Step 13 and make another show leds block and pause block. draw a “U” figure in the LED square block , put them inside the on NUM2 button pressed block . see following figure:
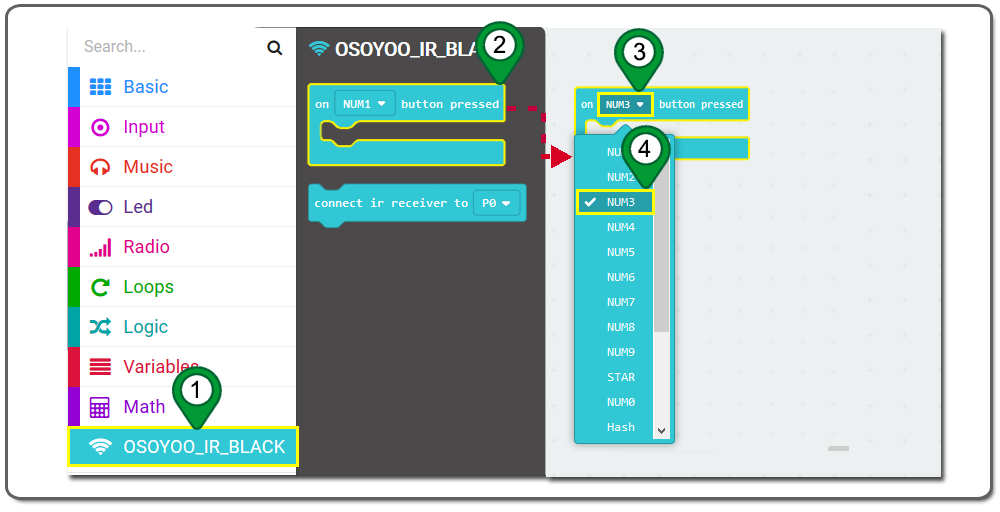
Step 15.Click on the OSOYOO IR BLACK category again.Drag and drop another on NUM3 button pressed block to blank area.
Step 16.Click on the Basic category and drag and drop the show leds block and place it inside the on NUM3 button pressed block. Then click a coin on the squares as following figure.
Step 17. Right-click duplicated from the show leds block over . You will get a duplicated blocks ,and place it inside the on NUM3 button pressed block .and click a small heart on the squares as following figure.
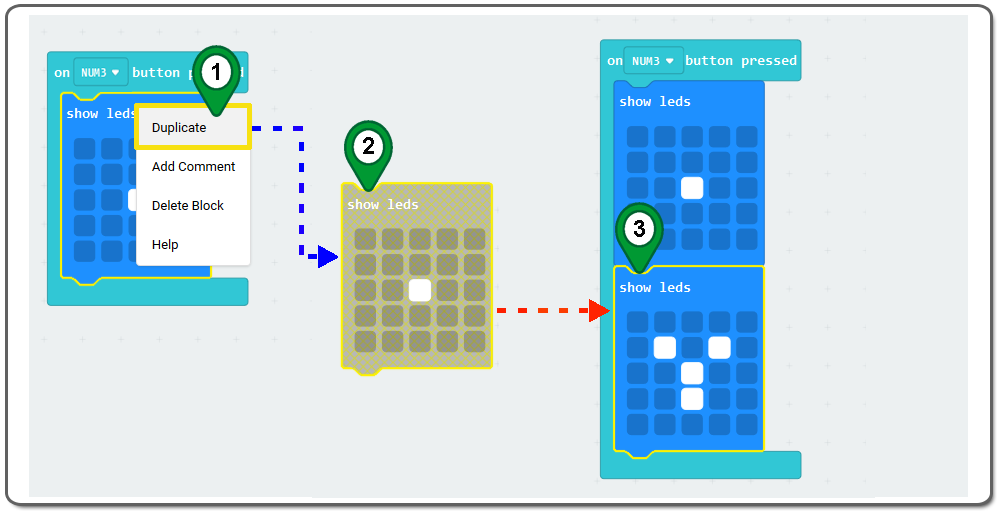
Step 18. Repeat step 17 and make some more show leds blocks as following picture, put them inside on NUM3 button pressed block.
Step 19.Click on the OSOYOO IR BLACK category again.Drag and drop an on NUM4 button pressed block.
Step 20.Click on the Basic category and drag and drop the show leds block and place it inside the on NUM4 button pressed block.
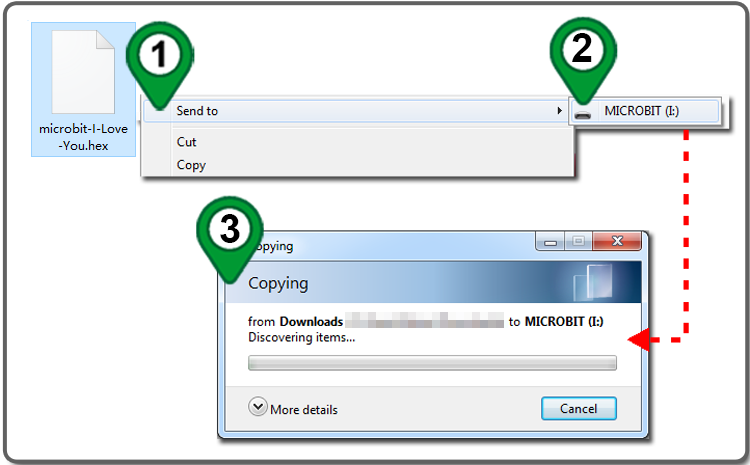
Step 21. Download this “.hex” file and save it to your MICROBIT disk Driver as following figure.
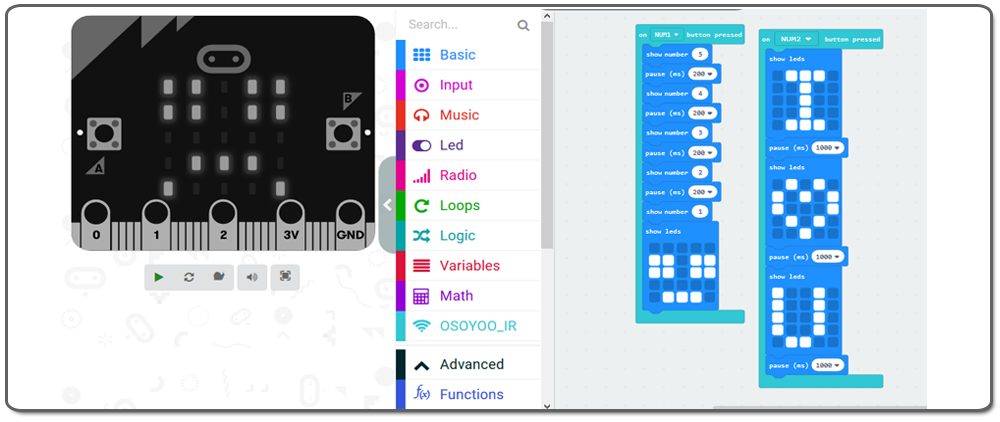
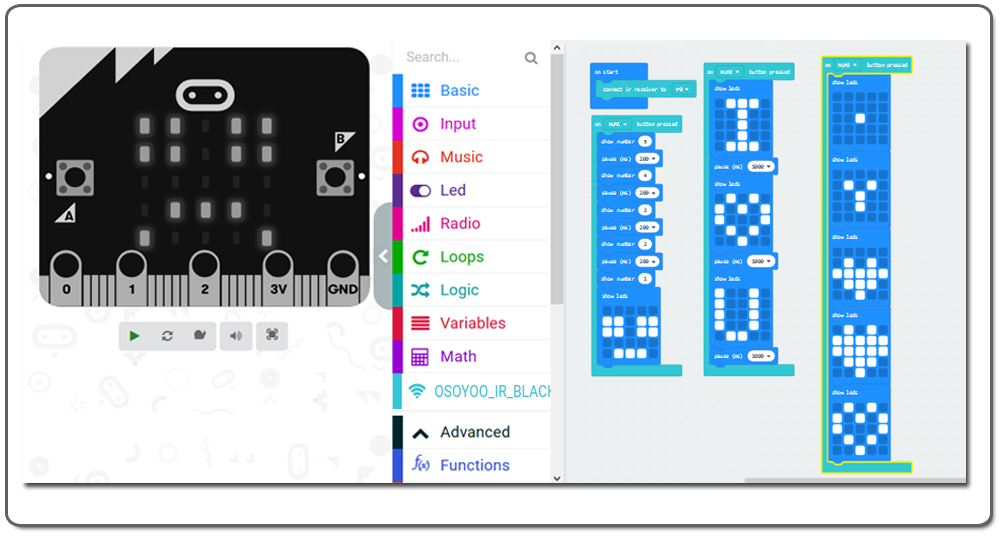
Below are the full Graphic programming code blocks we have done for you as reference:


Hello, is there also a tutorial on how to control a 2WD smart car with IR Remote?
Thank you