Introduction
This lesson will guide you through downloading, installing, and testing the Arduino IDE (short for “Arduino Integrated Development Environment”). Before you go to the page for your operating system, make sure you have everything prepared.
Preparation:
- A computer (Windows, Mac, or Linux)
- An Arduino-compatible microcontroller (such as the Osoyoo NodeMCU)
- A USB A-to-B cable, or another appropriate way to connect your Arduino-compatible microcontroller to your computer (check out this USB buying guide if you’re not sure which cable to get).
Extended Reading
If you’re new to Arduino in general, check out the links below to learn more:
If you’re ready to get started, click on the link in the column on the left that matches your operating system, or jump to your operating system here:
Install the Arduino Software (IDE) on Windows PC
Download the Arduino Software (IDE)
Download the Arduino Software (IDE) from the download page.You can choose between the Installer (.exe) and Zip packages. We suggest using the first one that installs everything you need, including the drivers. With the Zip package, you need to install the drivers manually. The Zip file is also useful if you want to create a portable installation.
When the download finishes, proceed with the installation and allow the driver installation process when you get a warning from the operating system.
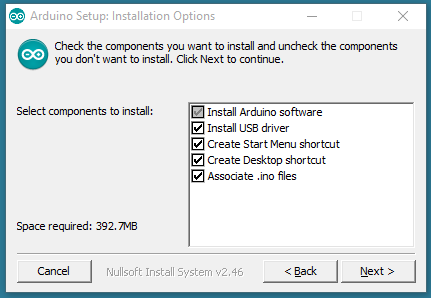
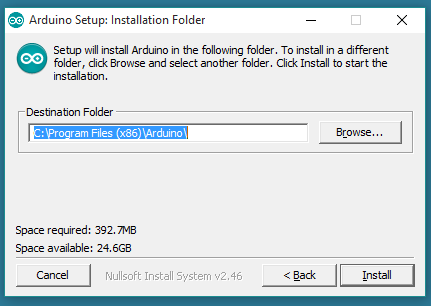
Choose the components to install
Choose the components to install and the installation directory (we suggest keeping the default one).
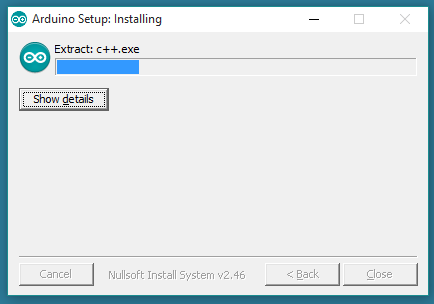
The process will extract and install all the required files to execute the Arduino Software (IDE) properly.
Proceed with board-specific instructions
When the Arduino Software (IDE) is properly installed, go back to the Getting Started Home and choose your board from the list on the right of the page.
Install the Arduino Software (IDE) on macOS
Download the Arduino Software (IDE)
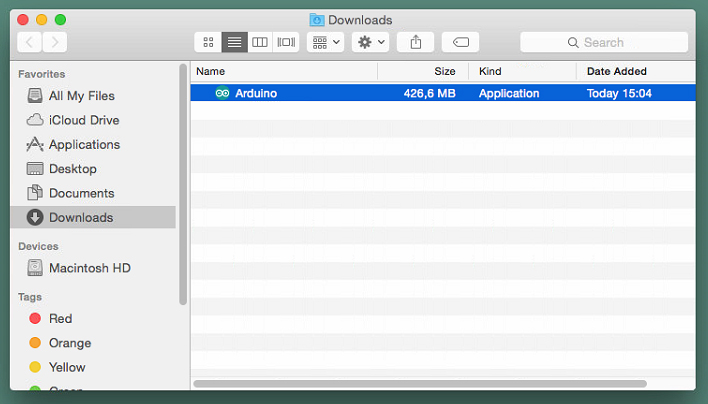
Get the latest version from the download page. The file is in Zip format; if you use Safari it will be automatically expanded. If you use a different browser you may need to extract it manually.
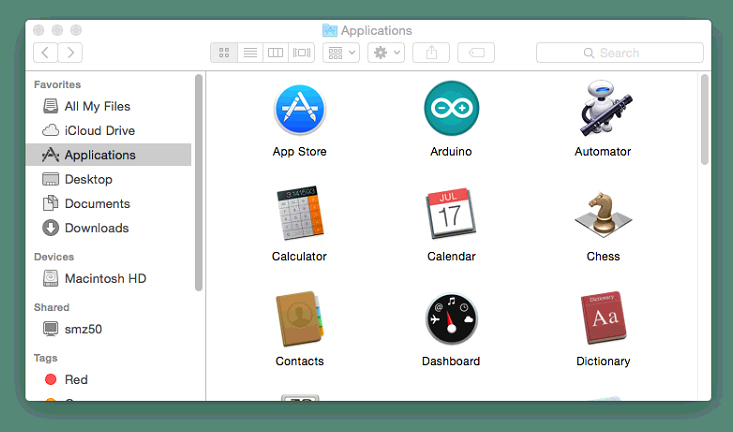
Copy the Arduino application into the Applications folder (or elsewhere on your computer).
Proceed with board specific instructions
When the Arduino Software (IDE) is properly installed you can go back to the Getting Started Home and choose your board from the list on the right of the page.
Install the Arduino Software (IDE) on on Linux
Quick Start
The Linux build of the Arduino Software (IDE) is now a package that doesn’t require ansy specific procedure for the various distributions available of Linux. The only relevant information is the 32 or 64 bit version of the OS.
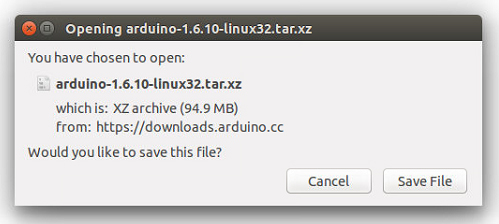
Download the Arduino Software (IDE)
Get the latest version from the download page. You can choose between the 32, 64 and ARM versions. It is very important that you choose the right version for your Linux distro. Clicking on the chosen version brings you to the donation page and then you can either open or save the file. Please save it on your computer.
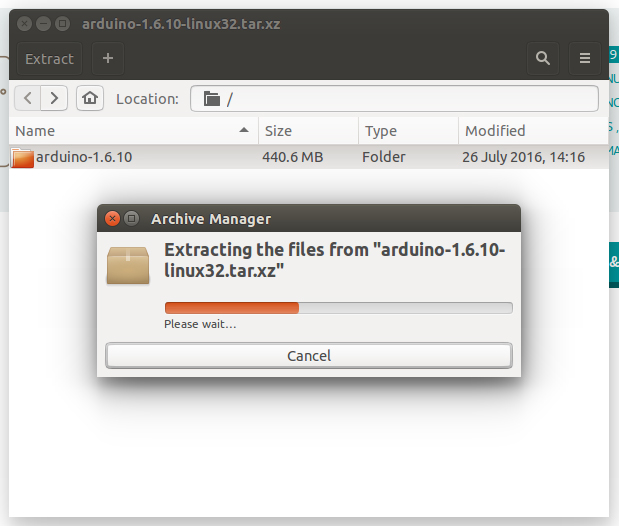
Extract the package
The file is compressed and you have to extract it in a suitable folder, remembering that the application will run from that location.
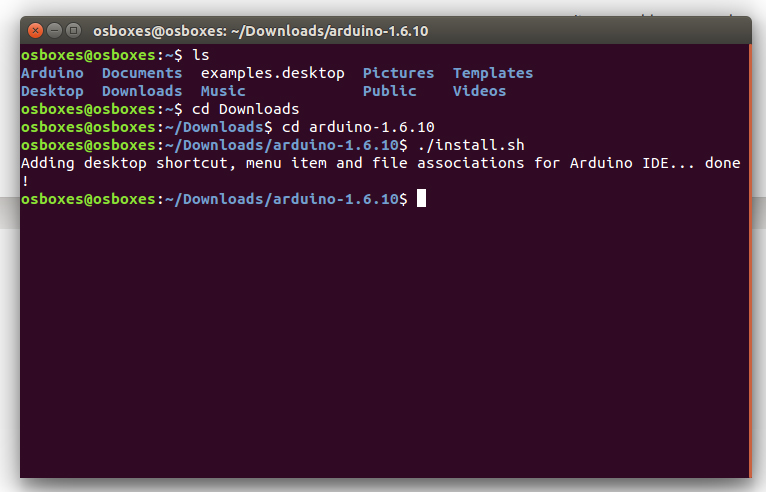
Run the install script
Open the arduino-1.6.x folder just created by the extraction process and spot the install.sh file. Right click on it and choose Run in Terminal from the contextual menu. The installation process will quickly end and you should find a new icon on your desktop.
If you don’t find the option to run the script from the contextual menu, you can open a Terminal window and move into the arduino-1.6.x folder. Type the command ./install.sh and wait for the process to finish. You should find a new icon on your desktop.
Proceed with board specific instructions
When the Arduino Software (IDE) is properly installed you can go back to the Getting Started Home and choose your board from the list on the right of the page.
Please Read…
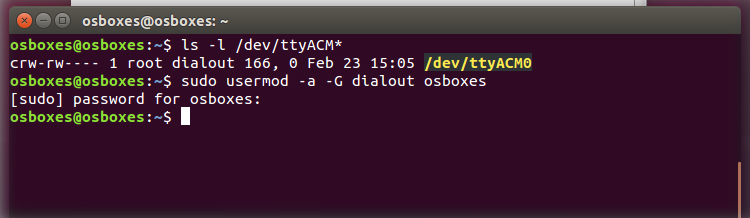
It might happen that when you upload a sketch – once you have selected your board and serial port, you get an error opening serial port … If you get this error, you need to set serial port permission.
Open Terminal and type:
ls -l /dev/ttyACM*
you will get something like:
crw-rw---- 1 root dialout 188, 0 5 apr 23.01 ttyACM0
The 0 at the end of ACM might be a different number, or multiple entries might be returned. The data we need is “dialout” (is the group owner of the file).
Now we just need to add our user to the group:
sudo usermod -a -G dialout
where is your linux user name. You will need to log out and log in again for this change to take effect.
This is the procedure to access the serial port from the Arduino Software (IDE) if you get an error
After this procedure, you should be able to proceed and upload the sketch to your board or use the Serial Monitor.
The text of the Arduino getting started guide is licensed under a Creative Commons Attribution-ShareAlike 3.0 License. Code samples in the guide are released into the public domain.
This paper is from:https://www.arduino.cc/en/Guide/HomePage,more info please click:https://www.arduino.cc/en/Guide/Environment