


| Buy from US |
Buy from UK |
Buy from DE |
Buy from IT |
Buy from FR |
Buy from ES |
Buy from JP |
 |
 |
 |
 |
 |
 |
 |

In lesson 15, we learned to use some simple graph blocks to let robot car do some simple movement. In this project, we will show you how to change motor’s speed with a potentiometer.

- OSOYOO Magic I/O Shield for Arduino
- OSOYOO UNO Board
- Wheels
- Acrylic Chassis
- Motor Box
- Potentiometer x 1 pcs
- OSOYOO 3-Pin PNP Cable
- OSOYOO 4-Pin PNP Cable
- USB Cable
- PC
Notice:
Not much is needed for this lesson, Make sure you have a good quality syncing cable,do not pick a ‘charge only’ USB cable.

Hareware connection:
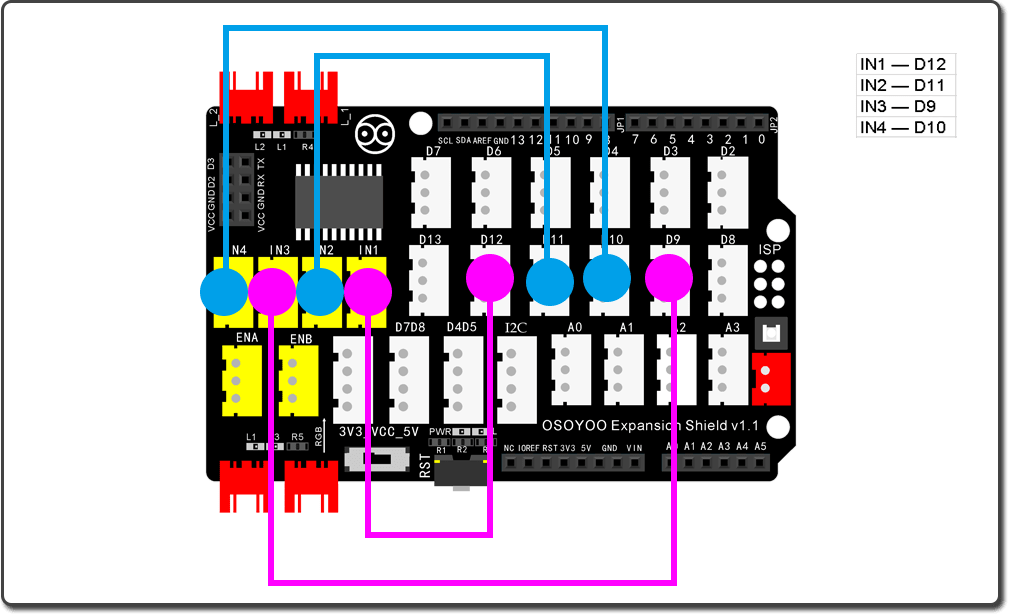
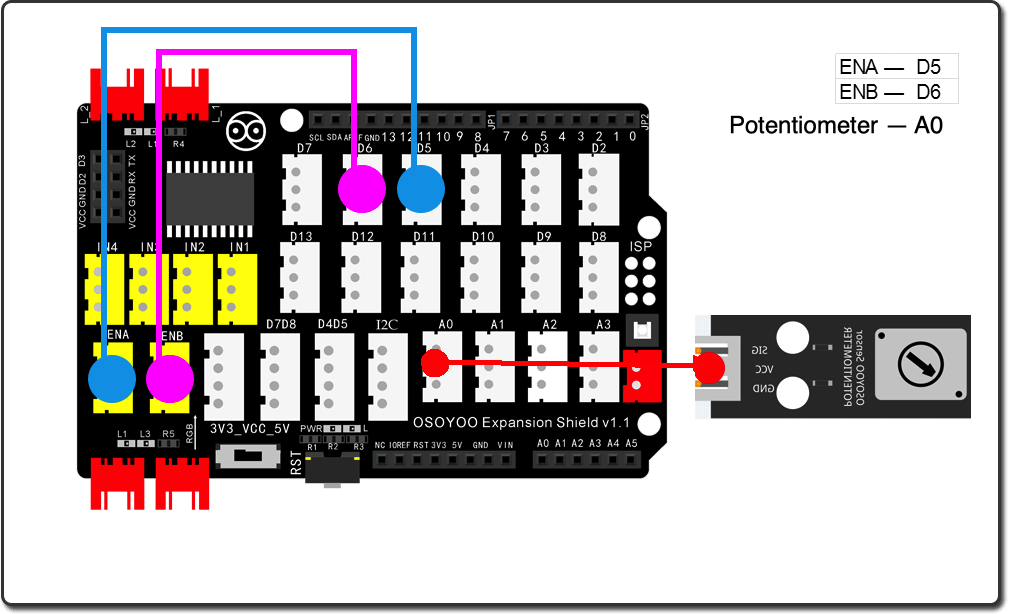
Please keep all the mechanic installation and wire connection exact same as Lesson 15, just add a potentiometer module to A0 port as following:

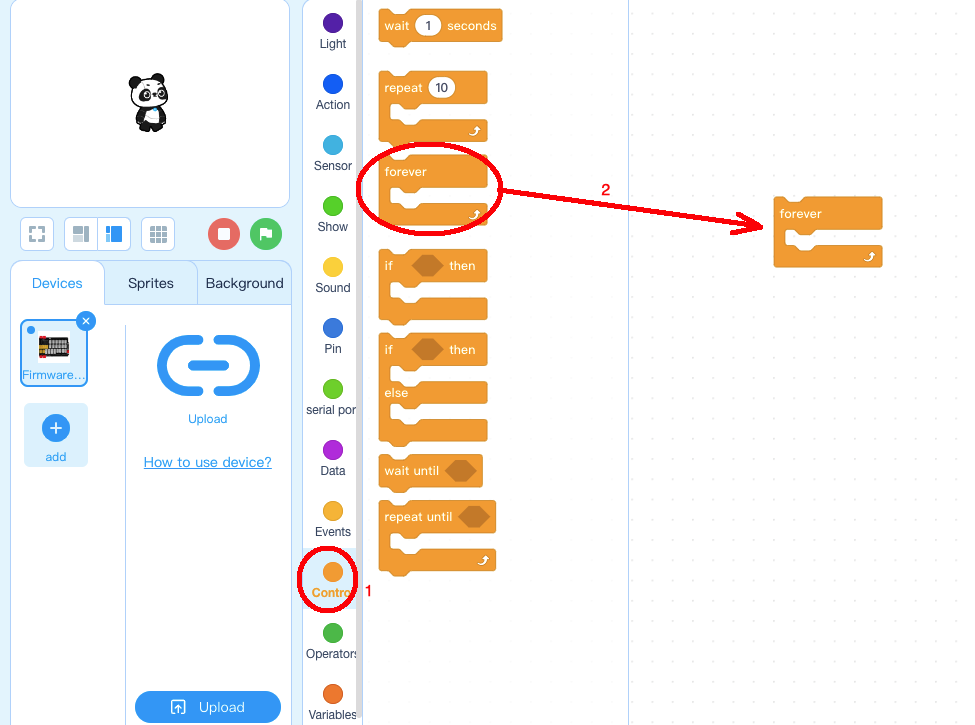
Step 1: Click Control, then Drag and drop Forever block to programming area as following:
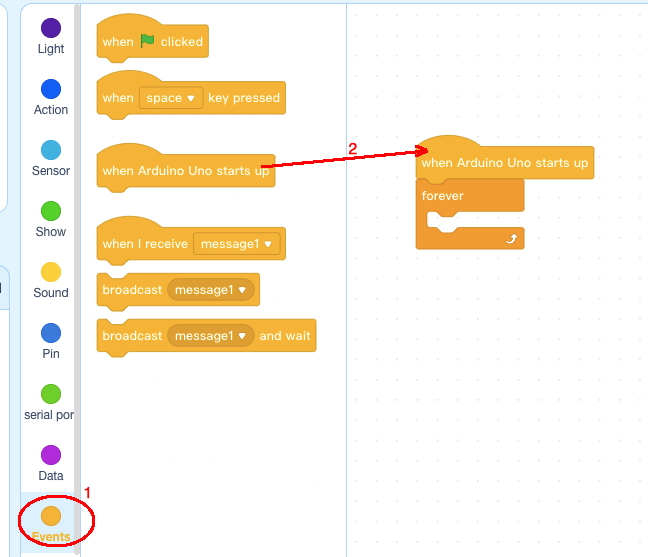
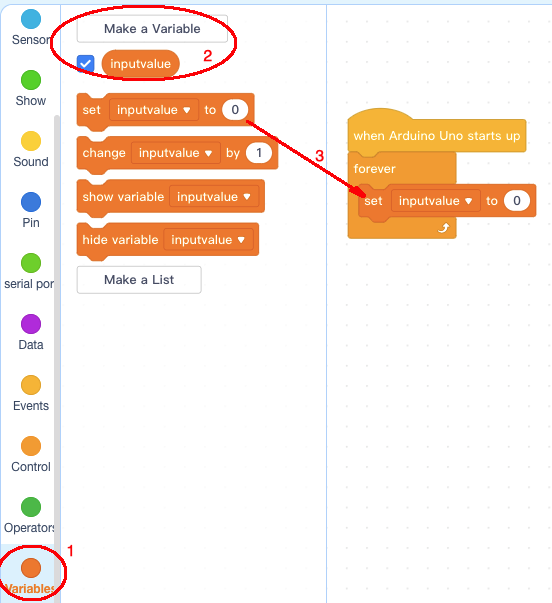
Step 2: Click Events, add when Arduino Uno starts up block to the top:
Step 3: Click Variable, make a variable and give it a name inputvalue, add set inputvalue to 0 block inside forever block:
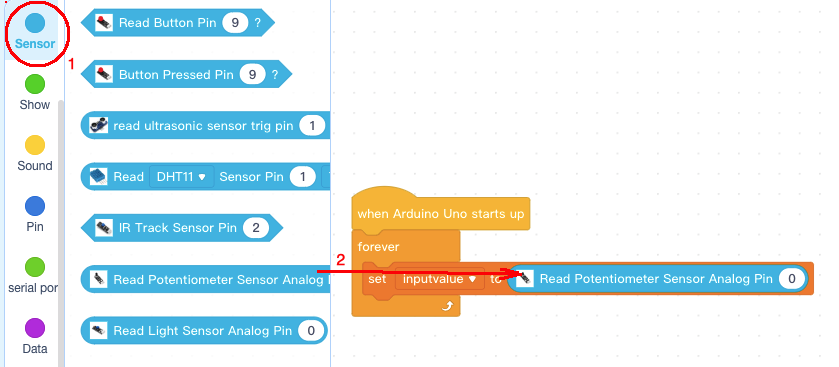
Step 4: Click Sensor, add Read Potentiometer Sensor Analog Pin 0 block inside set inputvalue to block:
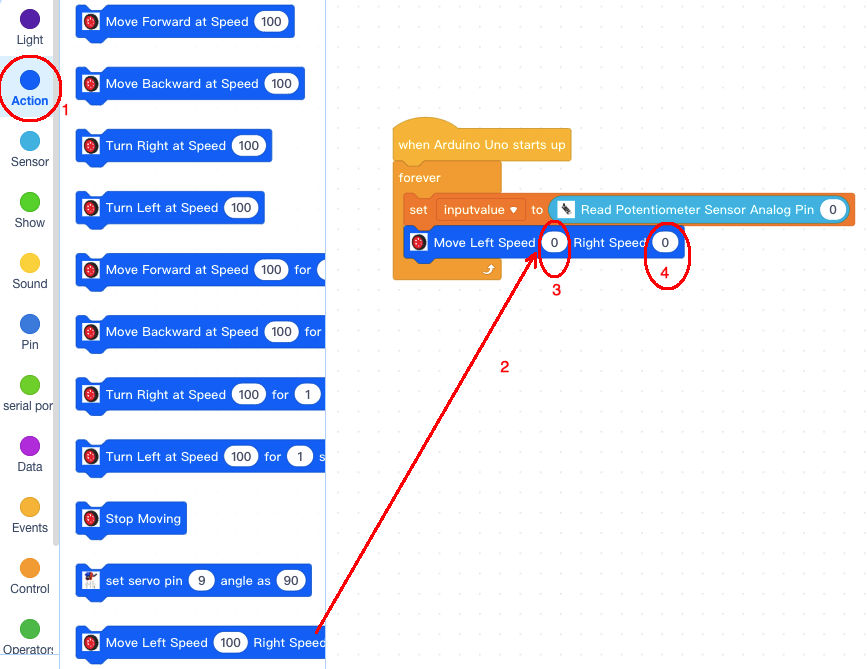
Step 5: Click Action category, add Move Left Speed 100 Right Speed 100 block below set inputvalue to block, change both speed 100 to speed 0 :
Step 6: Click Operator category, add ” / ” divide operator block inside Right Speed as field, then change denominator to 4:
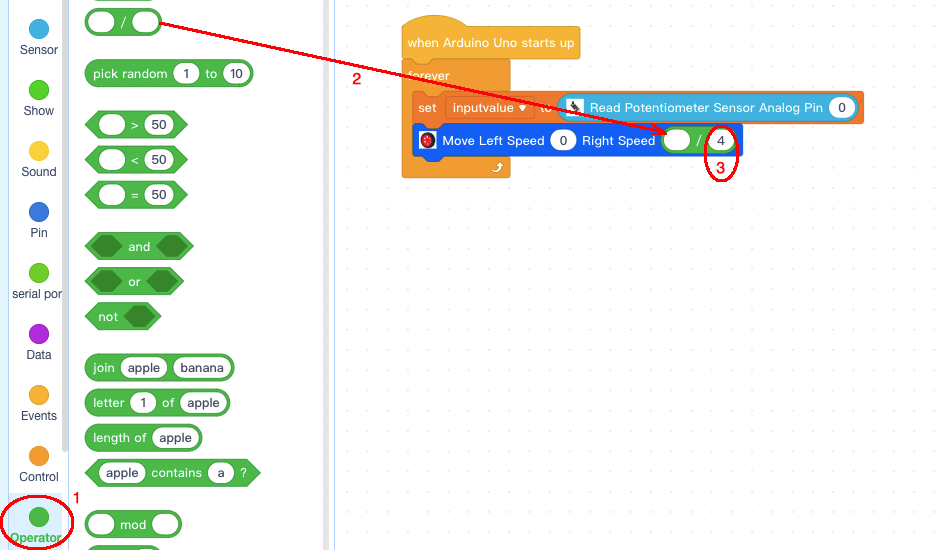
Step 7: Click Variable category, add inputvalue block inside Numerator field:
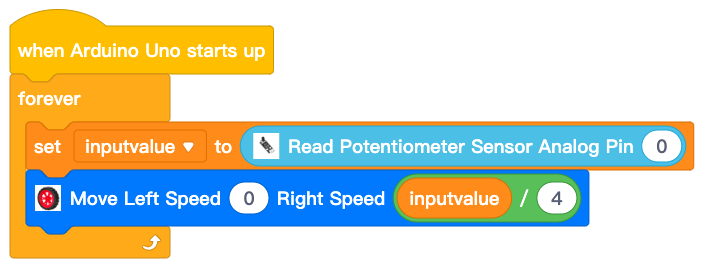
Now we have completed the block programming. The final blocks look like following:

Disconnect Arduino from PC, put a 9V battery into battery pox(make sure polar direction is correct, otherwise it can destroy your device and cause fire hazard).
Now turn on the power switch in the Arduino Magic I/O shield, rotate the potentiometer. You will see the speed of the Right wheel(motor) will change as per the angle of your potentiometer position.


