Overview
OSOYOO IoT UDP Robot APP is designed to send/receive UDP data to/from OSOYOO Robot Cars and OSOYOO IoT SmartHome Devices. It can also get http video stream from Robot camera and use it to control robot car movement.
App Privacy
The developer, Pinetree Electronics Ltd, indicated that the app’s privacy practices may include handling of data as described below. For more information, see the developer’s privacy policy.
Data Not Collected
The developer does not collect any data from this app.
Privacy practices may vary, for example, based on the features you use or your age.
Download
In Google Play or Apple Store, please search key words “OSOYOO IOT UDP Robot APP”, you will find an red icon APP as following:
Or you can download the APP from below links:
UI Introdction
After completing the installation, click the icon to open the app, you can see the following page
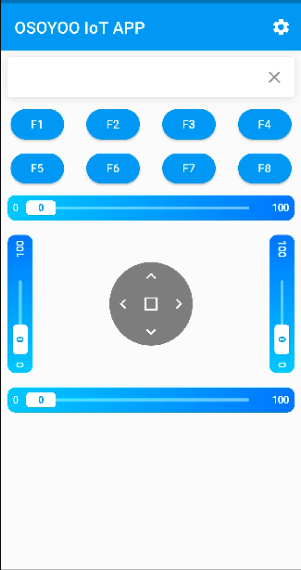
In the APP UI interface from top to bottom you can see these components:
APP name
Settings button
By clicking the Settings button, we can enter the backend to set up the APP, and we can define the corresponding UDP characters for each widget.
Text display box
After the APP is successfully connected to the UDP device, it can display the text, numbers and symbols sent by the device.
8 Function buttons, “F1-F8”
You can define different functions for these 8 buttons, each button represents a character, you can customize these characters in the setting interface, after pressing the button, the characters will be sent to the corresponding device, we can use these buttons to control different devices to complete the specified function.
4 Sliders
The default values are 0-100. We can control the minimum and maximum values of the sliders in the settings screen. This can be used to control the LED brightness, the buzzer sound level, the rotation angle of the servo, and other things you want to control.
Joystick control module(Arrow keys)
This module consists of up, down, left, right and center buttons, and like the “F” buttons, each button represents a character, and you can freely configure it. We often use this module to control smart cars, or robotics-related projects such as robotic arms, you can also explore more uses.
Video module
In fact, there is a video module hidden here, which will appear in the UI only after it has been successfully configured.
APP Settings Page
Click the setting icon button, you can see the UDP configration page.
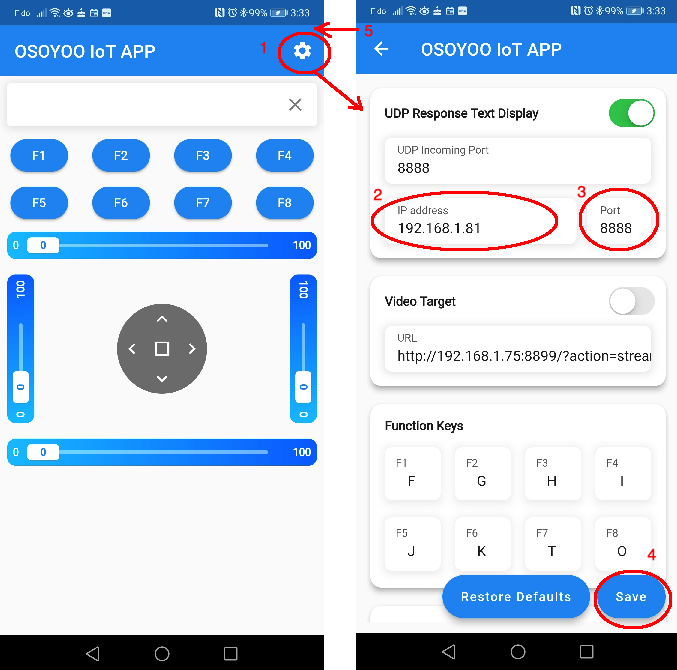
UDP response text display enable button – Enable or disable text play
UDP Incoming Port – Use this port to listen for and accept connections from remote UDP devices, we set it to “8888” by default.
IP address – Change it to your UDP device IP address
Port – Set your UDP device port, the default value is “8888”.
Note: When using LAN control, connect your phone with the same router WIFI SSID that your UDP device uses. Open the app, click on settings, enter the IP address of your UDP device, we configure port 8888 by default, you can also set the port you like.
Video target settings – Disable by default, there is a tutorial about this fuction. If you want to use it, please set video target IP address to match your UDP device IP address, enable the Video target, then Save.
There are also configuration pages for function keys, sliders, and joysticks(Arrow keys), where we can replace the default values or characters with the ones you need, but always remember to complete the same configuration on the UDP device side as well
Do not forget to click the “Save ” button to save your configration!
Related UDP Projects
There, you can search for more tutorials on how to use the UDP protocol with Arduino/NodeMCU/Raspberry Pi.


Hi admin,
I want to sync slider value from nodemcu to software. eg. my nodemcu has a value 30%, when software connect to it, value on software update to 30% too.
Thanks.