


I. Objective
II. Parts and Devices
III. Hardware Installation
IV. Software Installation
V. Functional Testing and Verification
VI. Troubleshooting

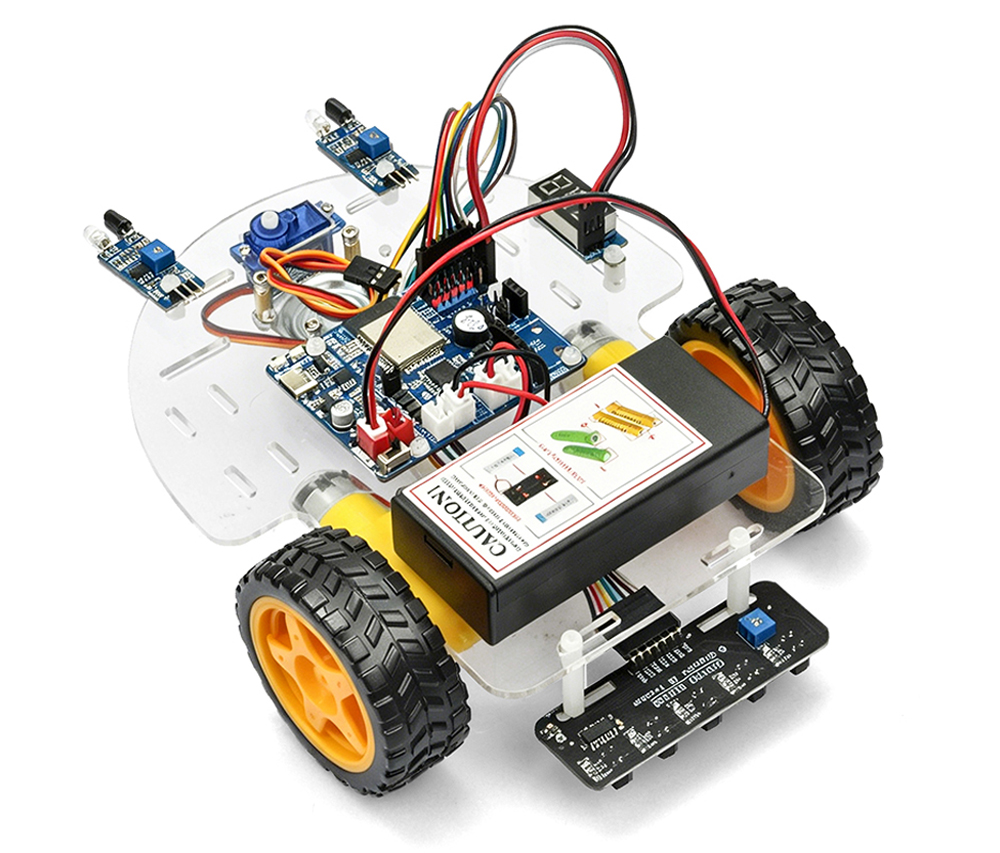
In this lesson, you will transform your OSOYOO Espro robot car into an autonomous line-following robot.
Using a 5-channel infrared line tracking sensor array, the robot can detect the position of a black line on a light-colored surface and continuously adjust its direction to stay on the track.
Line following is one of the most fundamental technologies used in mobile robotics and automated guided vehicles (AGVs). It provides an excellent introduction to sensor-based navigation and real-time decision making.

OSOYOO ESPro Robot car chassis x1
OSOYOO Wheels x2
OSOYOO DC motors x2
OSOYOO ESPro motor driver board x1
OSOYOO Voltage meter x1
OSOYOO Tracking sensor x1
OSOYOO Battery box x1
OSOYOO 3pin female to female jumper wire x1
OSOYOO 7pin female to female jumper wire x1
18650 Batteries (3.7 V) x2
Battery charger x1

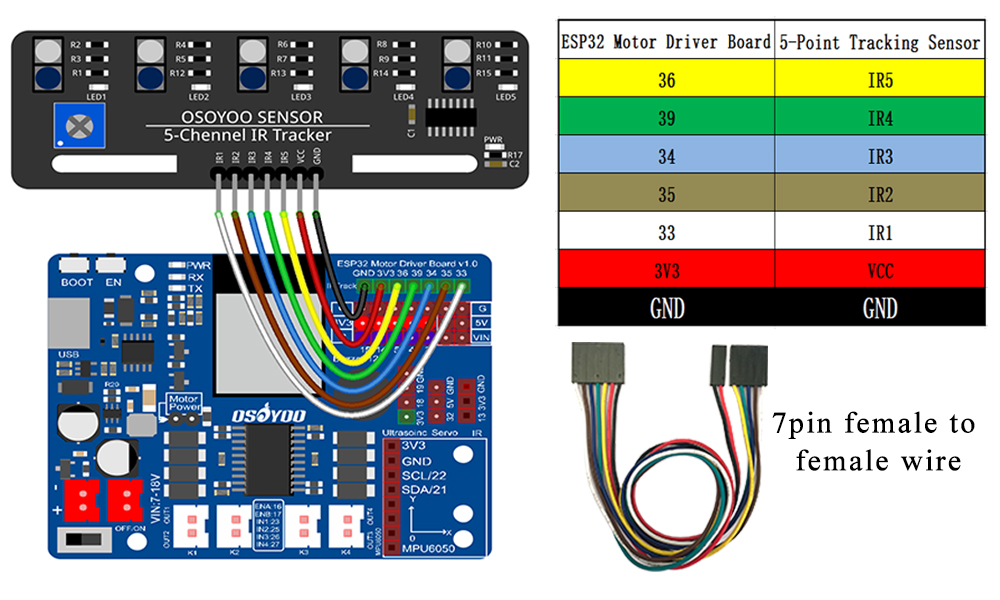
Connect the tracking sensor to the OSOYOO ESPro motor driver board using a 7-pin female-to-female jumper wire as shown in the connection diagram.

Step 1: Install latest Arduino IDE (If you have Arduino IDE version after 1.1.16, please skip this step). Download Arduino IDE from https://www.arduino.cc/en/Main/Software?setlang=en , then install the software.
Step 2: Download https://osoyoo.com/driver/espro-2wd-car/espro-lesson2-tracking-line.zip, unzip the download zip file espro-lesson1-basic.zip, you will see a folder called espro-lesson2-tracking-line.zip.
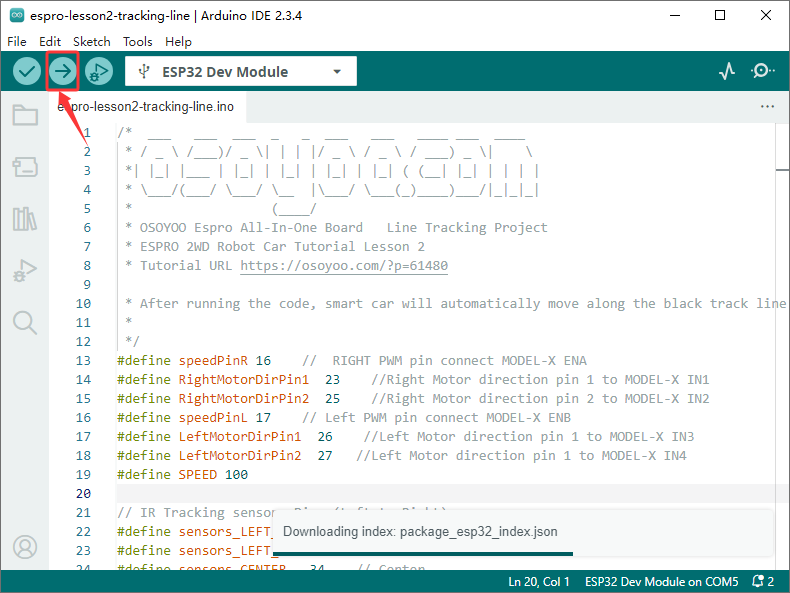
Step 3: Connect ESPro motor driver board to PC with USB cable, Open Arduino IDE -> click file -> click Open -> choose code “espro-lesson2-tracking-line.ino” in lesson1 folder, load the code into arduino.
Step 4: Select Tool->Board->board Manager, Search ESP32 and Add ESP32 into Board Manager.
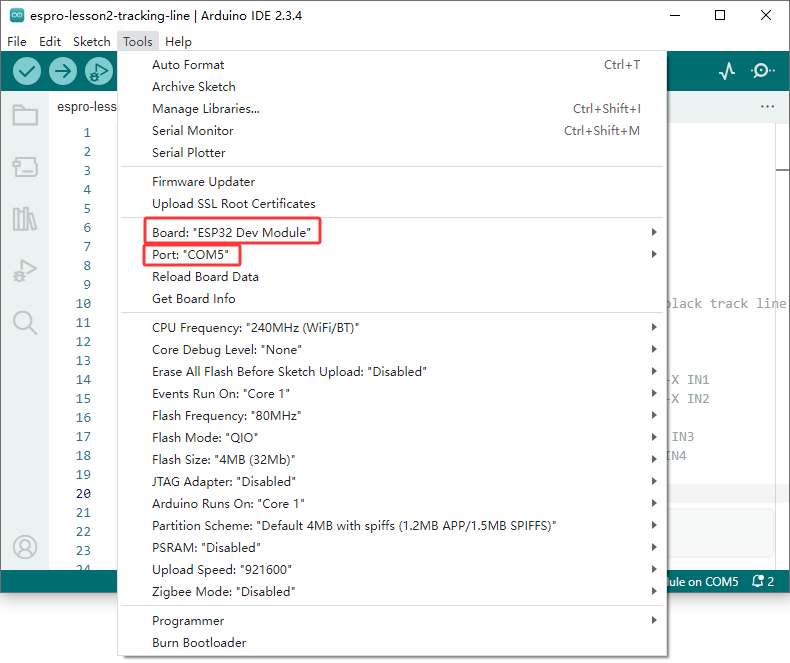
Then in Tool->Board, select esp32 ->ESP32 Dev Module,
Last select correct port which matches ESP32 board,upload the sketch to the board.

Adjust the sensitivity of tracking sensor modules.
Turn on and hold the car and adjust the potentiometer on the tracking sensor with Philips screwdriver until you get the best sensitivity status: the signal indicate LED light will turn on when sensor is above black track, and the signal LED will turn off when the sensor is above white ground.
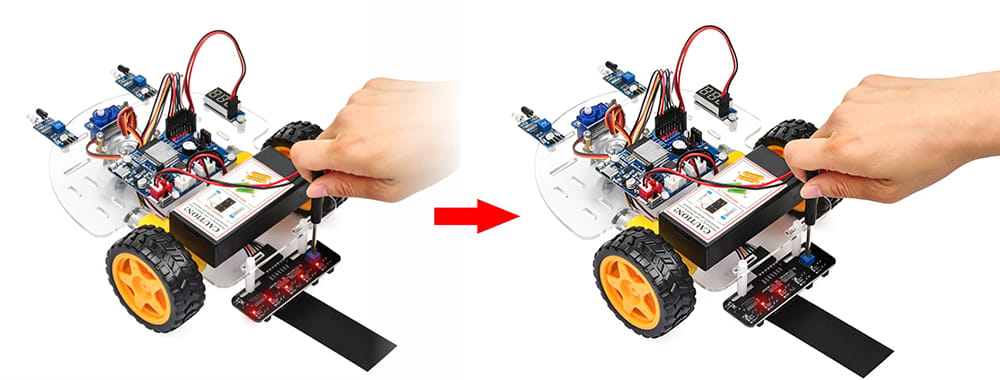
Final Test
Prepare a black track (the width of the black track is more than 20mm and less than 30mm) in white ground. Please note, the turning angle of track can’t be too sharp, otherwise the car will move out of the track.
Turn on the car and put the middle of tracking sensor module facing over black track, and then the car will move along the black track.


