← Back to Product Introduction
Table of Contents
1. Supported Hardware & OS
| Item |
Details |
| Display Panels |
OSOYOO 7″ DSI Touchscreen (#2025001200) |
| Supported Boards |
Raspberry Pi 3 / 4 / 5, CM3 / CM4 / CM5 |
| Operating System |
Raspberry Pi OS Bookworm / Trixie (Kernel 6.12+) |
Note: Make sure your hardware is connected correctly before proceeding. Refer to the Hardware Connection section in the product introduction if needed.
2. Method 1: Direct Installation via Git (Recommended)
This is the recommended method. Run the following commands on your Raspberry Pi:
git clone https://github.com/osoyoo/osoyoo-dsi-panel.git
cd osoyoo-dsi-panel
sudo ./install-direct.sh
After installation completes, open /boot/firmware/config.txt in the nano editor (or /boot/config.txt on older systems) and add the device tree overlay for your panel:
sudo nano /boot/firmware/config.txt
For OSOYOO 7″ panel:
dtoverlay=osoyoo-panel-dsi-7inch
For DSI0 interface (if your board uses DSI0 instead of DSI1):
dtoverlay=osoyoo-panel-dsi-7inch,dsi0

Type "Ctrl+X" to save your settings and type "Y" to confirm.
Then reboot:
sudo reboot
3. Method 2: Build .deb Package
If you prefer to install via a Debian package, use this method:
git clone https://github.com/osoyoo/osoyoo-dsi-panel.git
cd osoyoo-dsi-panel
sudo ./build-on-pi.sh
This generates osoyoo-dsi-panel-dkms_1.0-1_all.deb. Install it with:
sudo dpkg -i osoyoo-dsi-panel-dkms_1.0-1_all.deb
Then add the overlay to /boot/firmware/config.txt as described in Method 1, and reboot.
4. Method 3: Download Without Git
If Git is not available on your system, download the source tarball directly from GitHub:
wget https://github.com/osoyoo/osoyoo-dsi-panel/archive/refs/heads/main.tar.gz
tar -xzf main.tar.gz
cd osoyoo-dsi-panel-main
sudo ./install-direct.sh
Then add the overlay to /boot/firmware/config.txt as described in Method 1, and reboot.
5. Verification
After rebooting, verify the driver is loaded correctly:
lsmod | grep osoyoo
You can also check DKMS status:
dkms status osoyoo-dsi-panel
If the display is working, you should see the Raspberry Pi OS desktop on the screen.
6. Backlight Brightness Control
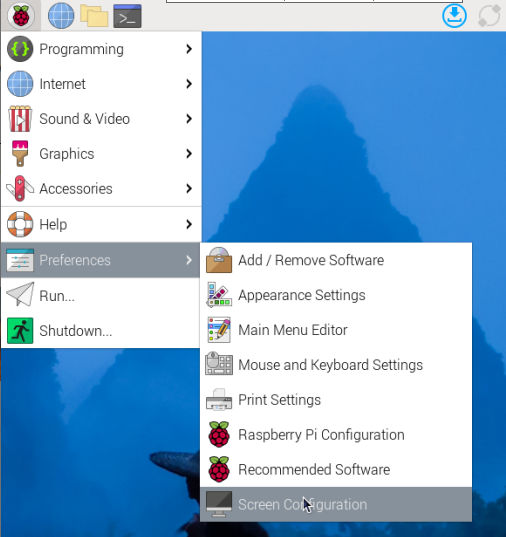
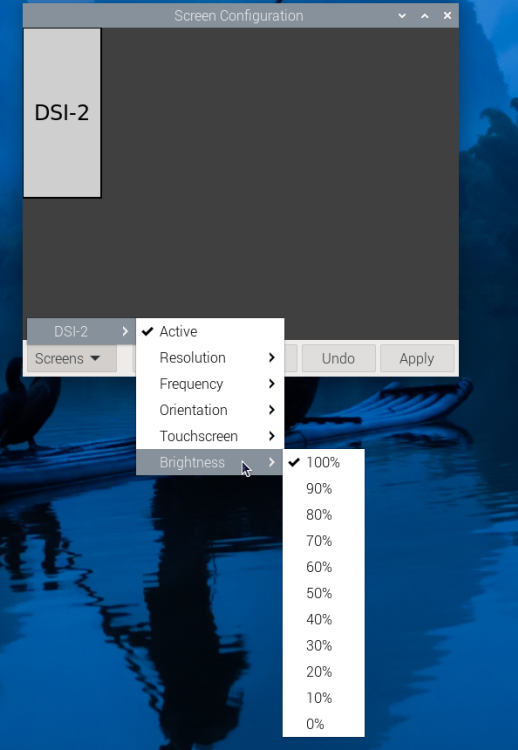
6.1 GUI Method
- Open the Screen Configuration application from the desktop menu.
- Click Screen → DSI-2 (or DSI-1 depending on your setup) → Brightness.
- Adjust the slider and click Apply.
6.2 Command Line Method
Set brightness via terminal (value range: 0 = darkest, 255 = brightest):
echo X | sudo tee /sys/class/backlight/*/brightness
Replace X with your desired value, for example:
echo 128 | sudo tee /sys/class/backlight/*/brightness
6.3 Brightness Demo Application
A demo application is also available:
wget https://osoyoo.com/driver/Brightness.zip
unzip Brightness.zip
cd Brightness
sudo chmod +x install.sh
./install.sh
7. Touchscreen Rotation (Bookworm & Trixie)
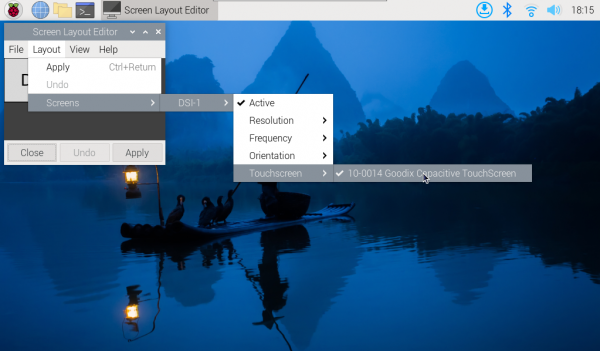
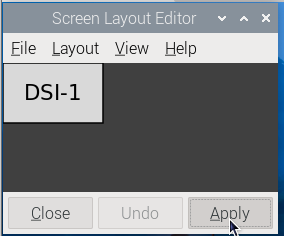
- Open Screen Configuration.
- Click Screen → DSI-1 → Touchscreen.
- Select 10-0014 Goodix Capacitive TouchScreen and click Apply.
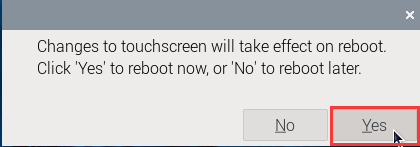
- Reboot when prompted.
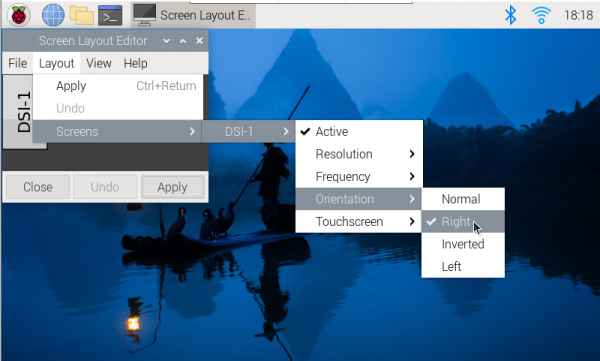
After reboot, to change screen orientation:
- Open Screen Configuration → Screen → DSI-1 → Orientation.
- Select your desired direction and click Apply.
8. Uninstallation
To remove the driver, navigate to the cloned repository folder and run:
cd osoyoo-dsi-panel
sudo ./uninstall.sh
Or if installed via .deb package:
sudo dpkg -r osoyoo-dsi-panel-dkms
9. Troubleshooting
| Issue |
Possible Cause |
Solution |
| Display does not turn on |
Driver not loaded or overlay missing |
Run lsmod | grep osoyoo to check; verify overlay is added to config.txt |
| Driver build fails |
Kernel headers missing |
Run sudo apt install raspberrypi-kernel-headers |
| Touch not working |
Touchscreen not configured |
Follow the Touchscreen Rotation section to configure the Goodix touch device |
| Model detection error |
Incompatible board or kernel |
Ensure you are using Raspberry Pi OS Bookworm or Trixie with Kernel 6.12+ |
10. Support
← Back to Product Introduction


