Overview
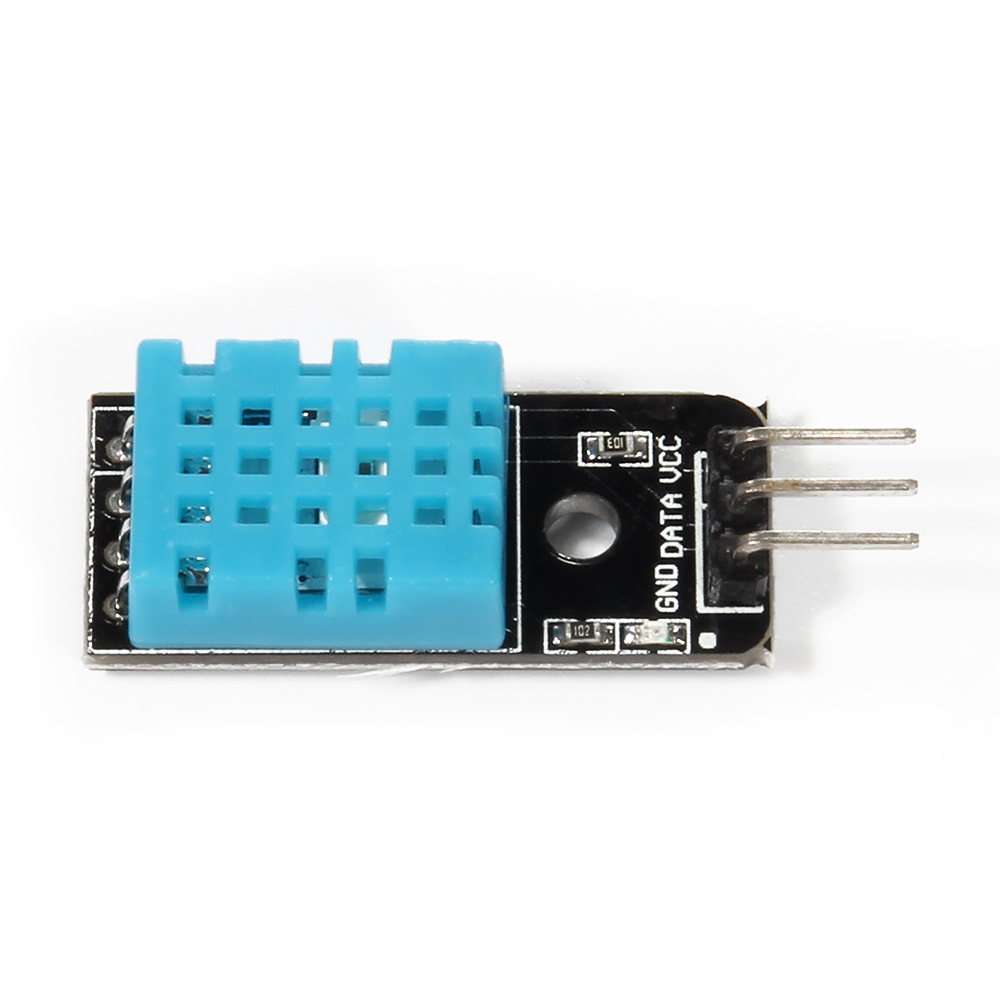
在本文中将介绍如何用树莓派读取温湿度传感器DHT11 温湿度数据。温度湿度模块看起来简单,只有三个引脚(实际4个接口,有一个脚悬空),但仔细一想,3个引脚分别作为VCC、GND、DATA用,因为传给树莓派GPIO的只有高电平、低电平,那么怎么来读取温度数字和湿度数字呢?这么一想,并不简单!因为引脚少,它需要高低变化的时序信号来表达数值,还有一些其它信号如开始信号等等。所以得先深入了解一下DHT11模块了。
DHT11时序介绍
1)数据帧格式
DHT11会向主机发送40位(5子节)数据,第一二个子节数据表示温度值;第三四个子节数据代表湿度值;最后一个子节是校验码。如果数据无误的情况下,前4个子节的和等于校验码。

2)握手阶段
默认状态下DATA脚为高电平,主机端GPIO发送开始信号,首先拉低DATA脚至少18ms,然后拉高DATA脚20-40us等待DHT11的响应信号
一旦DHT11收到开始信号,DHT11将向主机发送响应信号,同时将DATA脚拉低80us作为响应,然后DHT11拉高DATA脚80us,握手完毕。
3)数据发送阶段
一次的湿度和温度数据,DHT11需要发送40bits数据,每一位数据之前都以50us低电平开始,随后的高电平时序信号,持续26us-28us的表示这一位是0,持续70us表示这一位是1,然后继续50us低电平,紧接着下一位的高电平开始。
数据 ‘0’:

数据 ‘1’:

Parts
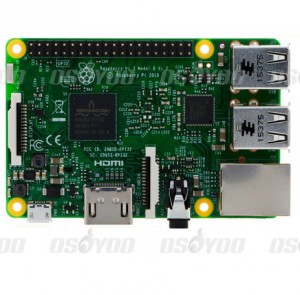
为了完成本项目需要用到如下器件
Hardware
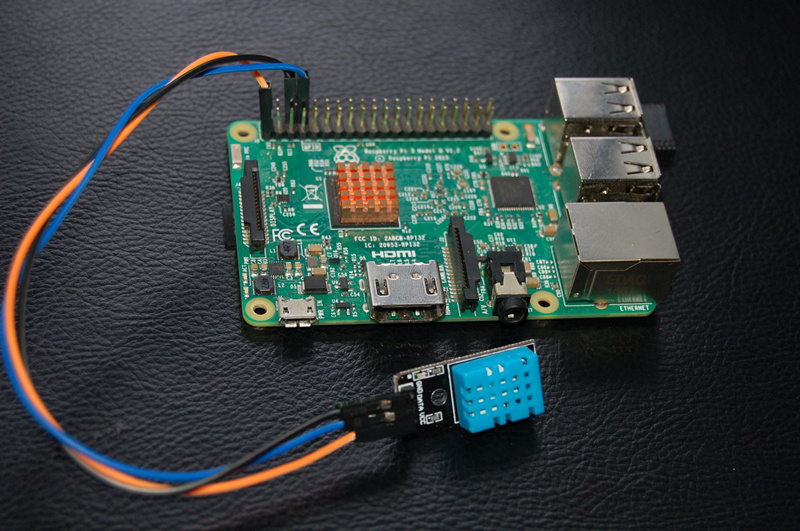
硬件连接很简单,将DHT11的VCC接到Pi的3.3V;DHT11的GND接到Pi的GND;DHT11的DATA接到Pi的GPIO14(BCM编码方式),关于GPIO的识别请参考: How to read Raspberry Pi i/o pin diagram (GPIO pin graph)

Software
本文将介绍2中方式读取DHT11数据,一种是Python方式读取,一种是C语言方式读取。
1)Python方式
在任一路径下(如/home/pi)用nano新建一个dht11-test.py文件
sudo nano dht11-test.py
往dht11-test.py文件写入如下代码:
# _____ _____ _____ __ __ _____ _____
#|     |   __|     |  |  |     |     |
#|  |  |__   |  |  |_   _|  |  |  |  |
#|_____|_____|_____| |_| |_____|_____|
#
# Use Raspberry Pi to get temperature/humidity from DHT11 sensor
#
import time
import dht11
import RPi.GPIO as GPIO

#define GPIO 14 as DHT11 data pin
Temp_sensor=14
def main():
  # Main program block
  GPIO.setwarnings(False)
  GPIO.setmode(GPIO.BCM)       # Use BCM GPIO numbers
  # Initialise display
#  lcd_init()
  instance = dht11.DHT11(pin = Temp_sensor)

  while True:
        #get DHT11 sensor value
        result = instance.read()
  print"Temperature = ",result.temperature,"C"," Humidity = ",result.humidity,"%"
  time.sleep(1)

if __name__ == '__main__':

  try:
    main()
  except KeyboardInterrupt:
    pass
#  finally:
#    lcd_byte(0x01, LCD_CMD)
运行Python代码需要依赖一个dht11.py文件,用下面的命令下载,需要保证dht11.py文件与dht11-test.py在同一路径下。
sudo sudo wget http://osoyoo.com/driver/dht11.py
运行Python程序
sudo python ./dht11-test.p
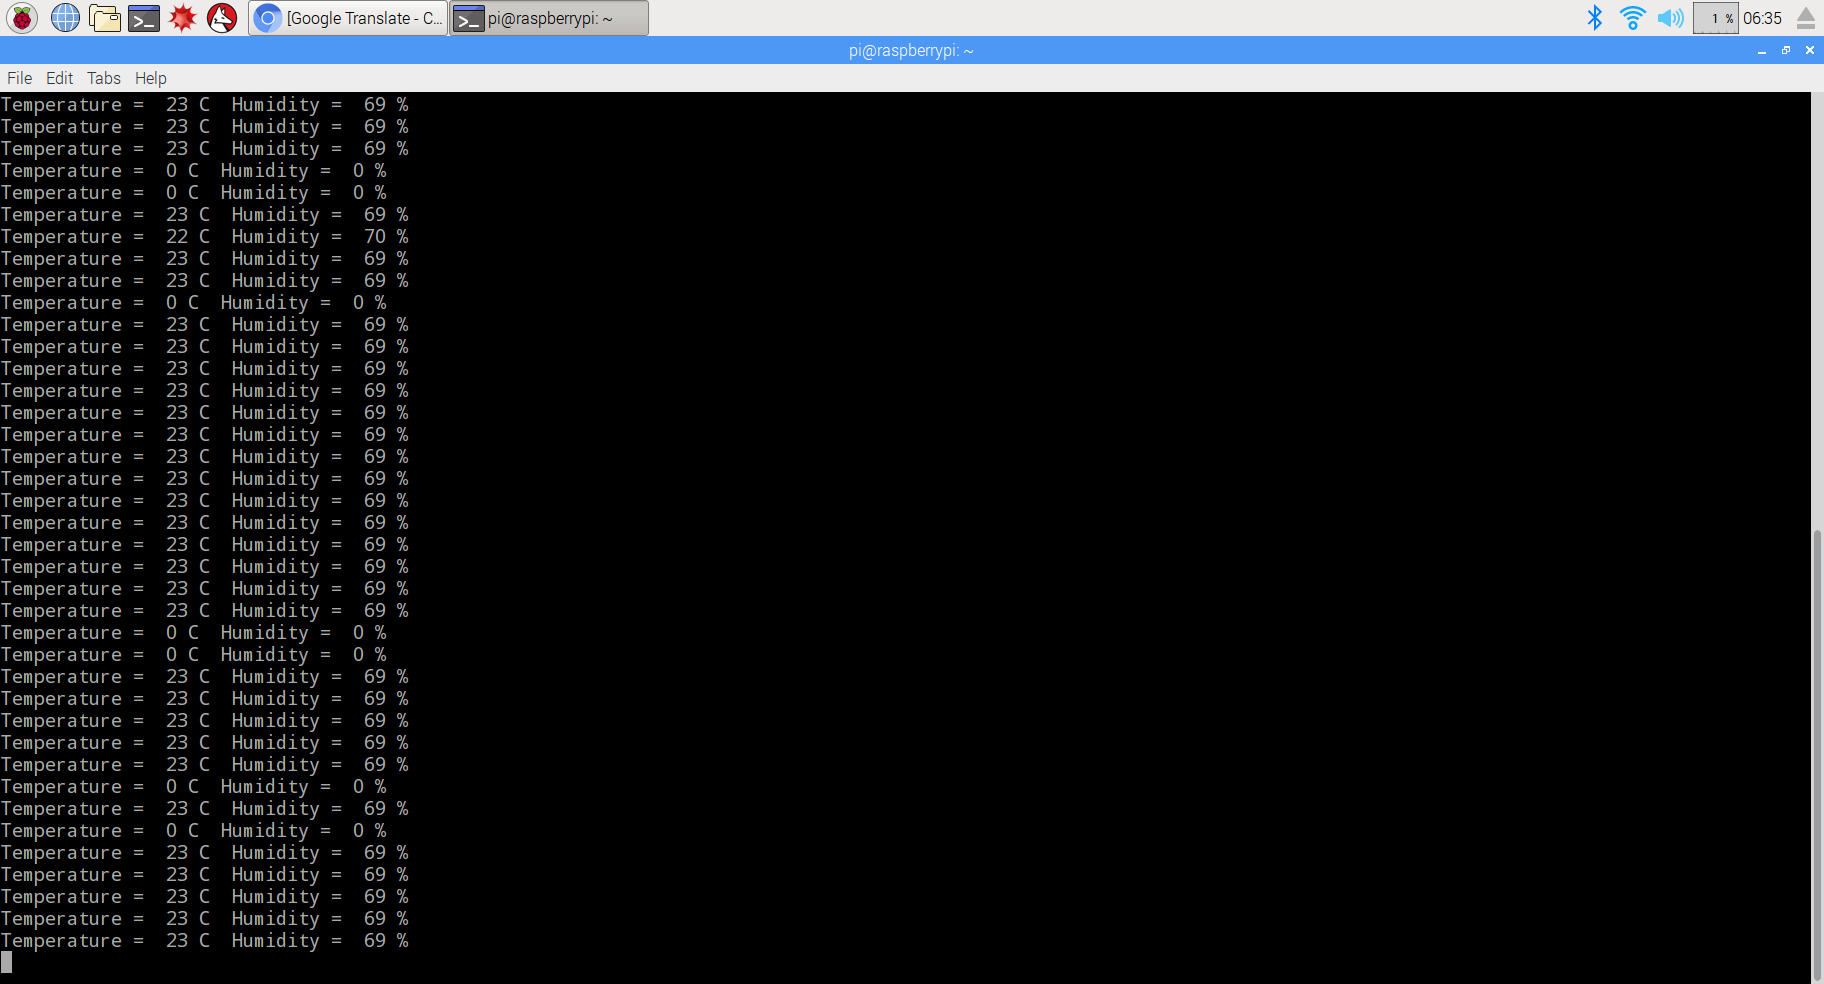
执行完上面的命令后会在屏幕上打印出温湿度值,但是很多时候会出现温湿度都等于0的情况,这是为什么?原因在于树莓派读取DHT11的输出信号,需要微秒级的定时,否则在数据传输阶段,很难准确的识别出每一位是“0”还是“1”,树莓派运行的Raspbian系统是一个非实时系统,很难实现准确的微秒级定时,会导致数据丢失,使DHT11在数据校验时候不正确。
2)C语言方式
A.在树莓派下用C语言操作GPIO需要首先安装GPIO库,运行下面命令(如果已经安装请跳过)
sudo git clone git://git.drogon.net/wiringPi
sudo cd wiringPi
sudo ./build
B.在任一路径下(如/home/pi)用nano新建一个dht11-test.py文件
sudo nano dht11-test.c
往dht11-test.c里面写入如下代码
/*
 *  dht11.c:
 *  Simple test program to test the wiringPi functions
 *  DHT11 test
 */

#include <wiringPi.h>
#include <stdio.h>
#include <stdlib.h>
#include <stdint.h>
#define MAXTIMINGS  85
#define DHTPIN    15
int dht11_dat[5] = { 0, 0, 0, 0, 0 };

void read_dht11_dat()
{
  uint8_t laststate = HIGH;
  uint8_t counter   = 0;
  uint8_t j   = 0, i;
  float f; /* fahrenheit */

  dht11_dat[0] = dht11_dat[1] = dht11_dat[2] = dht11_dat[3] = dht11_dat[4] = 0;

  /* pull pin down for 18 milliseconds */
  pinMode( DHTPIN, OUTPUT );
  digitalWrite( DHTPIN, LOW );
  delay( 18 );
  /* then pull it up for 40 microseconds */
  digitalWrite( DHTPIN, HIGH );
  delayMicroseconds( 40 );
  /* prepare to read the pin */
  pinMode( DHTPIN, INPUT );

  /* detect change and read data */
  for ( i = 0; i < MAXTIMINGS; i++ )
  {
    counter = 0;
    while ( digitalRead( DHTPIN ) == laststate )
    {
      counter++;
      delayMicroseconds( 1 );
      if ( counter == 255 )
      {
        break;
      }
    }
    laststate = digitalRead( DHTPIN );

    if ( counter == 255 )
      break;

    /* ignore first 3 transitions */
    if ( (i >= 4) && (i % 2 == 0) )
    {
      /* shove each bit into the storage bytes */
      dht11_dat[j / 8] <<= 1;
      if ( counter > 16 )
        dht11_dat[j / 8] |= 1;
      j++;
    }
  }

  /*
   * check we read 40 bits (8bit x 5 ) + verify checksum in the last byte
   * print it out if data is good
   */
  if ( (j >= 40) &&
       (dht11_dat[4] == ( (dht11_dat[0] + dht11_dat[1] + dht11_dat[2] + dht11_dat[3]) & 0xFF) ) )
  {
    f = dht11_dat[2] * 9. / 5. + 32;
    printf( "Humidity = %d.%d %% Temperature = %d.%d *C (%.1f *F)\n",
      dht11_dat[0], dht11_dat[1], dht11_dat[2], dht11_dat[3], f );
  }else  {
    printf( "Data not good, skip\n" );
  }
}

int main( void )
{
  printf( "Raspberry Pi wiringPi DHT11 Temperature test program\n" );

  if ( wiringPiSetup() == -1 )
    exit( 1 );

  while ( 1 )
  {
    read_dht11_dat();
    delay( 1000 ); /* wait 1sec to refresh */
  }

  return(0);
}
C.编译、执行程序
sudo gcc -o dht11-test dht11-test.c -lwiringPi
sudo ./dht11-test
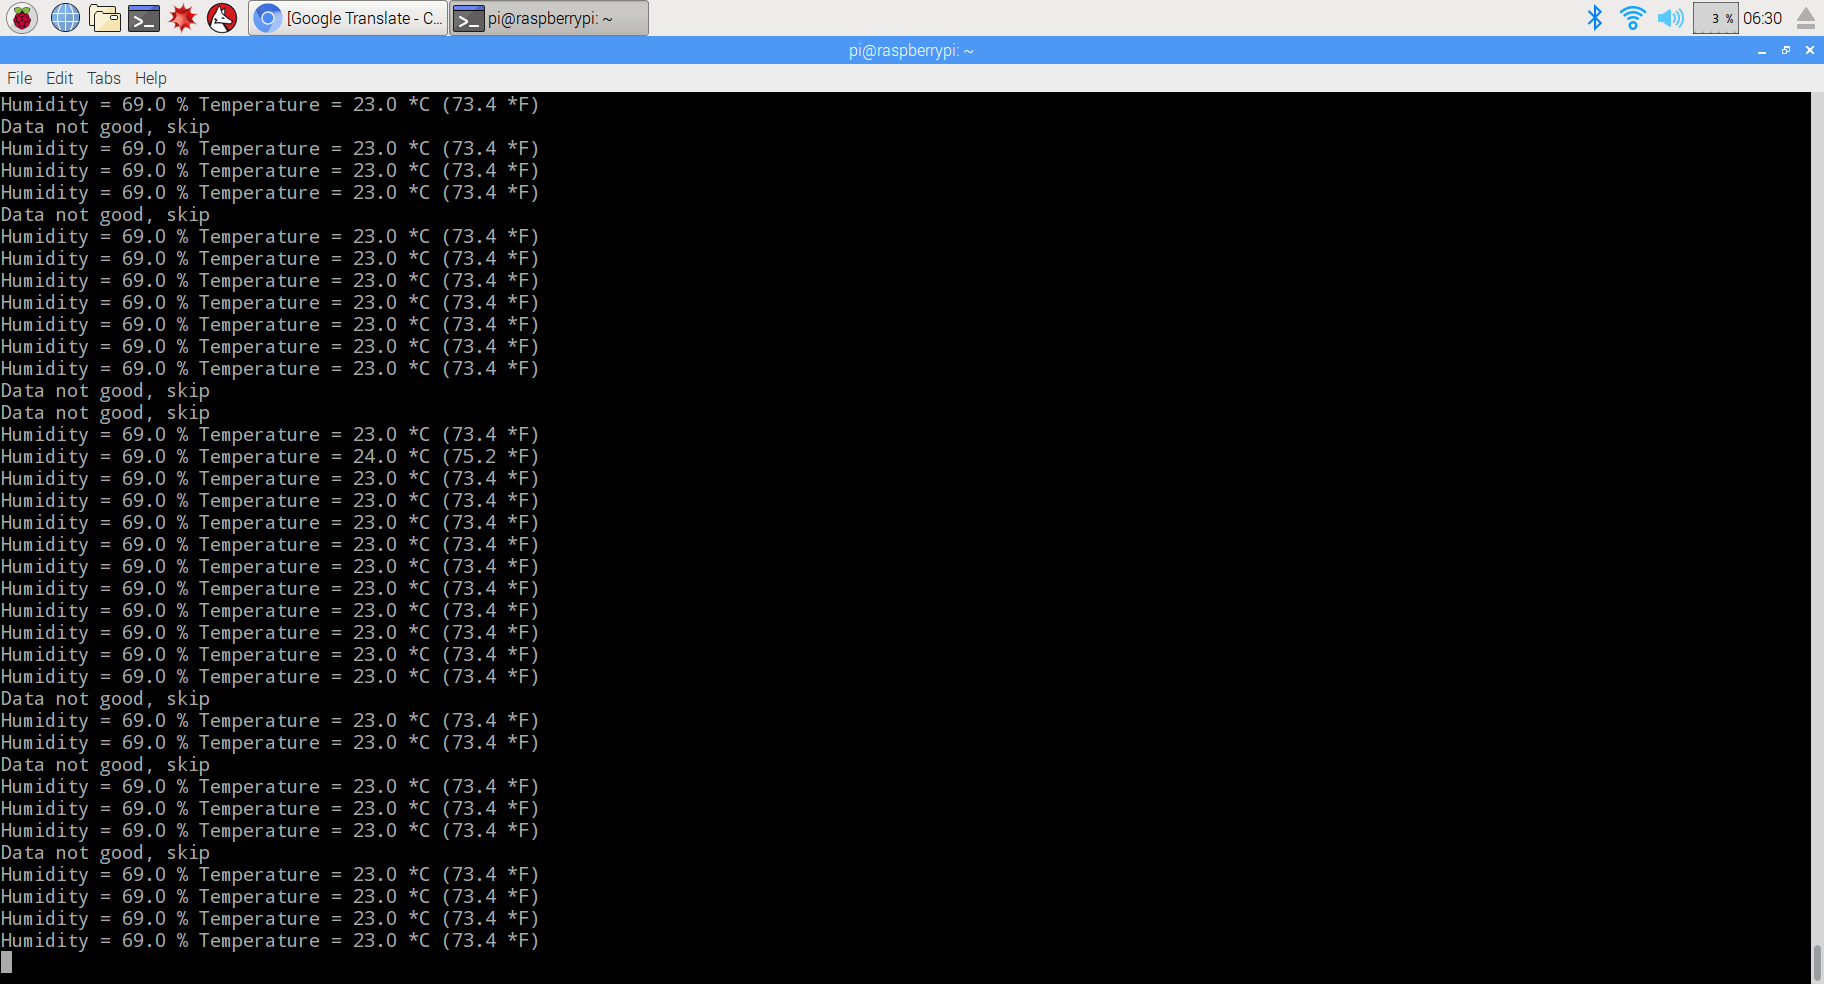
本文中所有用到的代码可以通过下面的命令获取到
sudo wget http://osoyoo.com/wp-content/uploads/2017/03/dht11_code.rar
对比发现,C语言方式虽然也有数据丢失的情况,但是总体来说比Python少一些,,这是因为C语言是高级语言,直接对树莓派GPIO进行操作。


