Welcome to the second lesson of Arduino smart car!
1.功能介绍
有了第一课对电机驱动板、车轮、电机、电压表、蜂鸣器、电池盒以及小车核心部分Arduino UNO的安装经验,本课将在上一课的基础上安装红外接收模块,红外接收模块用于接收红外遥控器发射的红外信号,当红外接收模块收到遥控器发送指令后小车执行相应的动作。例如遥控器发送一个前进的指令,模块收到指令后就会执行前进的动作。就像空调一样,拿着遥控器对着空调按下“电源”键,空调开机。
2.物料清单
|
器件
|
|
|
|
|
|
|
|
L298N MOTOR driver module
|
|
Box for 18650 3.7V battery+
DC power connector
|
|
|
|
|
|
|
|
|
|
|
Jumper wires(male-male,male-female,female-female)
|
|
|
|
|
Installation
1) 底盘、电机驱动板及其他部件安装,请参考第一课
OSOYOO Robot Car Starter Kit Lesson 1: Install UNO R3 Board and Motors on Chassis
2) 安装红外接收模块
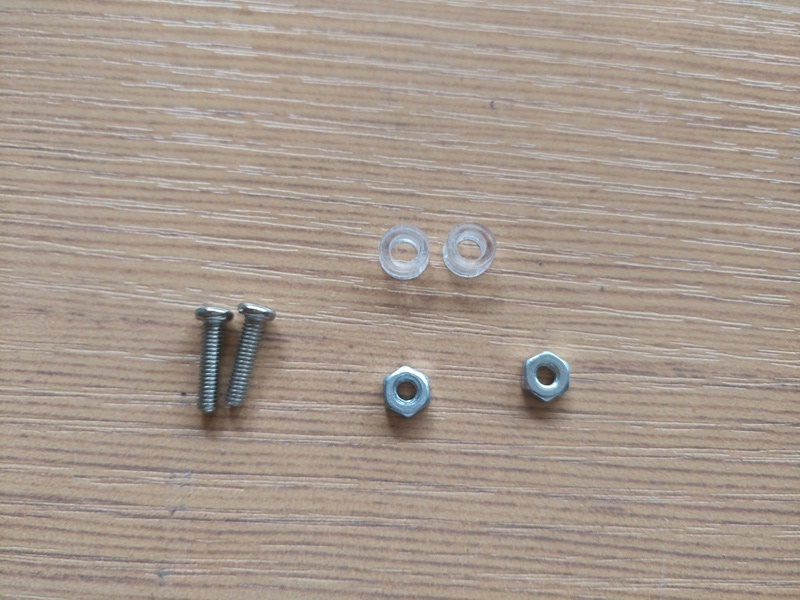
| 所需配件 |
数量 |
| M2.5*10螺丝 |
2 |
| M2.5*10螺帽 |
2 |
| 塑料垫 |
2 |

将两个塑料垫放在较短一块底盘上安装红外接收模块处,将红外接收模块放置于塑料垫上,用M2.5*10螺丝将红外接收模块和所料垫固定于底盘上
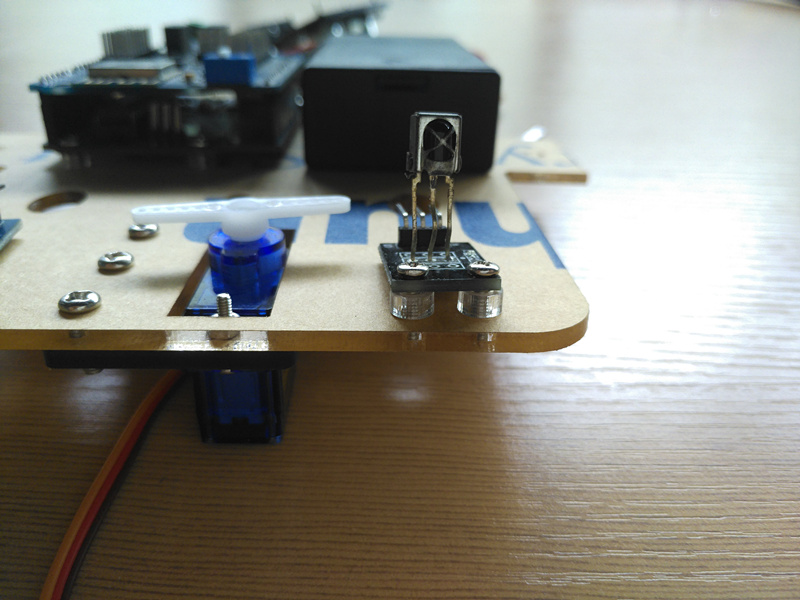
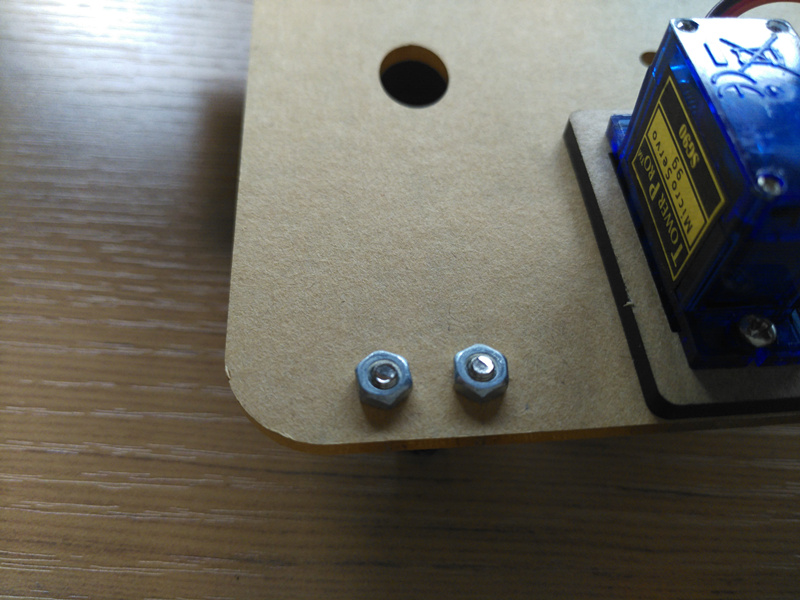
拧上螺丝帽
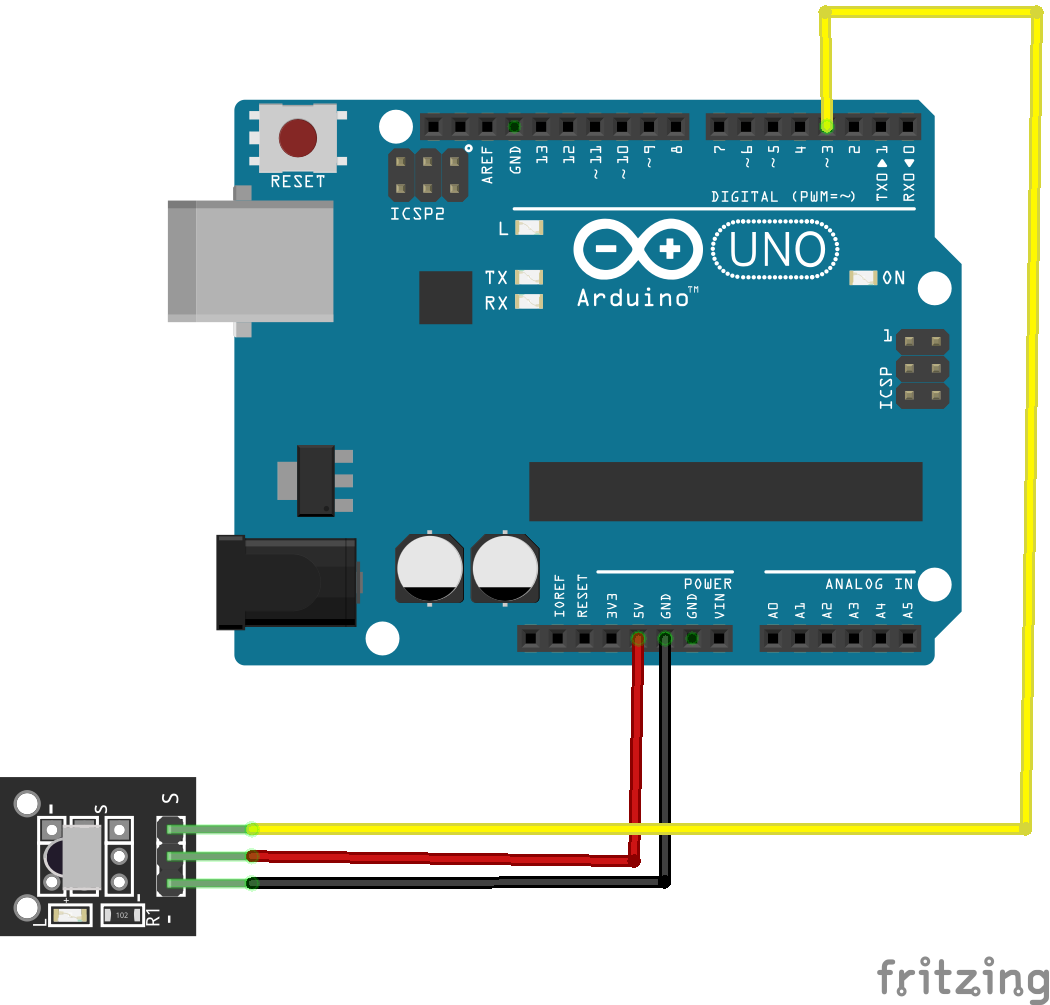
3) 线路图
红外接收模块与Arduino UNO链接请参考下图
Software Installation:
Step 1: Install latest Arduino IDE (If you have Arduino IDE version after 1.1.16, please skip this step)
Download Arduino IDe from https://www.arduino.cc/en/Main/Software?setlang=en , then install the software.
Step 2:下载本课示例代码:https://osoyoo.com/driver/smartcar-lesson2.zip,解压压缩包,你会看到在smartcar-lesson2文件夹下有smartcar-lesson2.ino和configuration.h文件
Step 3: Connect Arduino UNO to PC with USB cable, use Arduino IDE to open the file smartcar-lesson2.ino in smartcar-lesson2 folder, load the code into arduino.
项目中用到了IRremote库,下载链接:https://osoyoo.com/wp-content/uploads/2017/02/IRremote.rar
Final Testing :
拔掉连接uno和PC之间的USB线,打开小车上电池盒侧面开关,取出遥控器可以看到电池扣处有一片透明的塑料垫片,将塑料垫片拔掉,把遥控器对着小车上的红外接收模块按下列按键,小车会做相应的动作。
▲—–前进
▼—–后退
>—–右转
<—–左转
OK—–停止
如果按下按键后下车没有反应或者小车运动缓慢,你应该从以下几方面检查小车:
1)电池电压是否过低,如果电压低于7.2V,如果低于7.2V请取出18650电池,给其充电;
2)按遥控器时是否对准红外接收模块,如果没有对准请 对准;
3)红外接收模块是否与UNO之间连接正确


I just received the following error message:
Arduino: 1.8.5 (Windows 10), Board: “Arduino/Genuino Uno”
C:\Users\zaite\Desktop\Osoyoo\smartcar-lesson2\smartcar-lesson2.ino:11:22: fatal error: IRremote.h: No such file or directory
#include
^
compilation terminated.
exit status 1
Error compiling for board Arduino/Genuino Uno.
This report would have more information with
“Show verbose output during compilation”
option enabled in File -> Preferences.
can you please advise?
You should install the library — IRremote.h for your IDE, just follow the Software Installation in this project.
Backwards does not work!
step 2:Install IRremote library into Arduino IDE (If you have already installed IRremote library, please skip this step)
Download IRremote library from https://osoyoo.com/wp-content/uploads/samplecode/IRremote.zip, then import the library into Arduino IDE(Open Arduino IDE-> click Sketch->Include Library->Add .Zip Library)
i have a macintosh and attempted to follow these steps. It turns out that its sending me to a list of unnecessary codes rather then just clicking the zip file from the desktop and moving on to the next step. What advice should i attempt from here?
Hi friend,
Do you solve this issue?
I’m sorry that there are something wrong with our website before, and I can’t see your comment.
If any query, please feel free to contact with my email address: [email protected].
Elaine
I’m receiving the following error message:
/Users/peterkaminski/Desktop/Arduino.app/Contents/Java/libraries/RobotIRremote/src/IRremoteTools.cpp:5:16: error: ‘TKD2’ was not declared in this scope
int RECV_PIN = TKD2; // the pin the IR receiver is connected to
^
exit status 1
Error compiling for board Arduino/Genuino Uno.
Can you please tell me what’s wrong?
The robot can only run one code at a time correct?
yes.
Hi friend,
Do you solve this issue?
I’m sorry that there are something wrong with our website before, and I can’t see your comment.
If any query, please feel free to contact with my email address: [email protected].
Elaine
Installed the receiver and code uploaded successfully, but when I go to use the remote, nothing happens.
Having the same issue? It appears to upload fine and does nothing. Did you discover anything? Also the test IR code doesn’t work. I am wondering if it is something as simple as the remote battery.
As I understand, OSOYOO put wrong remotes. With different commands.
I have modified lesson 2.
Russian: Похоже, при упаковке положили новые пульты. У меня тоже не работало. Поменял исходники и вывел коды в монитор на комп. Потом поменял на найденные коды. Получилось. Коды внизу.
/**************detect IR code***************/
void do_IR_Tick()
{
if(IR.decode(&IRresults))
{
Serial.print(“IR Code = “);
Serial.println(IRresults.value, HEX); // Print codes to serial monitor to PC
if(IRresults.value==IR_ADVANCE)
{
Drive_Num=GO_ADVANCE;
……………
-= Part of file configuration.h =-
#define IR_ADVANCE 0x3D9AE3F7 //code from IR controller “▲” button
#define IR_BACK 0x1BC0157B //code from IR controller “▼” button
#define IR_RIGHT 0x0449E79F //code from IR controller “>” button
#define IR_LEFT 0x8C22657B //code from IR controller “<" button
#define IR_STOP 0x488F3CBB //code from IR controller "OK" button
#define IR_turnsmallleft 0xF0C41643 //code from IR controller "#" button
#define IR_turnsmallright 0xC101E57B //code from IR controller "#" button
#define IR_PRESS 0xFFFFFFFF //code from IR controller "#" button
But this remote don’t repeat commands. If You hold button it transmin right code once and then transmit code 0xFFFFFFFF with all buttons.
And you have to press button many times to drive the car.
My sun is sad about it.
On the Lego-technics he can press and hold remote button and car will move…
Hi friend,
Do you solve this issue?
I’m sorry that there are something wrong with our website before, and I can’t see your comment.
If any query, please feel free to contact with my email address: [email protected].
Elaine
this is the error mesage
smartcar-lesson2:11:10: error: IRremote.h: No such file or directory
compilation terminated.
exit status 1
IRremote.h: No such file or directory
this is the error mesage
smartcar-lesson2:11:10: error: IRremote.h: No such file or directory
compilation terminated.
exit status 1
IRremote.h: No such file or directory
After downloading the code and IR library only 2 of the 4 wheels will work with the remote. We re-uploaded the code from lesson 1 and all 4 wheels work. However when we upload lesson 2 code again, only 2 wheels work. What are we missing? Ideas?
I believe you are using 9V square battery which has low capacity. wireless IR receiver consumes a lot of current which needs battery capacity >400MA . We recommend you use 18650 li-on battery which has much better performance in the rest of the lessons.