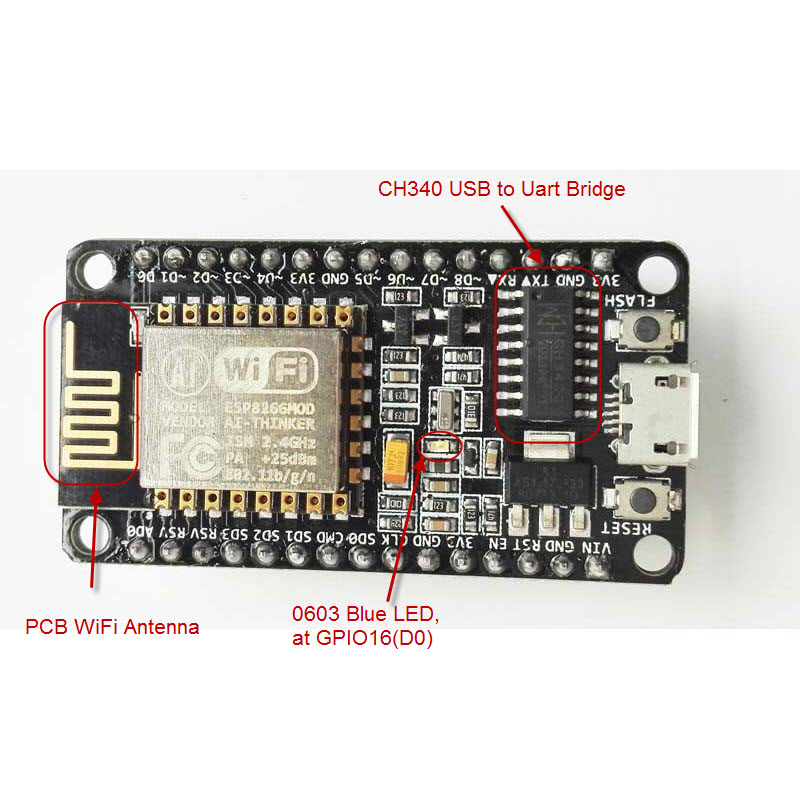
In this part,we will learn how to use the Arduino IDE to blink the on-board LED,the blue led in the board was used to signal the execution of a particular procedure.Because the GPIO16 (DO) limitation to use the analogWrite() and looking to see my LED doing something else…
First,connect the NodeMCU to the PC,put below code to the Arduino IDE:
#defineLEDD0// Led in NodeMCU at pin GPIO16 (D0).voidsetup(){pinMode(LED,OUTPUT);// LED pin as output.}voidloop(){digitalWrite(LED,HIGH);// turn the LED off.(Note that LOW is the voltage level but actually //the LED is on; this is because it is acive low on the ESP8266.delay(1000);// wait for 1 second.digitalWrite(LED,LOW);// turn the LED on.delay(1000);// wait for 1 second.}
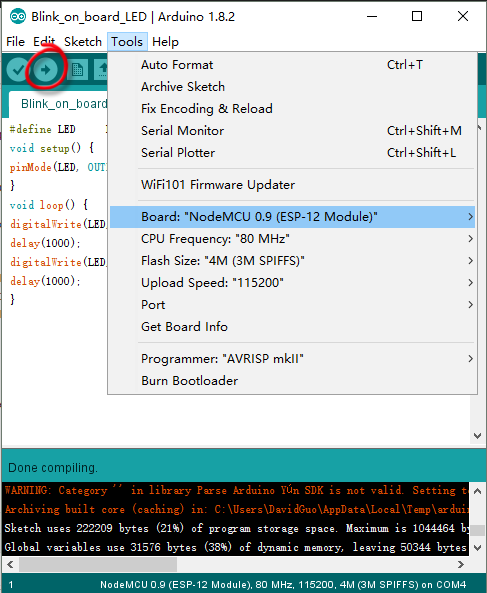
Then config the board settings(choose the corresponding board and port for your NodeMCU) and upload the sketch to the board.
After upload done,you will see the on-board LED blink every second.
Blink an external LED
We will show how to using the NodeMCU to blink an external LED.
Connection:
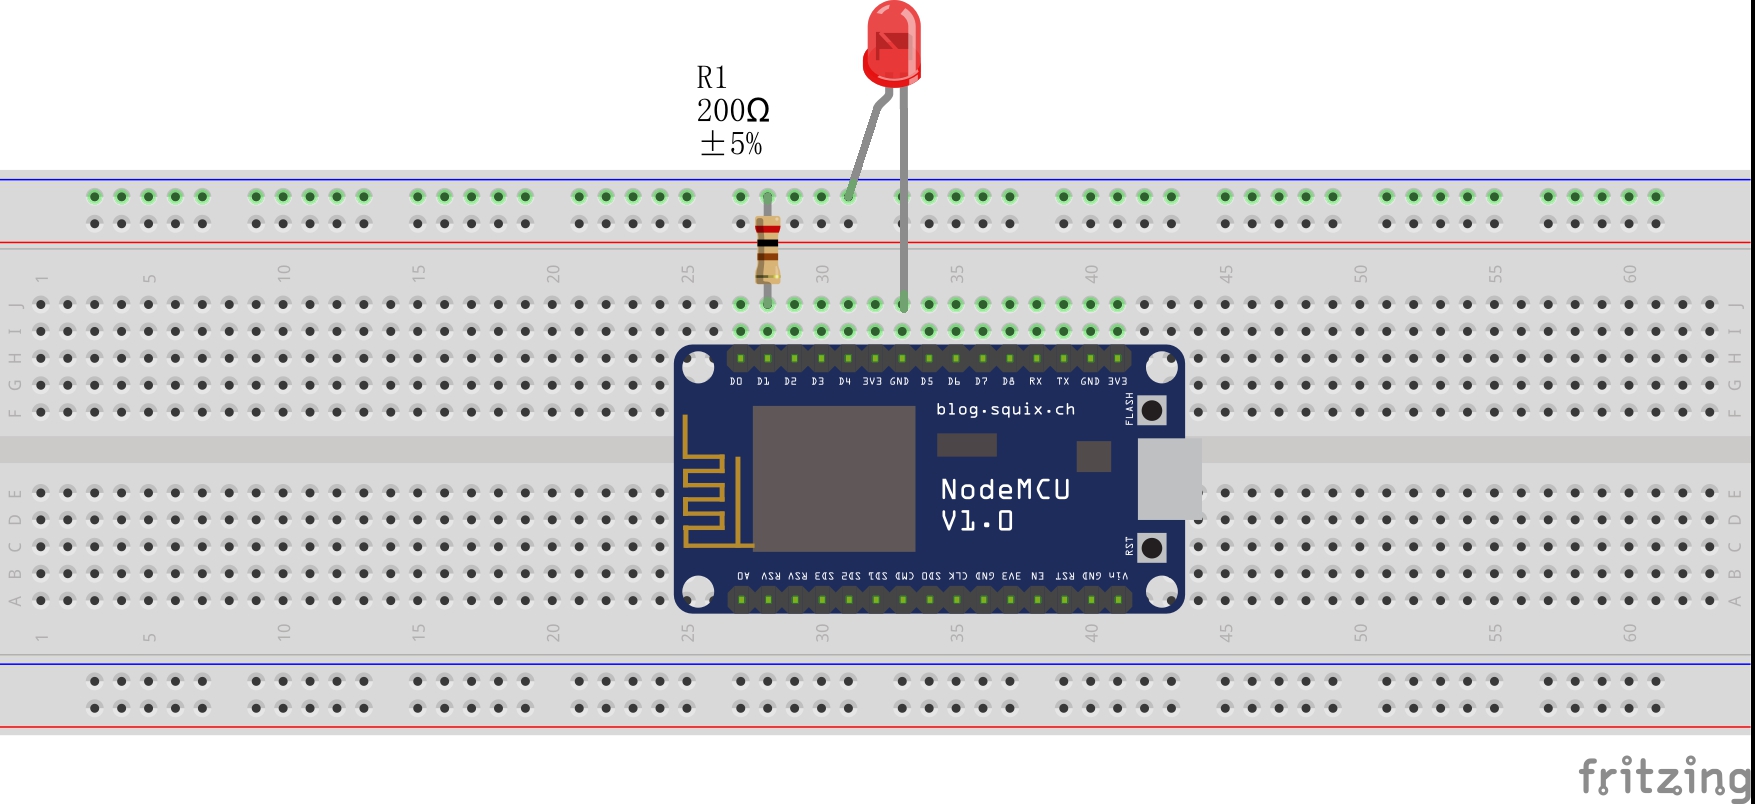
Connect one end of the resistor to the digital pin correspondent to the LED_BUILTIN constant. Connect the long leg of the LED (the positive leg, called the anode) to the other end of the resistor. Connect the short leg of the LED (the negative leg, called the cathode) to the GND. In the diagram below we show a NodeMCU that has D1 as the LED_BUILTIN value.
The value of the resistor in series with the LED may be of a different value than 200 ohm; the LED will lit up also with values up to 1K ohm.
#defineLEDD1// Led in NodeMCU at pin GPIO16 (D0).voidsetup(){pinMode(LED,OUTPUT);// set the digital pin as output.}voidloop(){digitalWrite(LED,HIGH);// turn the LED off.(Note that LOW is the voltage level but actually//the LED is on; this is because it is acive low on the ESP8266.delay(1000);// wait for 1 second.digitalWrite(LED,LOW);// turn the LED on.delay(1000);// wait for 1 second.}
After the upload done,you will see the led blink .