Note: ALL OSOYOO Products for Arduino are Third Party Board which is fully compatitable with Arduino
Authorized Online Retailers:
Content
- Introduction
- Preparations
- The ‘L’ LED
- Connect the board
- Loading the ‘Blink’ Example
- Select Corresponding Board Type/Port Type
- Uploading Blink to the Board
- How ‘Blink’ Workst
- Blinking Faster
Introduction
In this lesson, you will learn how program your Arduino to make the Arduino’s built-in LED blink.

Preparations
Hardware
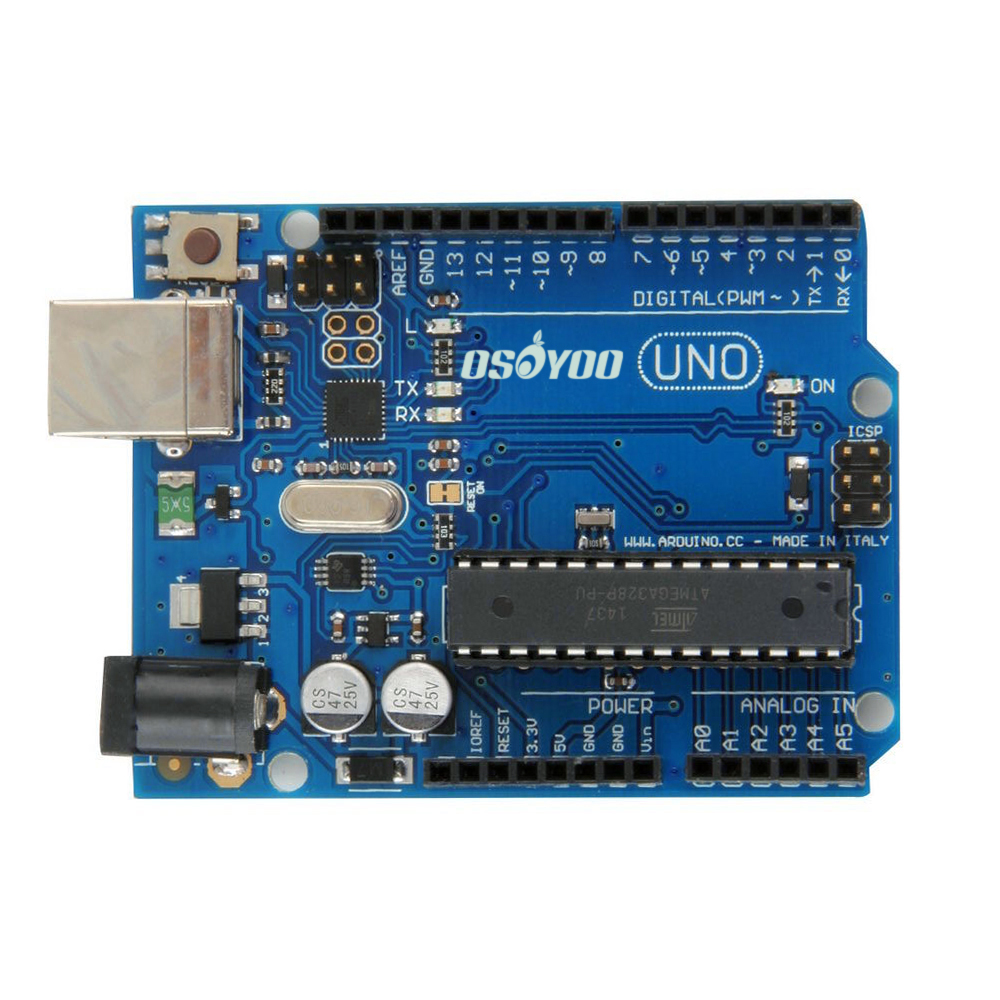
- OSOYOO Basic board (Fully compatible with Arduino UNO rev.3) x 1
- USB Cable x 1
- PC x 1
Software
Arduino IDE (version 1.6.4+)
Notice:
Not much is needed for this lesson,make sure you’ve gone through Preparation lessons and Hello World lesson first!
Make sure you have a good quality syncing cable,do not pick a ‘charge only’ USB cable
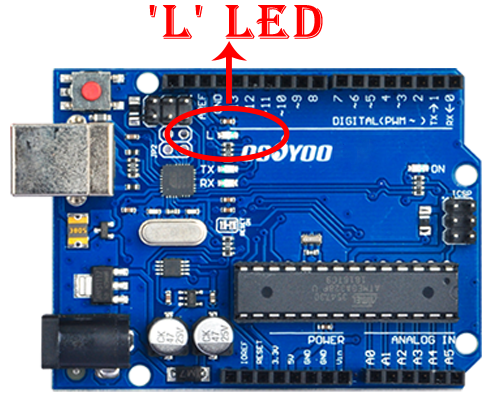
The ‘L’ LED
The OSOYOO Basic board has rows of connectors along both sides that are used to connect to electronic devices and plug-in ‘shields’ that allow the OSOYOO Basic board to do more.However, the OSOYOO Basic board also has a single LED that you can control from your sketches. This LED is built onto the OSOYOO Basic board and is often referred to as the ‘L’ LED as this is how it is labelled on the board.
The position of this LED is circled in red on the pictures of the OSOYOO Basic board and Leonardo below.
Connect the board
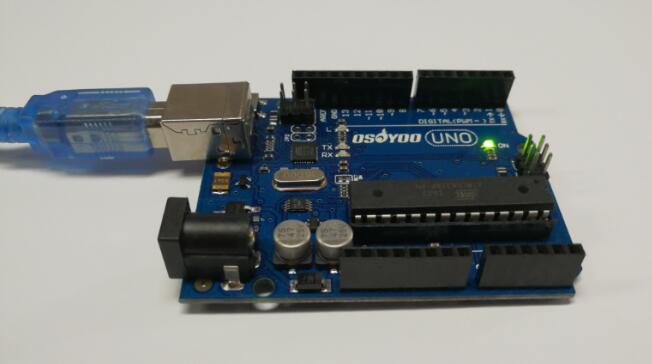
Connect the OSOYOO Basic board to your computer using the USB cable. The green power LED (labelled PWR) should go on.
Loading the ‘Blink’ Example
You may find that your OSOYOO Basic board’s ‘L’ LED already blinks when you connect it to a USB plug. This is because OSOYOO Basic boards are generally shipped with the ‘Blink’ sketch pre-installed.
In this lesson, we will reprogram the OSOYOO Basic board with our own Blink sketch and then change the rate at which it blinks.In Hello World Lesson, you setup your Arduino IDE and made sure that you could find the right serial port for it to connect to your OSOYOO Basic board. The time has now come to put that connection to the test and program your OSOYOO Basic board.
The Arduino IDE includes a large collection of example sketches that you can load up and use. This includes an example sketch for making the ‘L’ LED blink.
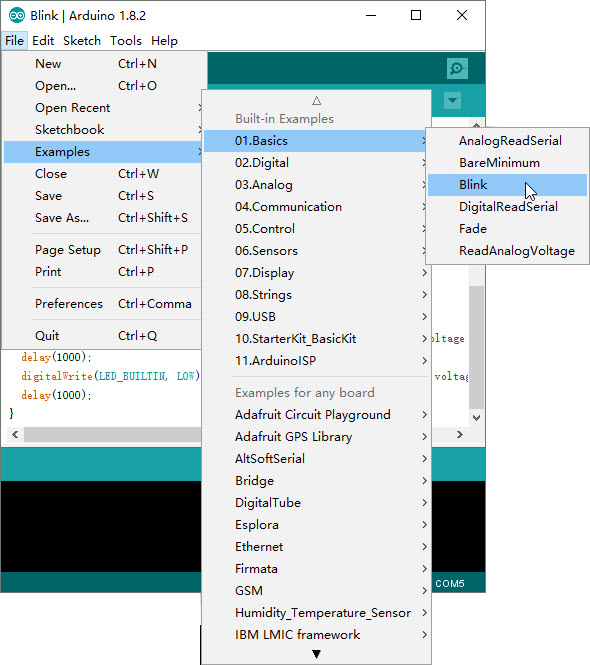
Load the ‘Blink’ sketch that you will find in the IDE’s menu system under File → Examples → 01.Basics→Blink.
Select Corresponding Board Type/Port Type
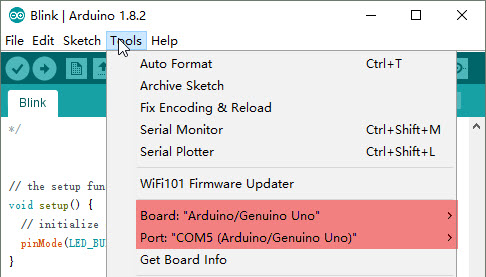
You’ll need to select the entry in the Tools > Board menu that corresponds to your Arduino,we choose “Arduino/Genuino Uno” here.
Select the serial device of the OSOYOO Basic board from the Tools | Serial Port menu. This is likely to be COM3 or higher (COM1 and COM2 are usually reserved for hardware serial ports). To find out, you can disconnect your OSOYOO Basic board and re-open the menu; the entry that disappears should be the OSOYOO Basic board. Reconnect the board and select that serial port.We choose “COM**(Arduino/Genuino Uno)” here.
Uploading Blink to the Board
Click on the ‘Upload’ button. The second button from the left on the toolbar.

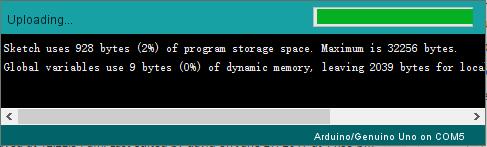
If you watch the status area of the IDE, you will see a progress bar and a series of messages. At first it will say ‘Compiling Sketch..’. This converts the sketch into a format suitable for uploading to the board.

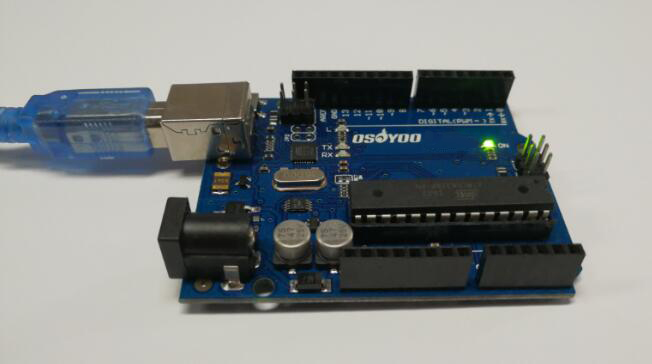
Next, the status will change to ‘Uploading’. At this point, the LEDs on the OSOYOO Basic board should start to flicker as the sketch is transferred.
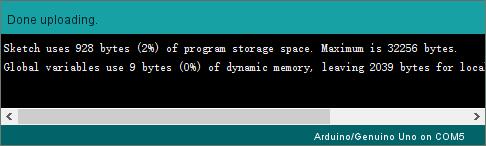
Finally, the staus will change to ‘Done’.
How ‘Blink’ Works
/*  Blink  Turns on an LED on for one second, then off for one second, repeatedly.
Most board for Arduinos have an on-board LED you can control. On the UNO, MEGA and ZERO
it is attached to digital pin 13, on MKR1000 on pin 6. LED_BUILTIN is set to
the correct LED pin independent of which board is used.   This example code is
in the public domain. */
// the setup function runs once when you press reset or power the board
void setup() {
// initialize digital pin LED_BUILTIN as an output.
pinMode(LED_BUILTIN, OUTPUT);
}
// the loop function runs over and over again forever
void loop() {
digitalWrite(LED_BUILTIN, HIGH);
// turn the LED on (HIGH is the voltage level)
delay(1000);
// wait for a second
digitalWrite(LED_BUILTIN, LOW);
// turn the LED off by making the voltage LOW
delay(1000);
// wait for a second
}
The first thing to note is that quite a lot of this sketch is what is called ‘comments’. Comments are not actual program instructions, they are just comments about how the program works. They are there for out benefit, so that there is some explanation to accompany the sketch.
Everything between /* and */ at the top of the sketch is a block comment, that explains what the sketch is for.
There are also single line comments that start with // and everything up intil the end of the line counts as being a comment.
The first actual line of code is:
void setup() {
// initialize digital pin LED_BUILTIN as an output.
pinMode(LED_BUILTIN, OUTPUT); }
Every sketch must have a ‘setup’ function, and the part of it where you might want to add instructions of your own is between the { and the }.
In this case, there is just one command there, which, as the comment states tells the OSOYOO Basic board that we are going to use the LED pin as an output.
It is also mandatory for a sketch to have a ‘loop’ function. Unlike the ‘setup’ function that only runs once, after a reset, the ‘loop’ function will, after it has finished running its commands, immediately start again.
// the loop function runs over and over again forever
void loop() {
digitalWrite(LED_BUILTIN, HIGH);
// turn the LED on (HIGH is the voltage level)
delay(1000);
// wait for a second
digitalWrite(LED_BUILTIN, LOW);
// turn the LED off by making the voltage LOW
delay(1000);
// wait for a second
}
Inside the loop function, the commands first of all turn the LED pin on (HIGH), then ‘delay’ for 1000 milliseconds (1 second), then turn the LED pin off and pause for another second.
Blinking Faster
You are now going to make your LED blink faster.As you might have guessed, the key to this lies in changing the parameter in () for the ‘delay’ command.

This delay period is in milliseconds, and so if you want the LED to blink twice as fast, change the value of 1000 to 500. This would then pause for half a second each delay rather than a whole second.Upload the sketch again and you should see the LED start to flash more quickly.