2. When the remote controller can’t work, please connect your raspberry Pi with Ethernet cable
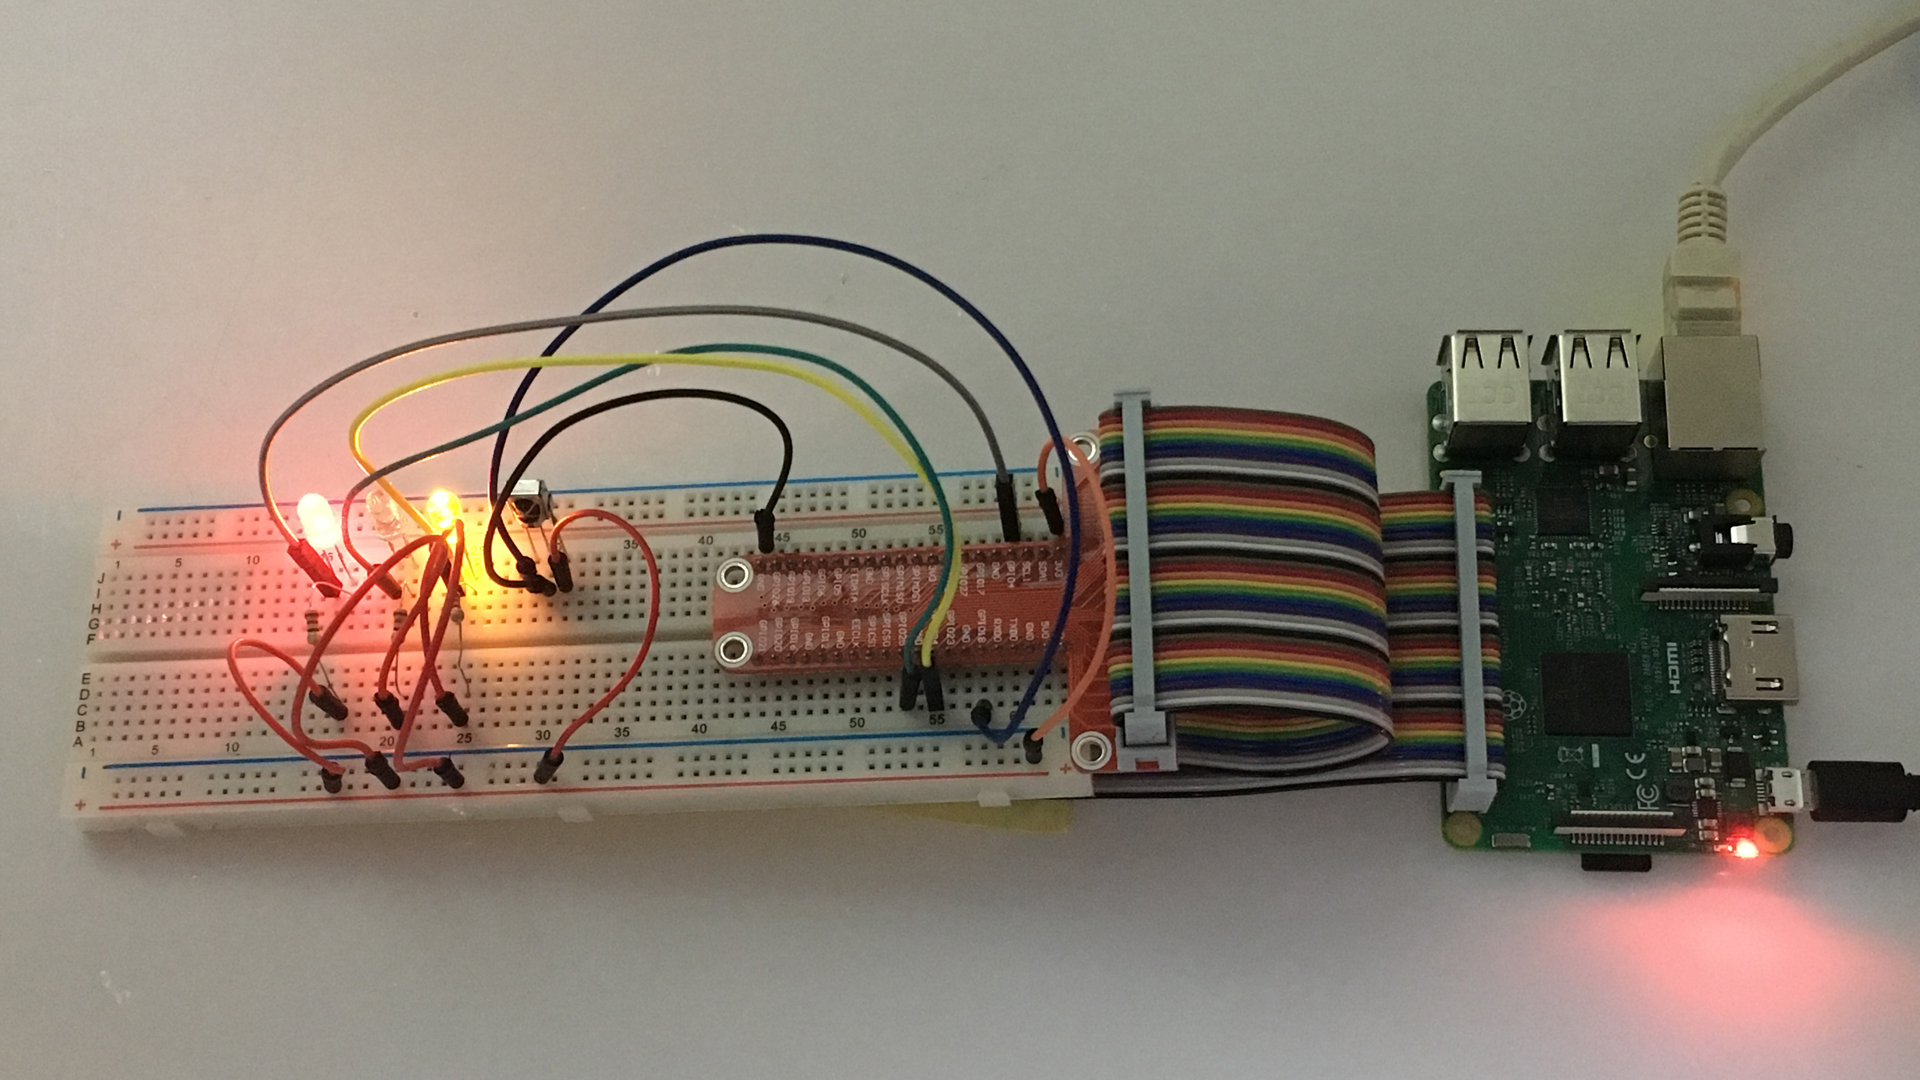
Experimental Principle In this lesson, we use VS1838B IR receiver which can convert incoming IR signal into digital data output. as photo shows:
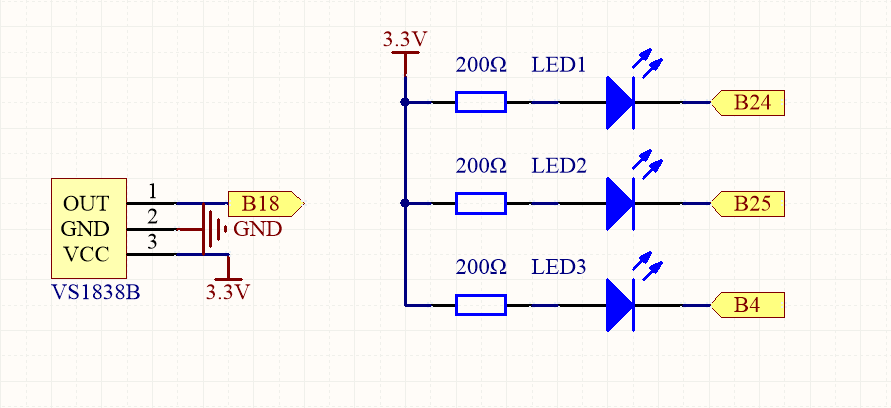
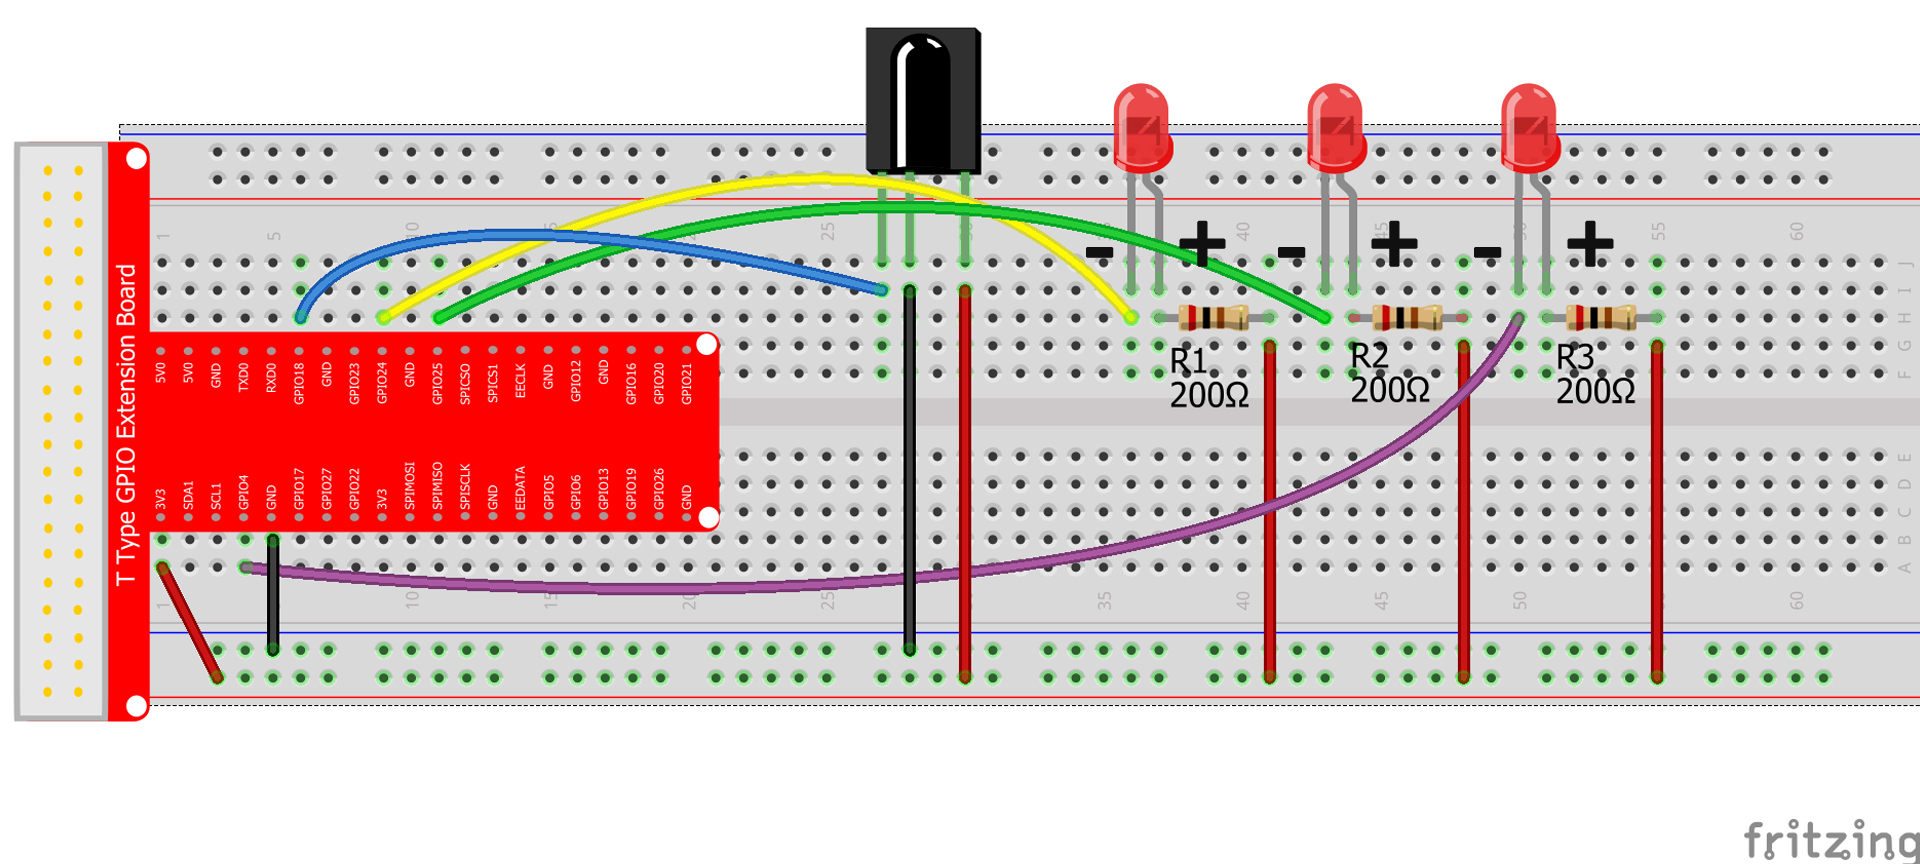
Schematic diagram of VS1838B with raspberry pi:
Note: Learn more about GPIO of raspberry pi, please review our lesson 2: Introduction Of Raspberry Pi GPIO
Note: You can also use nano editor to copy and paste code into IRtest1.py, IRtest2.py, IRtest3.py by typing command: sudo nano IRtest1.py
4) Program result
Once the program is running, when you press 1 of remote controller at IR receiver, the first LED will turn off if it is on, or the first LED will turn on if it is off. when you press 2, and 3, you will see the second LED and third LED as the same.
Python Code Explanation:
irexec executable file is a program which comes with LIRC package. When irexec starts running, it will look up key events handling program in .lircrc file. In this example, .lircrc defined that KEY_1 event will be handled by python program /home/pi/IRtest1.py , KEY_2 by /home/pi/IRtest2.py, and KEY_3 by /home/pi/IRtest3.py . The details of these 3 python program are as following:
IRtest1.py,
"""
$      If KEY_1 is pressed,this script will be executed,LED1 will turn on(or off)
$      LED1 connect to GPIO5(BCM_GPIO 24)
"""
import RPi.GPIO as GPIO

PIN = 24

GPIO.setmode(GPIO.BCM)
GPIO.setwarnings(False)

GPIO.setup(PIN, GPIO.IN)
GPIO.setup(PIN, GPIO.OUT)

if GPIO.input(PIN) == 0:
     GPIO.output(PIN, GPIO.HIGH)
else:
     GPIO.output(PIN, GPIO.LOW)
IRtest2.py
"""
$      If KEY_2 is pressed,this script will be executed,LED1 will turn on(or off)
$      LED2 connect to GPIO6(BCM_GPIO 25)
"""
import RPi.GPIO as GPIO

PIN = 25

GPIO.setmode(GPIO.BCM)
GPIO.setwarnings(False)

GPIO.setup(PIN, GPIO.IN)
GPIO.setup(PIN, GPIO.OUT)

if GPIO.input(PIN) == 0:
     GPIO.output(PIN, GPIO.HIGH)
else:
     GPIO.output(PIN, GPIO.LOW)
IRtest3.py
"""
$      If KEY_3 is pressed,this script will be executed,LED1 will turn on(or off)
$      LED3 connect to GPIO7(BCM_GPIO 4)
"""
import RPi.GPIO as GPIO

PIN = 4

GPIO.setmode(GPIO.BCM)
GPIO.setwarnings(False)

GPIO.setup(PIN, GPIO.IN)
GPIO.setup(PIN, GPIO.OUT)

if GPIO.input(PIN) == 0:
     GPIO.output(PIN, GPIO.HIGH)
else:
     GPIO.output(PIN, GPIO.LOW)