Note: ALL OSOYOO Products for Arduino are Third Party Board which is fully compatitable with Arduino
Authorized Online Retailers:
Content
- Introduction
- Preparations
- Connection
- Upload Sketch
- Program Running Result
Introduction
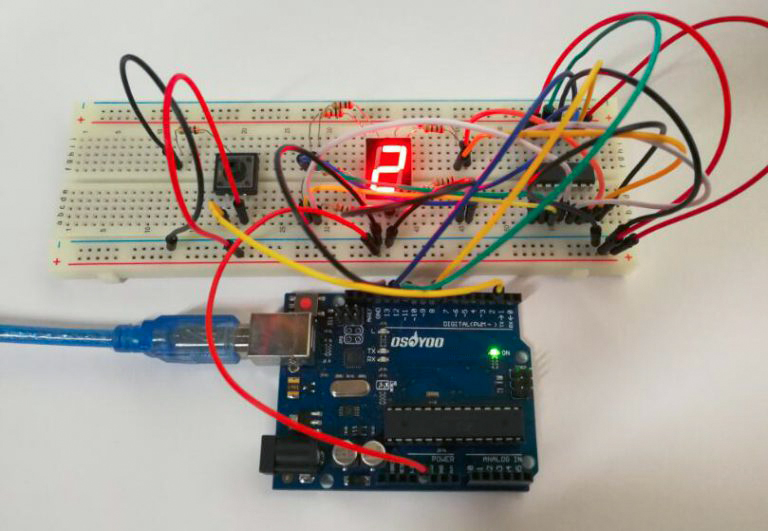
Dice is a squire type solid box which contains 6 different numbers on all of its sides. We throw dice on a surface to get a random number while playing the games. In this lesson, we will build a dice that is shaken by holding the button in and thrown by releasing the button. The shake, throw and number thrown are animated and displayed on a seven segment display. A 74HC595 IC is used to interface the 7-segment display to the Arduin, using only 3 Arduin digital pins.
Preparations
Hardware
- Osoyoo basci Board (Fully compatible with Arduino UNO rev.3) x 1
- One digit 7-Segment LED Display x 1
- 200 ohm Resistor x 8
- 10k ohm Resistor x 1
- Push Button x 1
- 74HC595 x 1
- Breadboard x 1
- Jumpers
- USB Cable x 1
- PC x 1
Software
- Arduin IDE (version 1.6.4+)
Find more information about interfacing the 74HC595 IC to the Arduin in the Lesson – 74HC595 article from the Osoyoo website. The circuit diagram uses the same Arduin pins as this article. If you want to get more info about the switch button please check the Button example, more info about the one digit 7-segment LED display please check the Lesson – one digit 7-segment LED display.
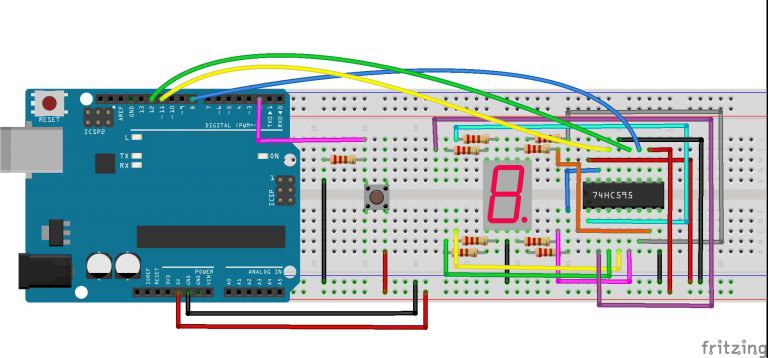
Connection
The circuit diagram is shown below. The seven segment display could have been directly interfaced to the Arduin, but by using the 74HC595, only 3 Arduin pins are used.
Upload Sketch
After above operations are completed, connect the board to your computer using the USB cable. The green power LED (labelled PWR) should go on.Open the Arduin IDE and choose corresponding board type and port type for you project. Then load up the following sketch onto your board.
const int latchPin = 12;//Pin connected to ST_CP of 74HC595
const int clockPin = 8;//Pin connected to SH_CP of 74HC595
const int dataPin = 11; //Pin connected to DS of 74HC595
const int ledPin = 13; //ledPin attach to
const int keyIn = 2;  //keyIn attach to
int num = 0;

//display 0,1,2,3,4,5,6,7,8,9,A,b,C,d,E,F
int datArray[16] = {
  252, 96, 218, 242, 102, 182, 190, 224, 254, 246, 238, 62, 156, 122, 158, 142};
long randNumber;

void setup()
{
  pinMode(latchPin,OUTPUT);  //set the latchPin as an output
  pinMode(clockPin,OUTPUT);  //set the clockPin as an output
  pinMode(dataPin,OUTPUT);  //set the dataPin as an output
  pinMode(ledPin,OUTPUT);  //set the ledPin as an output
  pinMode(keyIn,INPUT);  //set the keyIn as an input
  Serial.begin(9600);  // start serial port at 9600 bps:
  //initialize the random number generator with a fairly random input A0
  randomSeed(analogRead(0));
}

void loop()
{
  int stat = digitalRead(keyIn);  //store value read from keyIn
  if(stat == HIGH)  // check if the pushbutton is pressed
  {
    num ++;
    if(num > 1)
    {
      num = 0;
    }
  }

  Serial.println(num);  // print the num on serial monitor
  if(num == 1)  //when pushbutton is pressed
  {
    randNumber = random(1,7); //Generate a random number in 1-7
    showNum(randNumber);  //show the randNumber on 7-segment
    delay(1000);  //wait for 1 second
    while(!digitalRead(keyIn));  //When not press button,program stop here
    int stat = digitalRead(keyIn);
    if(stat == HIGH) // check if the pushbutton is pressed
    {
      num ++;
      digitalWrite(ledPin,HIGH); //turn on the led
      delay(100);
      digitalWrite(ledPin,LOW); //turn off the led
      delay(100);
      if(num >= 1)
      {
        num = 0;
      }
    }
  }
  //show random numbers at 100 microseconds intervals
   // If the button has not been pressed
  randNumber = random(1,7);
  showNum(randNumber);
  delay(100);
}

//the function to drive 7-segment show numbers
void showNum(int num)
{
  digitalWrite(latchPin,LOW); //ground latchPin and hold low for transmitting
  shiftOut(dataPin,clockPin,MSBFIRST,datArray[num]);
  //return the latch pin high to signal chip that it
  //no longer needs to listen for information
  digitalWrite(latchPin,HIGH); //pull the latchPin to save the data
}
Running Result
A few seconds after the upload finishes, you should now see the 7-segment display jump between numbers from 1 to 6. Press the button, and the jumping will slow down until it stops three seconds later. Press the button again, and the process will repeat.


