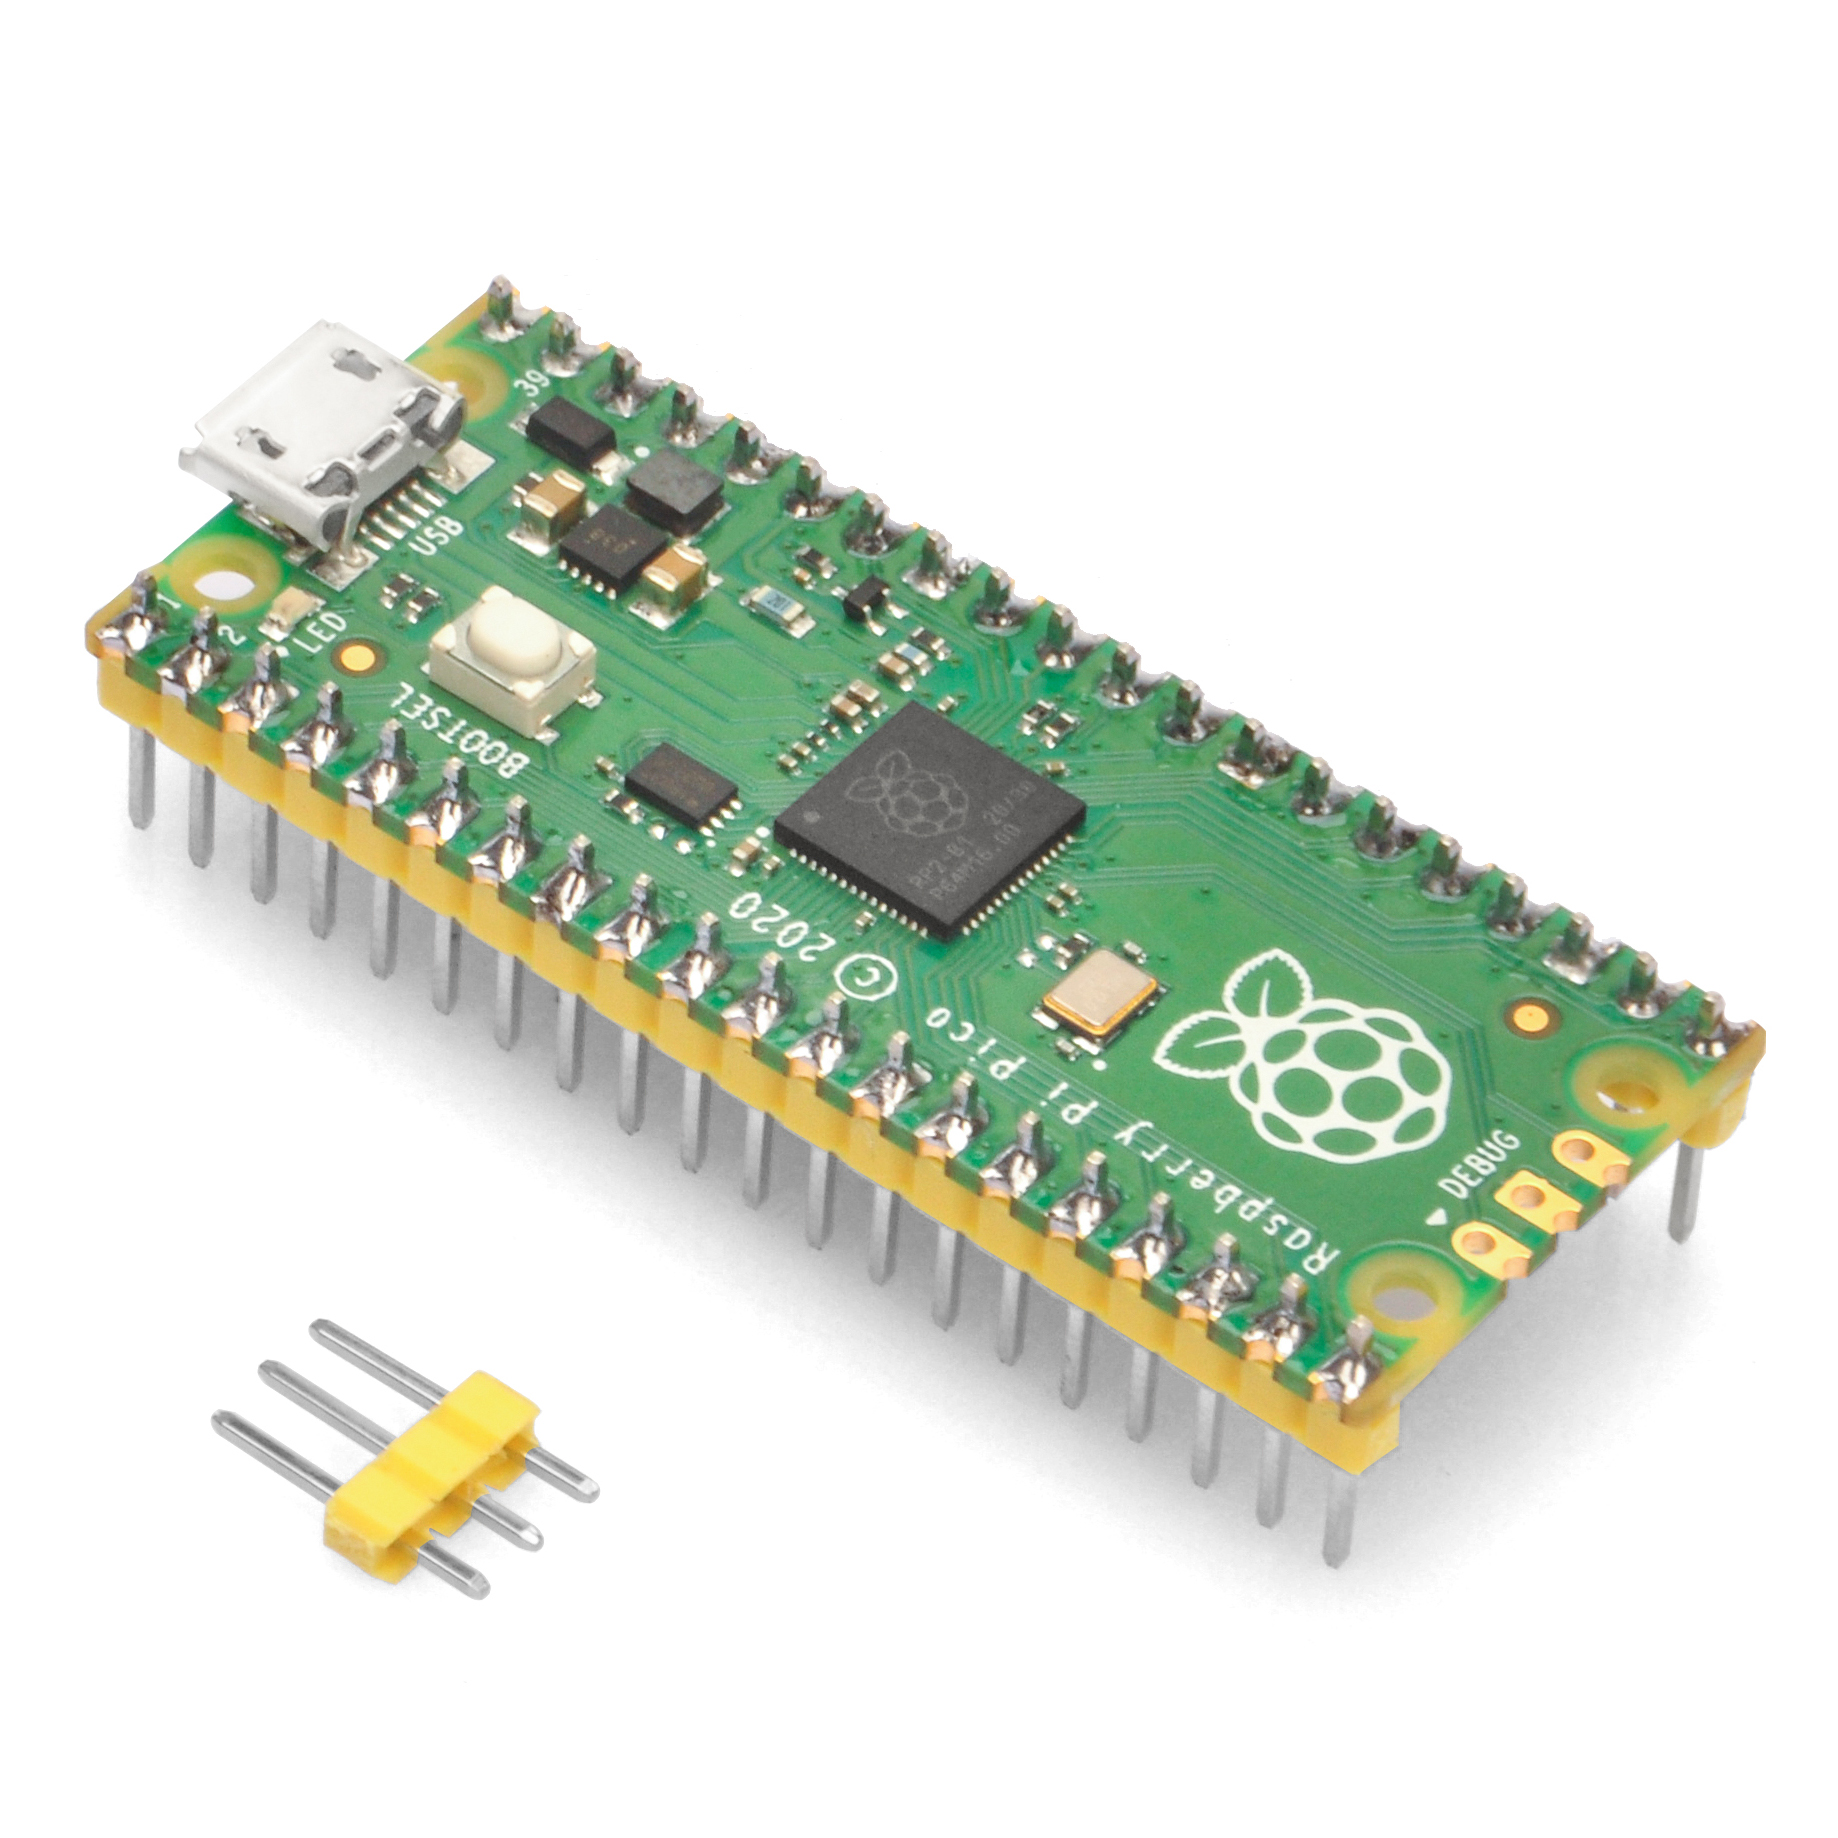
Raspberry Pico is a powerful and economical MCU board which can help people to do many interesting STEAM projects.
Pico supports many programming languages such as C,C++,Python which are great for intermediate to advanced users.
However, many school teachers or parents might feel text programming language like C,C++,Python are too abstract for the young children. They prefer a Graphic programming tool to help children understand how the computer works.
Fortunately, a company called make.playpiper.com has developed such Graphic programming environment for Raspberry Pi Pico. You just need a Pico board, a PC with Google Chrome browser, you can make interesting Pico program. The coding procedure is quite straightforward and easy to be understood.
In this lesson, we will teach you how to setup your Pico with make.playpiper.com and make your first Blinking project running in Pico.
Then go to the bottom of the page and click the icon “Setup my Pico” . Then you will start the procedure to setup your Pico firmware.
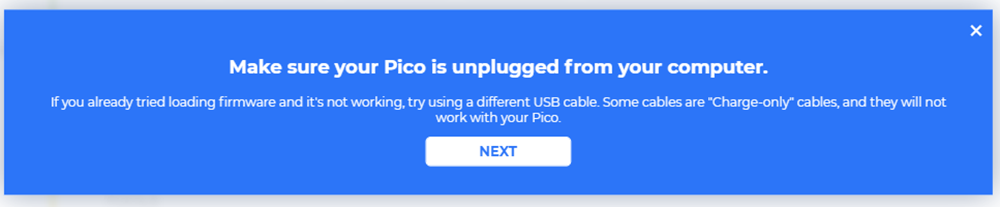
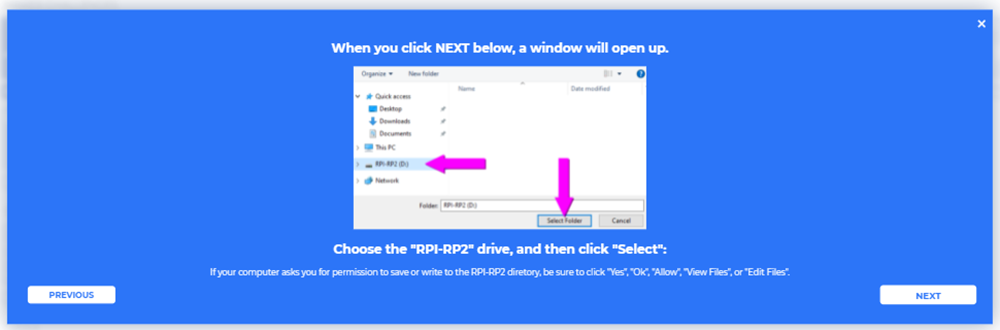
Please follow the guide in each of the steps, click “Next” button to enter next step.
Finally you will flash a new firmware to your Pico board(it might take a couple of minutes.
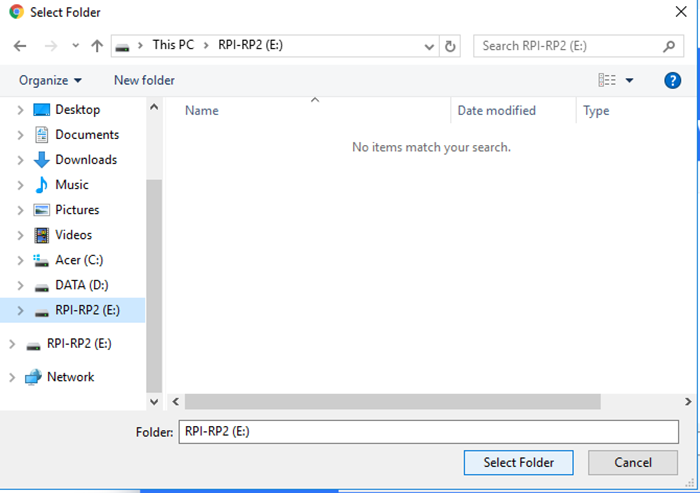
Note: Your browser might ask your permission to “View Files” and “Save Files”, always give permission to View Files and Save Files, NEVER click CANCEL.
After you finishes flashing the firmware into pico, you will see following message:
Step 2: Create a New Project and Connect the Pico to Serial Port
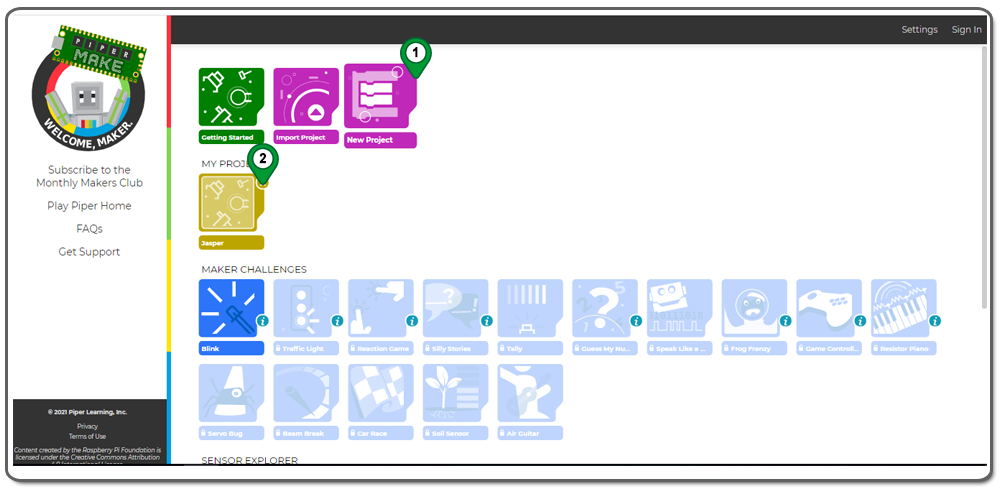
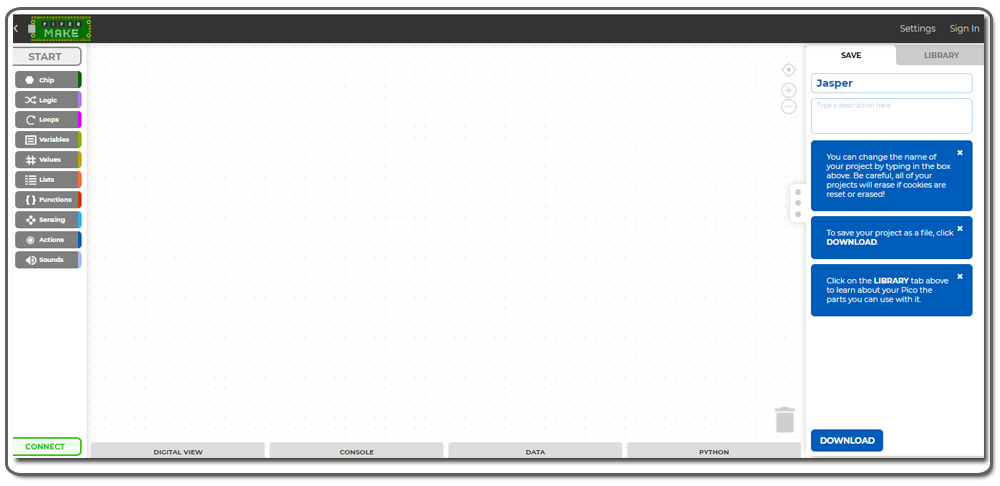
1)Click New Project icon, you will see a My project icon with a fancy name will pop up. 2)Click the new icon in My Projects
3)Now you will enter a new graphic programming page.
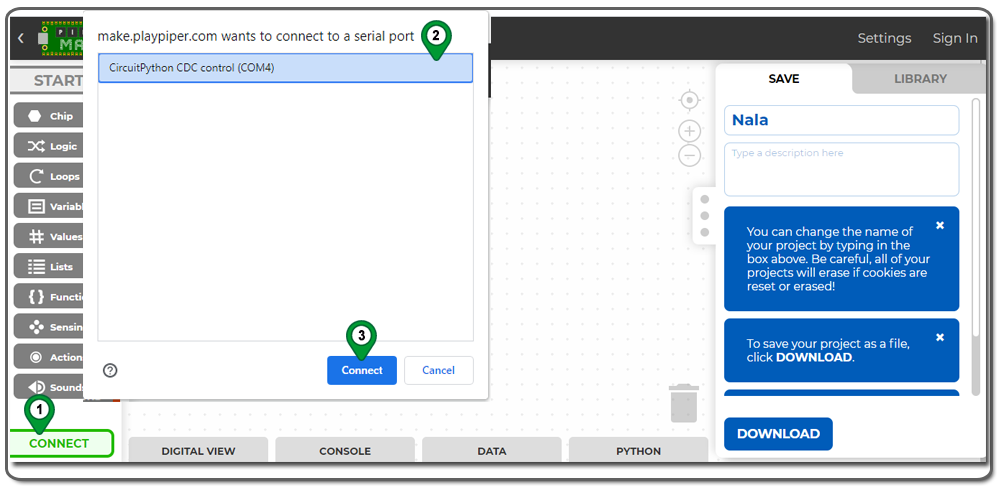
4)Please click CONNECT Button in the bottom of the page and connect your Pico board to your project.Then your browser will pop up a Serial Port option menu, please select Pico from the menu and click Connect button;
5)If you can not see Pico in the Serial Port menu, it means your Pico is not setup properly. You need go back to Step 1 and setup Pico again.
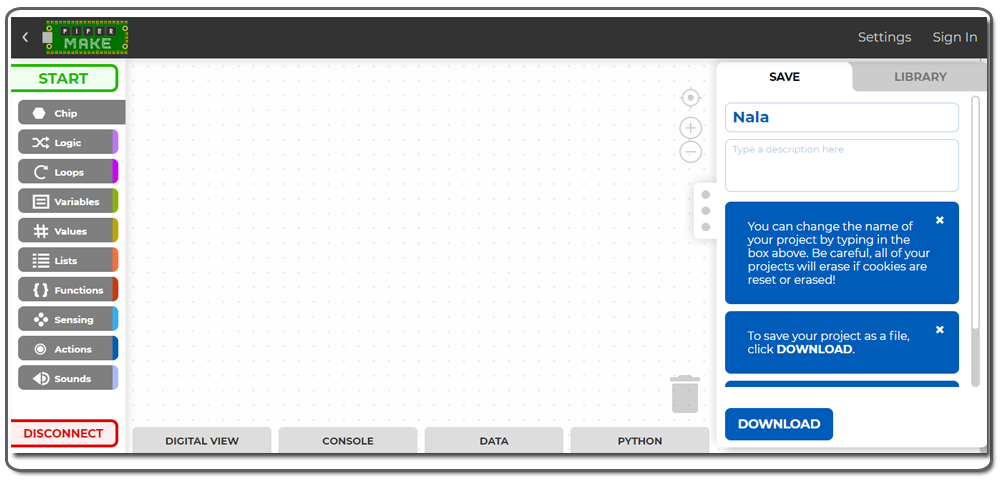
After you connect Pico to Serial Port, your GUI Connect button will switch to Disconnect button as following:
Step 3: Making Blink program with Graphic coding chips
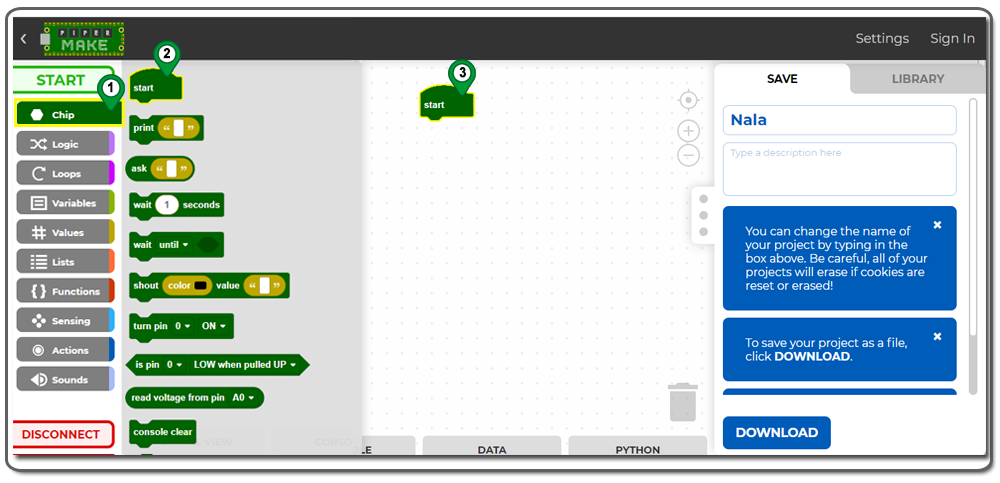
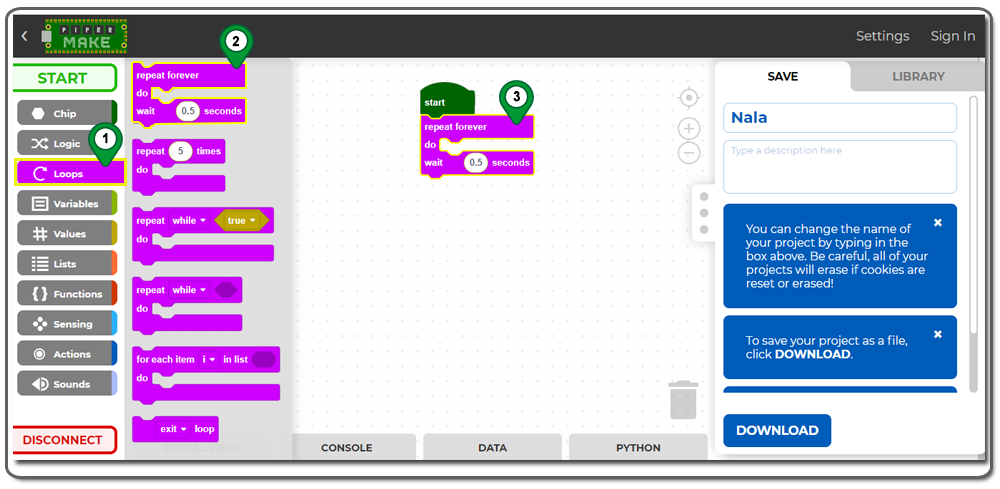
1)Click Chip -> Start , then move Start chip to coding area as following :
2)Click Loops -> repeat forever and move repeat forever block just below start block as following:
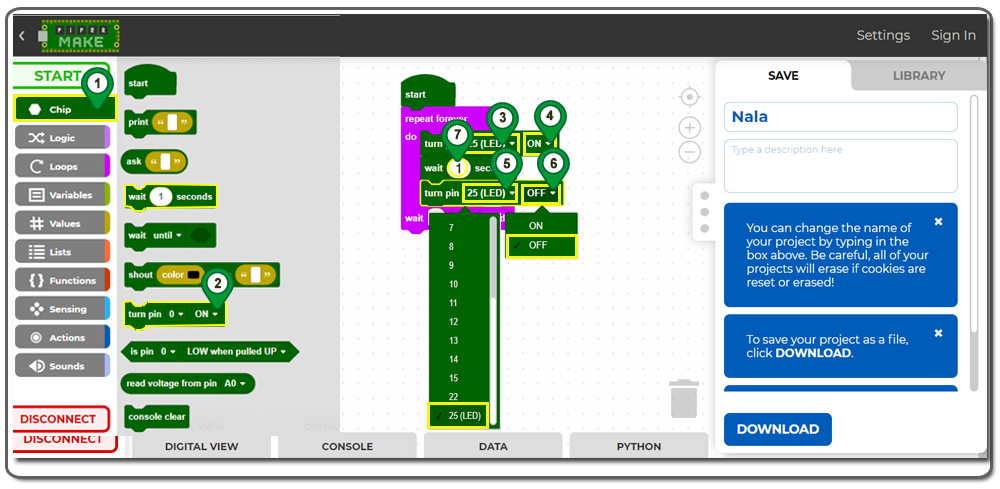
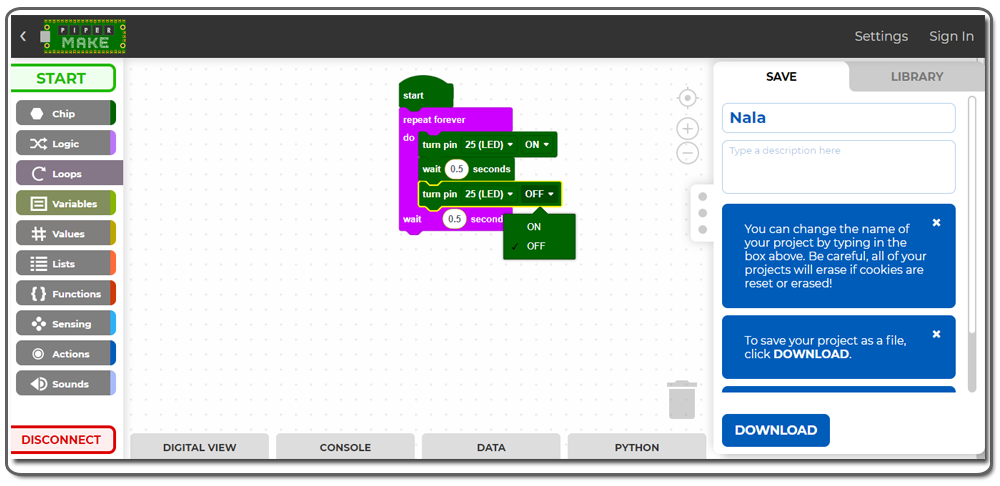
3)Click Chip and Add two turn pin block and one wait block inside repeat forever loop block .Change the pin number from 0 to 25, change the lower turn pin from ON to OFF and change the wait 1 second to 0.5 second as following picture:
Now the Blink project is ready to go!
4)Click Start button, your Pico LED will blink. The Start Button now changes name to Stop. You can click Stop to end blinking at any time.
Click the Digital View tag in the bottom of the page, you will see a virtual Pico board is running this program. The result is exactly the same as your real Pico.


 Step 1: Setup Pico in Google Chrome Browser