In this lesson, we will carry an infrared receiving module on the robot car, and we will show how to change the car moving direction and status through infrared remote controller.
OSOYOO Magic I/O Shield for Arduino
OSOYOO UNO Board for Arduino
OSOYOO IR Receiver and IR Controller
Wheels
Acrylic Chassis
Motor Gear Box
OSOYOO 3-Pin PNP Cable
OSOYOO 4-Pin PNP Cable
USB Cable
PC
Notice:
Not much is needed for this lesson, Make sure you have a good quality syncing cable,do not pick a ‘charge only’ USB cable.
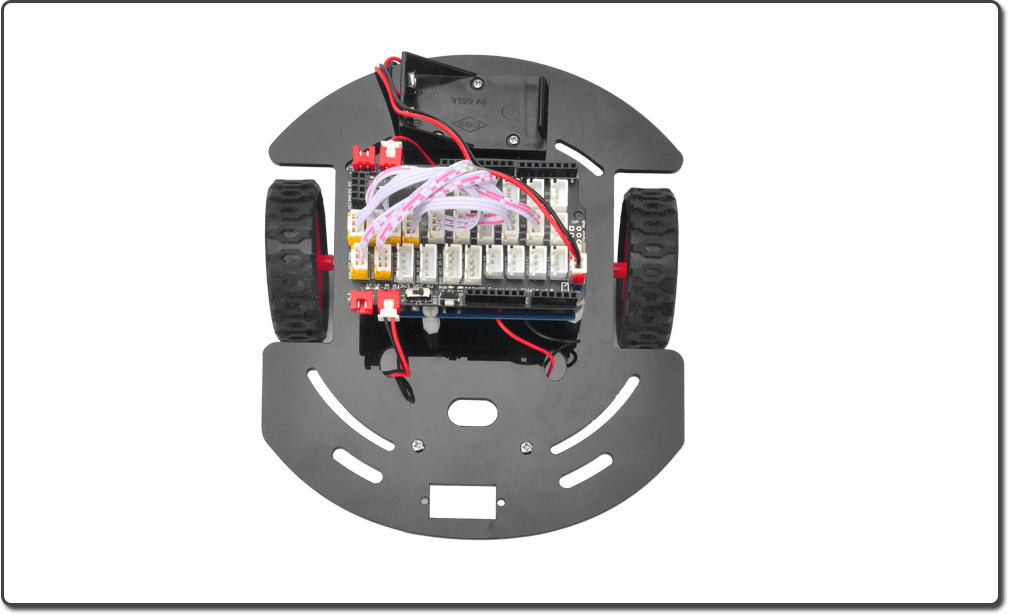
In this lesson, we will add a IR Receiver to the framework built in Lesson 21, if you have already completed installation in Lesson 21, just keep it.
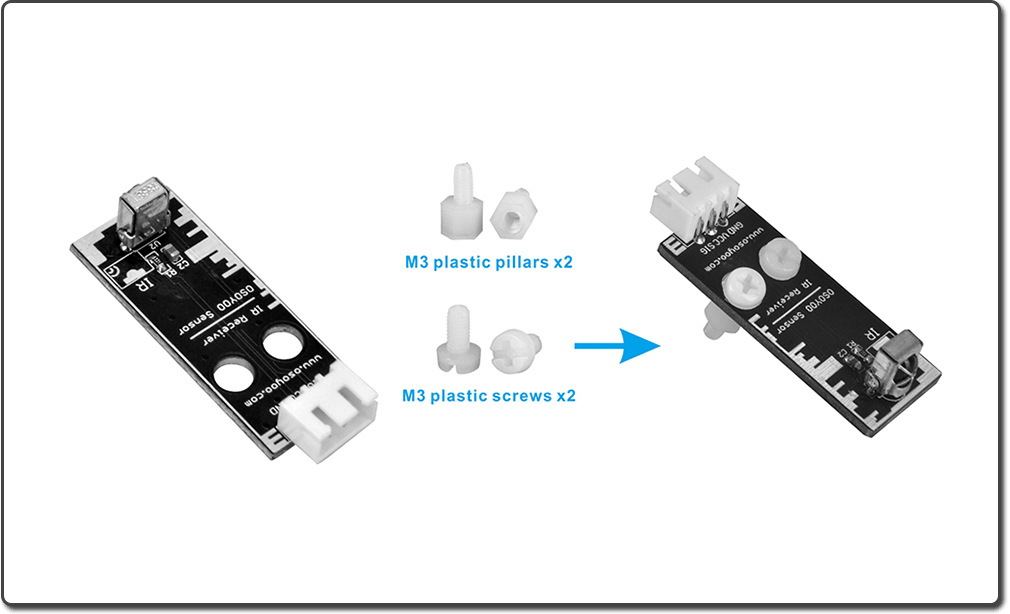
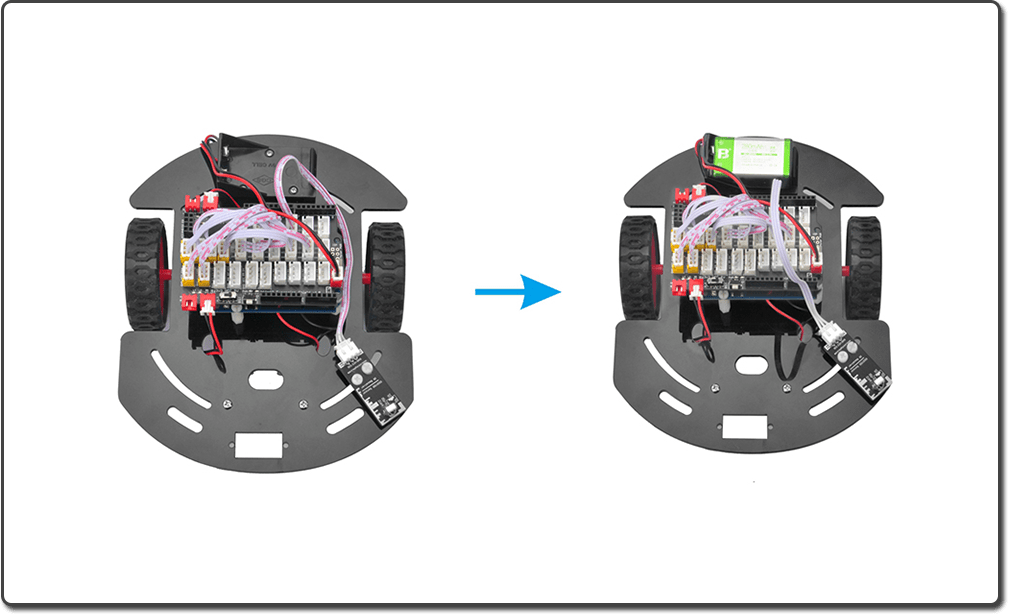
Install the IR receiver module with 2pcs M3 plastic screws and pillars:
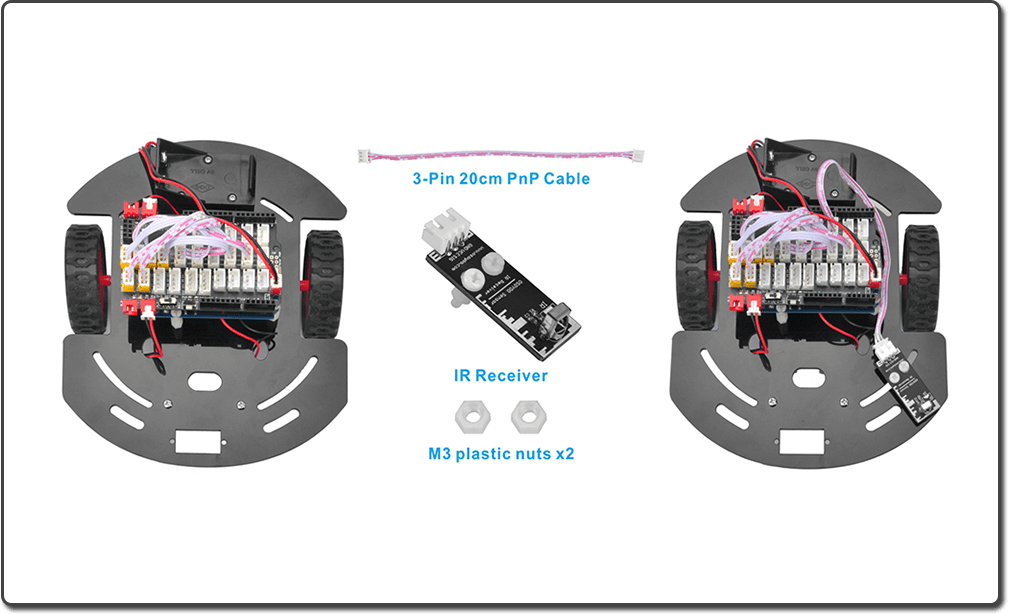
Then install the IR receiver module on the chassis with 2pcs M3 nuts, connect the module with OSOYOO Magic I/O Shield for Arduino:
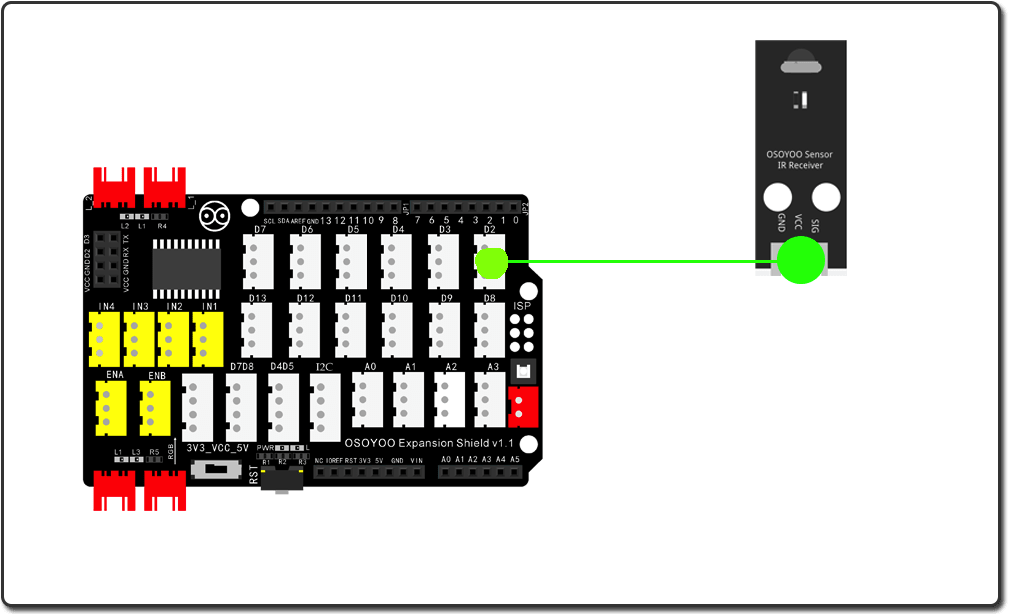
Connect IR sensor to D2 port.
Notice: Shut off your battery or Unplug your power adapter when upload sketch code to Arduino.
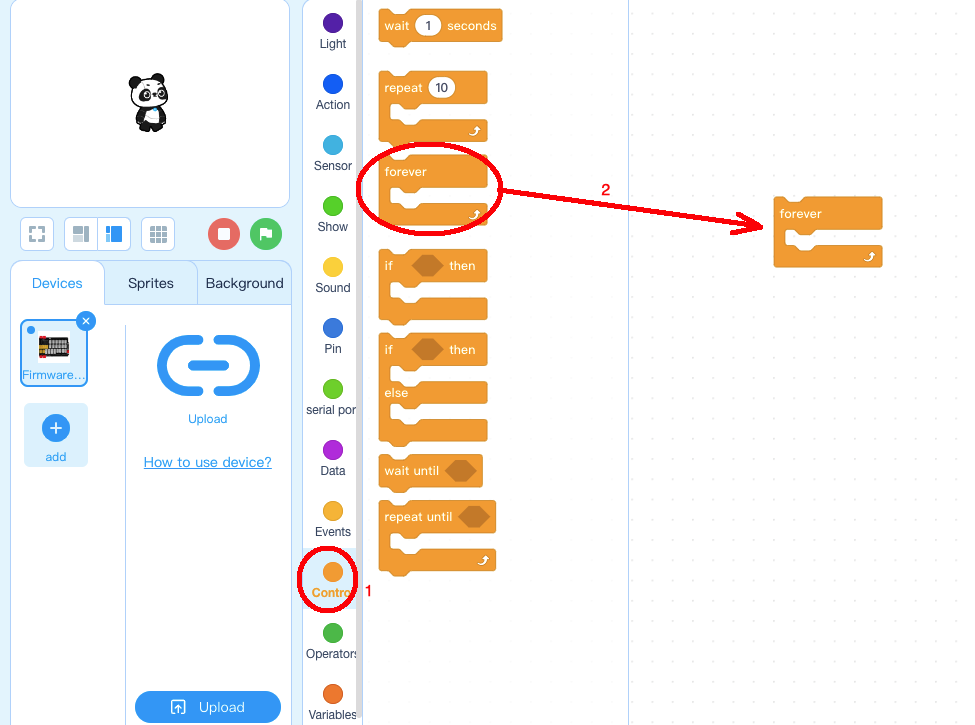
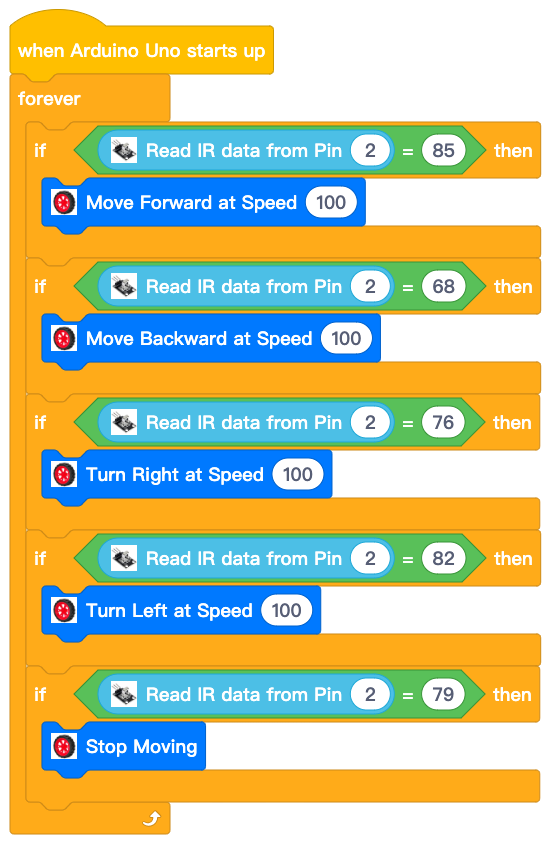
Step 1: Click Control, then Drag and drop Forever block to programming area as following:
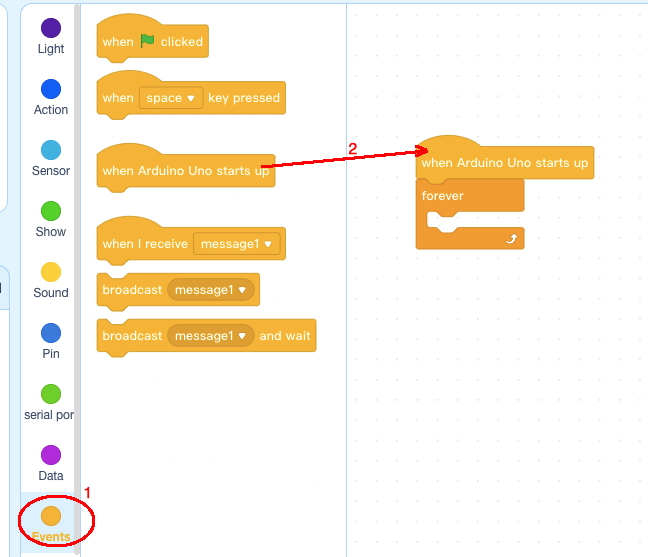
Step 2: Click Events, add when Arduino Uno starts upblock to the top:
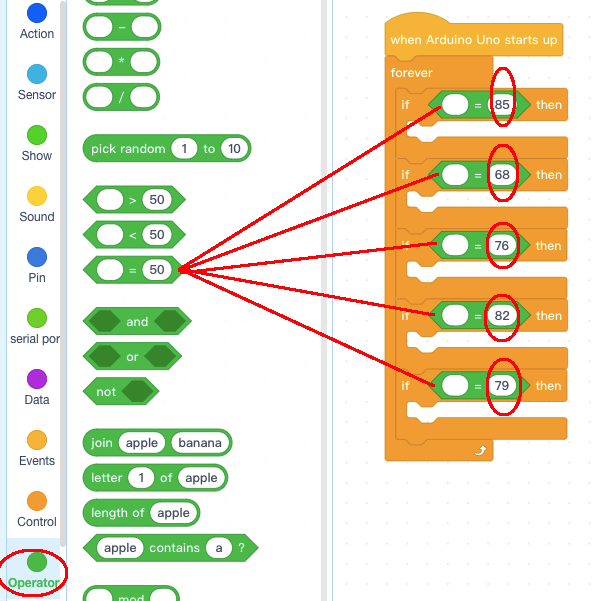
Step 4: Click Operator, add 5 pcs =50 blocks inside if block condition area, change the values to 85,68,76,82,79 as following:
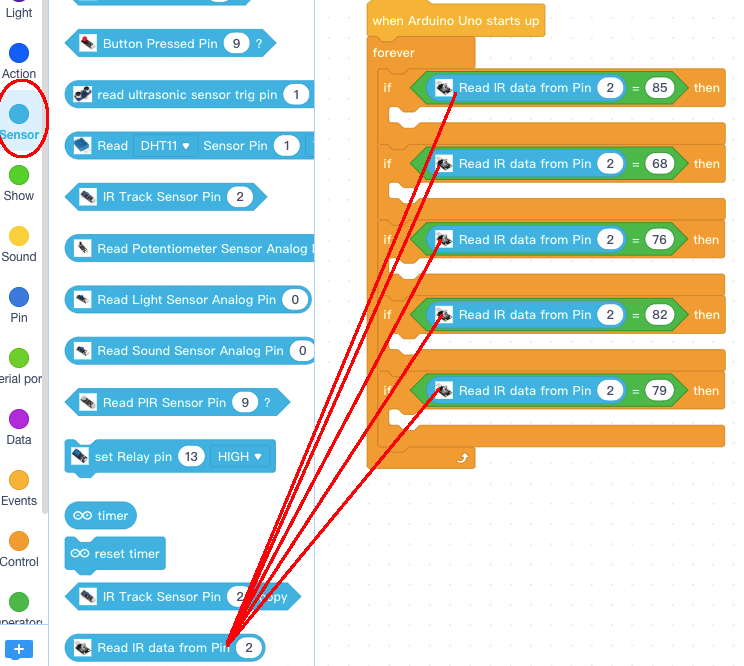
Step 5: Click Operator, add 5 pcs read IR data blocks inside equal block as following:
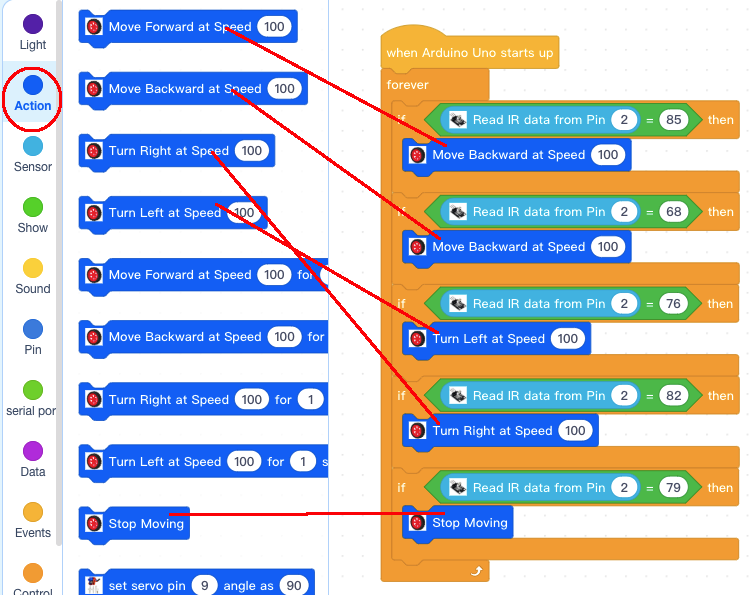
Step 6: Click Action, add 5 pcs move blocks inside if else block as following:
Final blocks look like this:
Disconnect Arduino from PC, put a 9V battery into battery pox(make sure polar direction is correct, otherwise it can destroy your device and cause fire hazard).
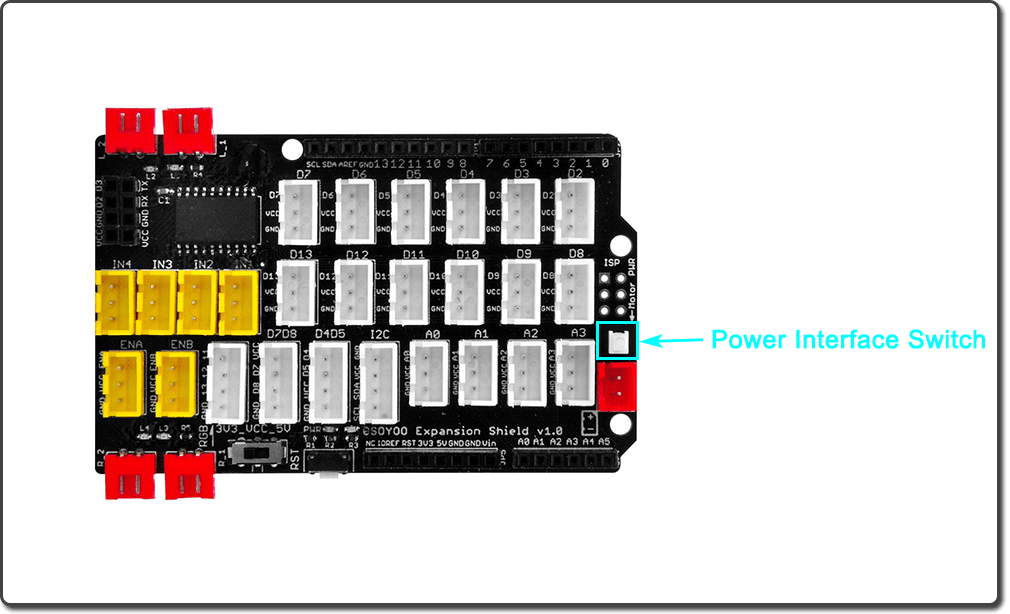
Press the Motor Power switch on the OSOYOO Magic I/O Shield for Arduino, then press IR controller keys to control the car movements:
If the car does not move as per above mentioned result, you should check your wire connection, battery voltage(must over 7.2v).