INTRODUCTION
In this project, we will show how to burn the An-Thinker AT Command firmware for the ESP8266 Module. To complete the next operation, we need to do the following preparations:
Hardware Preparations:
- OSOYOO ESP8266 Wifi Module x 1
- Arduino UNO board(or compatible board) x 1
- PC with Windows OS
- Some Jumper wires
Wire CONNECTION
- Connect UNO to ESP8266 Module by jumper wires as following
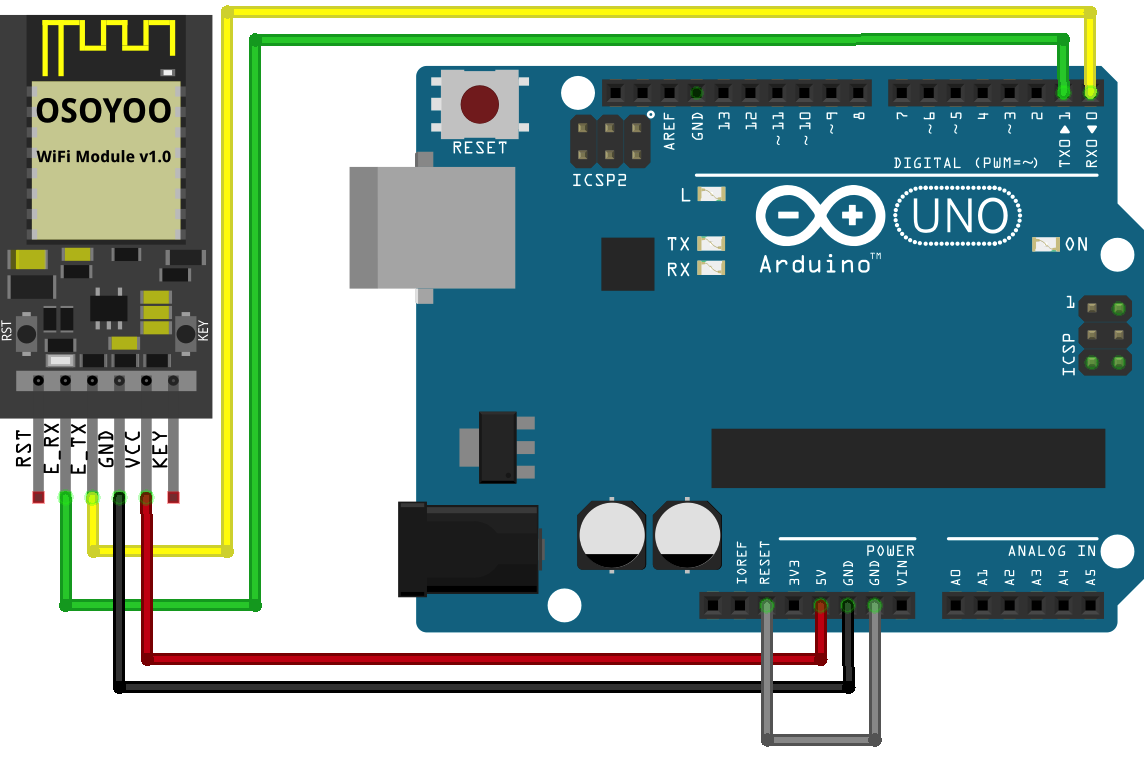
UNO board D0(RX) to ESP8266 Module E-RX
UNO board D1(TX) to ESP8266 Module E-TX
UNO board VCC to ESP8266 Module VCC
UNO board GND to ESP8266 Module GND
UNO board Reset to UNO board GND
SOFTWARE CONFIGURATIONS
First download flash_download_tools and AI-Thinker Firmaware from https://osoyoo.com/driver/FLASH_DOWNLOAD_TOOLS_V3.6.3.zip
double click flash_download_tools_v3.6.3.zip file to unzip the file
After completing above operations, open FLASH_DOWNLOAD_TOOLS_V3.6.3 folder ,
now double click ESPFlashDownloadTool_v3.6.3.exe program file and run the program, now you can config the software settings as per following steps:
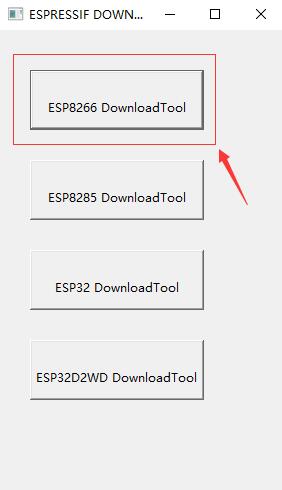
Choose the “ESP8266 DownloadTool” for this project.
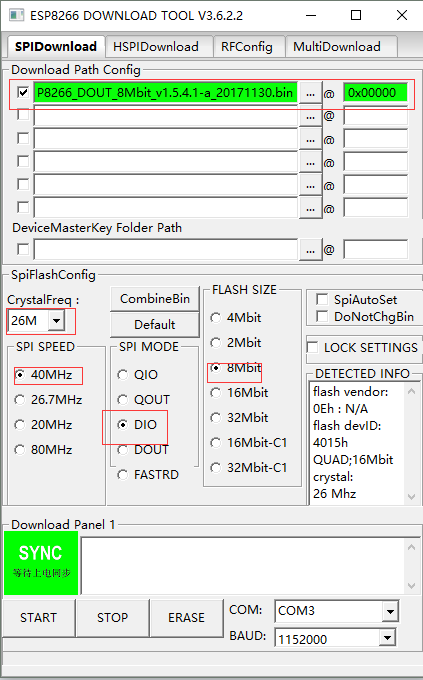
Set the field values as per following instruction:
- Ai-Thinker_ESP8266_DOUT_8Mbit_v1.5.4.1-a_20171130.bin ?? 0x00
- CrystalFreq: 26M
- SPI SPEED: 40MHz
- SPI MODE: DIO
- FLASH SIZE: 8Mbit
- From the COM drop-down menu select the COM port which your adapter is connected to.
Remove Old Firmware
- Make sure your software settings are correct
- Make sure the connections are completed
- Click the “Erase” button on the ESP8266 DownloadTool
- Hold the “Key” button down
- Press the “RST” button for once
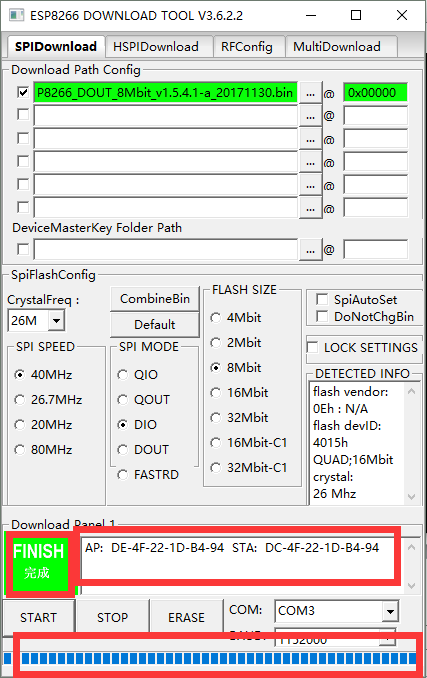
- Release the “Key” button, now you will see there is a progress bar extending in the bottom of tool.
As the below photo, you can see “FINISH” on the software, it means you have removed old firmware successfully.
Burning
- Click the “Start” button on the ESP8266 DownloadTool
- Hold the “Key” button down
- Press the “RST” button for once
- Release the “Key” button, now you will see there is a progress bar extending in the bottom of tool.
 ,
,
As the below photo, when you see “FINISH” on the software, it means you have burned the Ai-Thinker AT Command firmware successfully.
Test AT firmware:
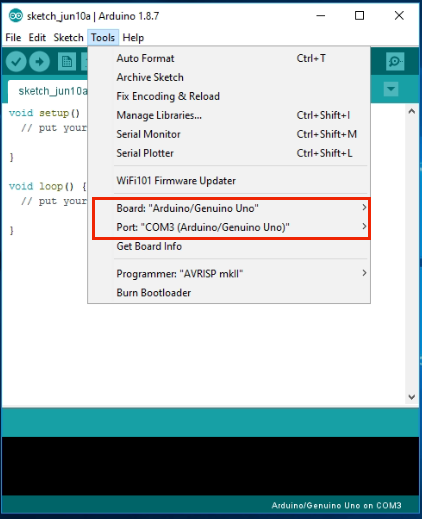
Open your IDE, select correct board and Port :
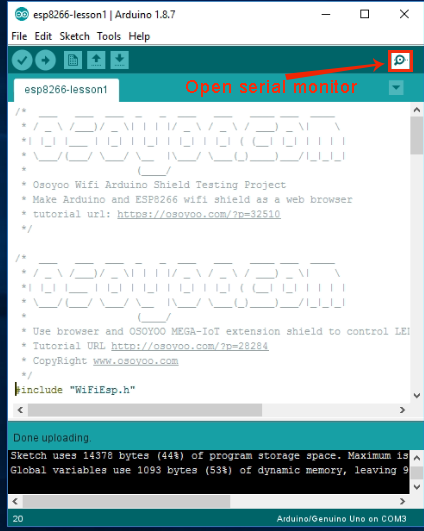
Open Serial Monitor (no need upload any code)
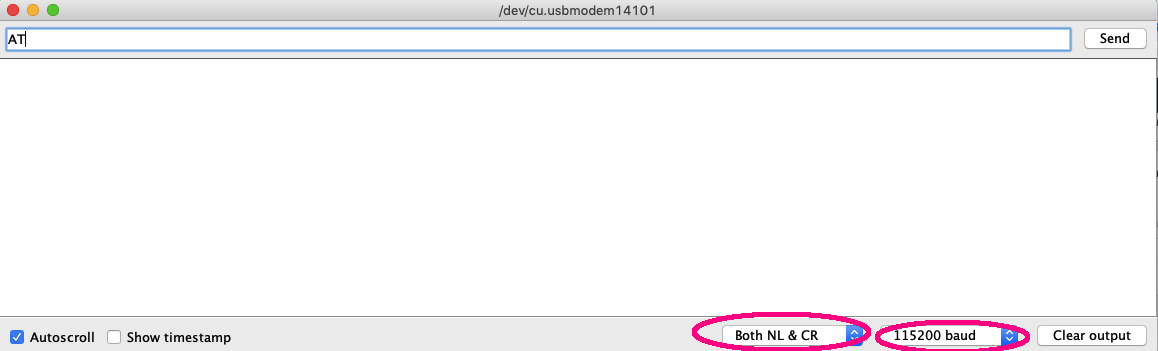
In Serial Monitor ,select 115200 baud rate and Both NL &CR as following picture, then type AT and click Send
Now your serial monitor will see AT OK as following picture:
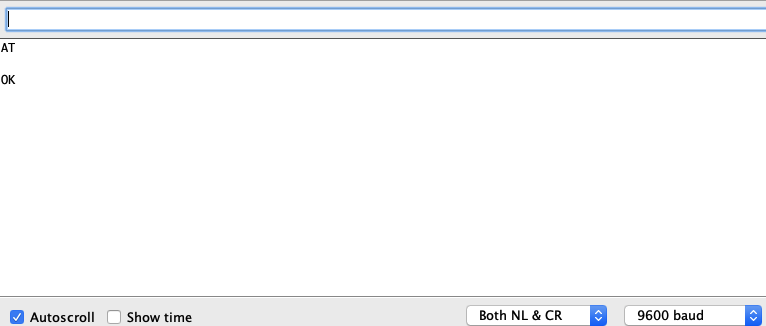
If you can see OK, that means our AT firmware has been installed properly. You can also type AT+GMR command to check the firmware version.


