Purchasing link
| Buy from OSOYOO |
Buy from US |
Buy from UK |
Buy from DE |
Buy from IT |
Buy from FR |
Buy from ES |
Buy from JP |
 |
 |
 |
 |
 |
 |
 |
 |
1Parts and Devices:
- At least 2 sets of OSOYOO V3.0 Robot Cars
2Software Installation
1) Download OSOYOO Wi-Fi UDP Robot Car control APP
In Google Play or Apple APP Store, please search keywords “OSOYOO IoT UDP Robot APP”, you will find a red icon APP as following (Note: If you can not find this APP in Google Play, you can directly download the APP from following link: https://osoyoo.com/driver/udp-app.apk ):
2) There are two ways to control 2 robot cars at the same time: to control 2 cars in STA mode and a master AP mode car to control a slave car
3Control 2 cars in STA mode
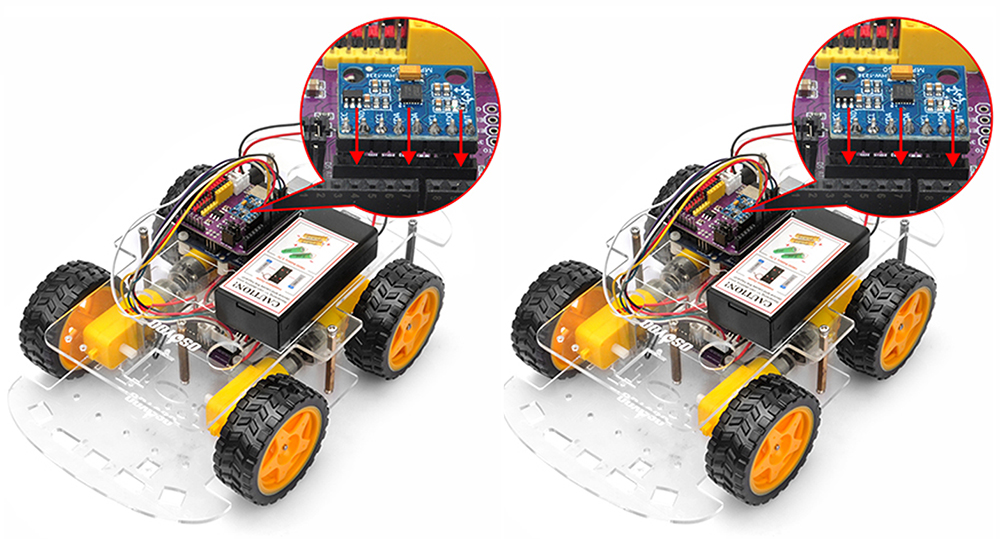
1. Install Hardware
Install basic framework as robot car Lesson 2 . If you have already completed hardware installation of other lessons , just keep it as is.
2. Upload code
Step 1. Install Libraries:
Firstly, download Libraries zip files from following links:
WiFiEsp-master: https://osoyoo.com/driver/WiFiEsp-master.zip
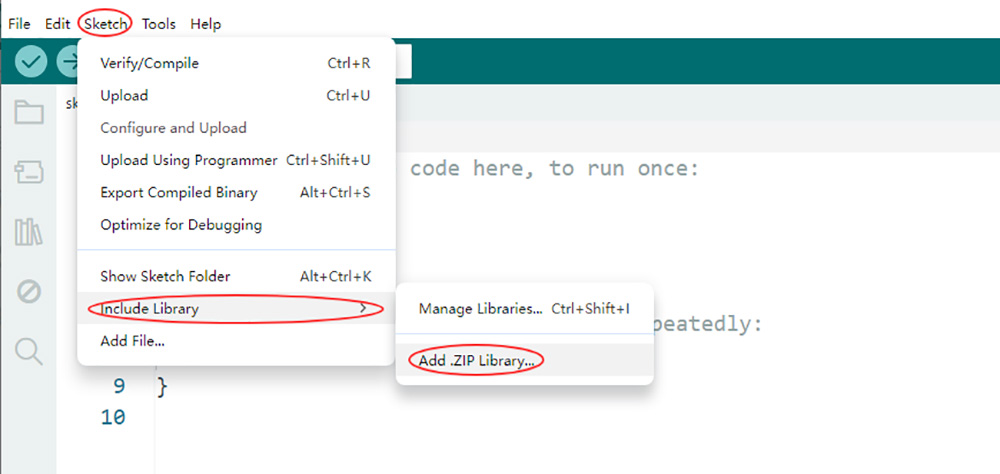
Second, do NOT unzip them, open Arduino IDE ->Sketch ->Include Library ->Add Zip Library. Then upload above zip files to Arduino.
Step 2. Please download https://github.com/osoyoo/v3_dance/blob/master/v3_dance.ino. Unzip the file.
Step 3. Upload the same code in two robot car. Open IDE -> click file -> click Open -> choose code “v3car-lesson6A.ino” in v3car-lesson6A folder. ( Note: Please confirm you have Install WiFiEsp-master Library before uploading the code)
step 4. You need change the code Line 12 and Line 13 :
const char* WIFI_SSID = “***”; //replace *** with your wifi ssid
const char* WIFI_PASSWORD = “***”; //replace *** with your wifi password
Step 5. Navigate to Tools > Board and select Arduino Uno. Then, go to Tools > Port and select the appropriate serial port for two robot car,. Upload the sketch to your board.
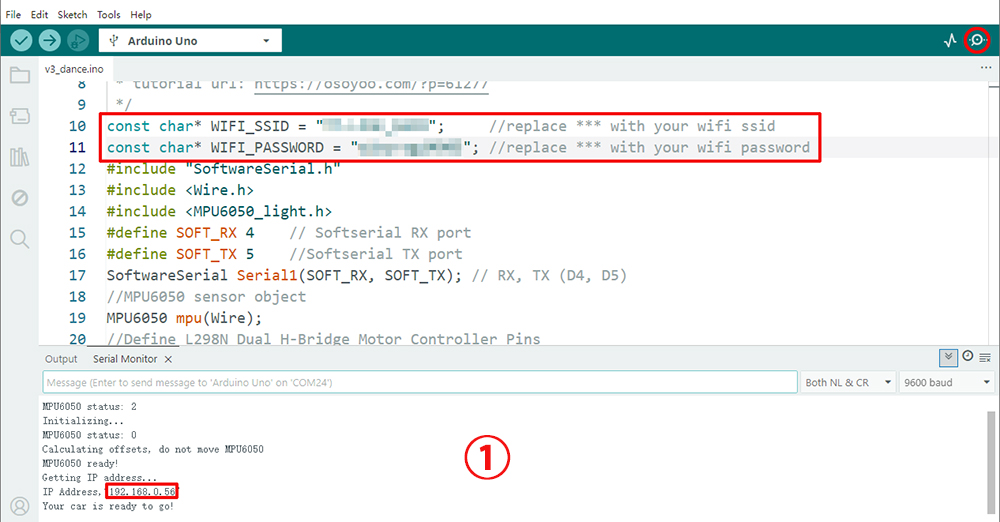
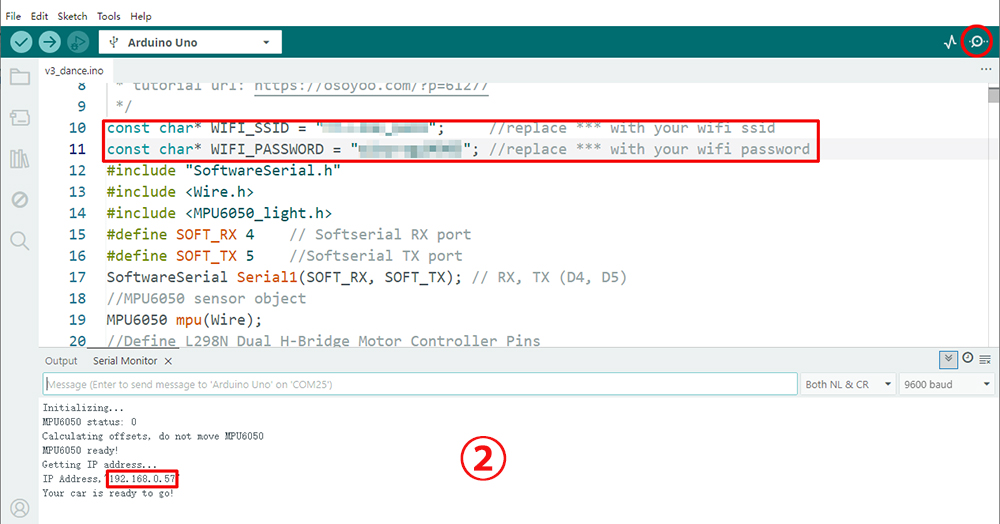
Step 6. click the Serial monitor in upper right corner of IDE, you will see following result:
3. Osoyoo IoT UDP Robot APP setting
Turn on the power of all robot cars, you need connect cell phone to the same LAN ssid of your robot car and set IP address same as the Robot IP showed in Serial Monitor.
Based on the IP address from robot car, you can set a broadcasting IP address in OSOYOO Wifi UDP APP.
For example, The robot cars IP addresses are 192.168.0.56 and 192.168.0.57 (as the upper serial monitors shown), normally the broadcasting IP is 192.168.0.255. Once press a key in the APP, all the robot cars will get the same control signal.
4. Test the cars:
1)Turn on the power of all robot cars
2)Set APP ip address to the broadcast IP address
3)Use APP to control all the cars.
4A master AP mode car to control a slave car
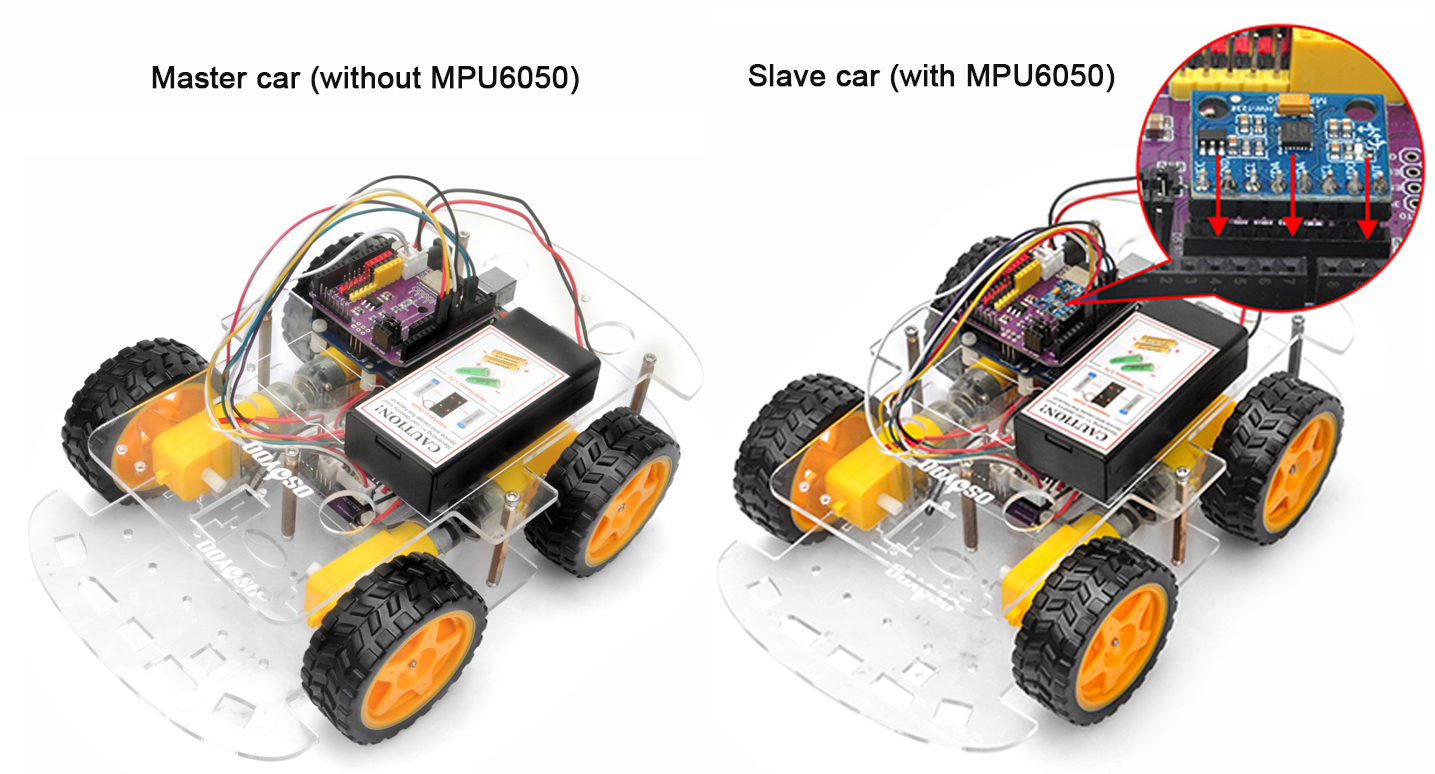
1. Install hardware
Master robot car framework as robot car Lesson 1
Slave robot car framework as robot car Lesson 2
2. Upload code
Step 1. Install Libraries:
Firstly, download Libraries zip files from following links:
WiFiEsp-master: https://osoyoo.com/driver/WiFiEsp-master.zip
MPU6050_light: https://osoyoo.com/driver/2wd/MPU6050_light.zip
PID: https://osoyoo.com/driver/2wd/PID.zip
Second, do NOT unzip them, open Arduino IDE ->Sketch ->Include Library ->Add Zip Library. Then upload above zip files to Arduino One by One.
Step 2. Please download Master car code from: https://github.com/osoyoo/v3car_wifi-ap/blob/master/v3car_wifi_ap.ino. Unzip the file and upload this code in master car ( Note: Please confirm you have Install WiFiEsp-master Library before uploading the code).
Step 3.Please download Slave car code from: https://github.com/osoyoo/v3_dance_slave/blob/master/v3_dance_slave.ino. Unzip the file and upload this code in salver car. ( Note: Please confirm you have Install MPU6050_light and PID Libraries before uploading the code)
3. Test the cars:
1)Turn on the Master Robot Car
2)Connect the cell phone to OSOYOO_Robot Wifi SSID , no need password
3)Set the IP address in OSOYOO wifi UDP APP to 192.168.4.255
4)Turn on all other slave robot cars.
5)Use the APP to control all these cars