| Buy from US |
Buy from UK |
Buy from DE |
Buy from IT |
Buy from FR |
Buy from ES |
ここでご購入を! |
 |
 |
 |
 |
 |
 |
 |


- BBC micro:bit board x 1
- Micro USB Cable x 1
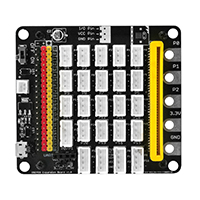
- OSOYOO Plug&Play (PnP) board for micro:bit x 1
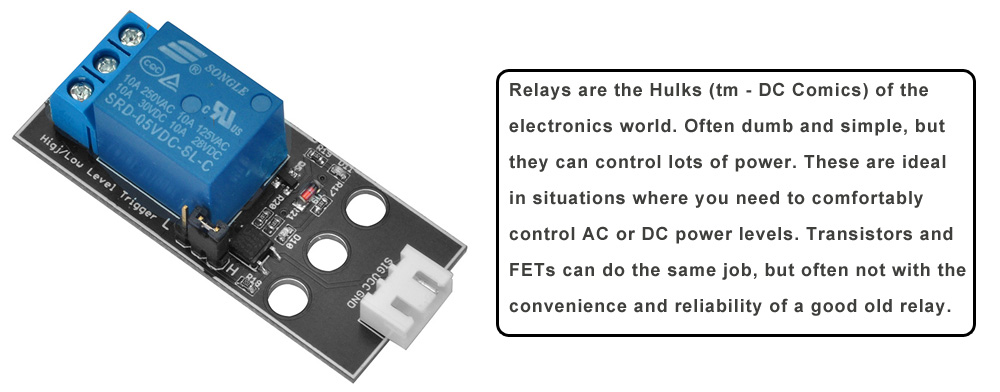
- OSOYOO Relay module x 1
- OSOYOO LED module x 1
- OSOYOO 3-pin PnP cable x 1
- 2pin female to female jumper wire
- 1pin male to female jumper wire
- Computer/Tablet PC/Phone x1


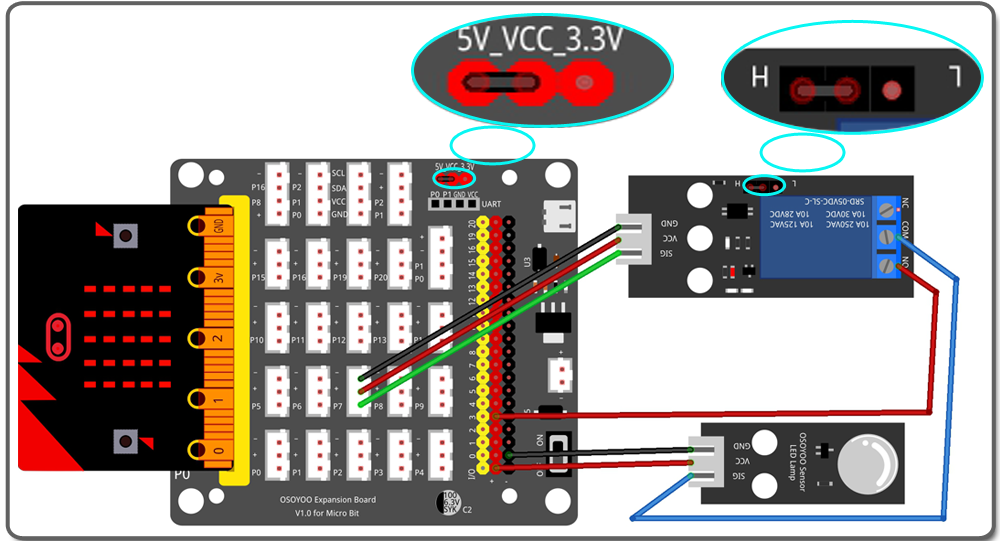
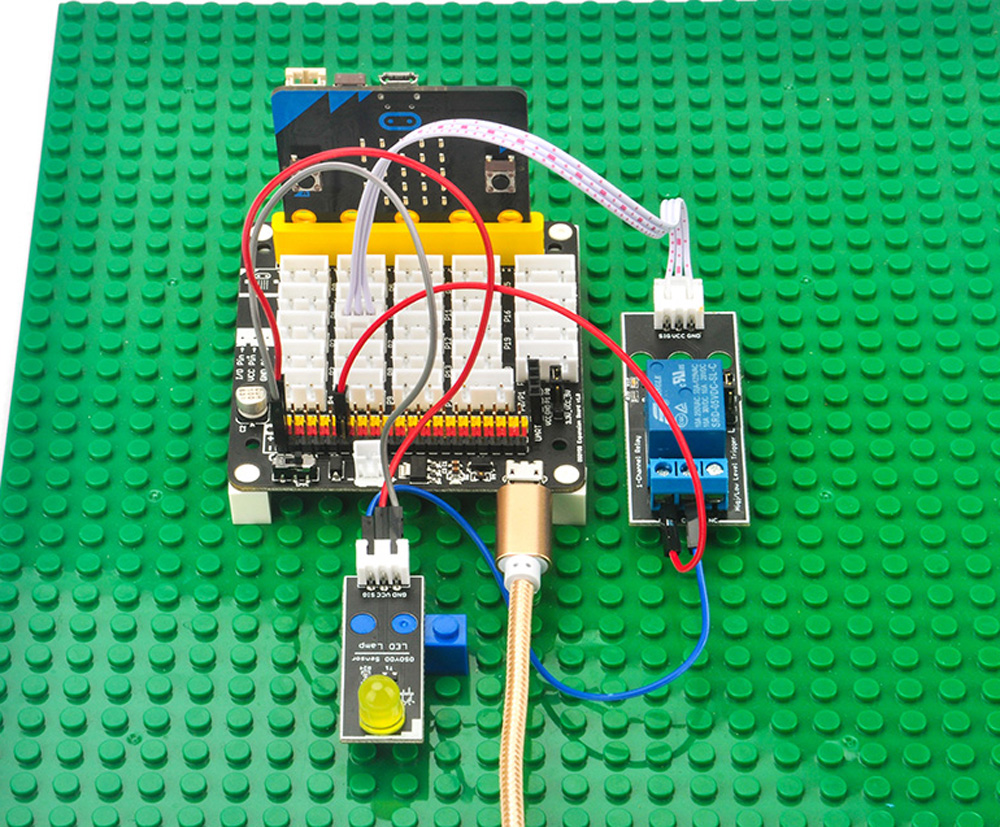
- Connect Relay module to P7 of OSOYOO PnP board for micro:bit with 3-pin PnP cable as below;
- Connect NO of relay module to VCC of PnP board for micro:bit with 1pin male to female jumper wire as below;
- Connect SIG of LED module to COM of relay module with 1pin male to female jumper wire as below;
- Connect VCC of LED to VCC of PnP board for micro:bit with 1pin female to female jumper wire as below;
- Connect GND of LED to GND of PnP board for micro:bit with 1pin female to female jumper wire as below;
- Connect 5V to VCC on PnP board with jumper cap as below;
- Connect H to middle pin on relay module with jumper cap as below, this will make the Relay work in Active-High mode(when SIG input is HIGH or 1, the Relay is Active and COM to NO is connected, otherwise COM to NO is disconnected );
.png)
Step 0. Using your web browser, go directly to https://makecode.microbit.org to land the MakeCode for micro:bit home page. You can bookmark this package to easily open this package for next project. In the My Projects section, click on the New Project
For more information about MakeCode, please go to our tutorial: What is MakeCode

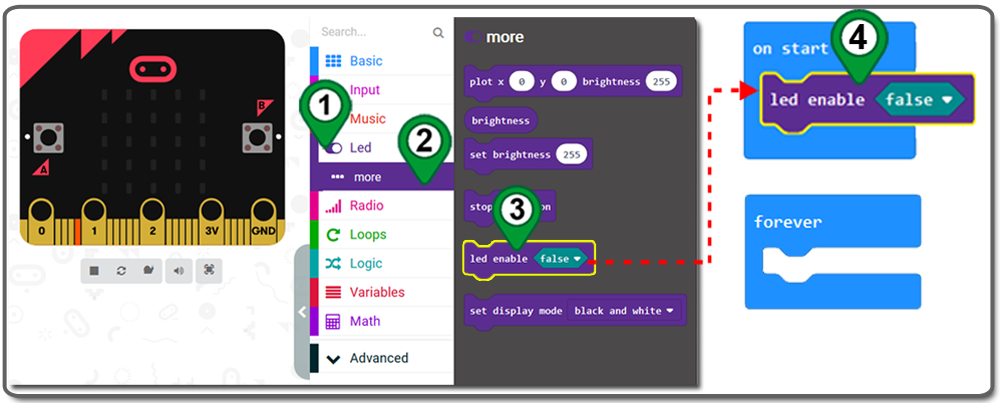
Step 1. In the Toolbox, click Led category and then more. Drag and drop led enable false block over and place it inside on start block
Step 2. In the Toolbox, click on the Pins category under Advanced.

Step 3. Click on the Pins category and drag and drop the digital write pin P0 to 0 block over and place it inside the forever block.

Step 4. Choose P7 from the drop-down menu, and change “to” value from 0 to 1 as following picture:

Step 5. In the Toolbox, click on the Basic category, click and drag the pause(ms) block over and place it inside of the forever block, and choose 1000ms as following figure:

Step 6. Right click digital write and pause block, then select Duplicate to copy these two blocks as following.

Step 7. Change new digital write block ‘to’ value from 0 to 1, and place these block inside forever block

Step 8. rename the project and download it as following.

Step 9. Download this “.hex” file and send it to your MICROBIT disk.

Below is the full program we have done for you as reference:

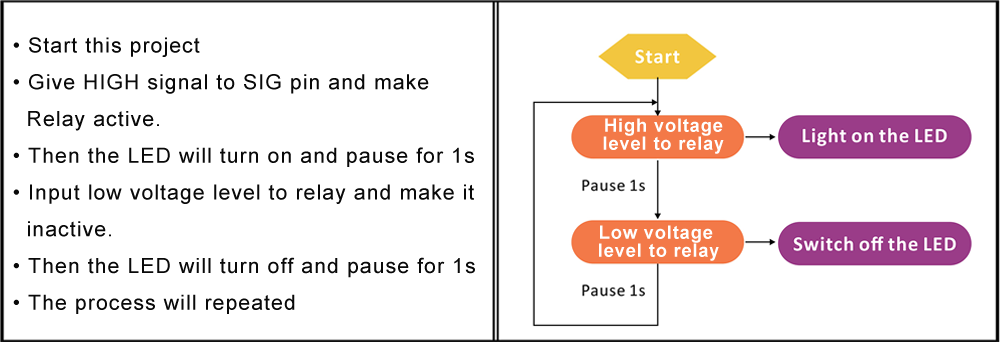


Complete wiring and power with 5V, You will see the LED turn on for 1s and then turn off for 1s, and you will hear “da,da” sound from relay.


Learn More about parts


.png)


