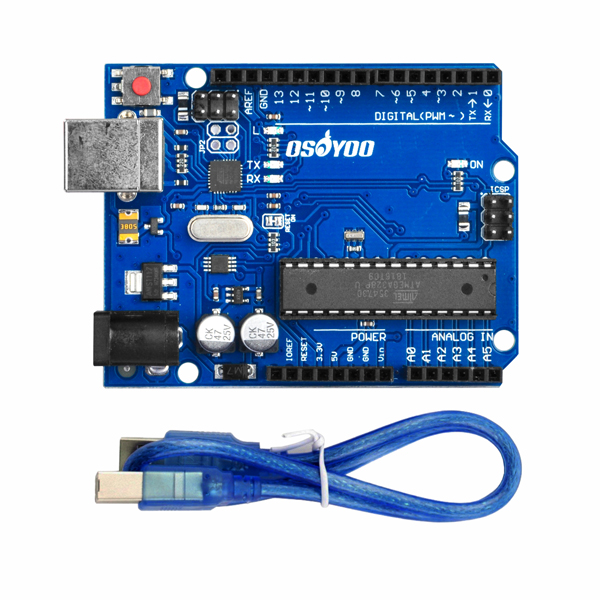
Make sure the jumper cap is connected E_TX to D4 and E_RX to D5.
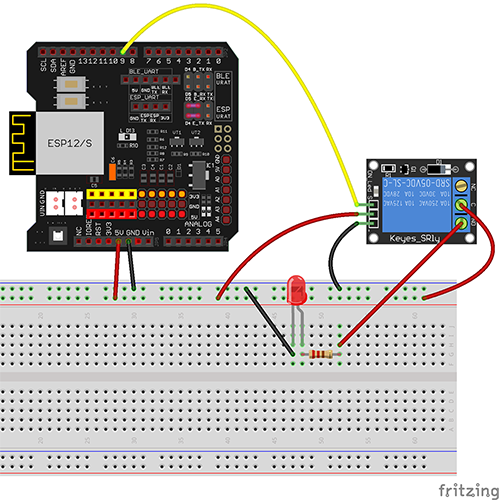
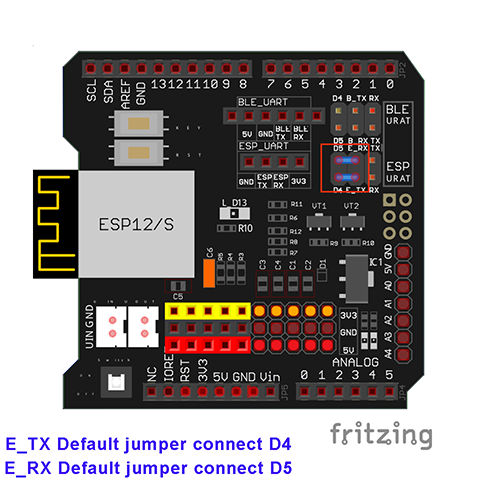 Connect the relay module with the mainboard as shown in the following diagram.
| OSOYOO Basic Board |
Relay |
| D9 |
S |
| GND |
GND |
| 5V |
VCC |

Software Installation:
Step A) Install the latest IDE from https://www.arduino.cc/en/Main/Software?setlang=en. If you have an IDE version after 1.1.16, please skip this step.
Step B) Connect the OSOYOO Basic board to your computer via a USB cable.
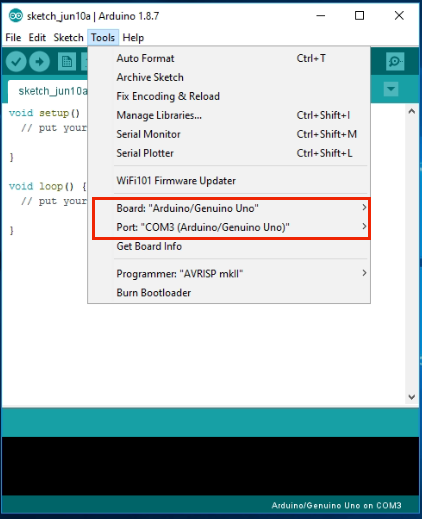
Step C) Open the IDE and choose the corresponding board type and port type for your project.
- Board:”Arduino/Genuino UNO”
- Port: Choose your own Serial Port for your mainboard
Step D) Download the sketch file from: https://osoyoo.com/driver/wifi-iot/lesson11/esp8266-lesson11B.zip Unzip the file and double click the esp8266-lesson11B.ino file. Load the sketch into IDE and find the following lines:
char ssid[] = "******"; // your network SSID (name)
char pass[] = "******"; // your network password
Please replace the ****** with your correct WiFi SSID and password; otherwise, your
project cannot connect to the Internet.

Step E) After changing the above lines, load the sketch into IDE.


Step F) Open your serial monitor and you can see your router will assign an IP address to your IDE as follows.

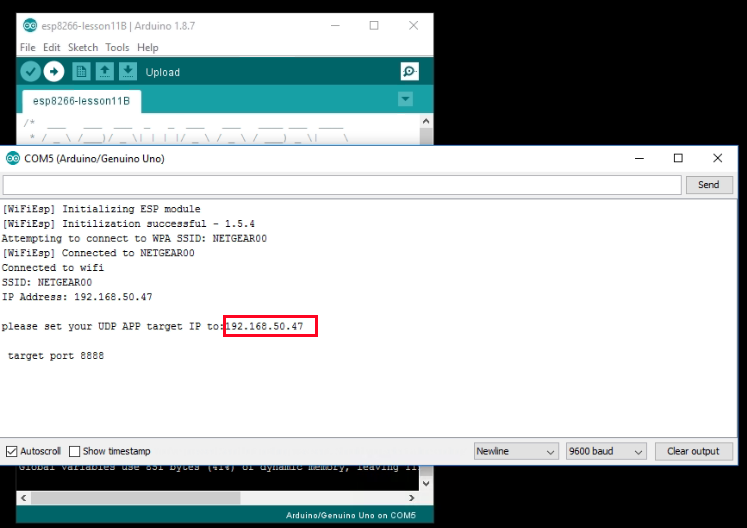 Please set your UDP app target IP to: 192.168.50.47, target port 8888.
In the above example, 192.168.50.47 is the IP address of my mainboard, and 8888 is the UDP port number that will be set into our cell phone app in the next step.


 Connect the relay module with the mainboard as shown in the following diagram.


 Please set your UDP app target IP to: 192.168.50.47, target port 8888.

