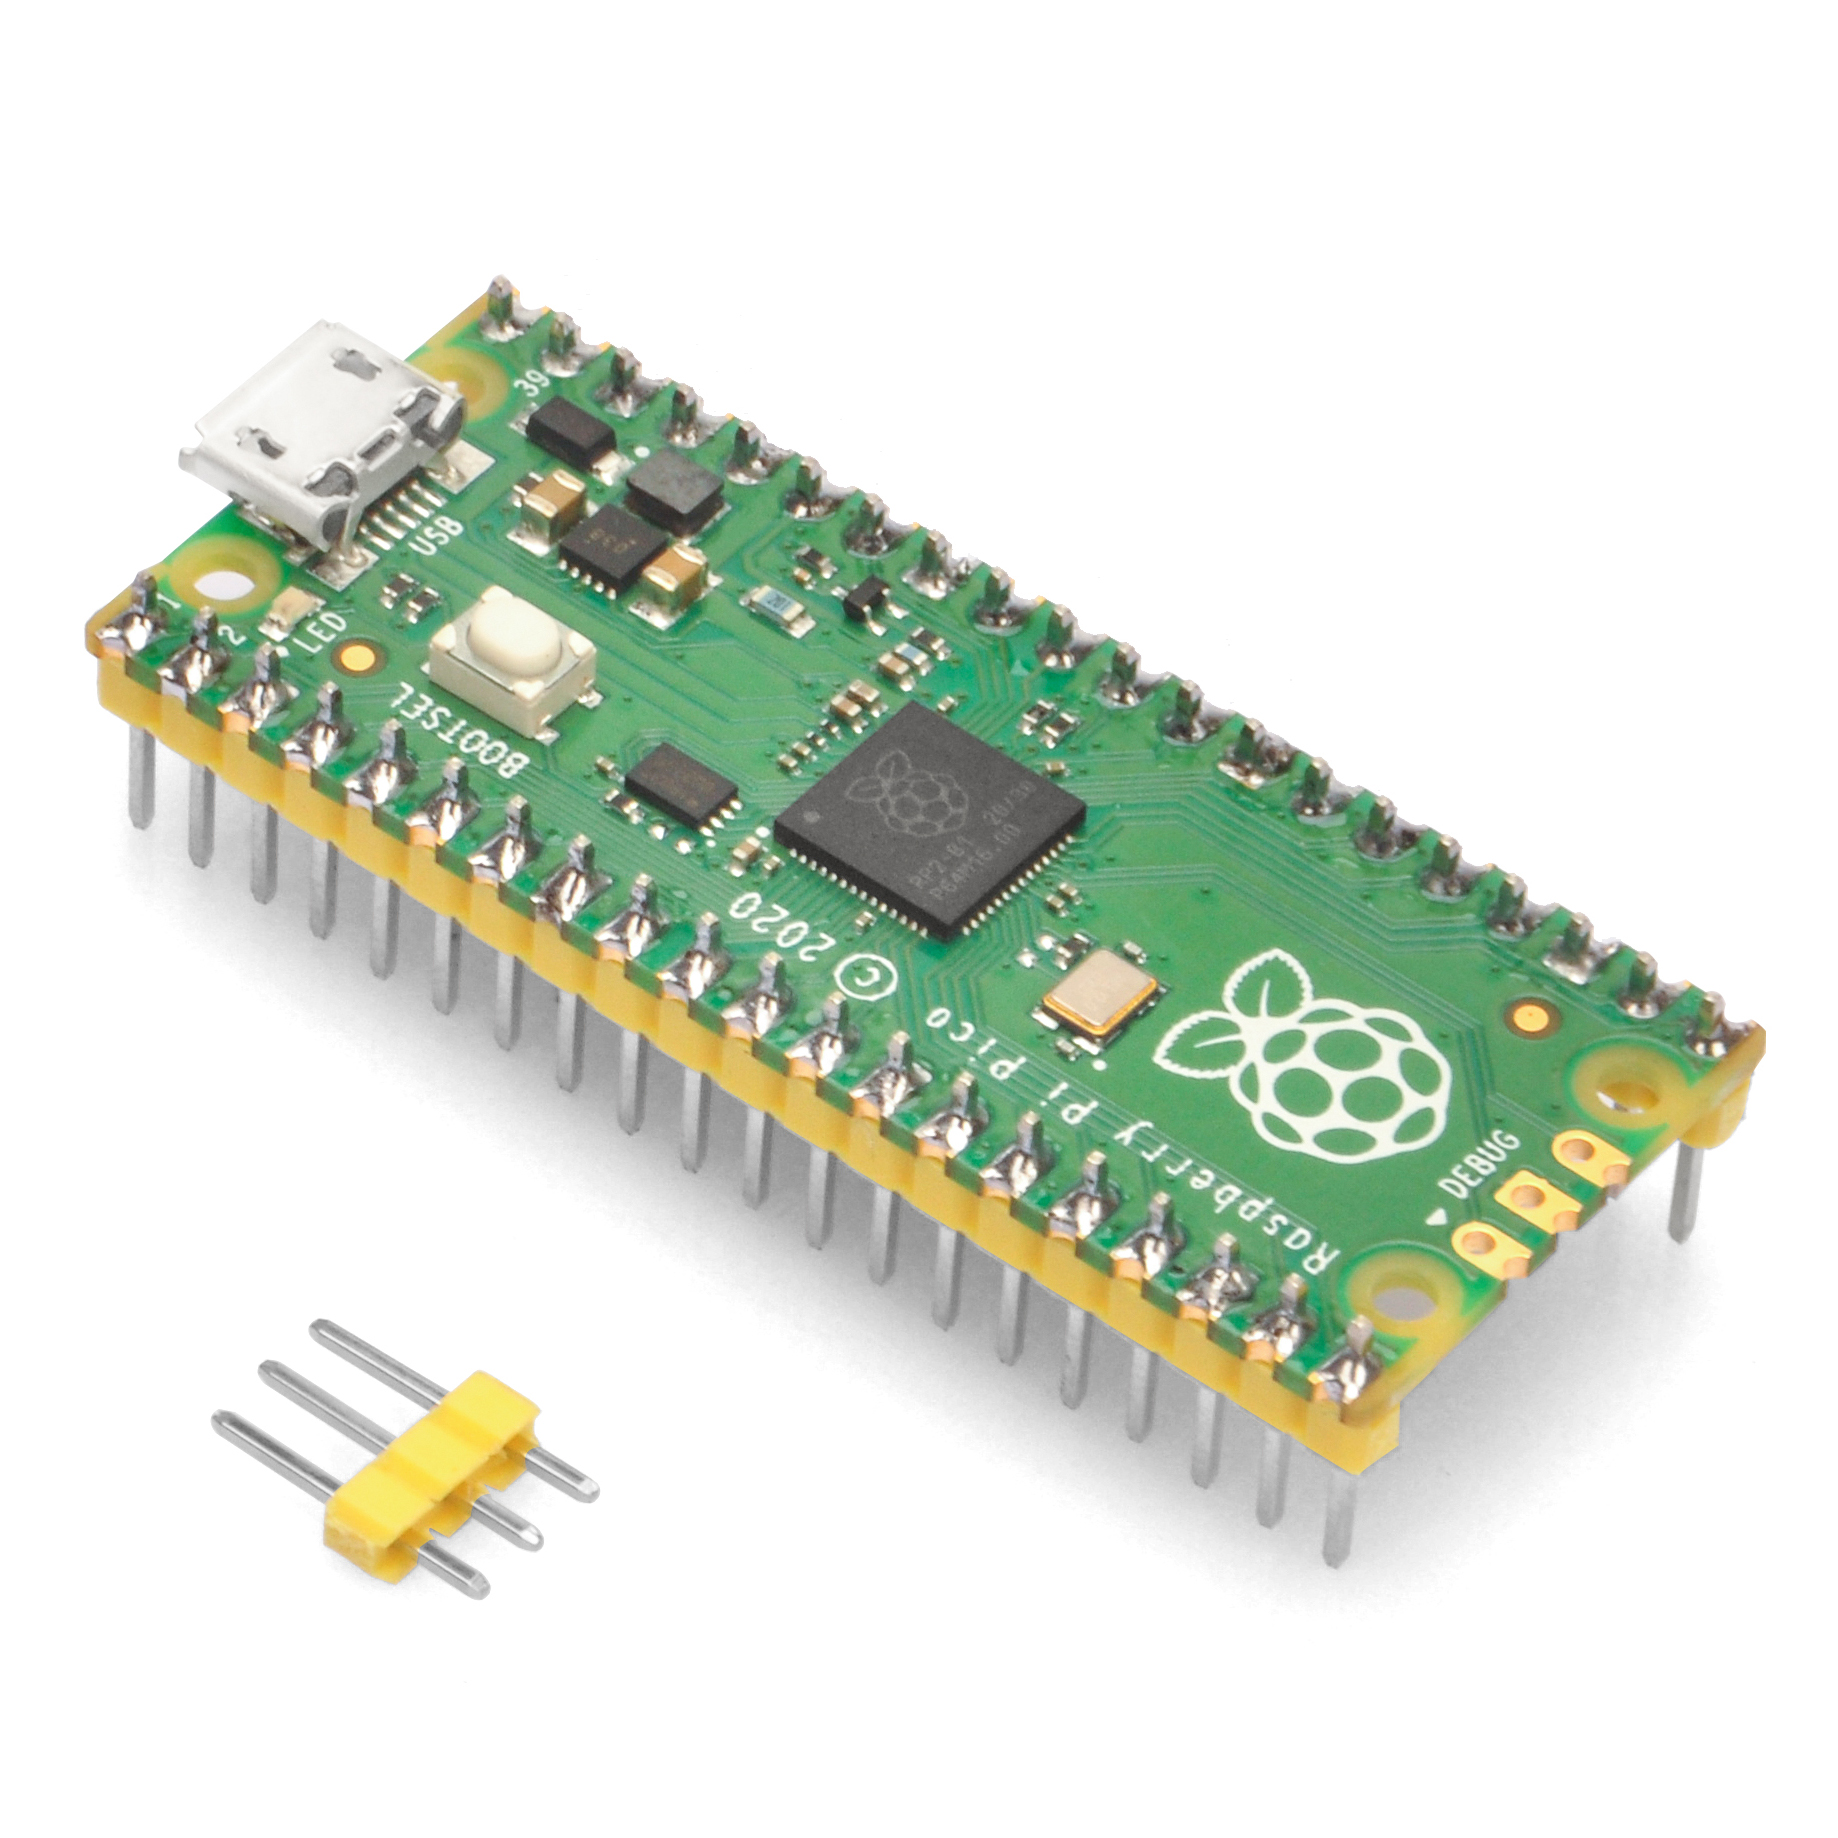
Raspberry Pi Pico is a small, high-speed, and versatile board that uses RP2040, a new microcontroller chip designed by Raspberry Pi in the UK. Despite its name, Raspberry Pi Pico is quite different from other Raspberry Pi products like the Raspberry Pi 2, 3, and 4 pocket computers, which run on Linux operating systems.Unlike those devices, Pico does not have an operating system. Instead, it is a low-cost, high-performance microcontroller board with flexible digital interfaces. In fact, its functionality is more similar to that of its competitor, Arduino MCU boards.
To program the Pico, you can use either C++ or MicroPython. In this tutorial, we will focus on MicroPython, as it is more beginner-friendly.
Step1 Here are the steps to download and install the MicroPython firmware on your Pico board:
Push and hold the BOOTSEL button on your Pico board, and then plug it into the USB port of your Raspberry Pi or other computer. Release the BOOTSEL button after your Pico is connected.
Your Pico will mount as a Mass Storage Device called RPI-RP2. Drag and drop the MicroPython UF2 file onto the RPI-RP2 volume.
Your Pico will reboot, and you are now running MicroPython.
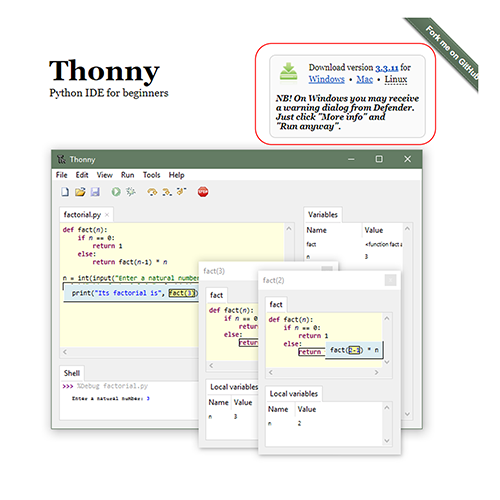
Step 2: Download and Install the Thonny Python IDE
To program your Pico with MicroPython, you will need an Integrated Development Environment (IDE). We recommend using Thonny, which is a beginner-friendly IDE that supports MicroPython.
Here are the steps to download and install Thonny Python IDE on your PC:
2.Download the version of Thonny that is compatible with your operating system.And Install Thonny on your PC.
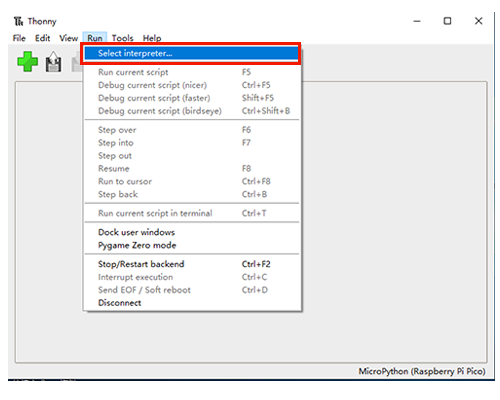
3.Now open the Thonny Python IDE, click Run to select MicroPython for Rapsberry Pi Pico as Interpreter :
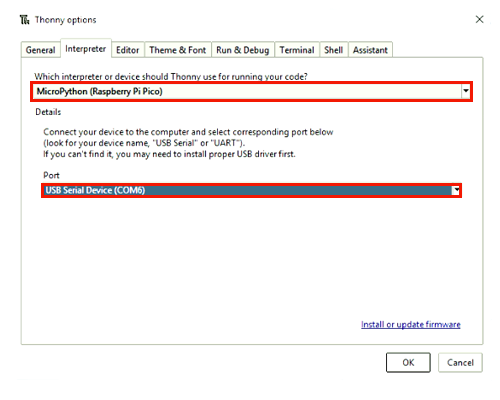
Also please select the COM port which your Pico board is connected as photo.After that, click OK to save the setting.
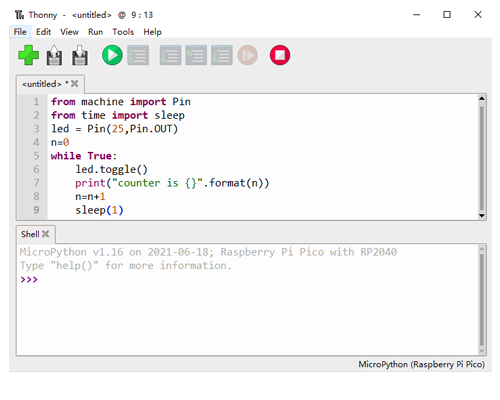
copy following code and paste them to the coding window:
from machine import Pin
from time import sleep
led = Pin(25,Pin.OUT)
n=0
while True:
    led.toggle()
    print("counter is {}".format(n))
    n=n+1
    sleep(1)
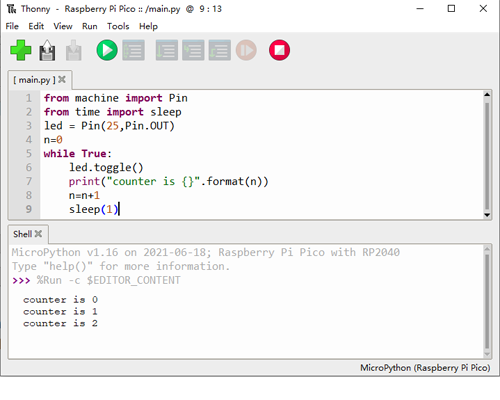
You will see the code in IDE as following
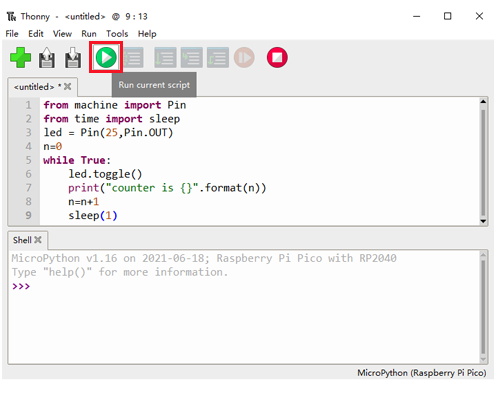
Click the little ► button to run the Python code
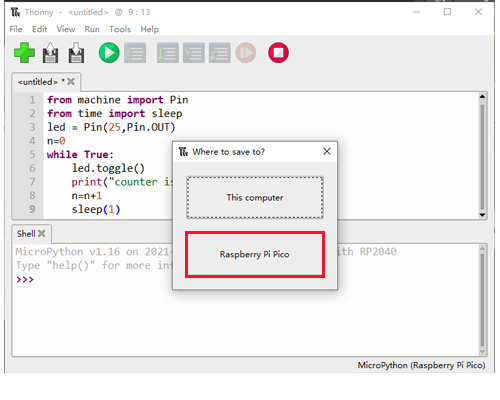
Click File ->Save As
Then select Raspberry Pi Pico as destination
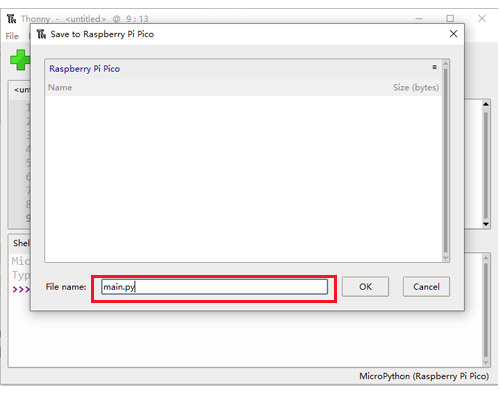
Name the file as main.py, then click OK
Now, when you connect your Pico board to USB power, the code in the main.py file will automatically run. It’s important to note that only main.py can be executed automatically. If your Python code is saved under a different name, it cannot be executed automatically
You should now see the LED on the Pico board flashing constantly. Congratulations! You have successfully run your first Python program on the Pico!
(see the # comments in each line):
from machine import Pin #import machine library to control GPIO pins
from time import sleep #import time library to use sleep function
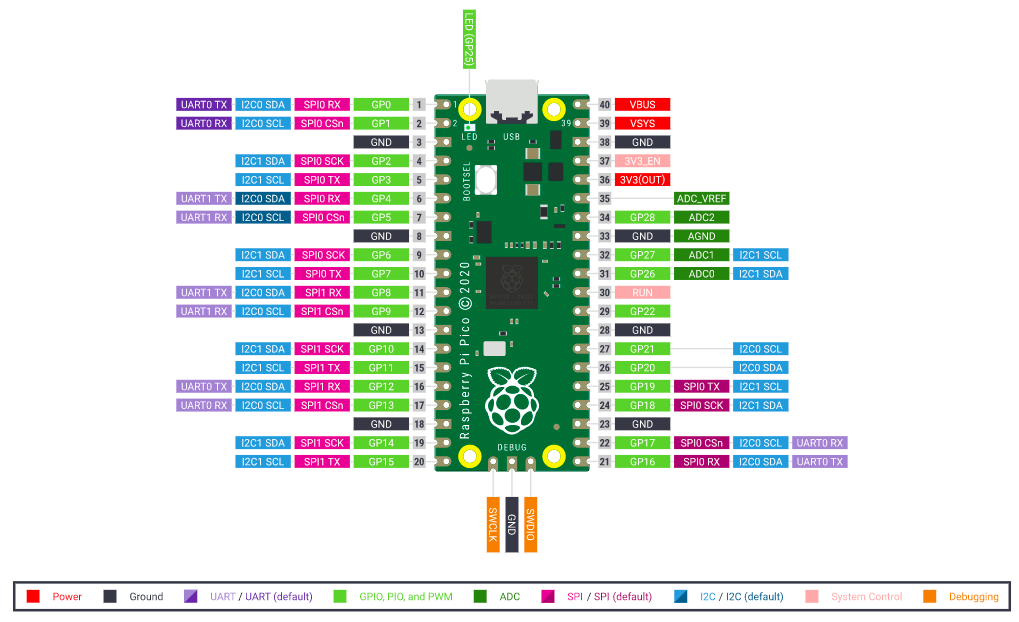
led = Pin(25,Pin.OUT) #Set Pin 25 in OUTPUT mode, Pin 25 is connected an internal LED integrated in the board
n=0
while True:
led.toggle() #make pin 25 led flash once
print("counter is {}".format(n)) # display flash counter in the terminal
n=n+1
sleep(1) #delay one second and do next flash


 (see the # comments in each line):