| Buy from US |
Buy from UK |
Buy from DE |
Buy from IT |
Buy from FR |
Buy from ES |
Buy from JP |
 |
 |
 |
 |
 |
 |
 |

In this lesson, we will learn how to use detect temperature and humidity with DHT11 sensor module and display the result to an I2C 1602 LCD. 
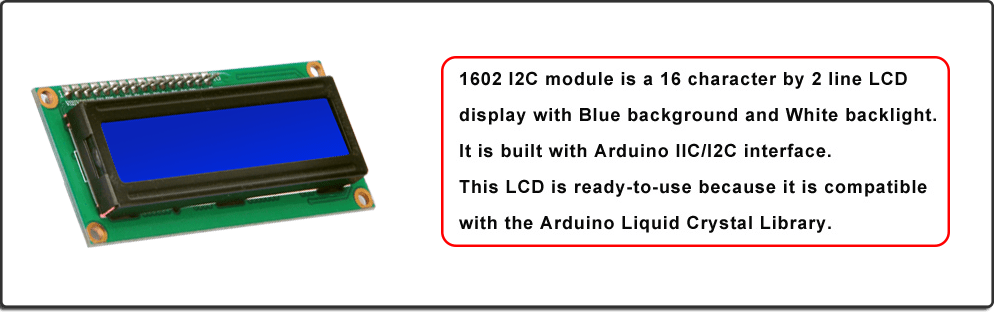
The I2C 1602 LCD can display two lines x 16 (total 32) characters. The characters are sent through a I2C bus port which included in Arduino and many other devices.
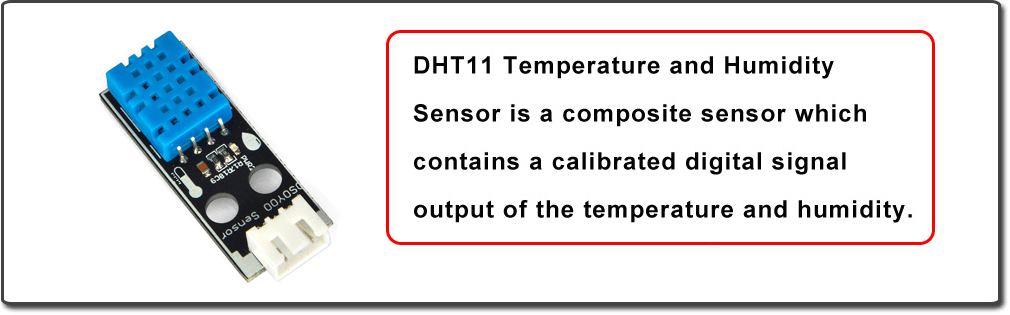
The digital temperature and humidity sensor DHT11 inside contains a chip that does analog to digital conversion and spits out a digital signal with the temperature and humidity, compatible with any MCUs, ideal for those who want some basic data logging stuffs. It’s very popular for electronics hobbyists because it is very cheap but still providing great performance.

- Osoyoo UNO Board (Fully compatible with Arduino UNO rev.3) x 1
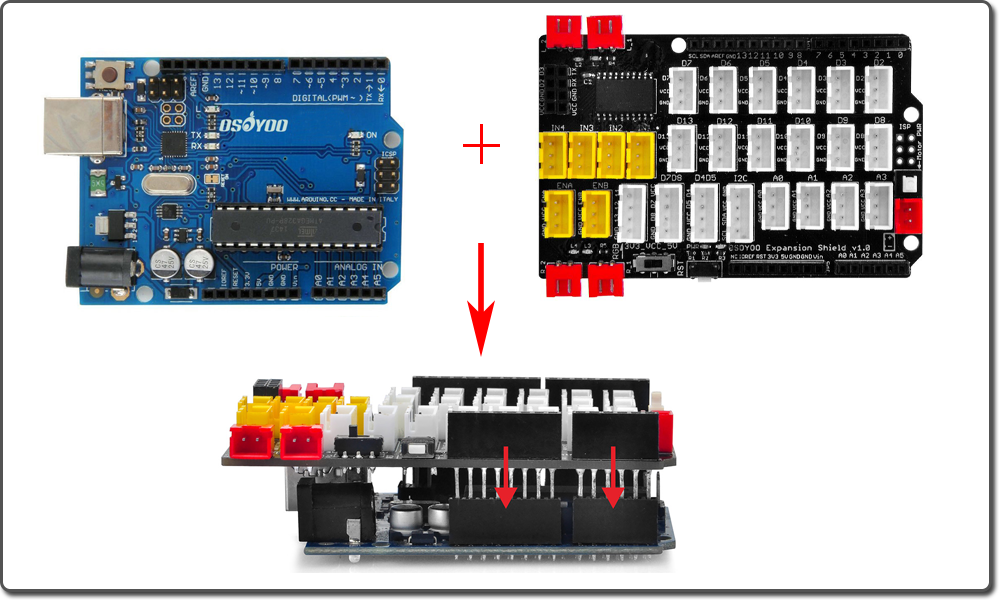
- OSOYOO Magic I/O Shield for Arduino x1
- DHT11 Sensor x 1
- I2C 1602 LCD Display x 1
- OSOYOO 3-Pin PNP Cable x 1
- OSOYOO 4-Pin PNP Cable x 1
- USB Cable x 1
- PC x 1

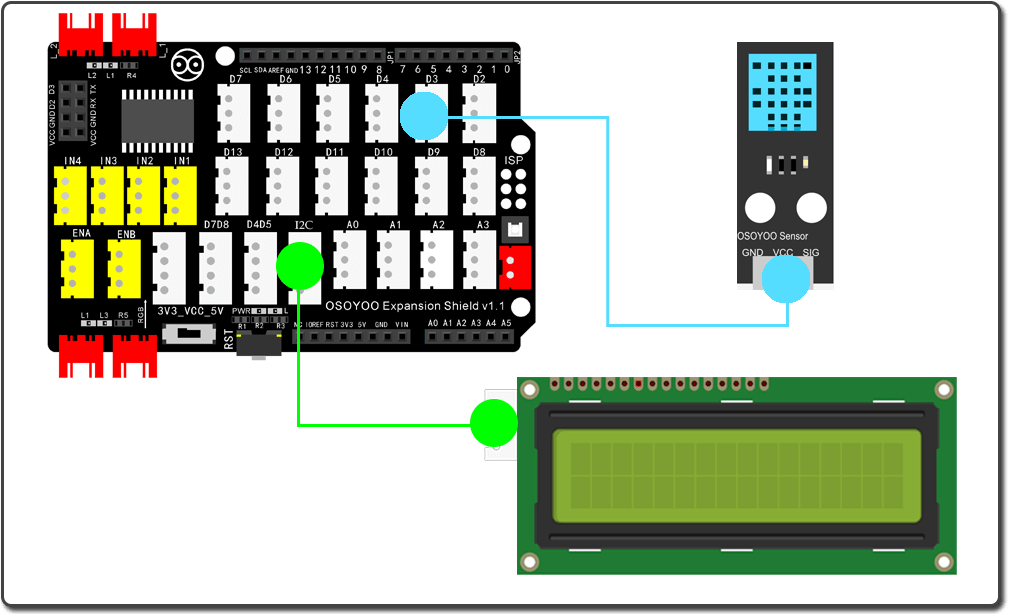
Firstly, please plug Osoyoo Magic I/O shield into UNO board as following:
Then plug DHT11 senstor to D3 and I2C 1602 screen to I2C port as following:

Step 1) If you haven’t install mBlock software in your PC, please read Lesson 1, download and install the software.
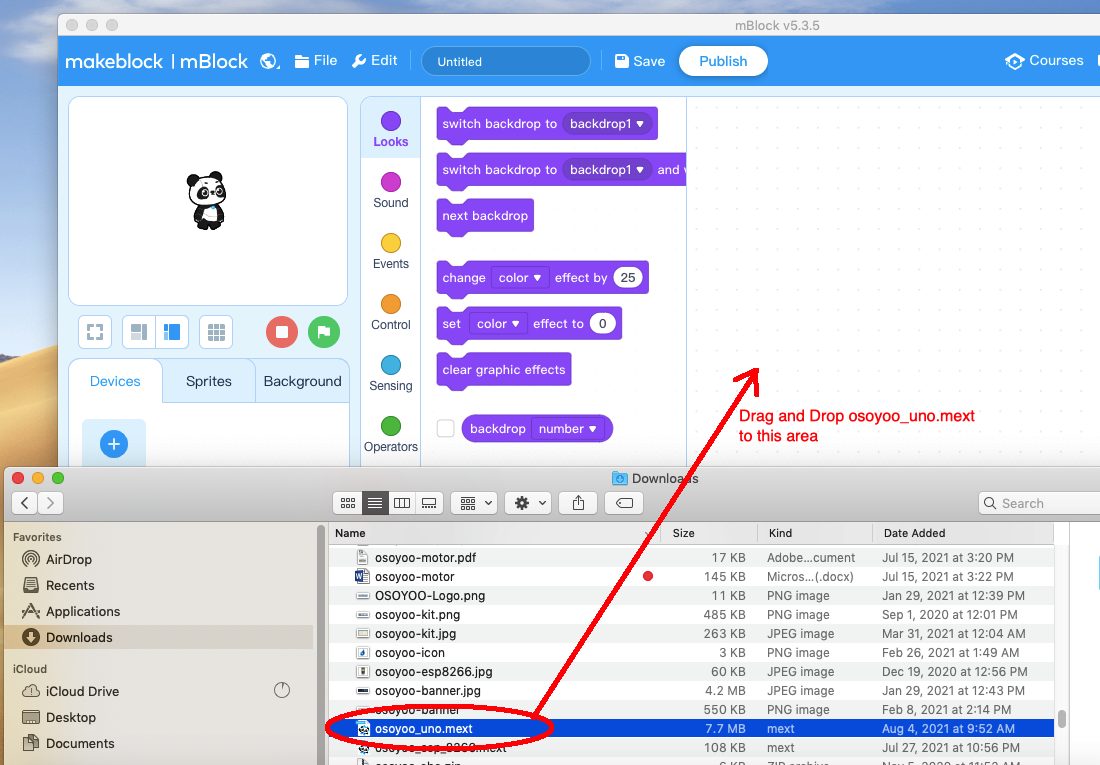
Step 2) Run the mBlock PC software by double click the lovely Panda icon. Drag and Drop osoyoo_uno_mext file(downloaded in Step 1) to mBlock software as following:
Now you will see a new device firmware in mBlock, see following picture:
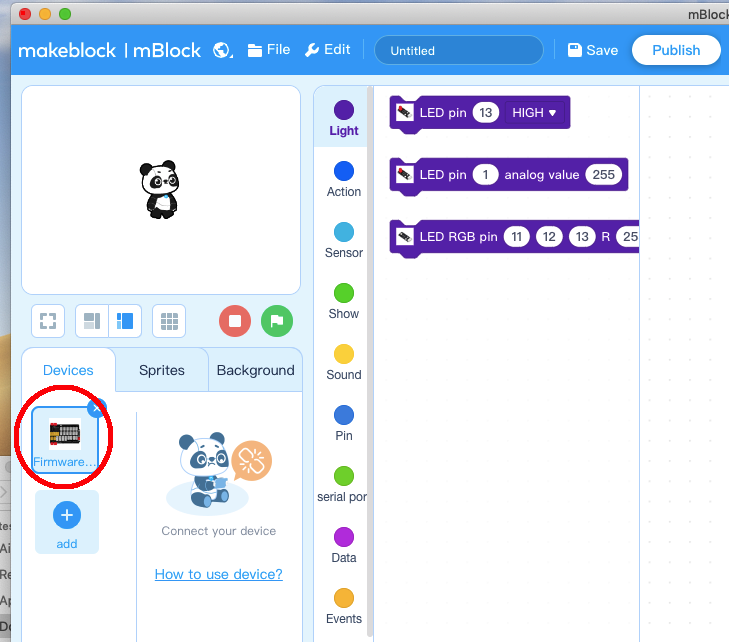
Now mBlock software and OSOYOO_UNO device firmware have been successfully installed in our PC!
Now we will show you how to use blocks to turn above idea into reality.
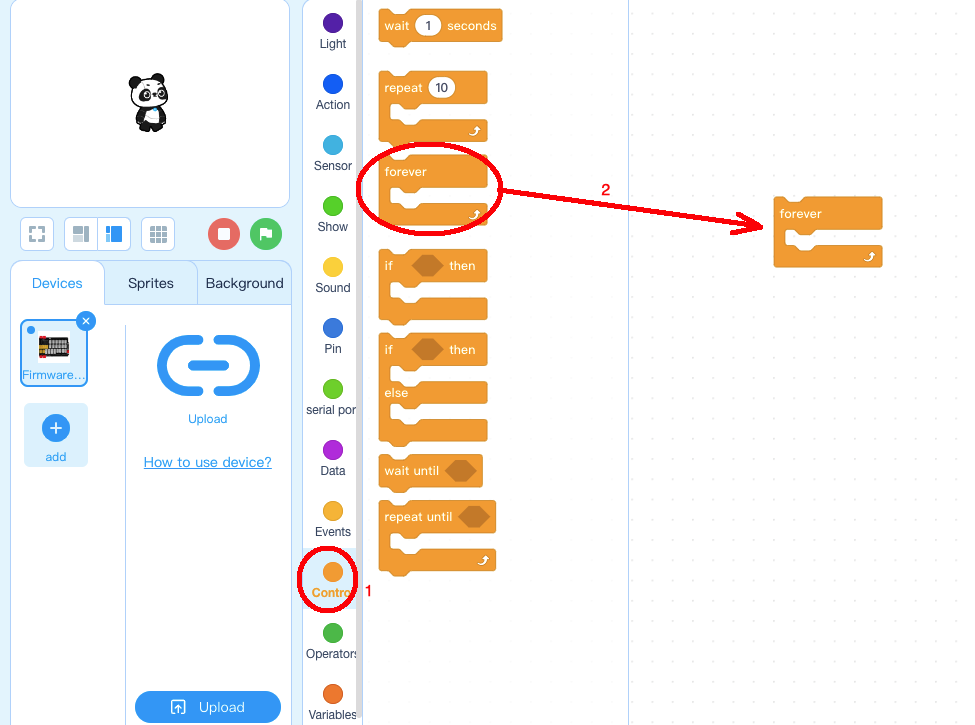
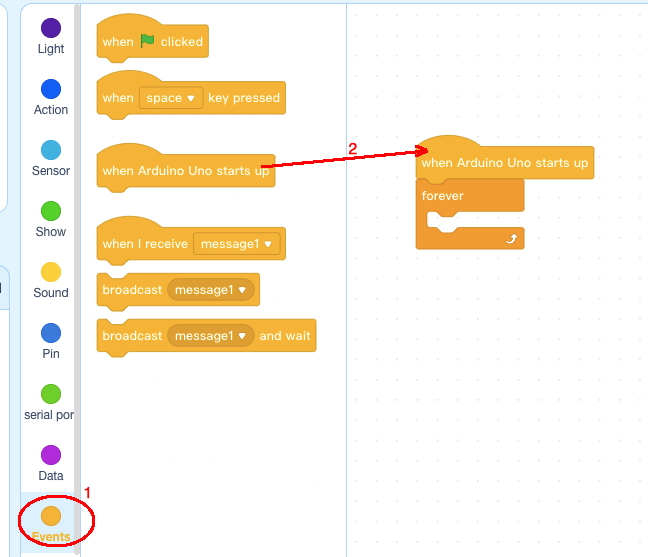
Step 1: Click Control, then Drag and drop Forever block to programming area as following:
Step 2: Click Events, add when Arduino Uno starts up block to the top:
Step 3: Click Show , make add 2 pcs of LCD prints block inside forever block:

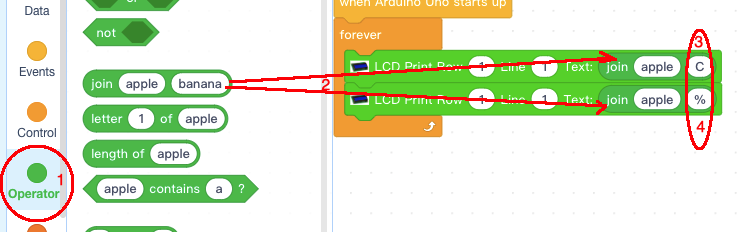
Step 4: Click Operator, add 2pcs of join apple banana block inside LDC print blocks text field , then change upper banana to C and lower banana to %.
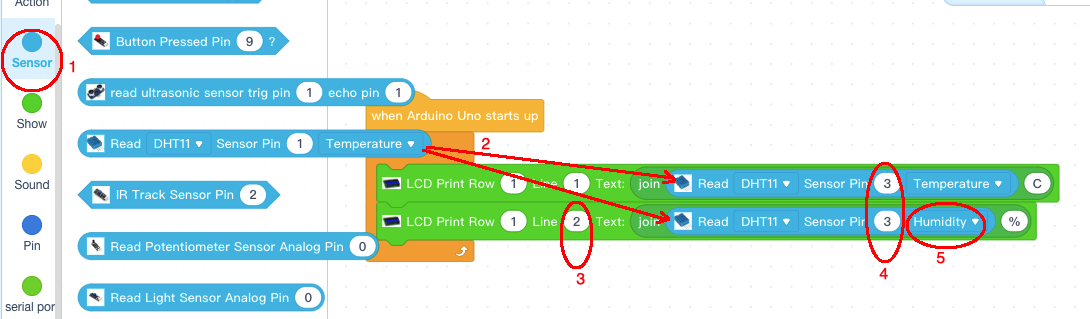
Step 5: Click Sensor category, add 2pcs Read DHT11 block below in LCD block join field,
change the lower LCD line number from 1 to 2,
Change both DHT11 Sensor pin from 1 to 3,
Change lower display field from Temperature to Humidity:
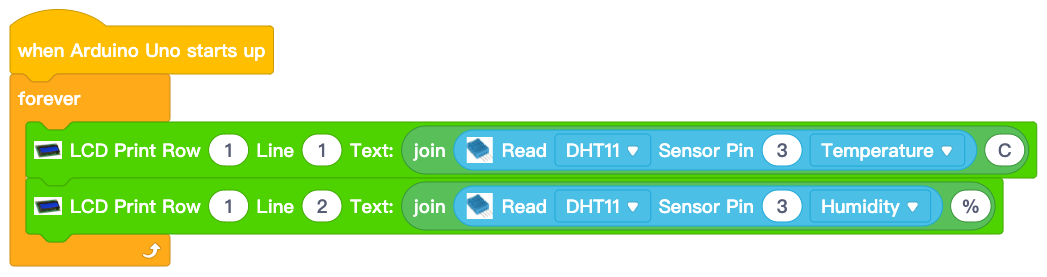
Now we have completed the block programming. The final blocks look like following:
Upload the program to Arduino
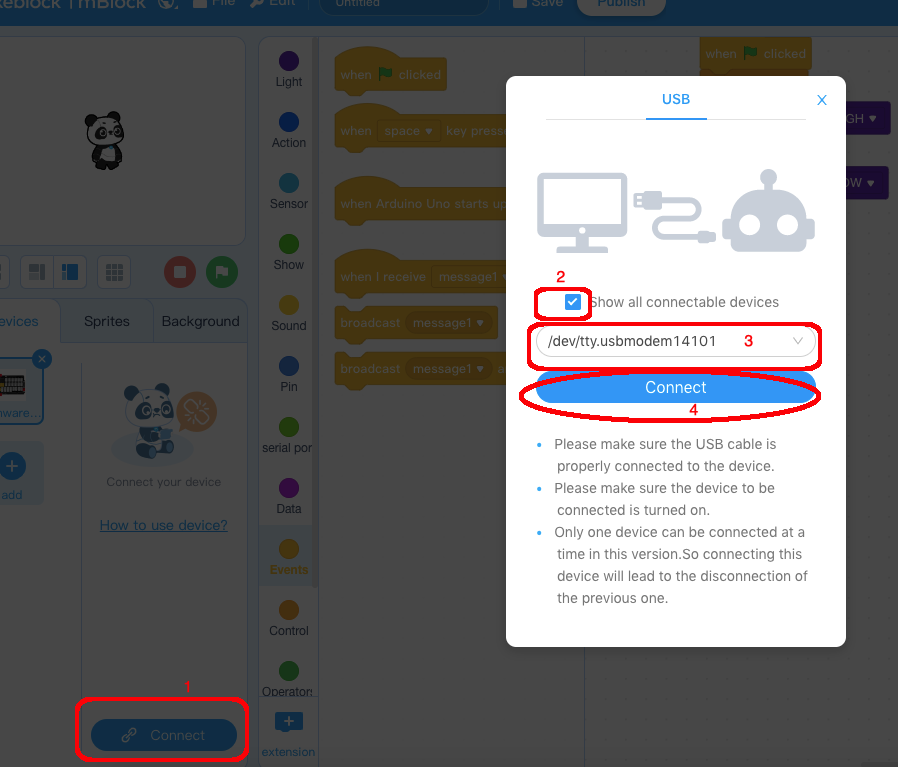
1)you need click the Connect button in the bottom of the mBlock software, you will see a USB window pop up,
2) select Show all connectable device check box , then a device drop-down menu will show up,
3) select your Arduino port from device drop-down menu
4) click Connect button to connect your PC to Arduino
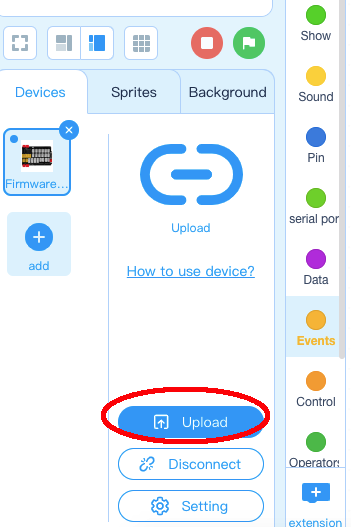
5)After you PC is connected to Arduino UNO board, please click Upload button in the bottom of your software, then the code will be uploaded to Arduino UNO board:
Test the program:
When you run the LCD, you will see the LCD display temperature in first line and humidity in 2nd line, similar to following:
24.50C
70.05%
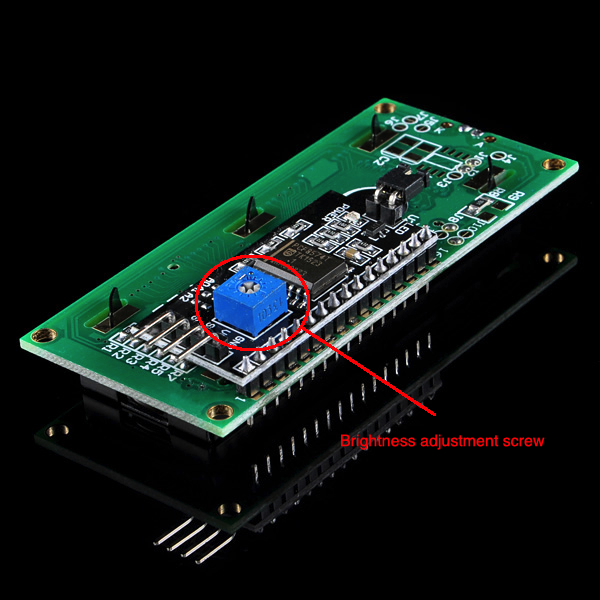
If you can not see any display, you might need to use a screw driver to adjust the brightness screw in the back of the LCD, see following picture: