In lesson 14, we learned IR tracking sensor(black/white sensor). In this project, we use two IR tracking sensors to design a simple line tracking Robot car.
A Line tracking Robot, as the name suggests, is an auto-driving vehicle which follows a black track line printed in white ground. Tracking sensors in the robot keeps checking if the current car location is out of the track. If yes, then car will make a negative movement to draw the robot car back to track.
OSOYOO UNO Board (Fully compatible with Arduino UNO rev.3) x 1
OSOYOO Magic I/O Shield for Arduino x1
OSOYOO Tracking Sensor Module x2
OSOYOO 3-Pin PNP Cable 10cm x 6
OSOYOO 3-Pin PNP Cable 20cm x 2
OSOYOO 4-Pin PNP Cable 20cm x 1
Acrylic Platform x1
transmission motor with two wheels
USB Cable
Notice:
Not much is needed for this lesson, Make sure you have a good quality syncing cable, do not pick a ‘charge only’ USB cable.
Install the smart car basic frame work as per Lesson 21, If you have already completed installation in Lesson 23, just keep it as is.
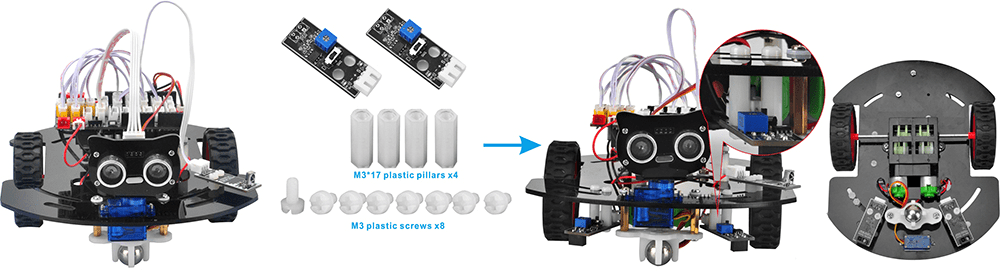
Step 1:Install the left and right tracking sensor with M3*6 plasctic screws, M3*17 plastic pillars.Make sure that every the potentiometer head is between the gaps at the front side of car chassis so that you get the best sensitivity status:the signal indicate LED light will turn on when sensor is above white ground, and the signal LED will turn off when the sensor is above black track.
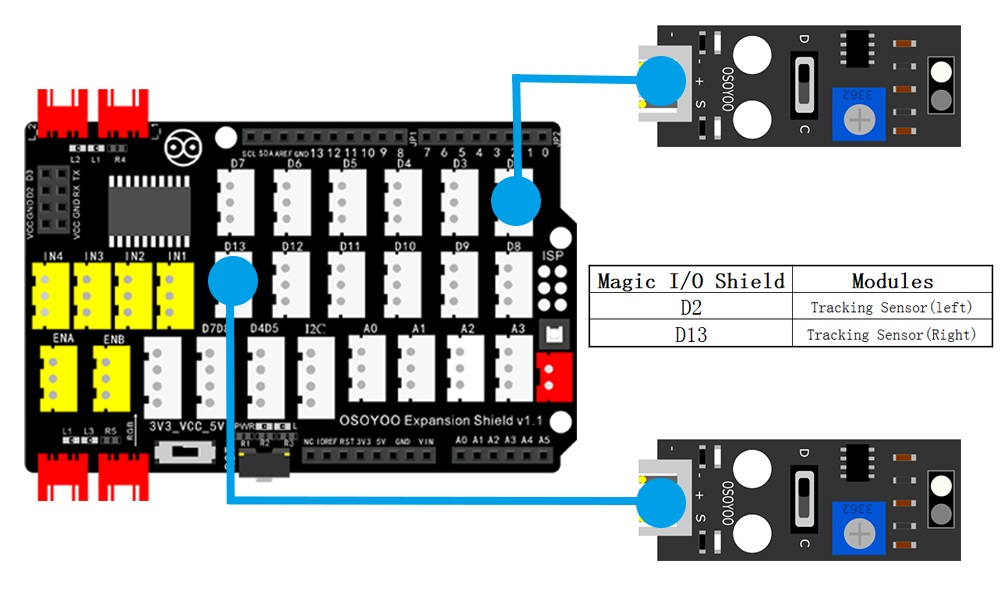
Step 2:Then connect the left and right tracking sensors to the D2 and D3 port of the Magic I/O shield with a 3-pin PNP cable as below:
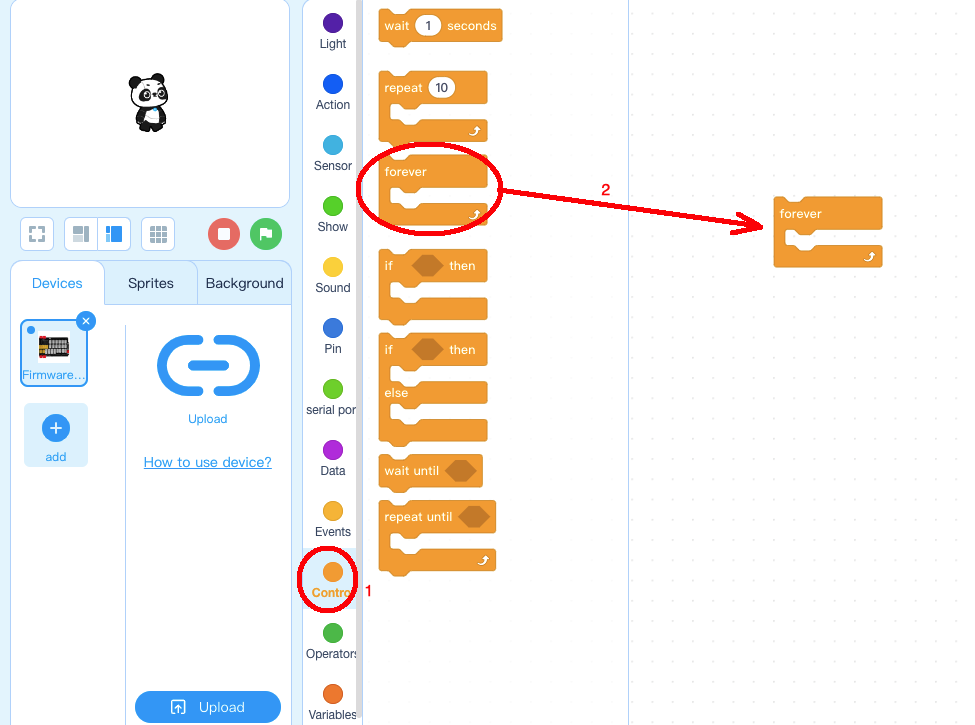
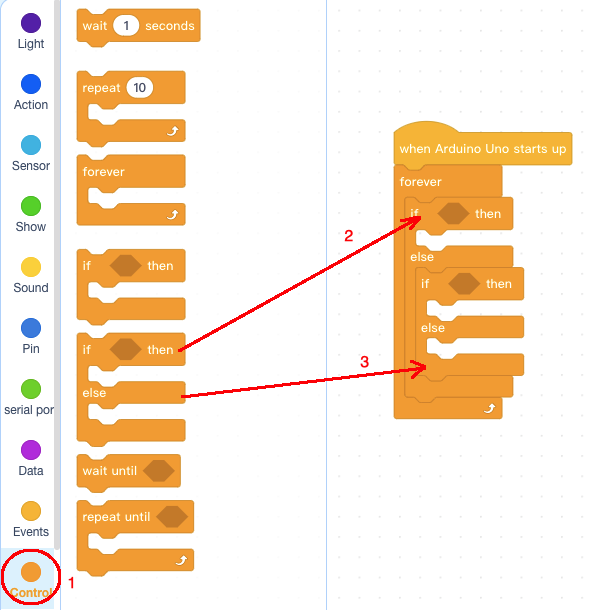
Step 1: Click Control, then Drag and drop Forever block to programming area as following:
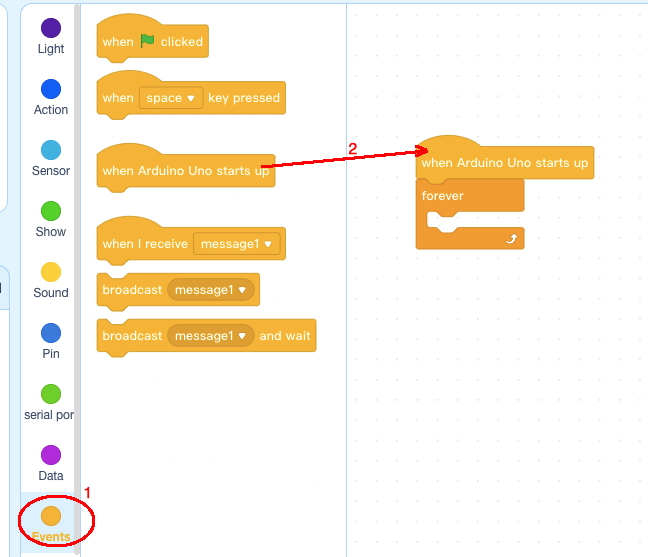
Step 2: Click Events, add when Arduino Uno starts upblock to the top:
Step 3: Click Control, add an if else block inside forever loop, then add another if else block inside the else area of first if else block:
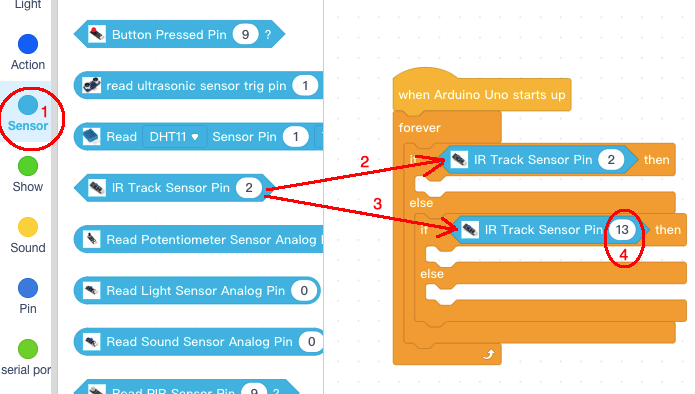
Step 4: Click Sensor, add 2 pcs of IR Tracking Sensor Pin 2blocks inside if condition area, change 2nd Pin number from 2 to 13 as following:
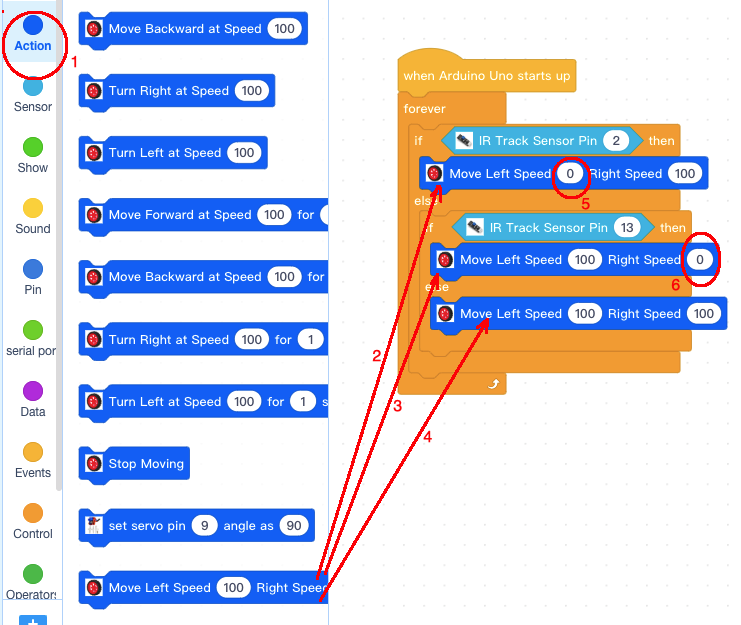
Step 5: Click Action category, add 3 pcs Move Left Speed 100 Right Speed 100block inside if else blocks, change first Left Speed from 100 to 0, change 2nd Right Speed from 100 to 0 :
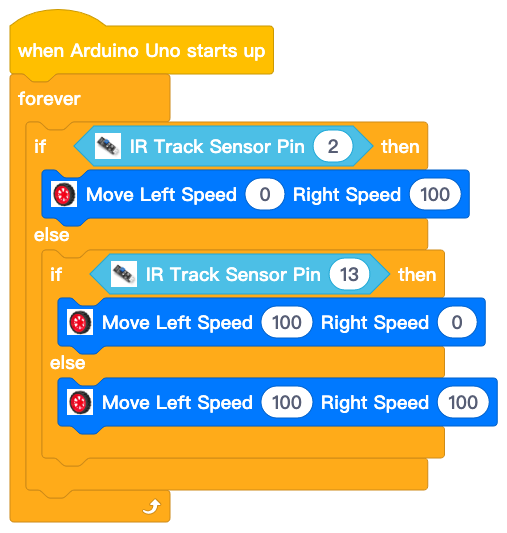
Now we have completed the block programming. The final blocks look like following:
Disconnect Arduino from PC, put a 9V battery into battery pox(make sure polar direction is correct, otherwise it can destroy your device and cause fire hazard).
In lesson 14, we have learnt how to adjust the sensitivity of tracking sensor. Turn on and hold the car and adjust the sensitivity screw on the tracking sensor with a screwdriver until you get the best sensitivity status: the signal indicate LED light will turn on when sensor is above white ground, and the signal LED will turn off when the sensor is above black track.
Prepare a black track (the width of the black track is more than 30mm and less than 60mm) in white ground. Please note, the turning angle((bending curve) of track can’t be two sharp(larger than 90 degree). If the turning is too sharp, the car will move out of the track.
Turn on the car and put the middle of tracking sensor module facing over black track, and then the car will move along the black track.