| Buy from OSOYOO |
Buy from US |
Buy from UK |
Buy from DE |
Buy from IT |
Buy from FR |
Buy from ES |
Buy from JP |
 |
 |
 |
 |
 |
 |
 |
 |
Compatibility Notice
Hardware: Raspberry Pi 5/4/3, Compute Module 5
Screen:OSOYOO 10.1″ DSI touchscreen (Model No.: 2025002500)
System:This tutorial is ONLY compatible with OS: Raspberry Pi OS 64bit desktop, Kernels: 6.12 and newer
Hardward Install
Hardware Connection with Raspberry Pi 5
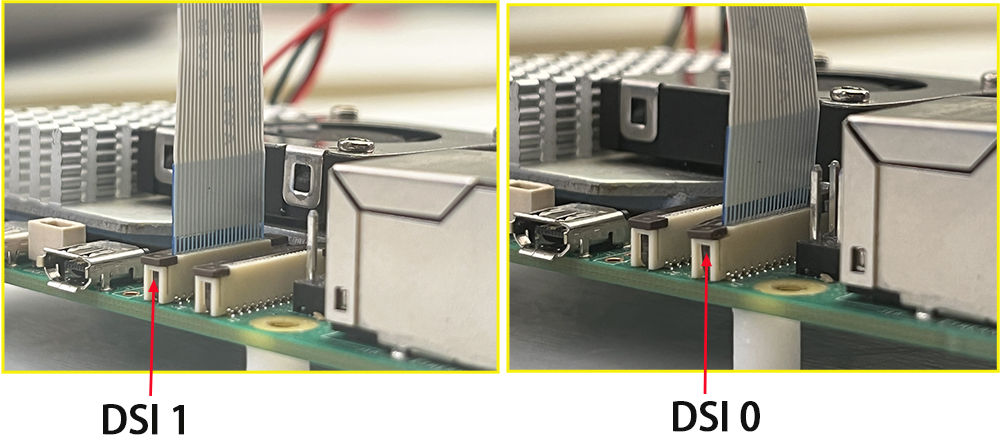
1. Use the 22pin-0.5mm to 22pin-0.5mm DSI cable (for Pi5) to connect the DSI port of the display to the 22PIN DSI1 or DSI0 port of the Raspberry Pi motherboard.
2. Use 2pin connector to connect the power connector of the display to the 5V GND pin header of the Raspberry Pi motherboard.
3. Secure the Raspberry Pi to the display with M2.5 screws.
Note: Make sure that the DSI cable is connected in correct direction and 5V power is supplied through the GPIO pins.

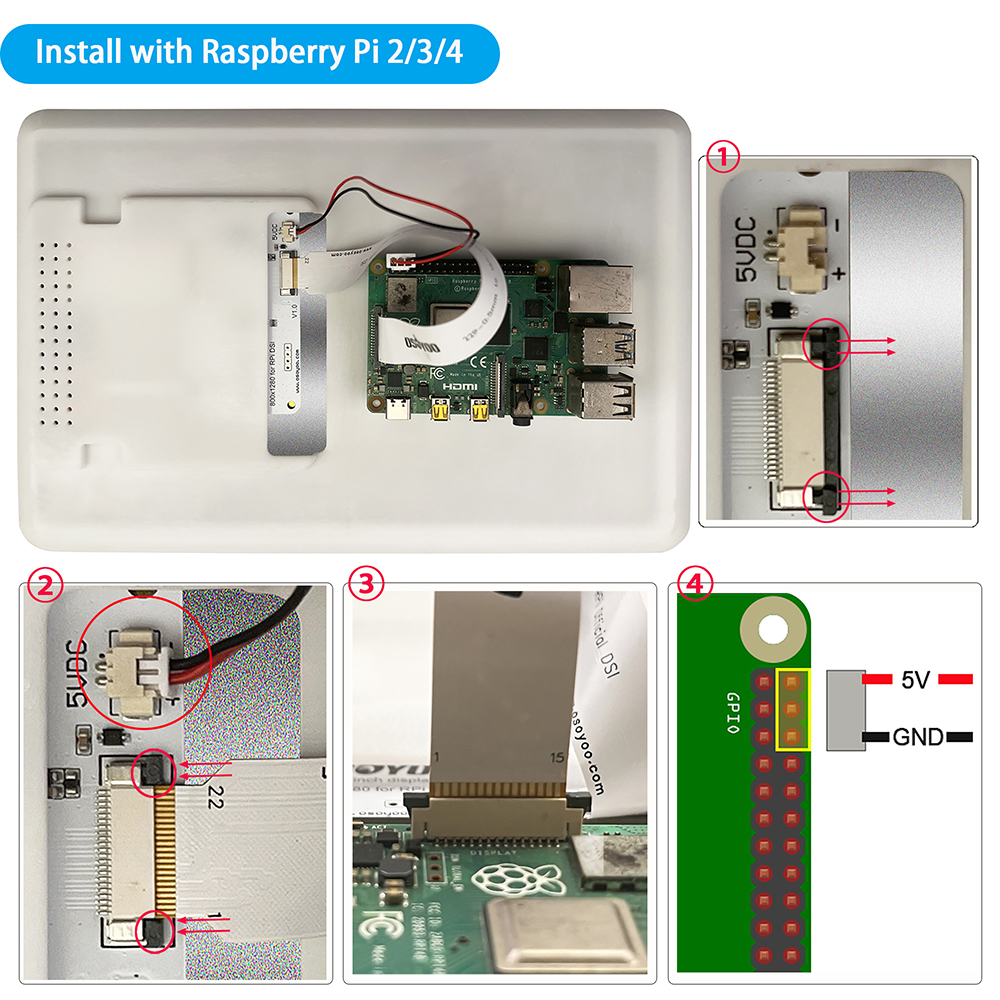
 Hardware Connection with Pi4B/3B+/3B/3A+
1. Use the 15pin-1mm to 22pin-0.5mm DSI cable (for Pi3/4) to connect the DSI port of the display to the 15PIN DSI port of the Raspberry Pi motherboard.
2. Use the 2pin connector to connect the power connector of the display to the 5V GND pin header of the Raspberry Pi motherboard.
3. Secure the Raspberry Pi to the display with M2.5 screws.
Note: Make sure that the DSI cable is connected in correct direction and 5V power is supplied through the GPIO pins.
Software Settings
Step 1: Insert a TF card installing Raspberry Pi OS into your raspberry pi, and then power on your Raspberry Pi.(Note: About how to install OS and control Raspberry Pi remotely, please visit: https://osoyoo.com/?p=60151)
Step 2: install script, open your PC terminal and run the following commends:
sudo apt update

# Clone the repository
git clone https://github.com/osoyoo/osoyoo-dsi-panel.git
cd osoyoo-dsi-panel

# Run direct installation script
sudo ./install-direct.sh
Note: The script will:
- Auto-detect your Pi model (Pi 3/4/5)
- Install dependencies
- Build and install the driver using DKMS
- Install device tree overlays
Step 3: configure and reboot
1) Edit config.txt
#If you are using Trixie OS, run following command:
sudo nano /boot/firmware/config.txt
#If you are using older OS, run following command:
sudo nano /boot/config.txt
2) Select one of these lines and add at the end of config.txt, then save the file
dtoverlay=osoyoo-panel-dsi-10inch,dsi0,4lane    # for 10.1" panel in dsi0 of Pi 5 or CM5

or
dtoverlay=osoyoo-panel-dsi-10inch,dsi1,4lane    # for 10.1" panel in dsi1 of Pi 5 or CM5

or
dtoverlay=osoyoo-panel-dsi-10inch   # for 10.1" panel  Pi 3/4 or CM3/4
3) Reboot your Raspberry Pi
sudo reboot

Adjust Rotation
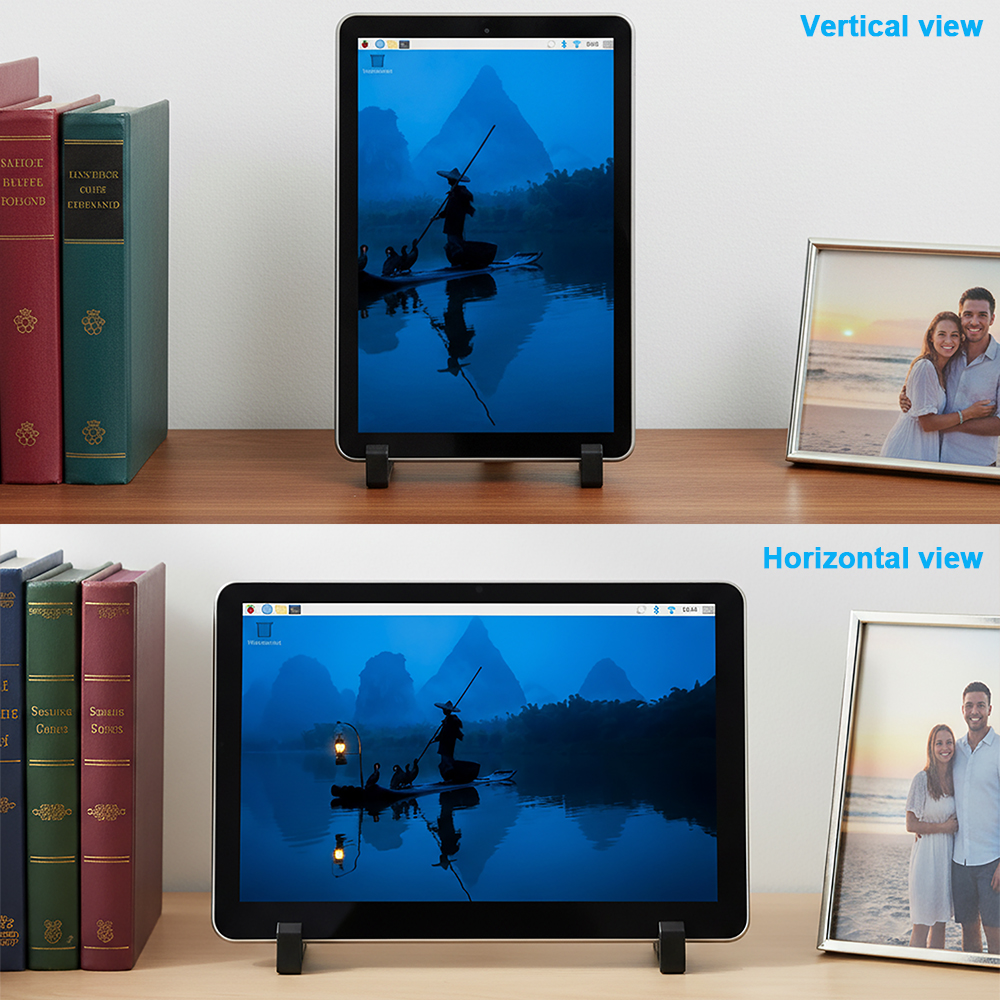
This screen support vertical view and horizontal view. Please follow the steps to change rotation:
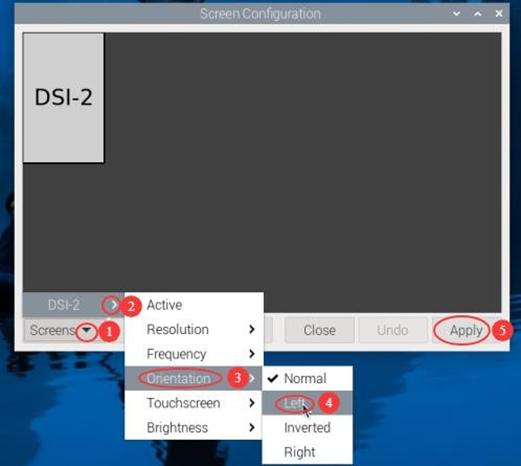
- Click “main menu” icon, then move to “Preferences” then to submenu “Screen Configuration”
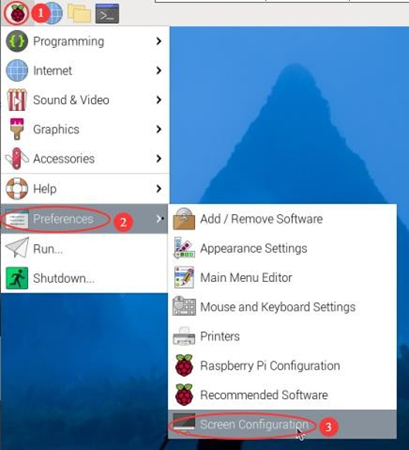
- In the pop window, click “Screens” thenmove to “DSI-2” (It’s different when you connect to different DSI port),then Orientation.Click the direction you need to rotate,and finally click Apply to complete the display and touch synchronous rotation.
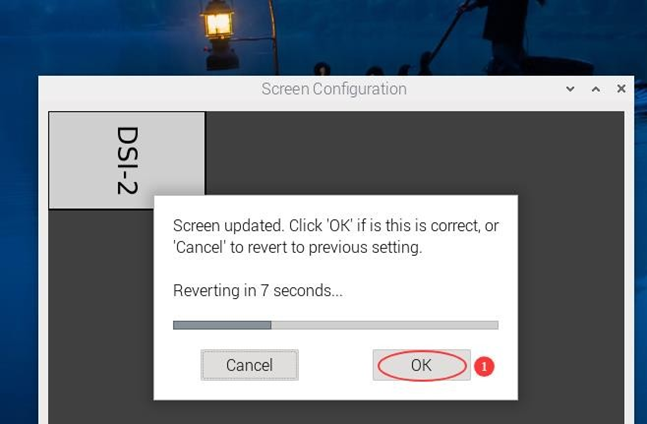
- click “OK” within 10 seconds to confirm your rotation
Adjusting Backlight Brightness
- 1. Open the “Screen Configuration” application;
- 2. Go to “Screen” -> “DSI-2” -> “Brightness”, check the backlight brightness you need to set, and finally click “Apply” to complete the backlight setting.


