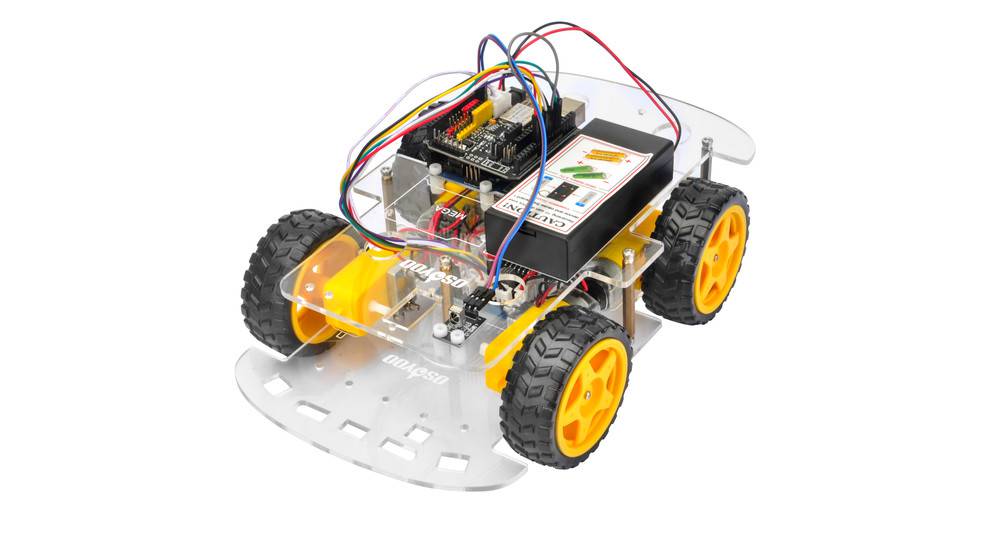
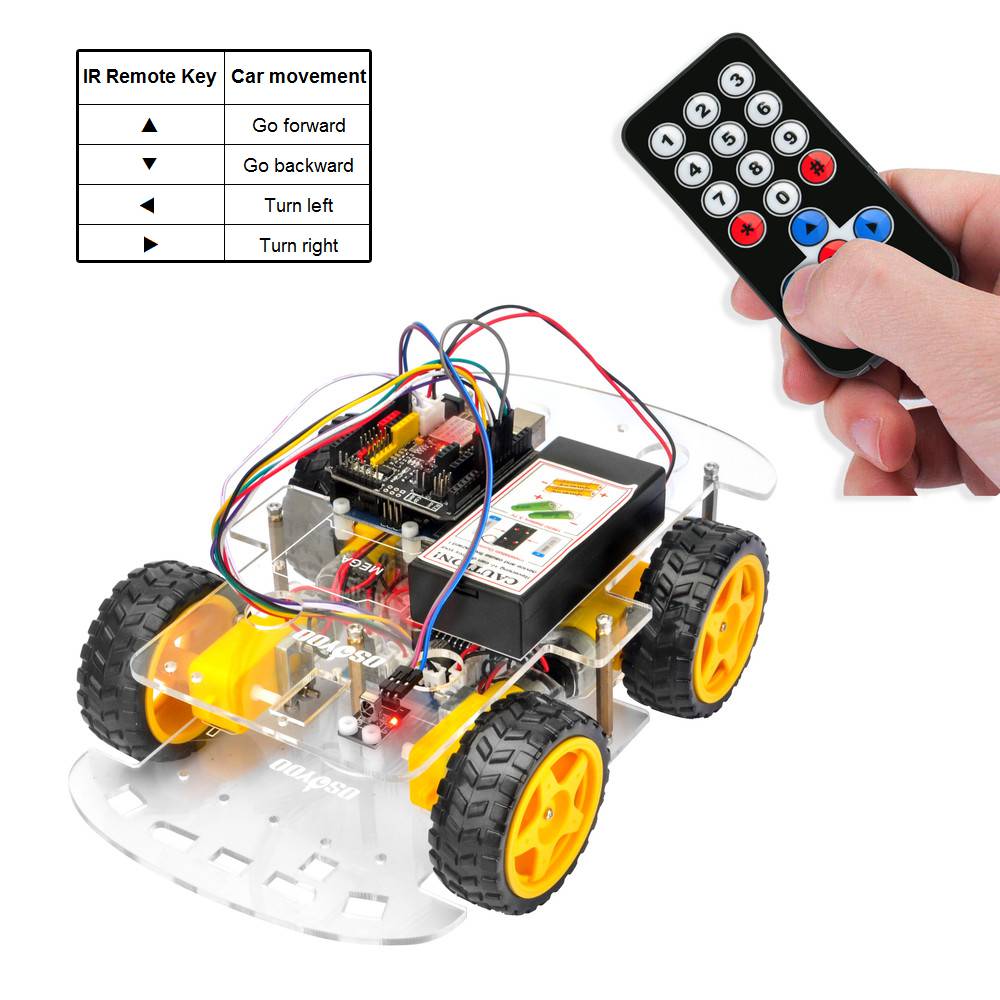
In this tutorial, we will use Osoyoo Smart DIY kit to make a simple remote controlled smart car. Once the car installation is completed, we will use a Infrared Remote to control the car movements including go forward, go back, left turn and right turn.
Parts and Devices:
No.
Picture
Device
Qty.
Accessories
Link
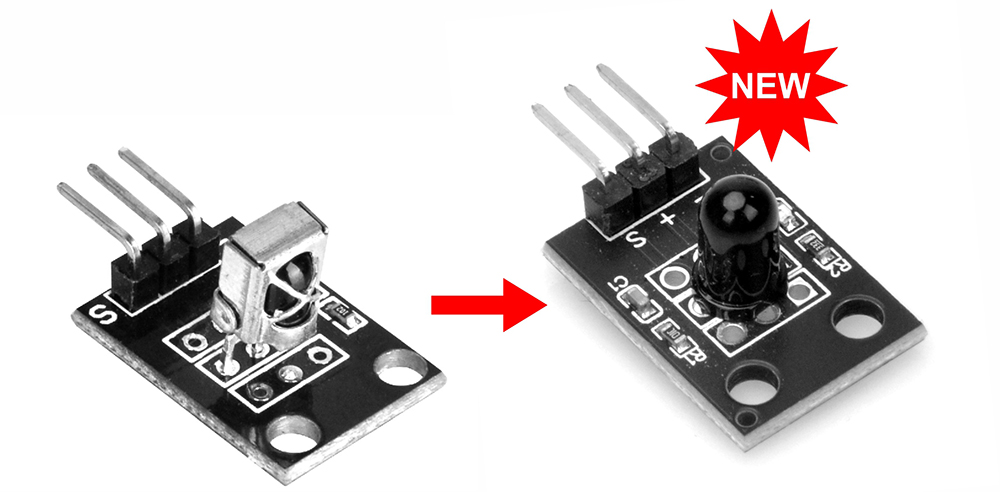
1
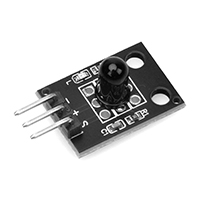
IR receiver
1
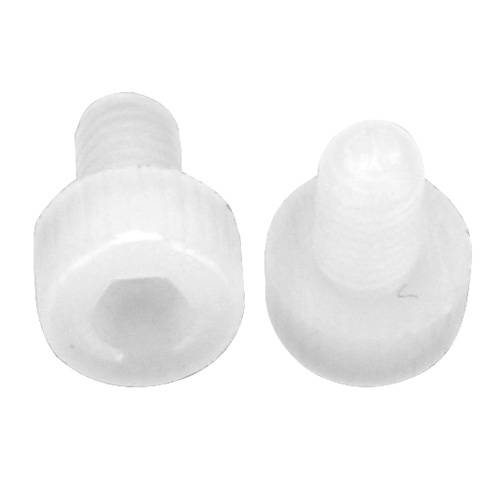
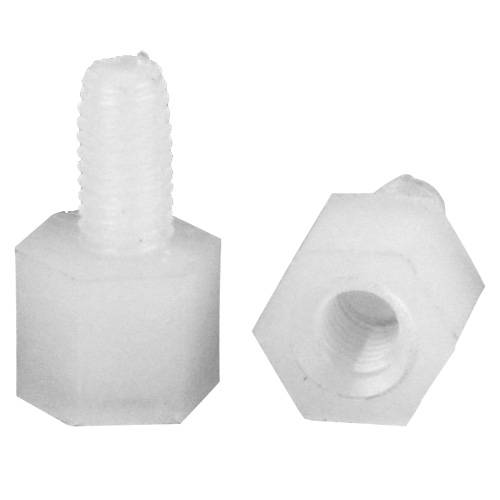
M3 Plastic Screw x 2
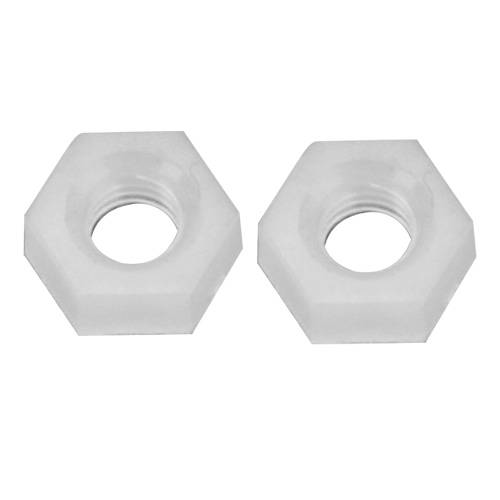
M3 Plastic Nut x 2
M3 Plastic Pillar x 2
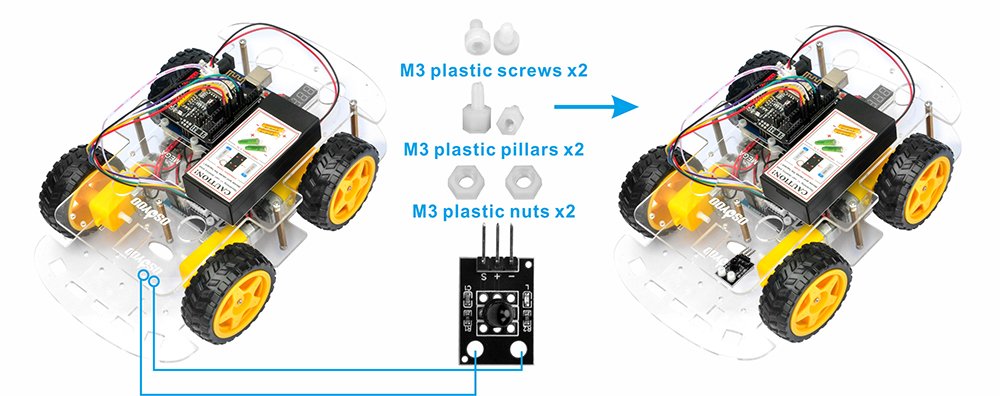
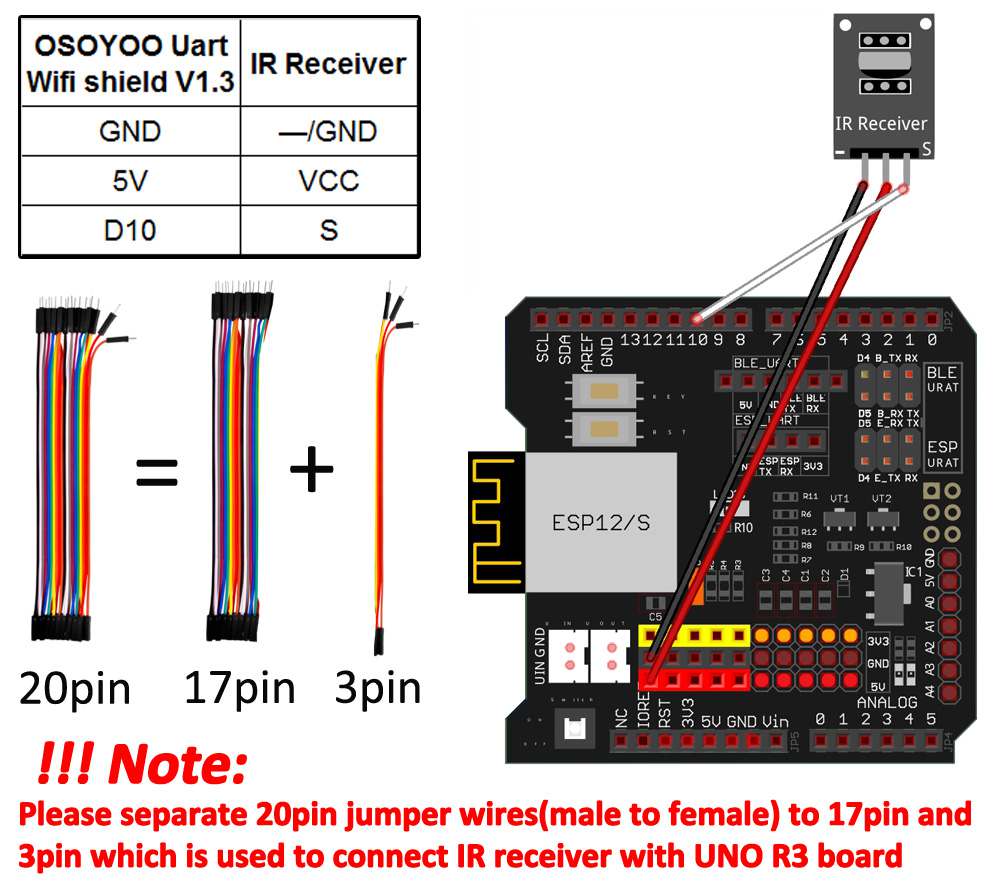
Hardware Installation: Step 1: Install the smart car basic frame work as per Smart Car Lesson 1 . If you have already completed installation in Lesson 1 , just keep it as is. Step 2: Add an IR receiver module onto the car. Install the IR receiver module with 2pcs M3 plastic screws, M3 plastic pillars and M3 plastic nuts at the front of upper chassis.
Step 3: Connect the S pin in IR receiver to D10 pin in your board, GND to GND, VCC to 5V, as the following photo (Remember : DO NOT remove any existing wires installed in Lesson 1 ) :
✅ This tutorial was written for the OSOYOO V2.1 Robot Car Kit
All 8 lessons, sample code, and circuit diagrams on this page are designed specifically for this kit.
Buy direct from OSOYOO Store and save 10% — plus get free shipping on orders over $70.
OSOYOO V2.1 Robot Car Kit
🔋 With battery & charger: $61.02 $67.80
— code ROBOTCAR10
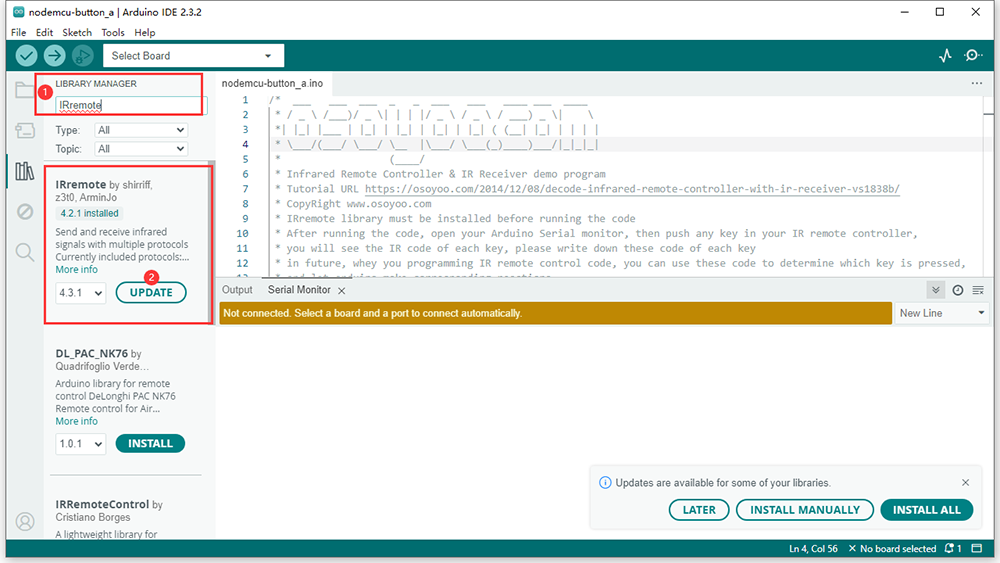
If you have a late version of Arduino IDE with a library IRRobotRemote, it may conflict and you may have to remove that library.Make sure to delete Arduino(root)/libraries/RobotIRremote. Where Arduino(root) refers to the install directory of Arduino. The library RobotIRremote has similar definitions to IRremote and causes errors.
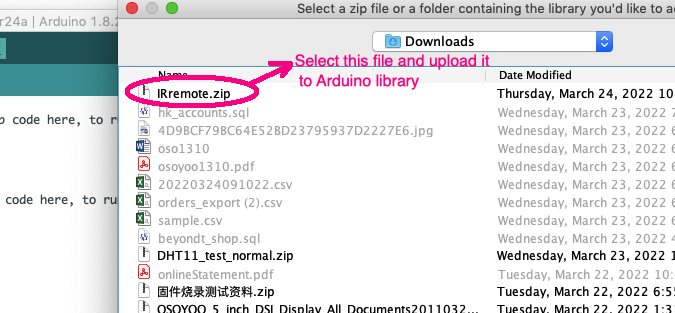
In the pop up window, go to your downloads folder, select the IRremote.zip file you downloaded just now.
Step 3: Download Lesson 2 IRremote smart car sample code from https://osoyoo.com/driver/v2car-lesson2.zip and unzip the download zip file smartcar-lesson2.zip, you will see a folder called smartcar-lesson2.
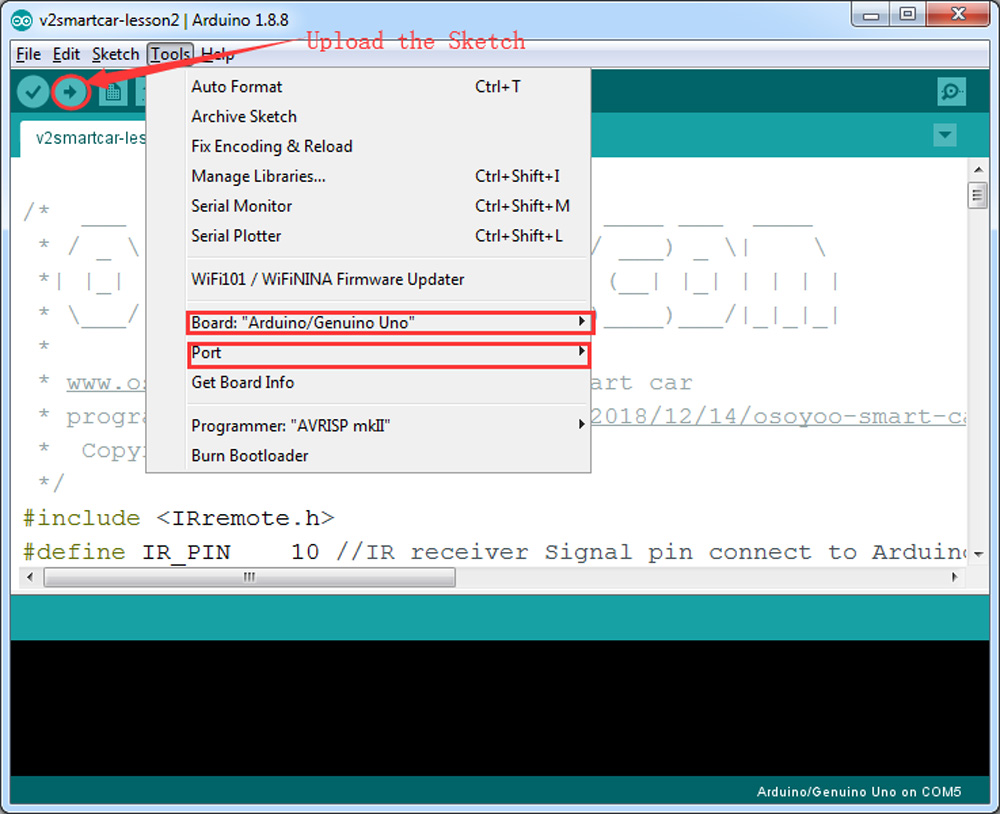
Step 4: Connect your board to PC with USB cable, Open IDE -> click file -> click Open -> choose code “smartcar-lesson2.ino” in smartcar-lesson2 folder, load the code into your board. Step 5: Choose corresponding board and port for your project, upload the sketch to the board.
Testing:
Press IR controller keys to control the car movements as per following instruction table:
Note:
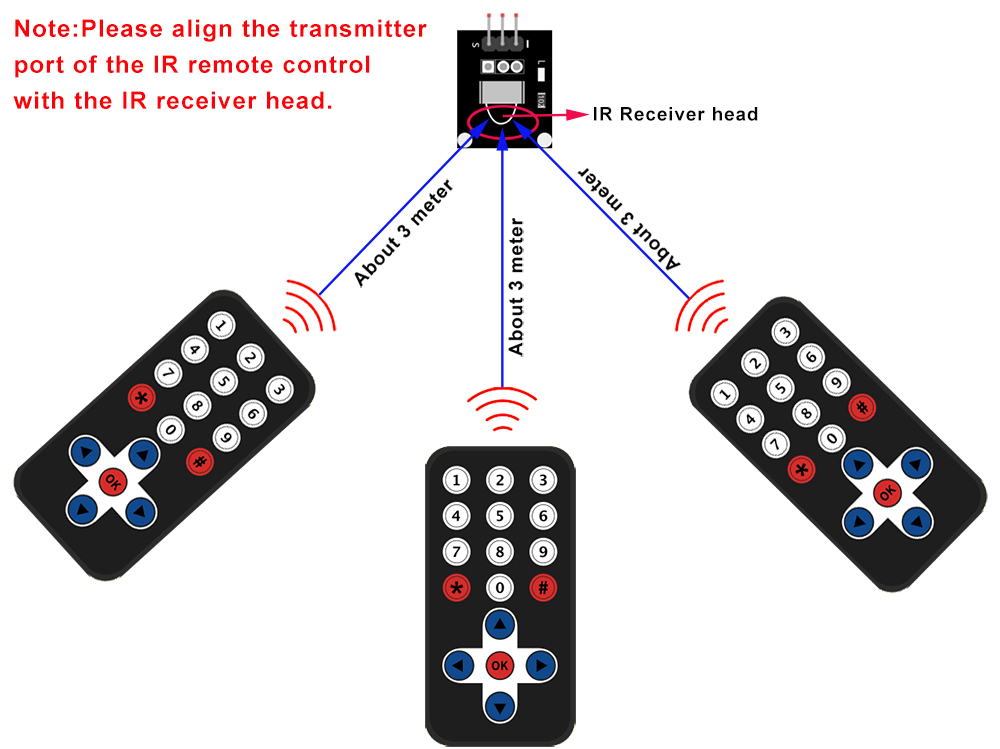
1) Please try to align the transmitter port of the IR remote control with the IR receiver head as the picture in the attachment.
2) Please press remote control gently and at regular intervals
Trouble shooting:
Some user found that this IR remote does not work. The reason might be the IR remote sends different button code which does not match our sample code. In order to solve this problem. Please take following steps: Step A) Get the IR code of each button in your IR remote. https://osoyoo.com/download/driver/irdemo.zip
upload above sketch into your board and open the serial monitor in your upper-right corner.
press the ◄ ► ▲ ▼ “OK” button in your remote, you will see their IR code as following picture:
Write down the IR code of your control buttons ◄ ► ▲ ▼ “OK” button,
STEP B)replace the IR code in lesson 2 sketch file:
Open your Lesson 2 code again, then you will see following lines define the IR CODE of each button:
#define IR_ADVANCE 24 //code from IR controller “▲” button
#define IR_BACK 82 //code from IR controller “▼” button
#define IR_RIGHT 90 //code from IR controller “>” button
#define IR_LEFT 8 //code from IR controller “<” button
#define IR_STOP 28 //code from IR controller “OK” button
#define IR_turnsmallleft 13 //code from IR controller “#” button
Please change the value of each button in above lines to match the code from Step A). If you don’t know how to change, just Send Email to us and give us the code of each button from Step A), I can help you to change the code and email new sketch file to you.
Above method can also allow you to use other IR sending device (i.e TV remote, DVD remote, air conditioner remote etc) to control the car. Just use Step A) to get the key code of your remote and change the sketch file in Step B), it will work.
Note: 1) Please try to align the transmitter port of the IR remote control with the IR receiver head as the picture in the attachment. 2) Please press remote control gently and at regular intervals
🤖 Start building your V2.1 Robot Car today
Official kit for this tutorial · WiFi + Bluetooth + 8 project lessons included
Use exclusive reader code ROBOTCAR10 for 10% off — buy direct and save vs Amazon
Completed Lesson 1 with no problems.
Completed Lesson 2 but I have a problem. The IR controller does not work. I have used the troubleshooter
but got no results on the serial printer. Is there any other way to test the IR receiver and IR transmitter controller?
I have gone back to go over the lessons again. I have found that I had missed out part of lesson2. I have now carried out the changing of the remote control codes but now have a problem. The sketch will not compile. I will send a copy of the sketch to your email.
Hi whom may concern, each time I press the left, right, forward and backward button, it return different codes. I don’t know what mistake I have done here. Thanks
Hi
My remote doesn’t work and I tried taking Step A to find the code for each button, the sketch was uploaded successfully, however, the serial monitor doesn’t show anything when I press buttons.
And FYI when I pressed the button, the IR module doesn’t light up like what was shown in the video( I believe a different IR module was used between the video and what is shipped now?)
when driving backwards, all wheels go backwards, and when forward, only two right wheels go forward.
when turning right, all wheels work, and when turning left, only the right wheels work
We bought your Model N0. 2019005000 thru Amazon. We are doing lesson 2. When we are pressing remote buttons the car unit is going in incorrect directions. None of the direction buttons are activating forward advance though. We uploaded the troubleshooting sketch and found that codes on the serial monitor match the codes in your lesson 2 however the car is not advancing correctly except for Right button. For example Forward button right movement(sometimes no movement), left button car going backwards, right button going backwards left, back button going backwards left. Wondering if there is an issue with the IR receiver or some other. Thanks
Making corrections to the above as my front and back of the car was mixed up. Left Remote button is activating forward move; Forward button is activating rotating right in the same place; right button is activating going back left; back button is activating going forward left. Thanks
I Have Question I completed the first part but the second part i can’t understand i did the IF IR remote doesn’t work I did that part to but I don’t think the IR REMOTE doesn’t work
I am repeating Osoyoo Smart Car lessons. Lesson is OK. Lesson has problem the same as last time. No response from Remote Controller. I have tried to get the IR codes of the Controller buttons but get no response from irdemo.zip at the serial monitor screen. I have installed the IRremote code into the library. I have replaced the battery in the Controller and also replaced the IR receiver.
Any suggestions.
The reason there has been a gap of four years since I last worked with your robot is I was taking care of my wife who had Alzheimer’s. My wife died six months ago and I have returned to this to keep my mind occupied.
Regarding Lesson 2 on the IR remote control: since Arduino has updated many of its libraries in recent years, the old IR control code may no longer be well-supported. I suggest you skip Lesson 2 and move on to the next projects. IR control is a bit outdated now, and you will find much better remote control methods in Lesson 6 (WiFi control) and Lesson 7 (Bluetooth control).


Completed Lesson 1 with no problems.
Completed Lesson 2 but I have a problem. The IR controller does not work. I have used the troubleshooter
but got no results on the serial printer. Is there any other way to test the IR receiver and IR transmitter controller?
Is there any error in the upload window?
Do you remove the plastic sheet in IR remote controller?
You can follow the tutorial to test IR receiver and IR transmitter controller:
https://osoyoo.com/2018/08/29/ir-remote-receiver-module-and-controller/
https://osoyoo.com/2017/11/05/infrared/
Everything is OK now and I have completed Lesson 2.
Many Thanks for your help.
I have gone back to go over the lessons again. I have found that I had missed out part of lesson2. I have now carried out the changing of the remote control codes but now have a problem. The sketch will not compile. I will send a copy of the sketch to your email.
Please send the sketch to my email: [email protected]
Hi whom may concern, each time I press the left, right, forward and backward button, it return different codes. I don’t know what mistake I have done here. Thanks
Please provide your order ID and full address to my email address: [email protected].
I’ll send the IR receiver as the replacement to you.
Hi
My remote doesn’t work and I tried taking Step A to find the code for each button, the sketch was uploaded successfully, however, the serial monitor doesn’t show anything when I press buttons.
And FYI when I pressed the button, the IR module doesn’t light up like what was shown in the video( I believe a different IR module was used between the video and what is shipped now?)
My robot has problem
when driving backwards, all wheels go backwards, and when forward, only two right wheels go forward.
when turning right, all wheels work, and when turning left, only the right wheels work
what should i check?
Hello,
We bought your Model N0. 2019005000 thru Amazon. We are doing lesson 2. When we are pressing remote buttons the car unit is going in incorrect directions. None of the direction buttons are activating forward advance though. We uploaded the troubleshooting sketch and found that codes on the serial monitor match the codes in your lesson 2 however the car is not advancing correctly except for Right button. For example Forward button right movement(sometimes no movement), left button car going backwards, right button going backwards left, back button going backwards left. Wondering if there is an issue with the IR receiver or some other. Thanks
Making corrections to the above as my front and back of the car was mixed up. Left Remote button is activating forward move; Forward button is activating rotating right in the same place; right button is activating going back left; back button is activating going forward left. Thanks
I Have Question I completed the first part but the second part i can’t understand i did the IF IR remote doesn’t work I did that part to but I don’t think the IR REMOTE doesn’t work
My IR receiver is not working at all
When i try to use the serial moniter all buttons return the same code, What do i do???
when you setup the cords you have make sure s is in d10 slot
I am repeating Osoyoo Smart Car lessons. Lesson is OK. Lesson has problem the same as last time. No response from Remote Controller. I have tried to get the IR codes of the Controller buttons but get no response from irdemo.zip at the serial monitor screen. I have installed the IRremote code into the library. I have replaced the battery in the Controller and also replaced the IR receiver.
Any suggestions.
The reason there has been a gap of four years since I last worked with your robot is I was taking care of my wife who had Alzheimer’s. My wife died six months ago and I have returned to this to keep my mind occupied.
I am so sorry to hear that.
Regarding Lesson 2 on the IR remote control: since Arduino has updated many of its libraries in recent years, the old IR control code may no longer be well-supported. I suggest you skip Lesson 2 and move on to the next projects. IR control is a bit outdated now, and you will find much better remote control methods in Lesson 6 (WiFi control) and Lesson 7 (Bluetooth control).
Many thanks, I shall follow your advice.
Regards, James Robb.