The OSOYOO Magic I/O Shield for Arduino is a powerful board for the beginners. With this Magic board, we can easily connect various sensors and actuators much easier than before. In addition, this extension board has a build-in motor driver chip which allows us to control movements of two pairs of electric motors.
In this lesson, we will show how to assemble a simple robot car and use Mixly to program its movement.
OSOYOO Magic I/O Shield for Arduino
OSOYOO Basic Board for Arduino
Wheels
Acrylic Chassis
Motor Box
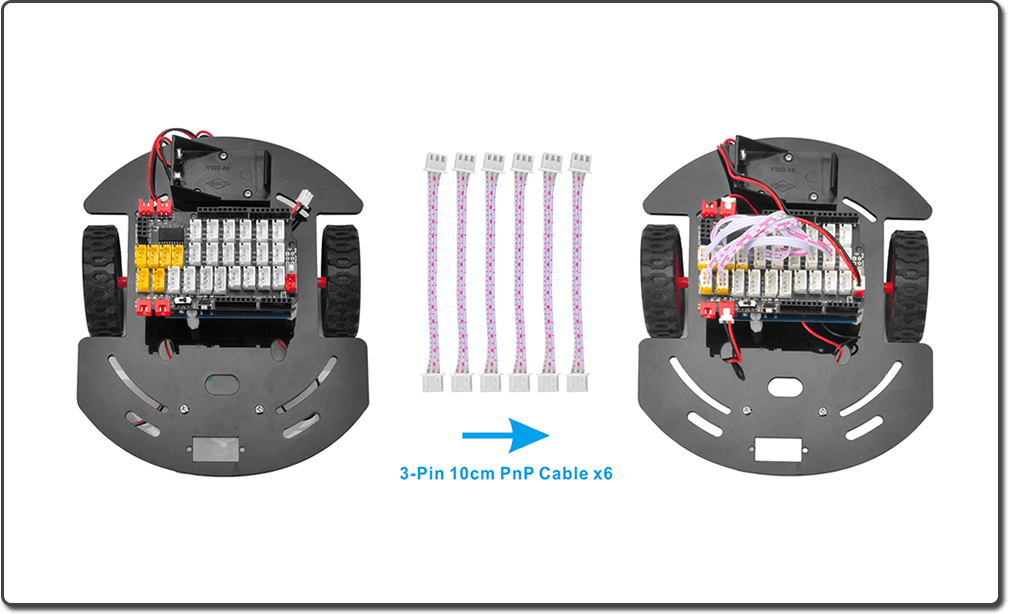
OSOYOO 3-Pin PNP Cable
OSOYOO 4-Pin PNP Cable
USB Cable
PC
Notice:
Not much is needed for this lesson, Make sure you have a good quality syncing cable,do not pick a ‘charge only’ USB cable.
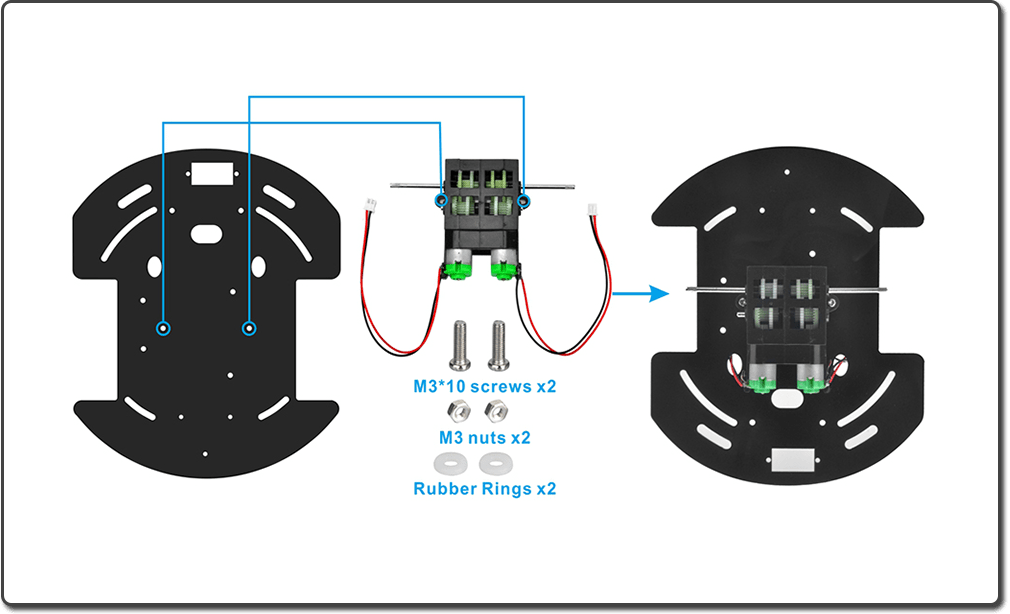
1. Remove the protective film from the chassis, then install the motor under the chassis with M3 screws,nuts and rubber rings as follow: (Please install the rubber rings on the chassis)
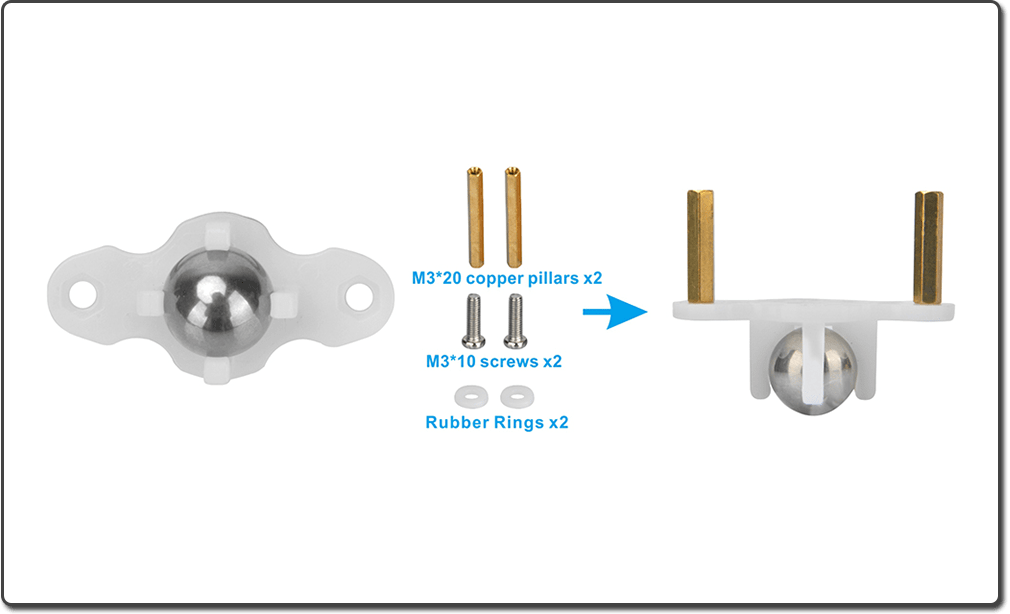
2. Install the universal wheel with the M3 screws, copper pillars and rubber rings:
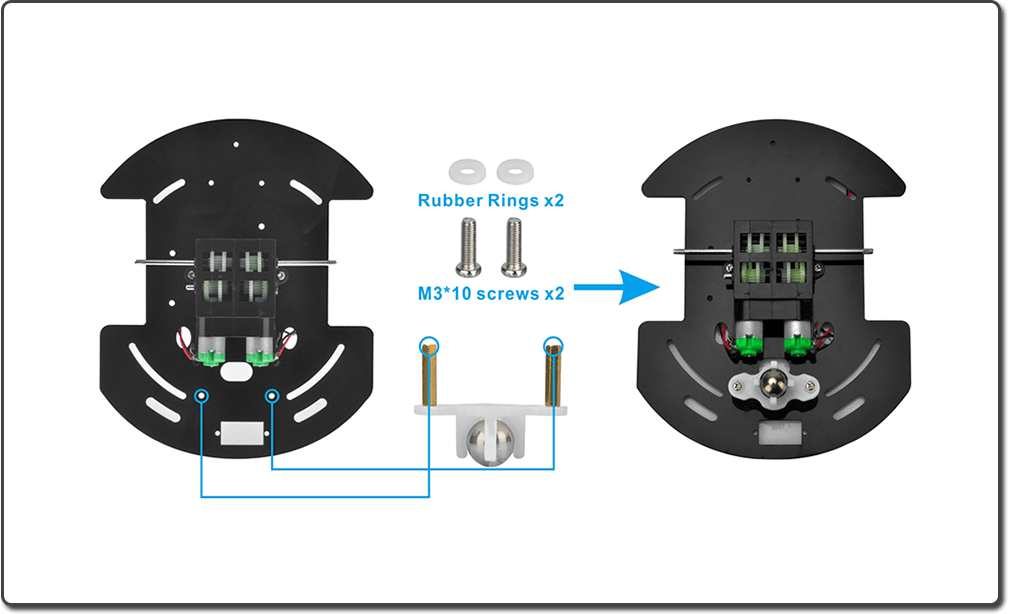
3. Install the universal wheel under the chassis with the M3 screws:
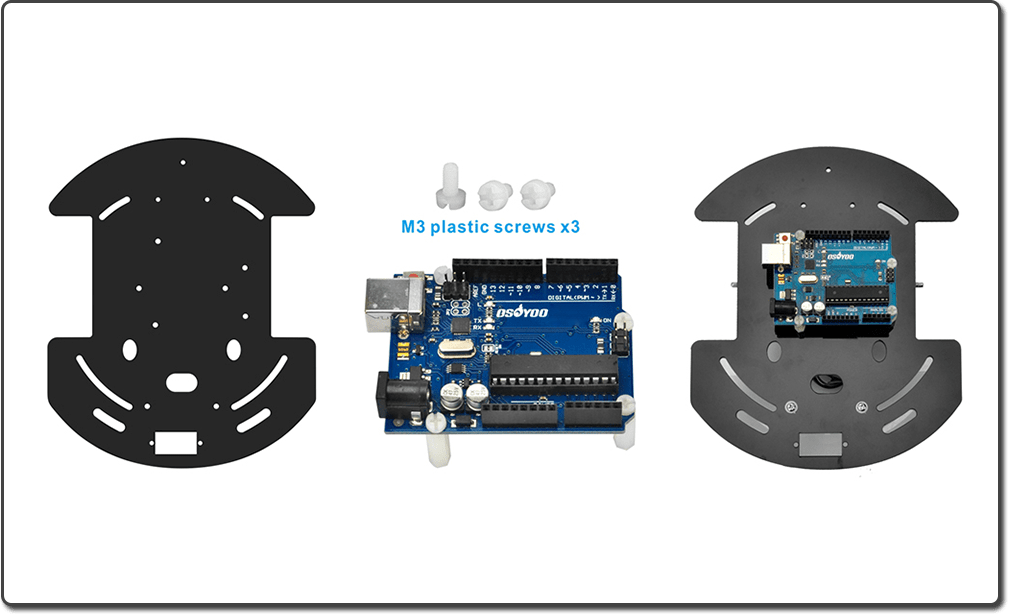
4. Install the OSOYOO Basic Board for Arduino with M3 plastic screws and pillars:
5. Install OSOYOO UNO Board on the chassis with M3 plastic screws:
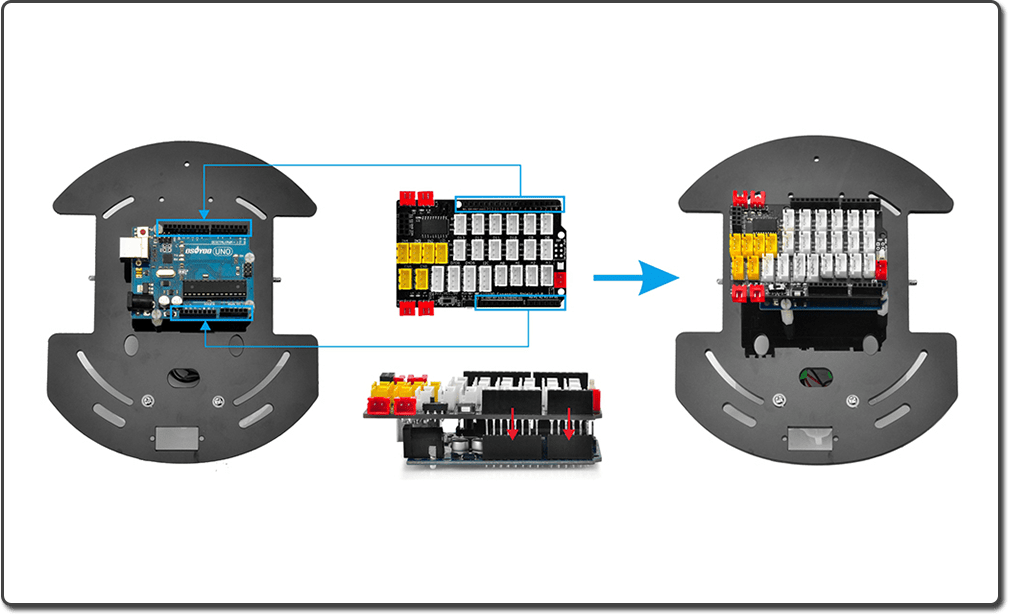
6. Plug OSOYOO Magic I/O Shield v1.1 into OSOYOO Basic Board for Arduino as the picture show:
7. Install the wheels:
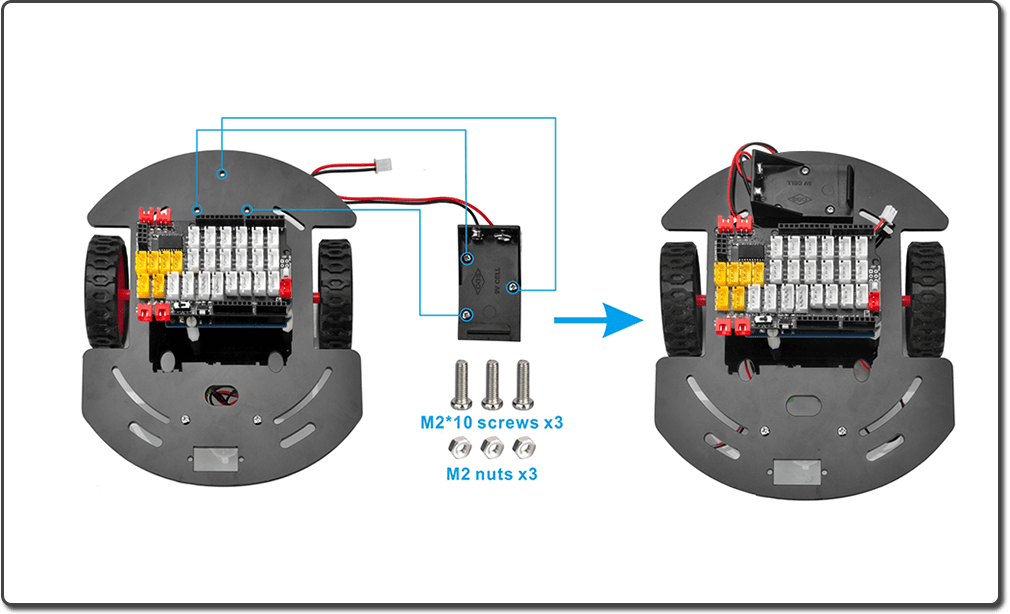
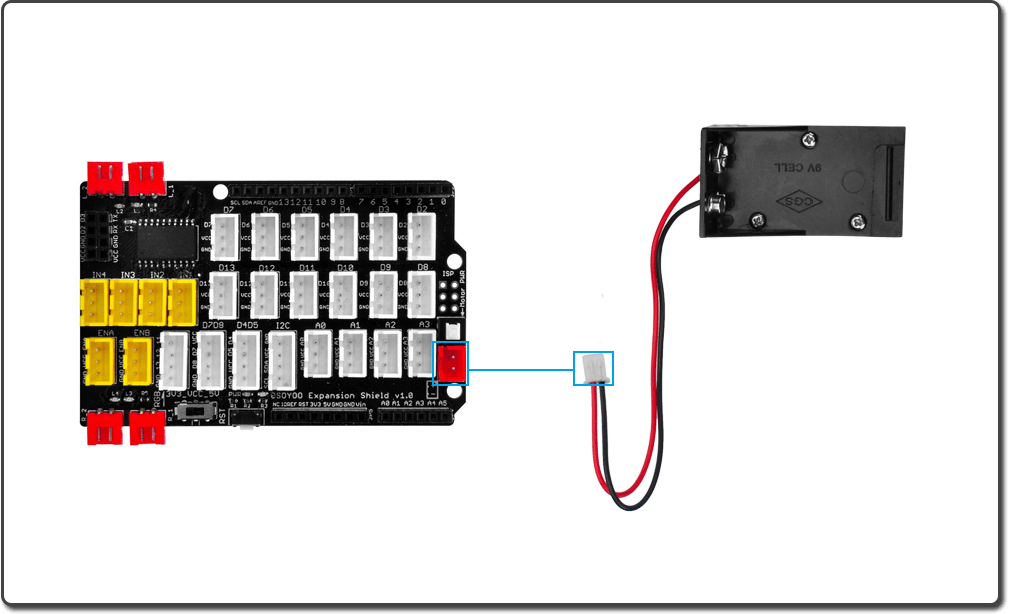
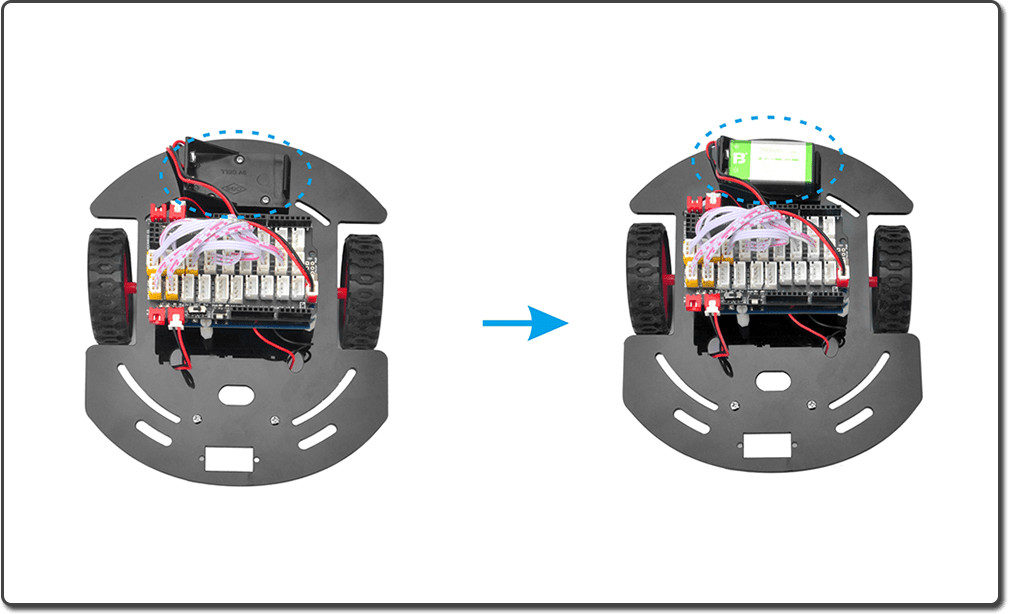
8. Install the battery box on the chassis with M2 screws and nuts:
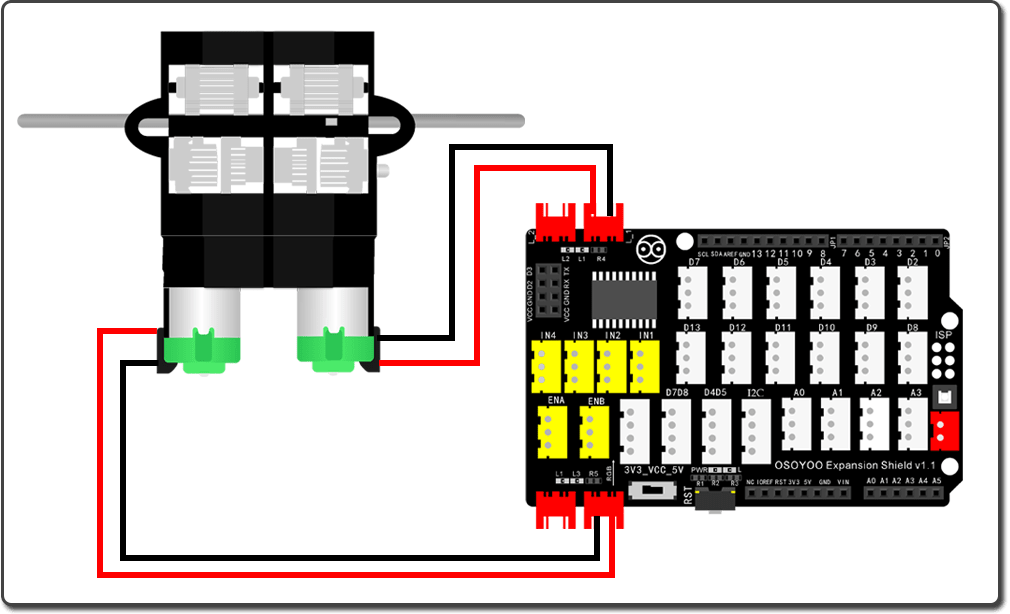
9. Connect the components:
Left Motor – L1
Right Motor – R1
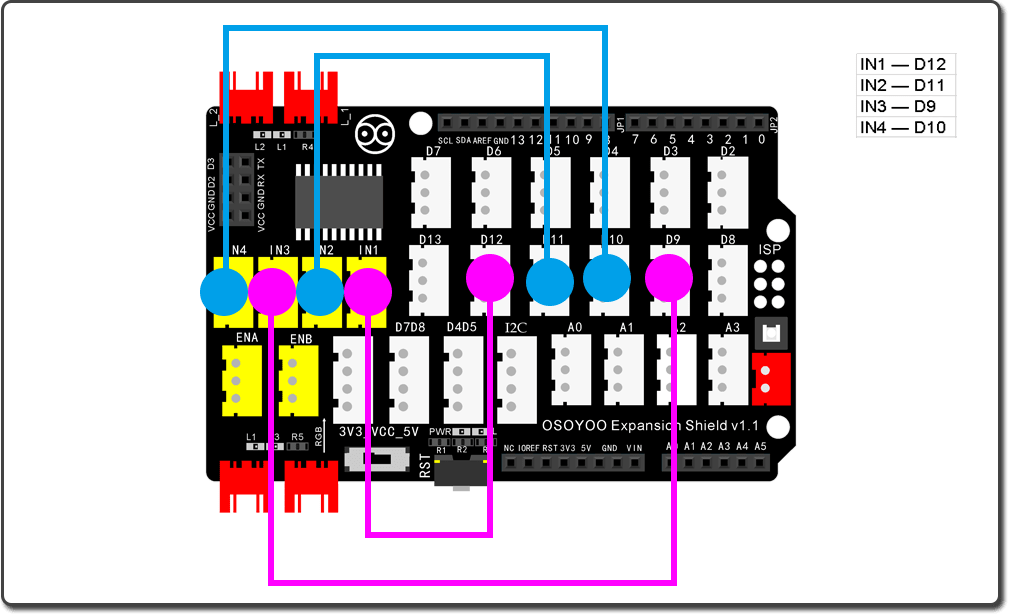
IN1 —D12 //K1、K2 motor direction
IN2 —D11 //K1、K2 motor direction
IN3 —D9 //K3、K4 motor direction
IN4 —D10 //K3、K4 motor direction
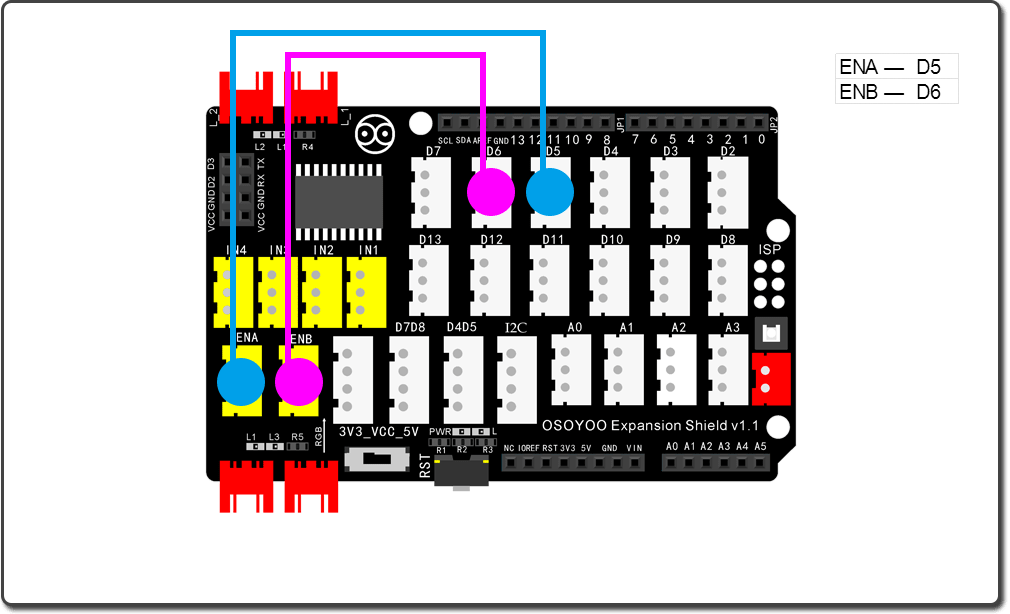
ENA —D5 // Needs to be a PWM pin to be able to control motor speed ENA
ENB —D6 // Needs to be a PWM pin to be able to control motor speed ENB
Notice: Shut off your battery or Unplug your power adapter when upload sketch code to OSOYOO Basic Board for Arduino.
After above operations are completed, connect the OSOYOO Basic Board for Arduino to your computer using the USB cable. The green power LED (labelled PWR) should go on.
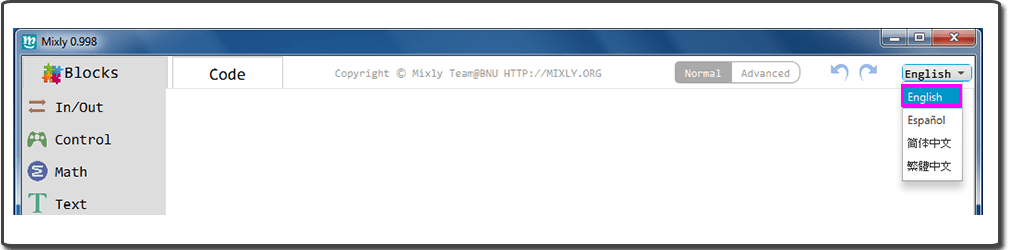
Open the Graphical Programming softwareMixly and follow the next operations:
If Mixly is not English, you should change the language first:
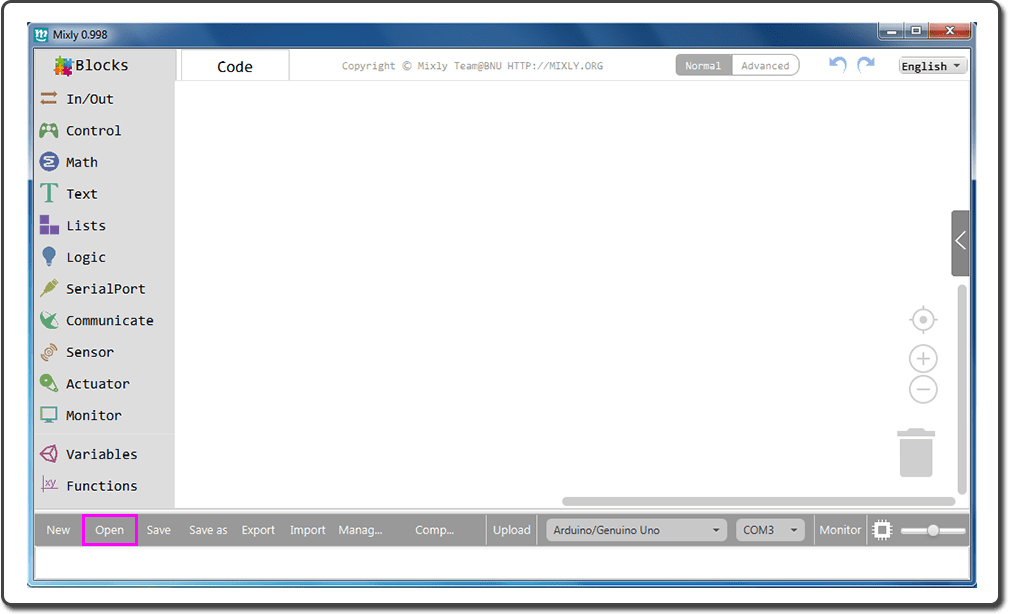
Click “Open” to choose the code you download:
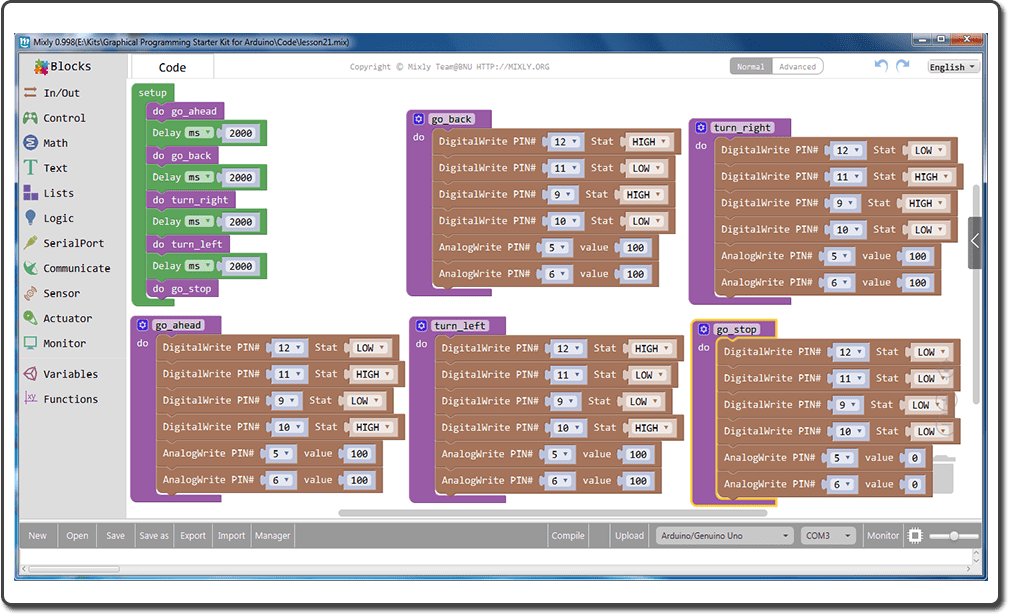
The Mixly will show as follow:
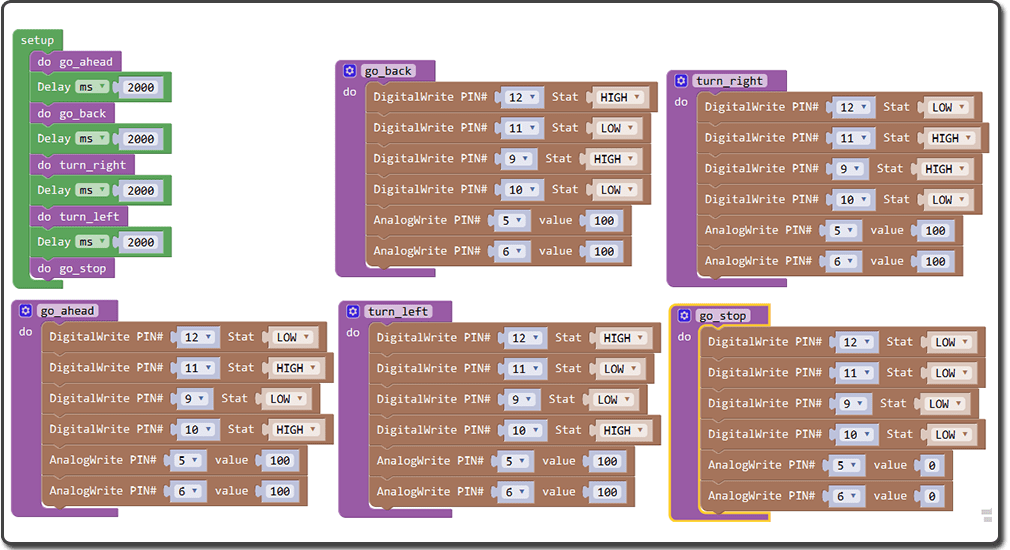
The whole program blocks are as following:
After above operations are completed, do as follows:
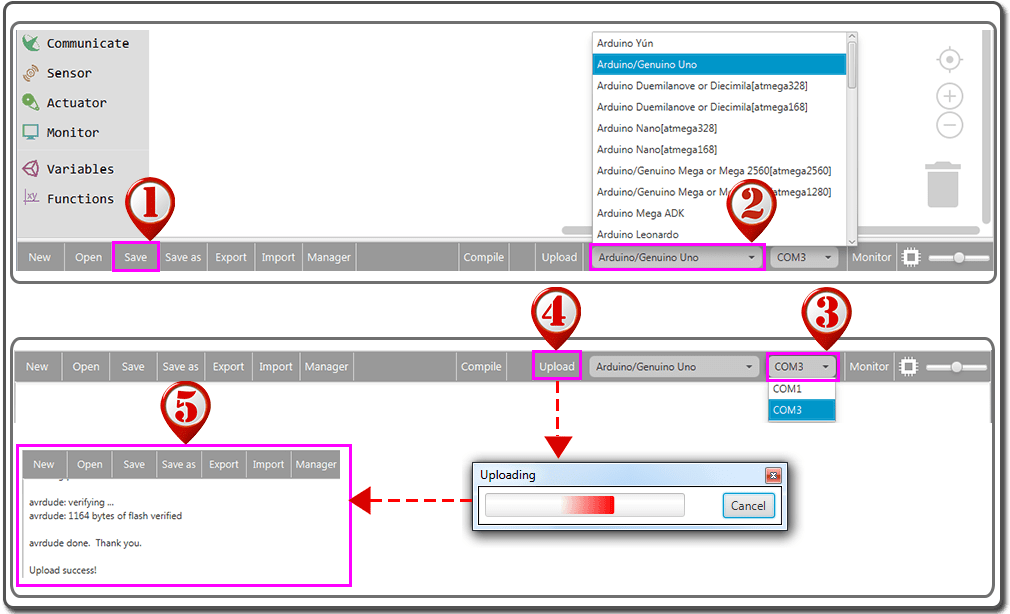
Click Save after programming is done.
Select the board type and serial port before uploading. For instance OSOYOO Basic Board for Arduino, just select Arduino/Genuino Uno: if you use a Mega2560, select Arduino/Genuino Mega or Mega2560.
Select the serial device of the OSOYOO Basic Board for Arduino from the COM menu. This is likely to be COM3 or higher (COM1 and COM2 are usually reserved for hardware serial ports). To find out, you can disconnect your OSOYOO Basic Board for Arduino and re-open the menu; the entry that disappears should be the OSOYOO Basic Board for Arduino. Reconnect the board and select that serial port.
Next,upload the code. If the uploading fails, check and correct the code according to the prompts.
Finally, the status will change to ‘Upload success!’.
Disconnect OSOYOO Basic Board for Arduino from PC, put a 9V battery into battery pox(make sure polar direction is correct, otherwise it can destroy your device and cause fire hazard).
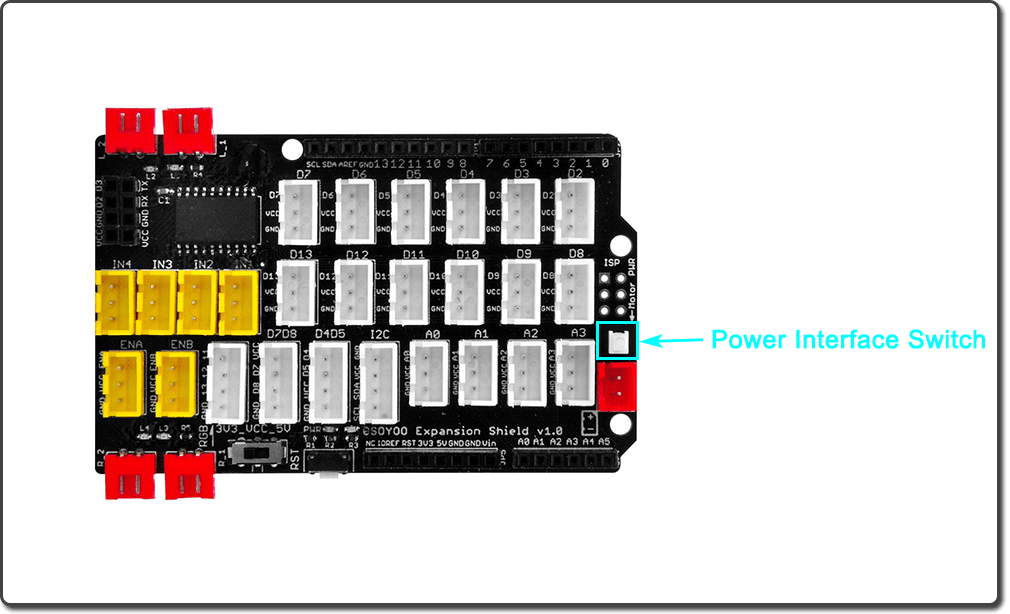
Put the car on the ground, press the Motor Power switch on the OSOYOO Magic I/O Shield for Arduino, the car should go forward 2 seconds, then go backward 2 seconds, then right turn for 2 seconds, then left turn for 2 seconds, then stop.
If the car does not move as per above mentioned result, you should check your wire connection, battery voltage(must over 7.2v).