


| Buy from US |
Buy from UK |
Buy from DE |
Buy from IT |
Buy from FR |
Buy from ES |
Buy from JP |
 |
 |
 |
 |
 |
 |
 |

In this lesson, we will learn how to use a sound sensor to detect environment sound(noise) level. When sound value reaches a certain level, a LED will turn on.


- OSOYOO UNO Board (Fully compatible with Arduino UNO rev.3) x 1
- OSOYOO Magic I/O Shield for Arduino x 1
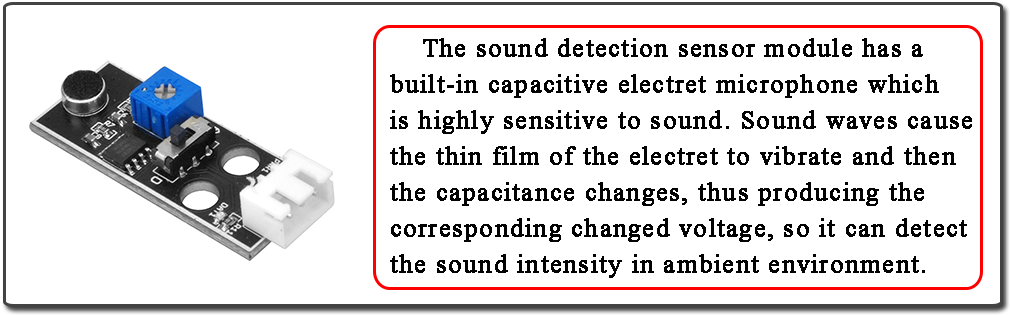
- OSOYOO Sound Detection Sensor x 1
- OSOYOO LED module x 1
- OSOYOO 3-Pin PnP cable x2
- USB Cable x 1
- PC x 1

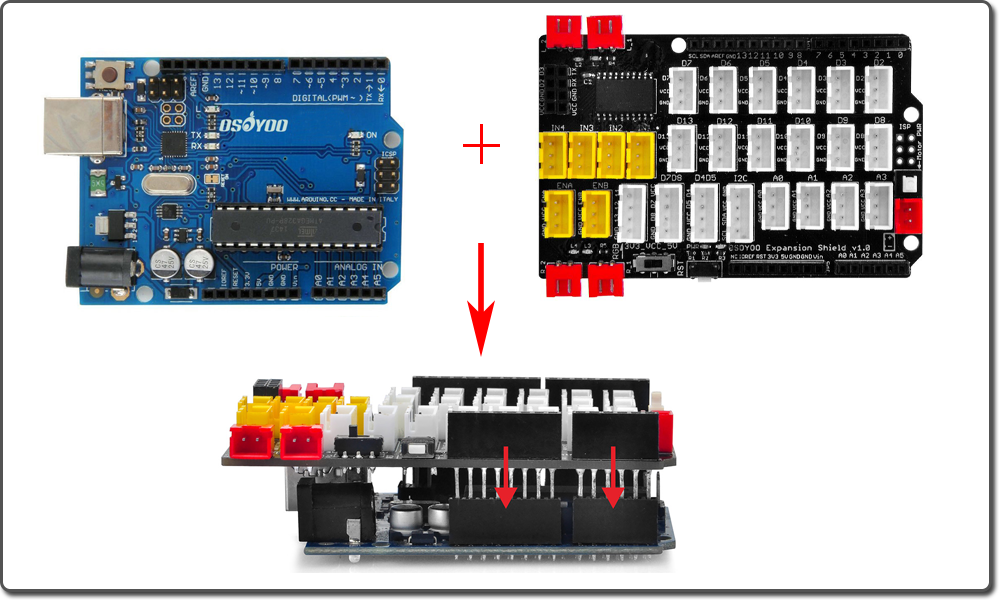
Firstly, please plug Osoyoo Magic I/O shield into UNO board as following:
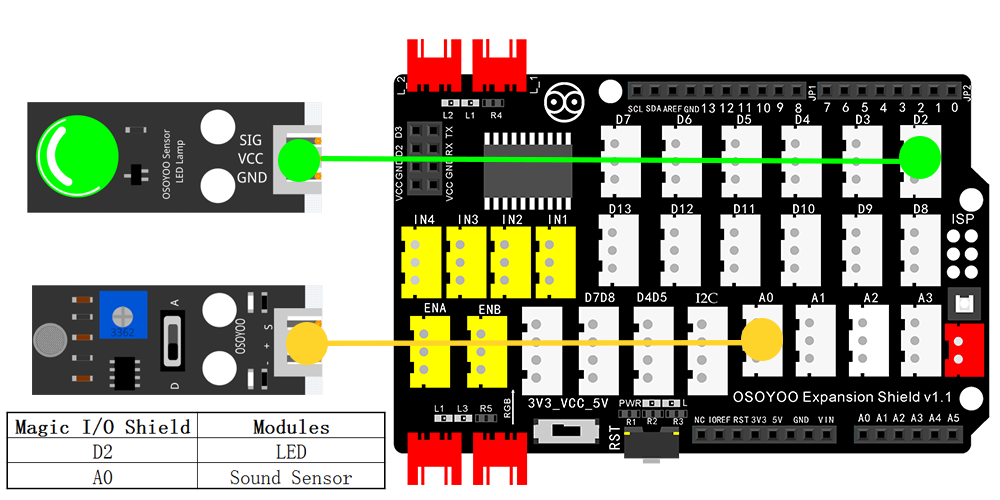
Then plug the sound sensor module to A0 port of the Magic I/O shield with a 3-pin PNP cable as following:

Step 1) If you haven’t install mBlock software in your PC, please read Lesson 1, download and install the software.
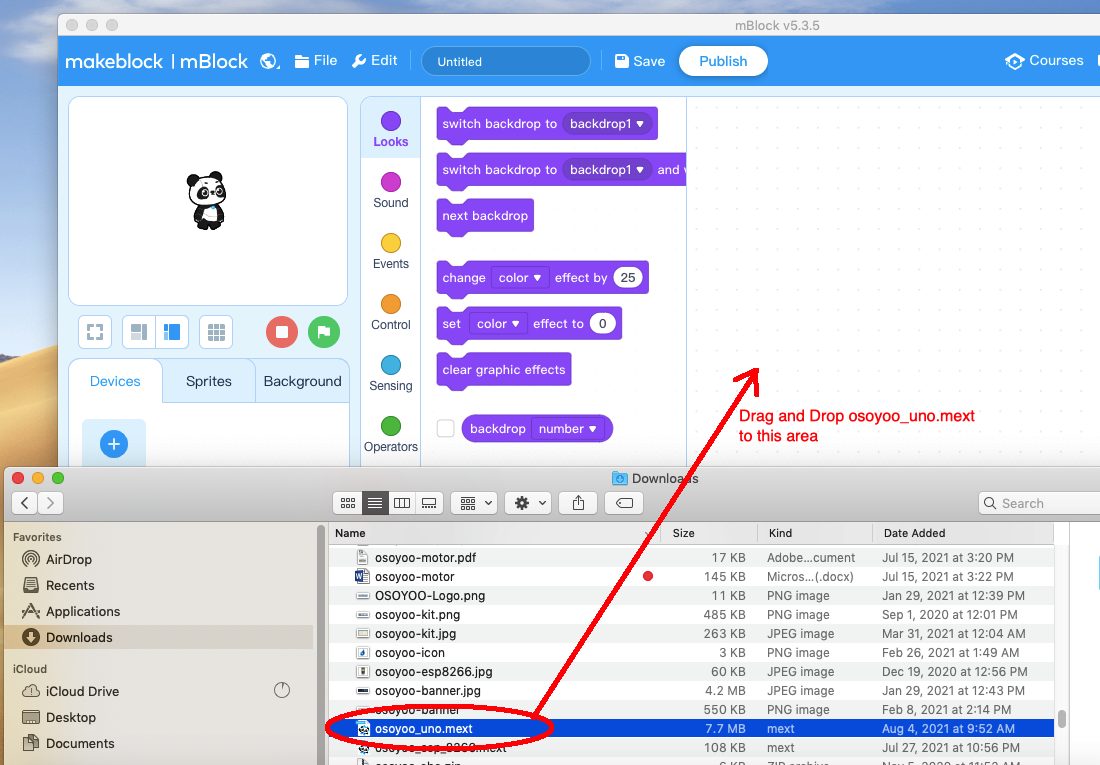
Step 2) Run the mBlock PC software by double click the lovely Panda icon. Drag and Drop osoyoo_uno_mext file(downloaded in Step 1) to mBlock software as following:
Now you will see a new device firmware in mBlock, see following picture:
Now mBlock software and OSOYOO_UNO device firmware have been successfully installed in our PC!
Now we will show you how to use blocks to turn above idea into reality.
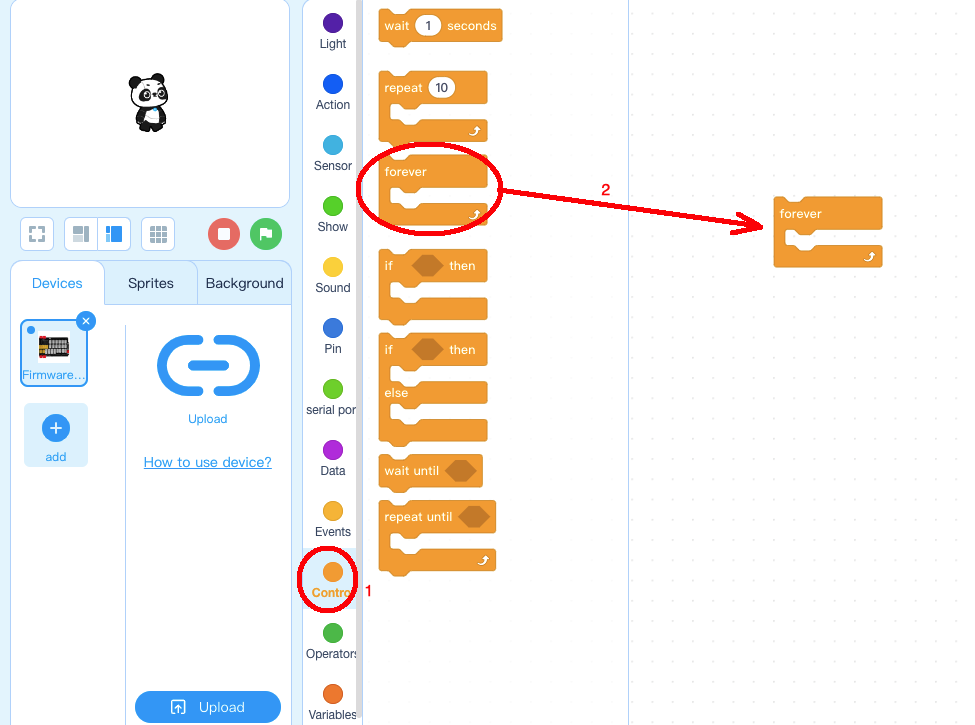
Step 1: Click Control, then Drag and drop Forever block to programming area as following:
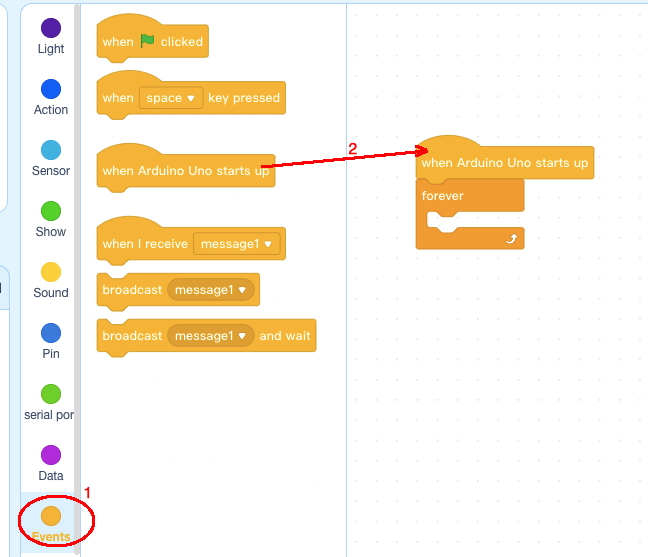
Step 2: Click Events, add when Arduino Uno starts up block to the top:
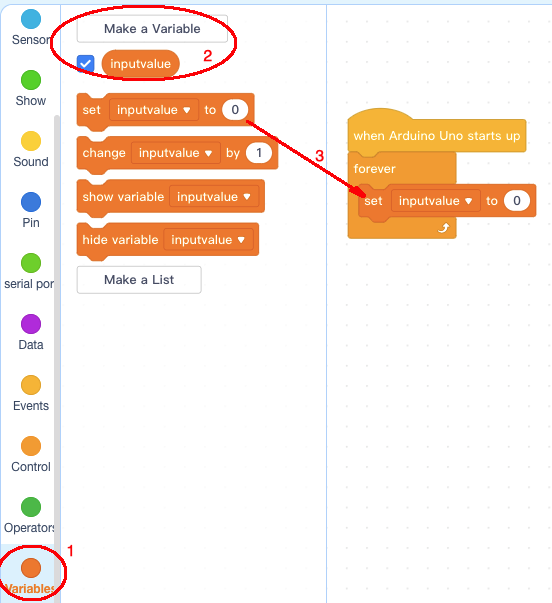
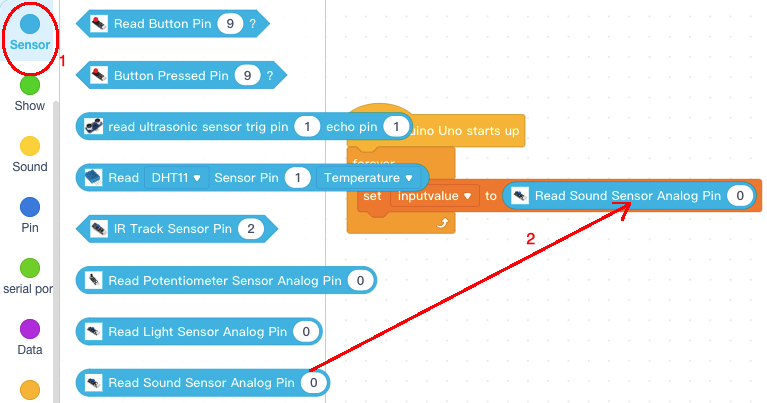
Step 3: Click Variable, make a variable and give it a name inputvalue, add set inputvalue to 0 block inside forever block:
Step 4: Click Sensor, add Read Sound Sensor block inside set inputvalue to block:
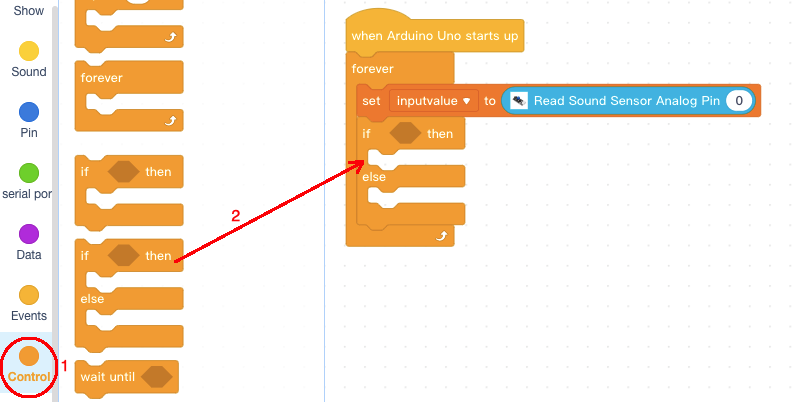
Step 5: Click Control category, add if else then block below set inputvalue to block:
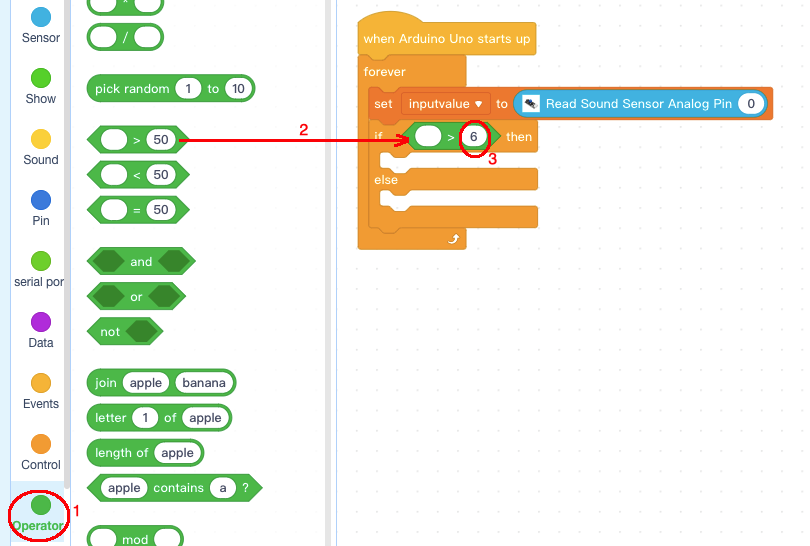
Step 6: Click Operator category, add > 50 block inside if block, then change > 50 to > 6:
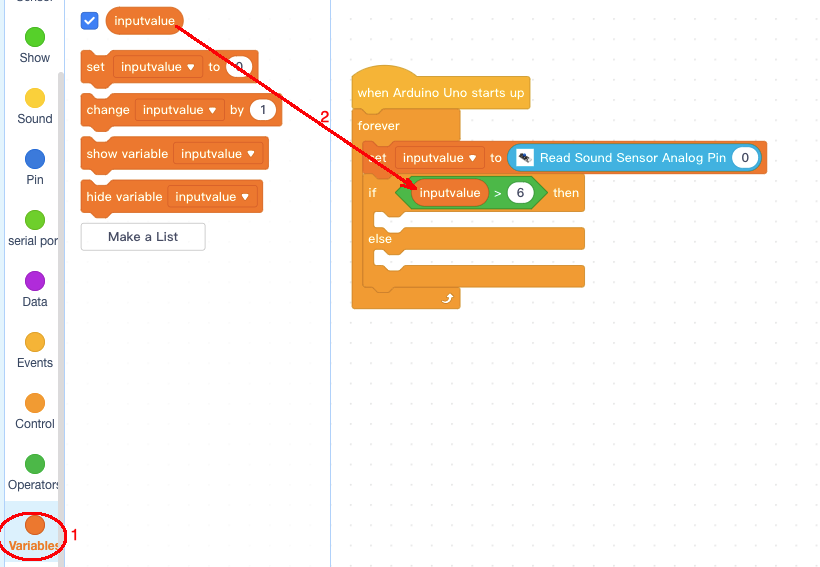
Step 7: Click Variable category, add inputvalue block inside if else then block first condition field:
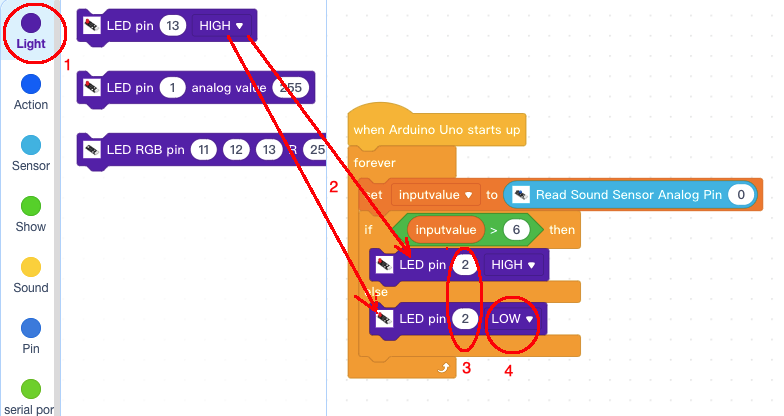
Step 8: Click Light category, add 2 pcs LED pin 13 HiGH block inside if else then block, then change pin number from 13 to 2, then change the lower LED pin value from HIGH to LOW as following:
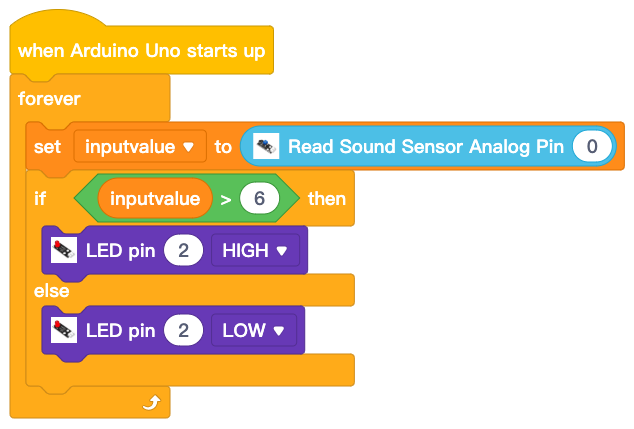
Now we have completed the block programming. The final blocks look like following:
Upload the program to Arduino
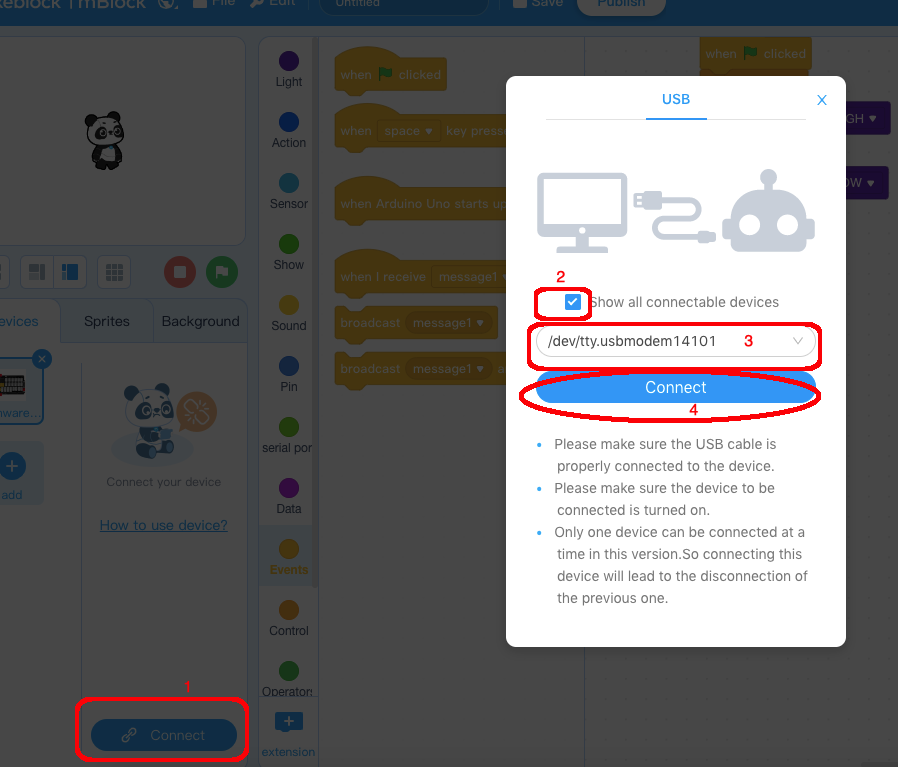
1)you need click the Connect button in the bottom of the mBlock software, you will see a USB window pop up,
2) select Show all connectable device check box , then a device drop-down menu will show up,
3) select your Arduino port from device drop-down menu
4) click Connect button to connect your PC to Arduino
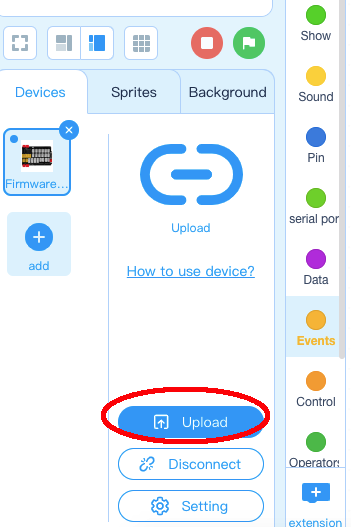
5)After you PC is connected to Arduino UNO board, please click Upload button in the bottom of your software, then the code will be uploaded to Arduino UNO board:
Test the program:
You can put a noise device (active buzzer) close to the sound sensor, you will find that when buzzer (noise) is turned on, then LED will turn on. If buzzer is turned off, LED will turn off.


