Authorized Retailers
Retailers of OSOYOO PiStudio Case for 7 inch IPS DSI screen
| Buy from OSOYOO |
Buy from US |
Buy from UK |
Buy from DE |
Buy from IT |
Buy from FR |
Buy from ES |
Buy from JP |
 |
 |
 |
 |
 |
 |
 |
 |
Retailers of OSOYOO 7 inch IPS DSI screen with PiStudio Case
| Buy from OSOYOO |
Buy from US |
Buy from UK |
Buy from DE |
Buy from IT |
Buy from FR |
Buy from ES |
Buy from JP |
|
|
|
|
|
|
|
|
Feature
OSOYOO PiStudio Case All-in-one desktop solution for Raspberry Pi is a case for Official Raspberry Pi 7 inch DSI Display and OSOYOO 7 inch IPS V4.0 DSI screen.
- Front plate with camera hole
- Door with fan
- Door for Raspberry Pi 5 with Active Cooler
- Adjustable angle Stand holder
- Wall mounting holes for hanging
- HDMI / Power / USB port access
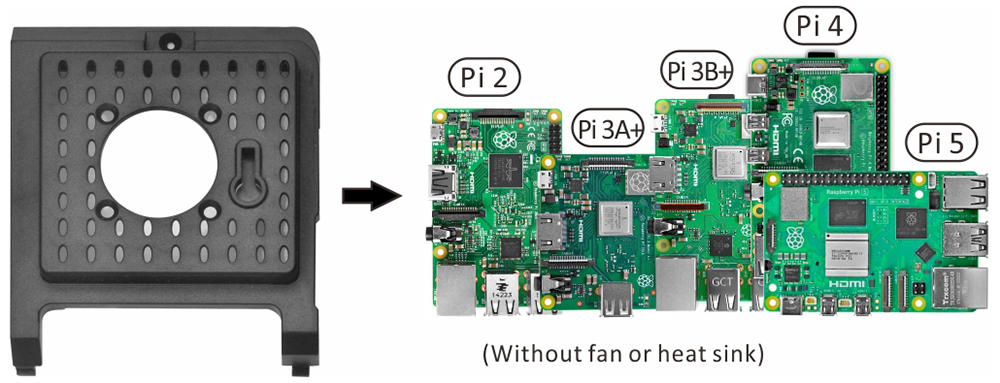
- Compatible with the Raspberry Pi B+,2B,3B,3A+,3B+, 4 and 5
- It’s compatible with Raspberry Pi V3 Camera, not compatible with Raspberry Pi camera V1 or V2 and HQ camera
- Compatible with the Official Raspberry Pi 7 DSI Display and OSOYOO 7 inch IPS V4.0 DSI screen
(Note: Please download the Installation guide from https://osoyoo.com/picture/7in_IPS/case/Installation_guide.pdf)
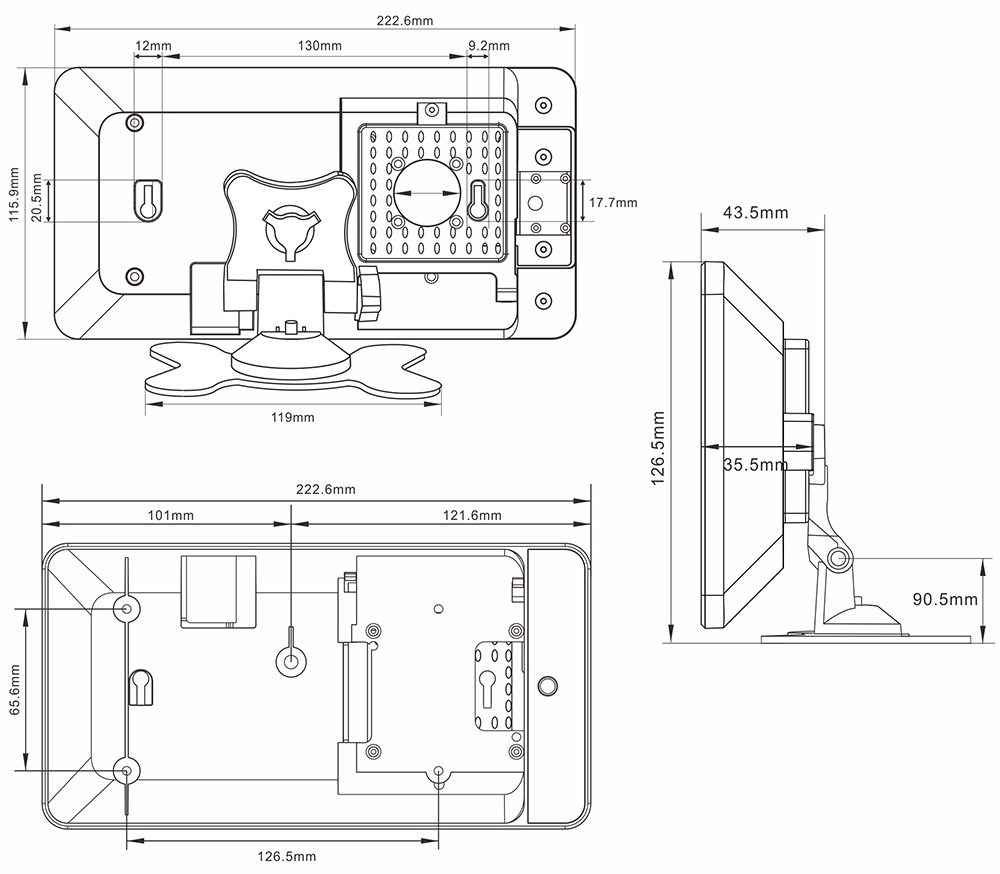
Product dimensions
Installation Steps
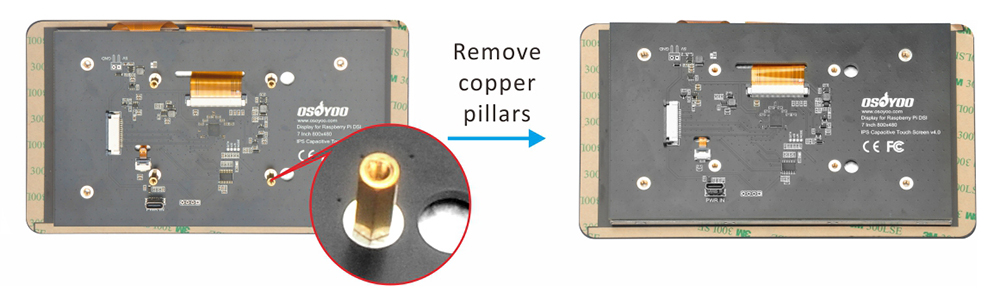
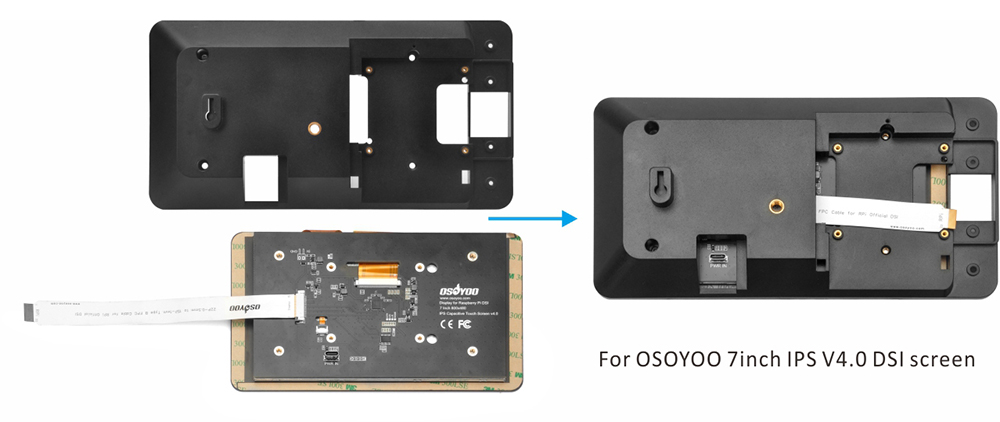
Step 0: If the case works with OSOYOO 7 inch IPS V4.0 DSI screen, please remove the copper pillars at the back of screen.
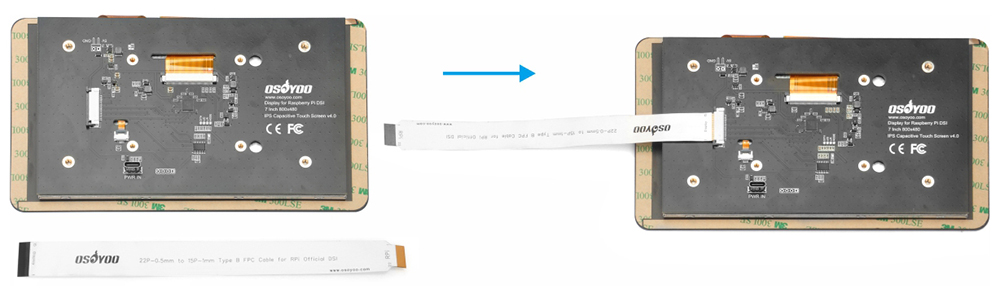
Step 1: Insert the 15pin-1mm end of DSI cable to OSOYOO 7 inch IPS V4.0 DSI screen. (ATTENTION: The metal contact point is upward)

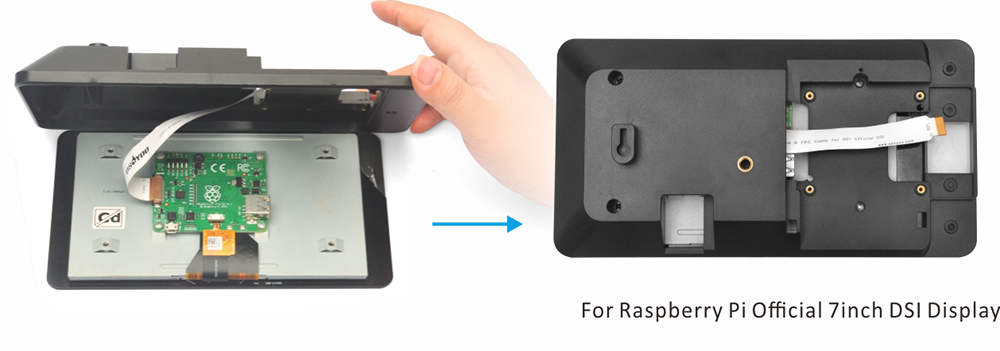
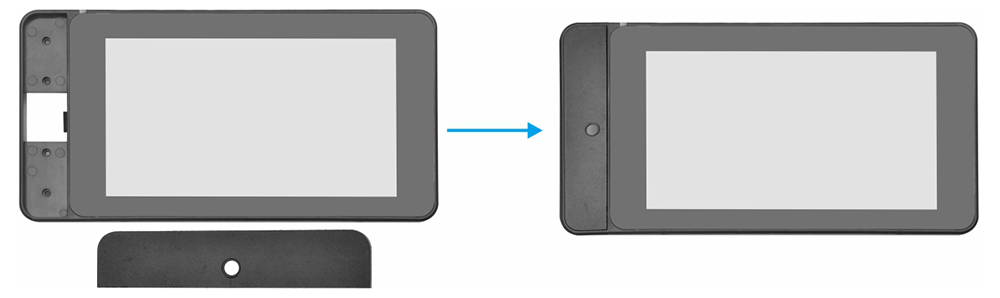
Step 2: Mount the display into the case as shown:
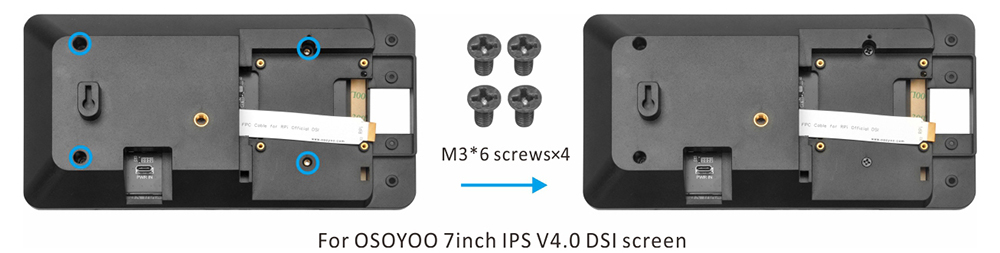
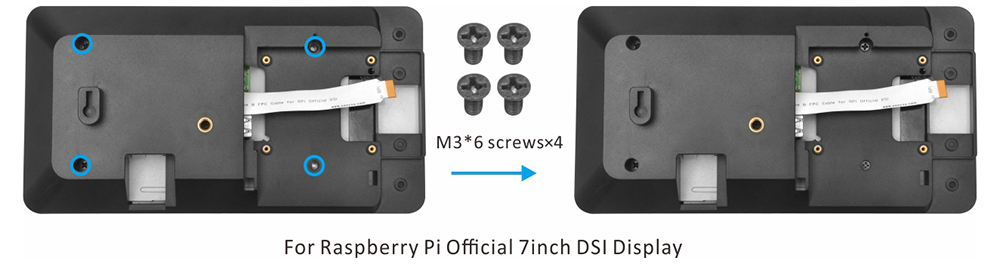
Step 3: Fix in the display using the 4pcs M3*6 screws
Step 4: Install front plate into the case as shown:
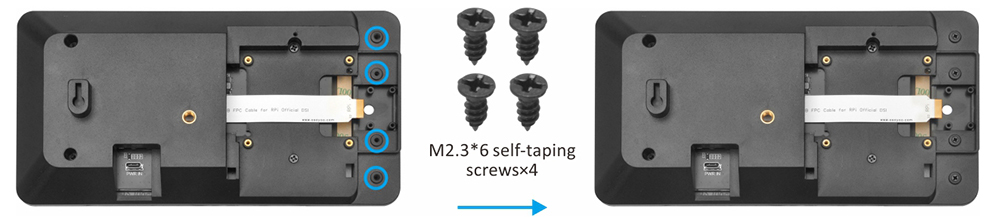
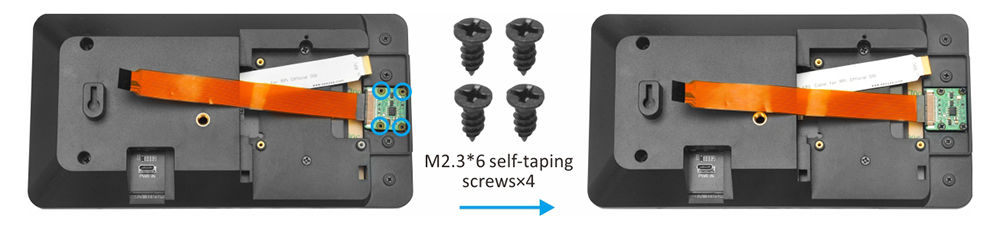
Step 5: Fix front plate with 4pcs M2.3*6 self-taping screws at the back side:
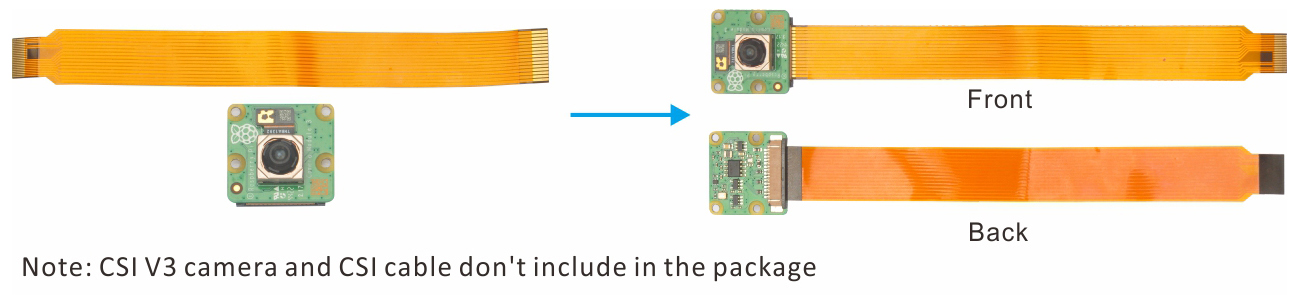
Step 6: Insert CSI cable into CSI V3 camera as following (please use about 15cm CSI cable)
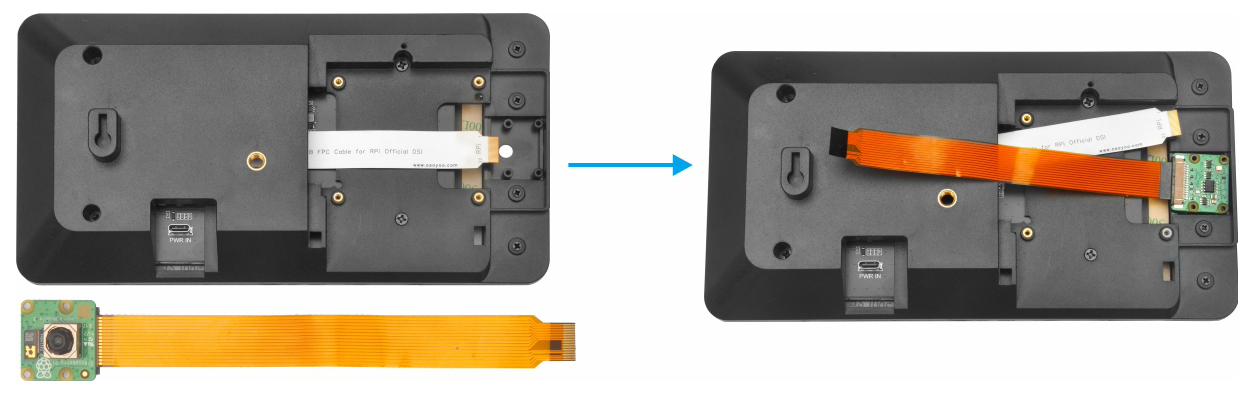
Step 7: Place V3 camera at the back of front plate as shown, then fix it with M2.3*6 self-taping screws as the following:
Step 8: Prepare a TF card and write OS image, then insert this card into Raspberry Pi TF card port

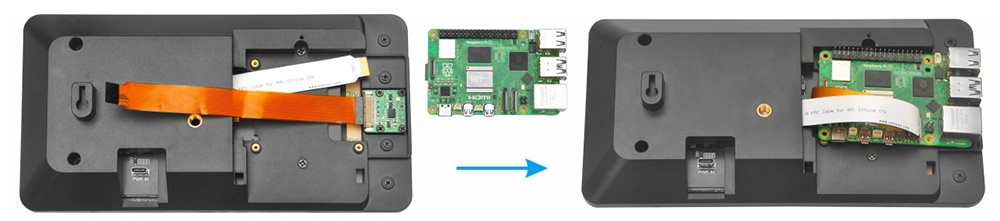
Step 9: Connect DSI and CSI cables to the Raspberry Pi DSI and CSI ports
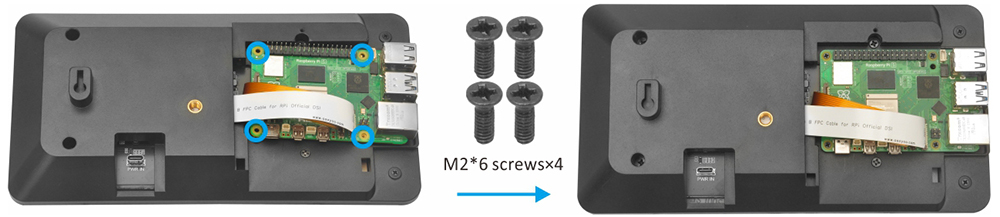
Step 10: Fix Raspberry Pi board on the case with 4pcs M2*6 screws as following:
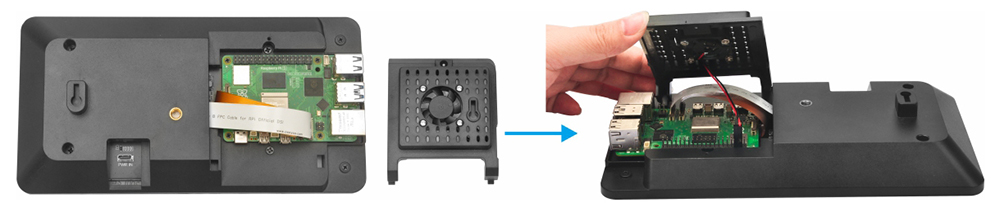
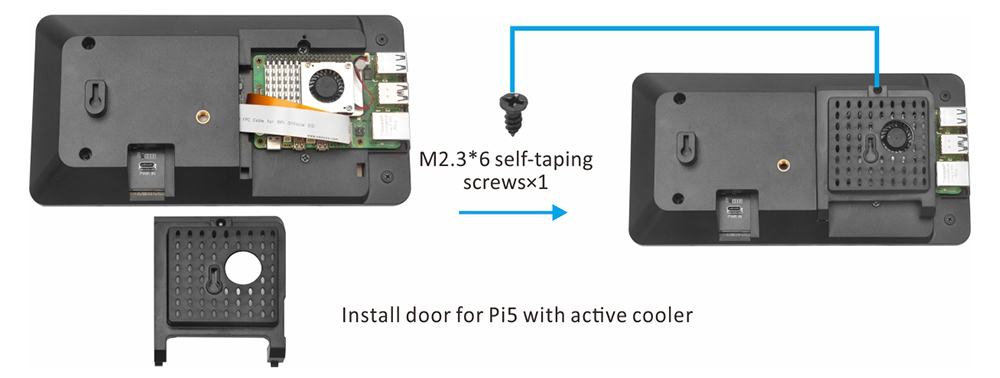
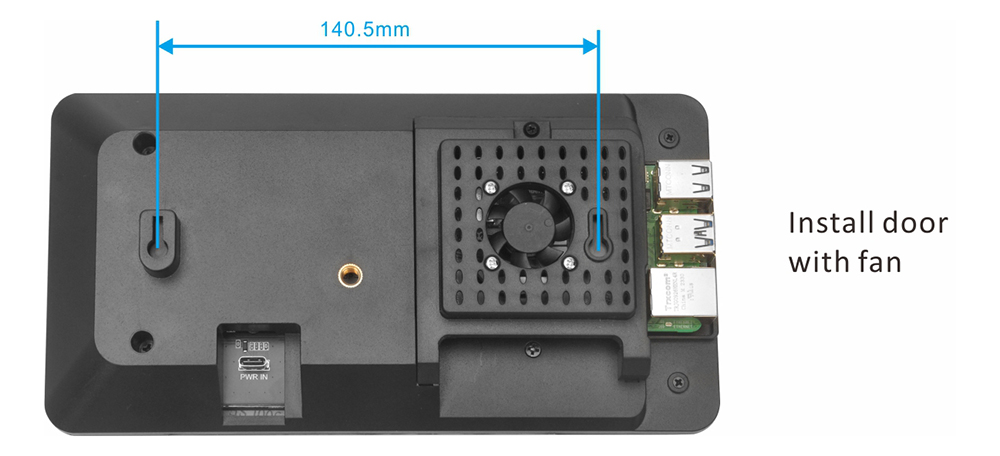
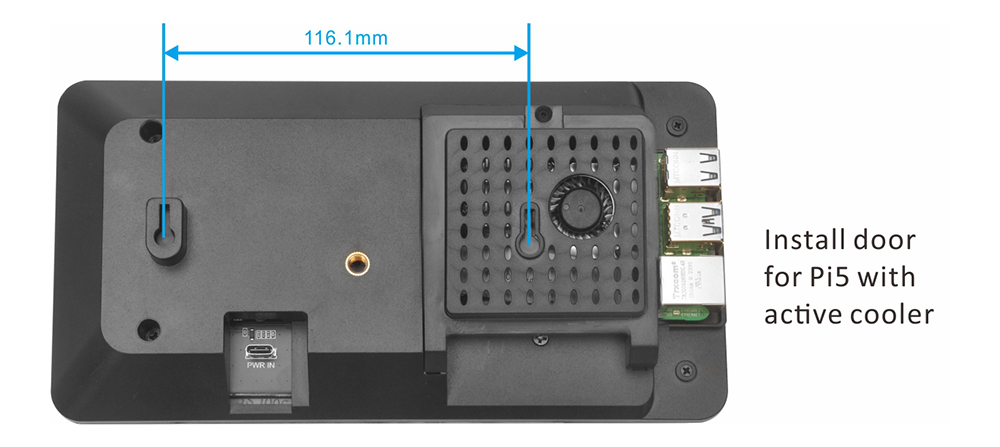
Step 11: Install fan on the door (Note: if you use Raspberry Pi 5 with active cooler, please skip step11-12)
Note: There are two doors in the package, please according to your Raspberry Pi to choose a correct door


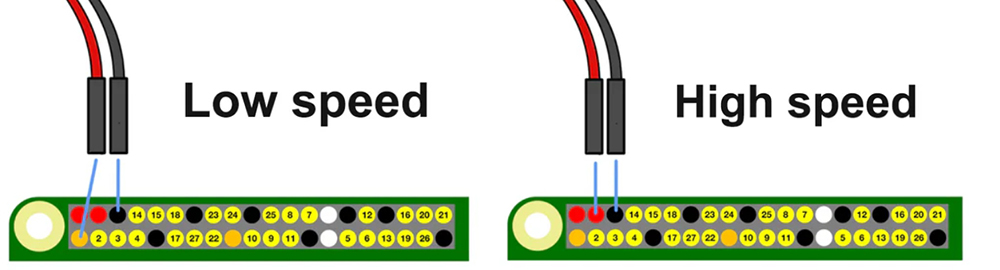
Step 12: Connect the wires of fan to the Raspberry Pi GPIO pins as the following (Note: We suggest starting with low speed as it is quieter. If you get the temperature icon in the display, you can always move up to the high speed.):
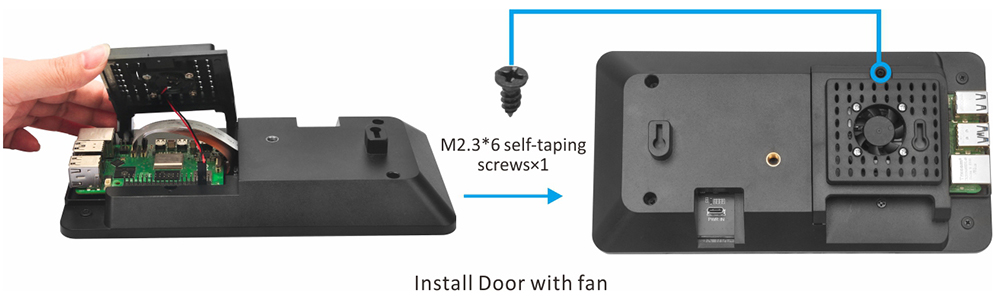
Step 13: Assemble the door. Be careful not to pinch cables, and fix the door with M2.3*6 self-taping screws
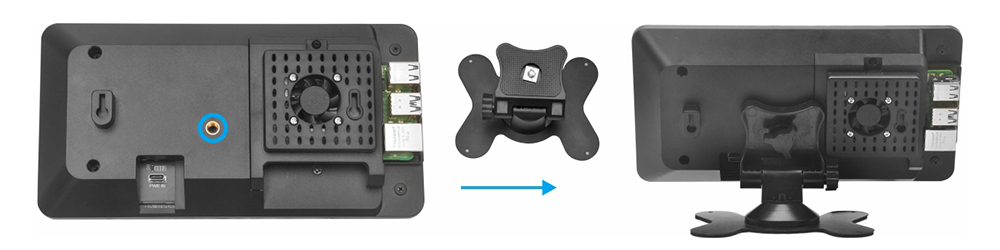
Step 14: Install the Stand holder on the back of case as shown:
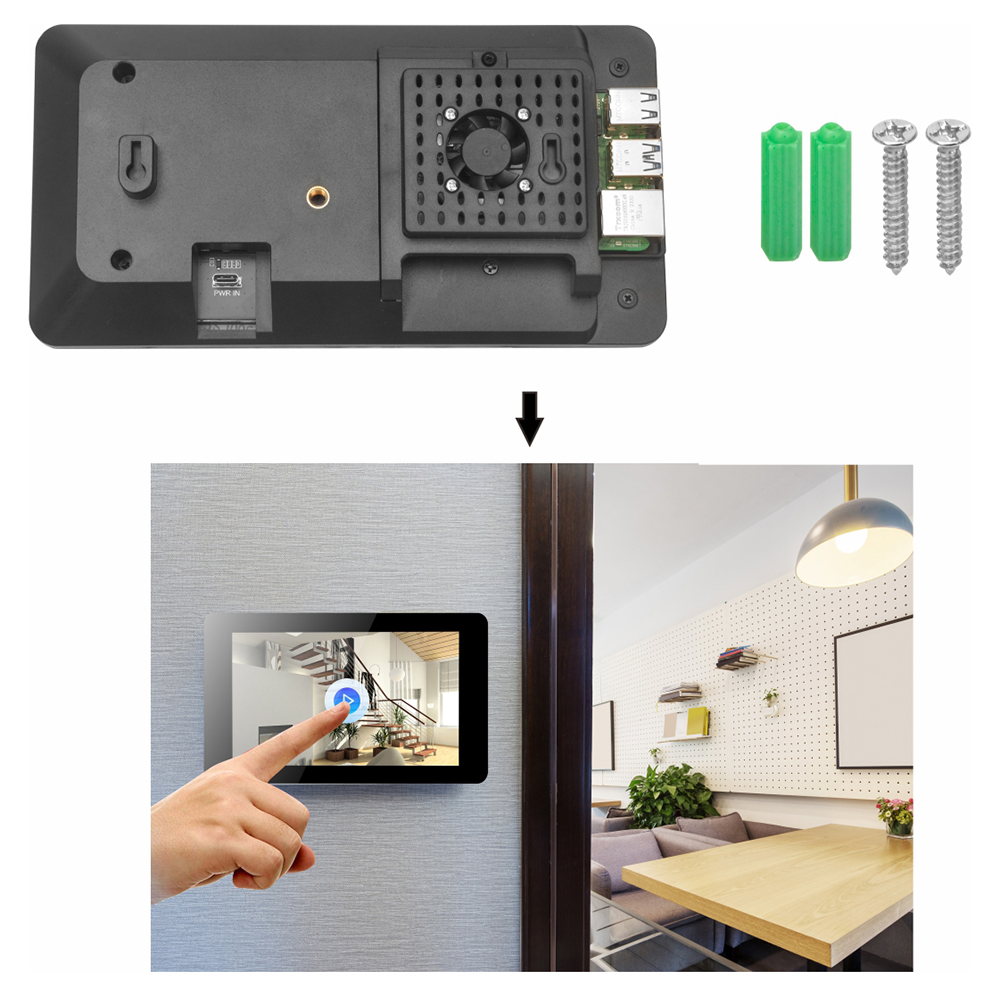
If you want to hang this screen on the wall, please mark the screw positions on the wall according to the following dimensions first.
Then you can use the matching expansion screws to hang the screen back on the wall. (Make sure the screws are securely embedded in the wall before hanging the screen)