Many people purchased our two types of Mecanum Omni wheel robot car from following link:
Acrylic chassis (Green or Orange) https://osoyoo.com/?p=30176
Metal chassis (Black) https://osoyoo.com/?p=30022
Above robot cars are controlled by Arduino. Actually the robot car can also be controlled by Raspberry Pi.
In this lesson we will tell you how to use Raspberry Pi 3 python programming language to control the Mecanum wheel car.
If you have installed the Arduino Mecanum robot car lesson 1, please keep all the installation except following change:
There are two pcs of Model X boards in Arduino kit. Please remove JUST ONE pc Model-X and replace it with a Model Pi board.
Model Pi and Model X are almost same, but Model Pi have USB 5V output which can power raspberry Pi. So we only need one pc Model Pi board and keep another Model X board in the chassis.
The installation tutorial of Model-Pi is in https://osoyoo.com/2020/03/01/python-programming-tutorial-model-pi-l298n-motor-driver-for-raspberry-pi/ , actually it is exact same as Model X. Just let you know your Raspberry Pi can get power from its USB port.
After replacing the Model X with Model-Pi and Arduino with Raspberry Pi, the car will look as following:
You must complete lesson 1 (assembling the car) before you continue on with this lesson. In this lesson, we will use raspberry pi 3B+ board and L298N motor pi to control the robotic car .
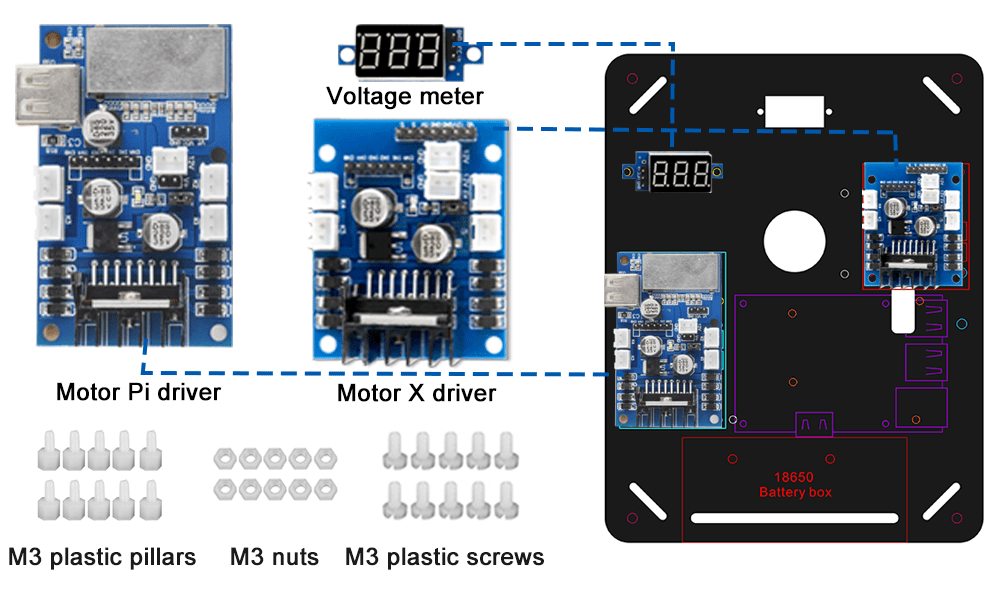
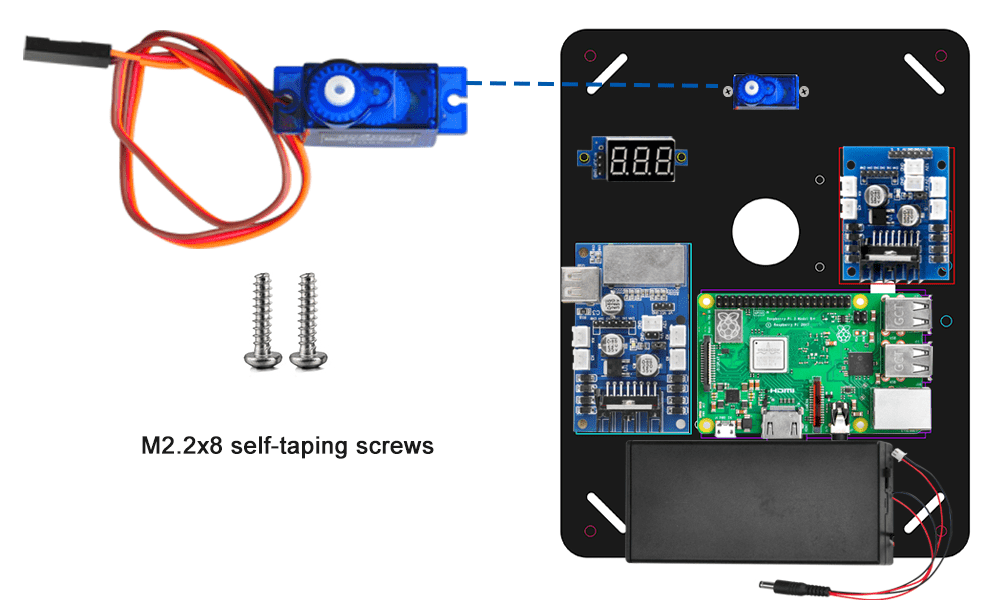
(1)Install motor Pi ,model X and voltage meter on car chassis with M3 plastic screws, M3 plastic pillars and M3 plastic nuts.
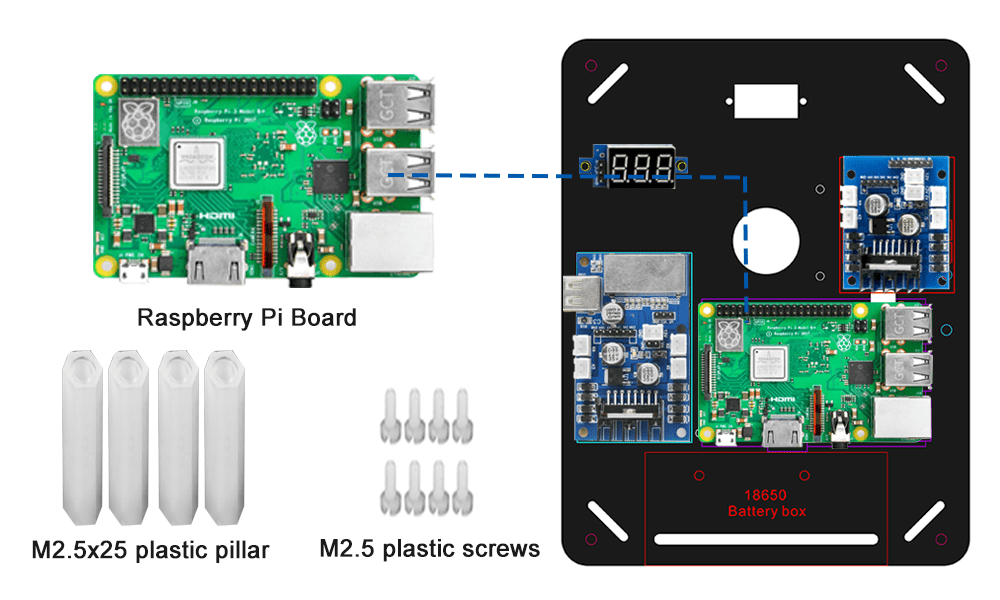
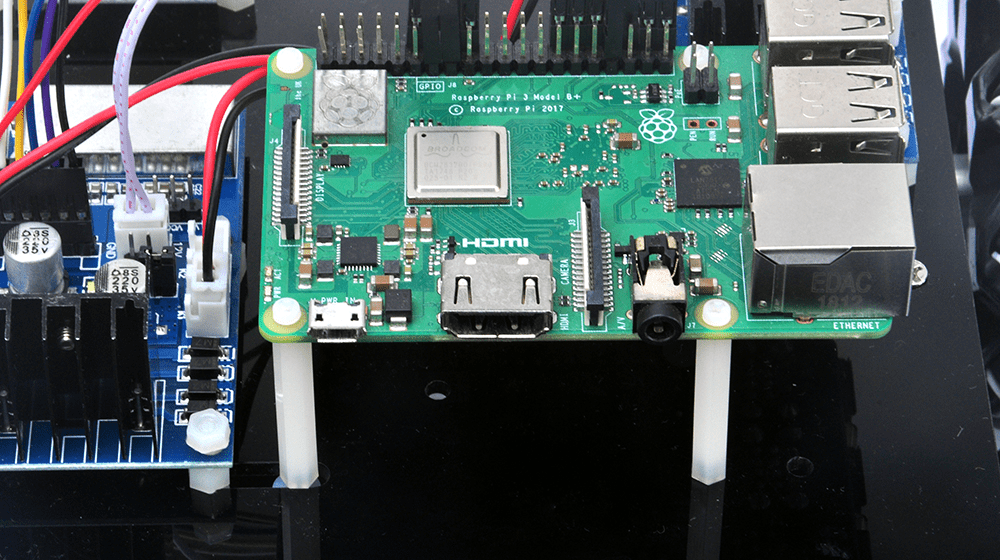
(2)Install raspberry pi board with M2.5×25 plastic pillars and M2.5 screws.
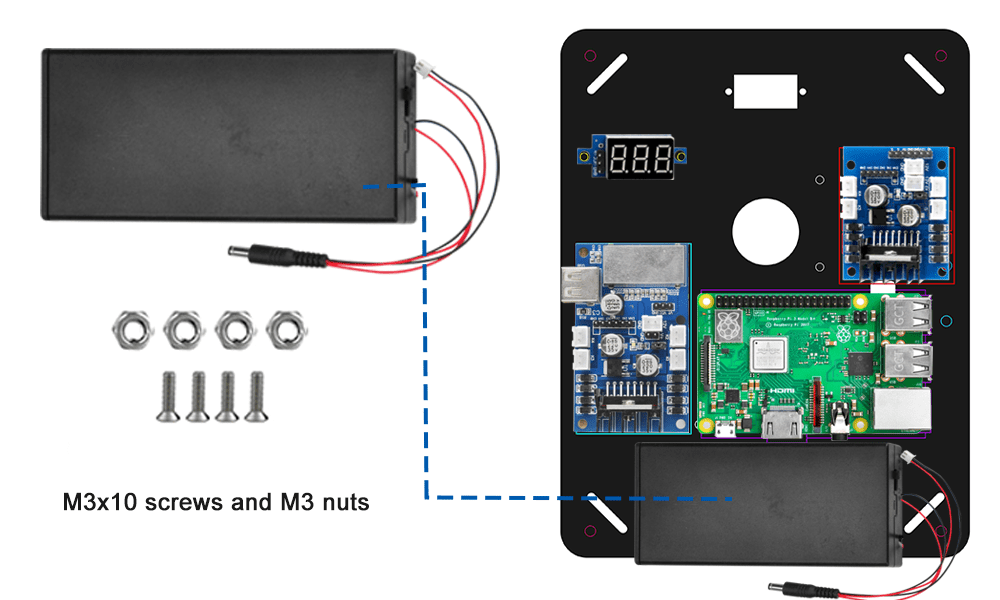
(3)Install 18650 battery box with M3x10 metal screws andM3 nuts.
(4)Remove screws on copper pillars and install servo motor on car chassis with 2pcs M2.2*8 Self Tapping Screws
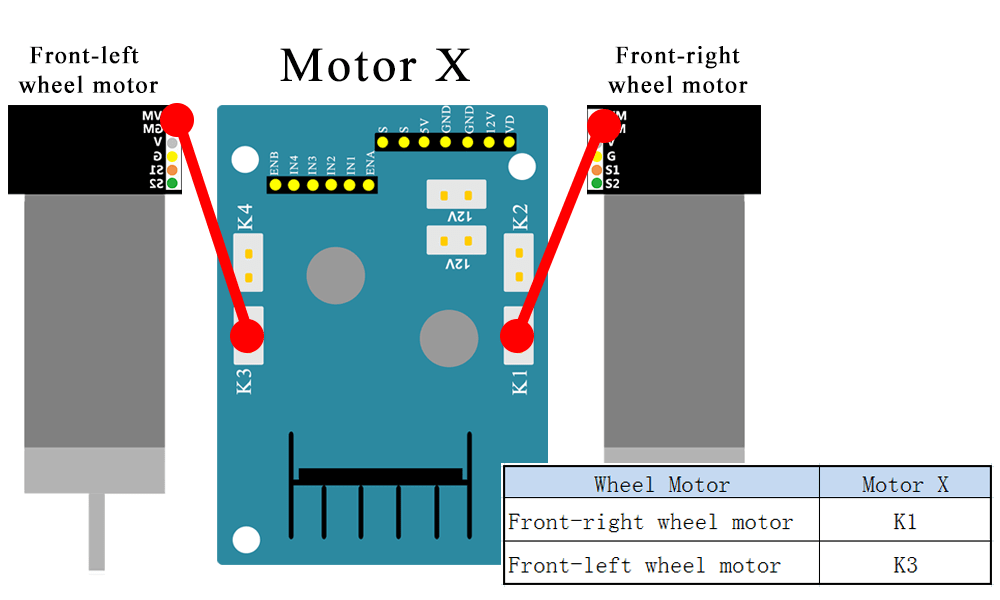
(1) Connect Front L298N (Model X) module to front 2 motors as following:
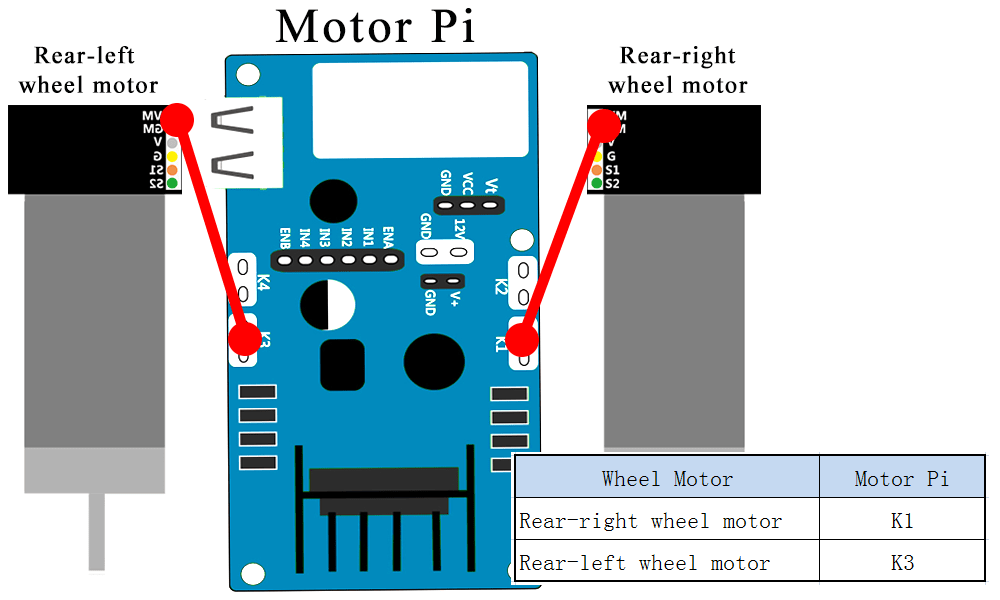
(2) Connect Model-Pi L298N module to 2 motors in the back as following:
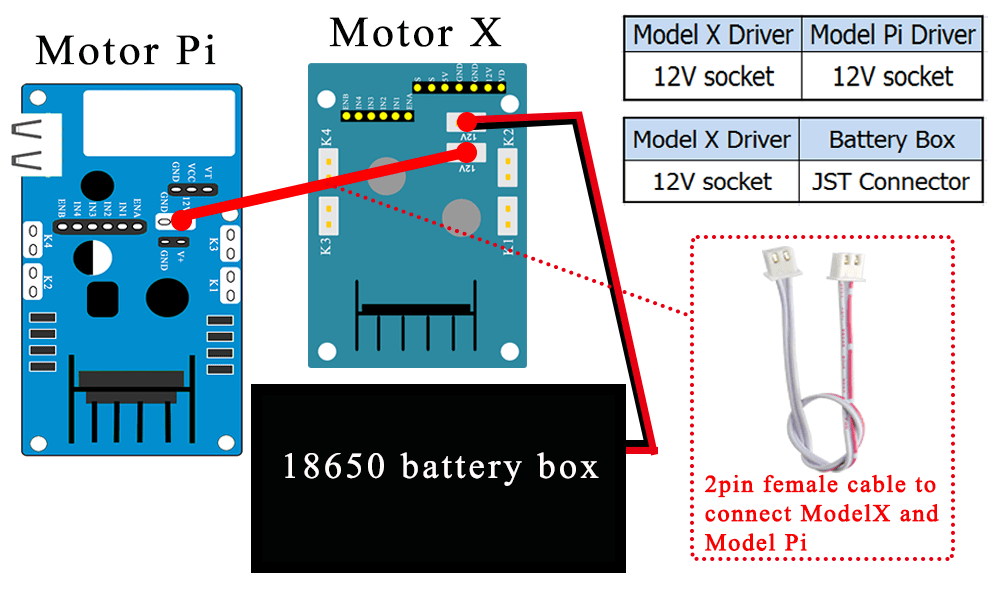
(3) Connect Motor X drivers to Motor Pi with 2pin XH connector,then connect power to motor X
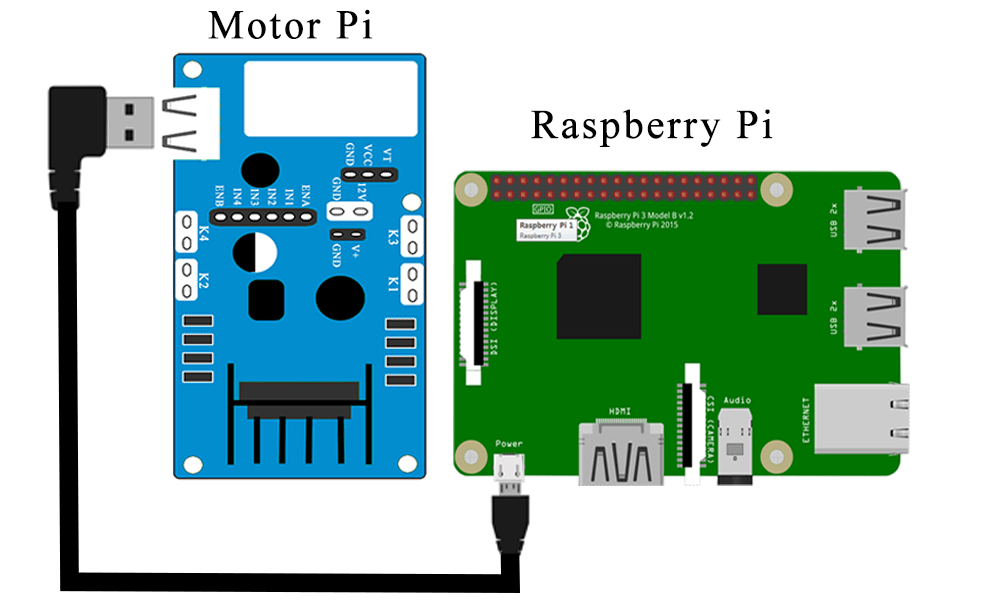
(4) Connector Motor Pi to raspberry pi with USB cable.
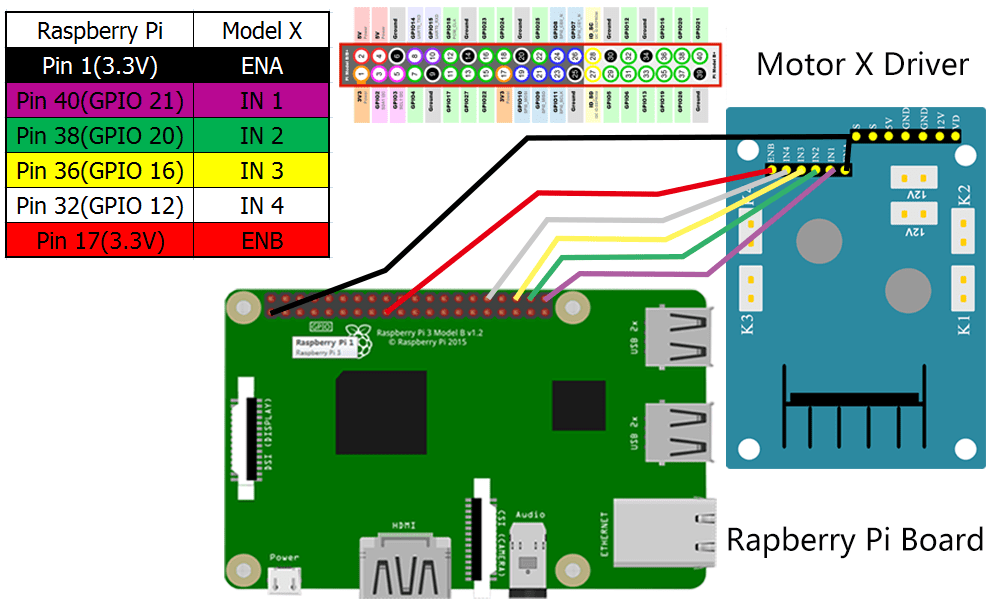
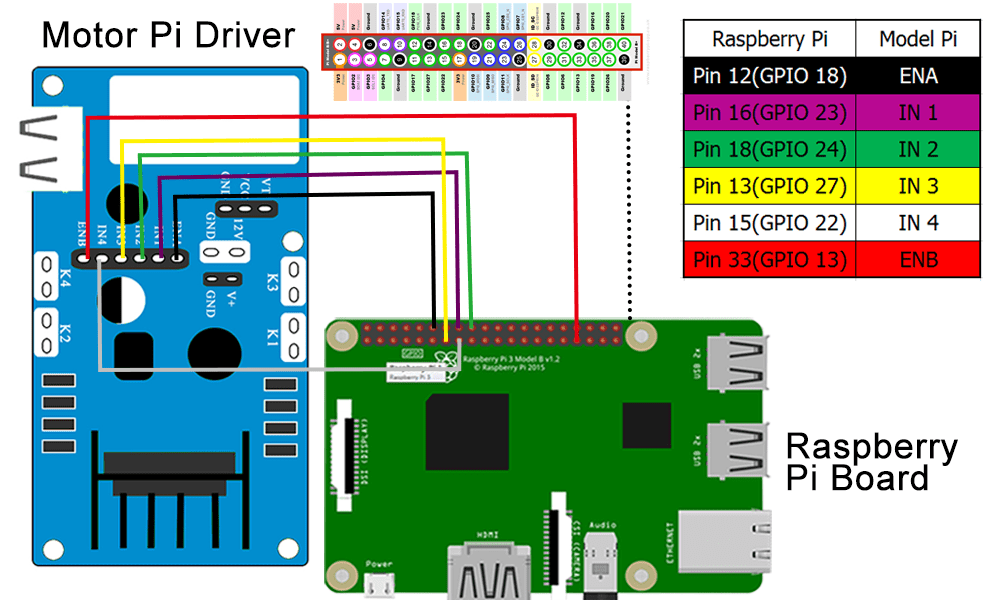
(5) Connect two L298N Motor drivers control ports to Raspberry Pi GPIO ports
Raspberry Pi to Front Model-X board
Raspberry Pi to Rear Model-Pi board
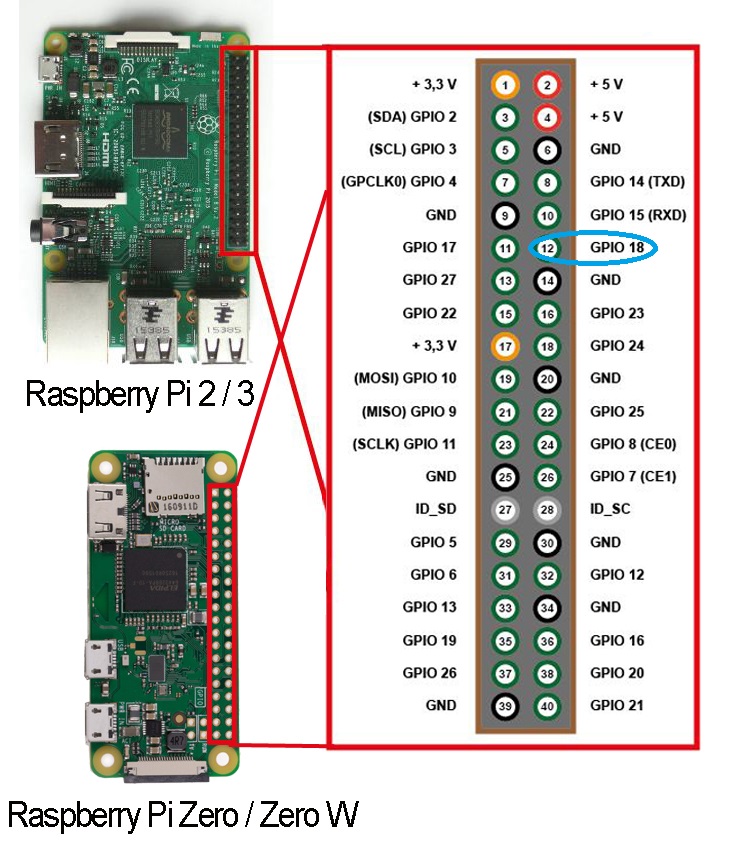
If you don’t know the GPIO PIN location in Raspberry Pi, check following pin map:
Now turn on the battery box and make sure Raspberry Pi and Model Pi board both have LED turned on.
Step 1:Before connect to Raspberry Pi, you need to install Raspbian Operation System(OS) onto SD card.You can select the latest version of RASPBIAN system on the official website: https://downloads.raspberrypi.org/raspbian/images/. Write the image via Win32DiskImager utility into your microSD/TF card(minimum 16G), then plug the card into the slot on your Raspberry Pi.
Step 2: Connect Wifi
Firstly, Connect Raspberry Pi to your HDMI monitor or TV. Put a keyboard and mouse into Raspberry Pi USB ports. Insert SD card into the slot on your Raspberry Pi.Click on the wireless icon top right on desktop, should give a list of access points, select your wifi ssid and connect it. Once your Pi is connect to Wifi, you can hover your mouse to the wifi icon to see the your IP address.
Or your can type sudo ifconfig wlan0 command in terminal. Your local ip address will show in wlan0 block(right side of the word inet addr:). It will look like 192.168……
Please remember above IP address, it will be used in our next steps.
Step 3: Open SSH connection
SSH enable user to type shell command remotely from internet so that we can control the car through wifi.In order to enable SSH function, we need type following command from terminal:
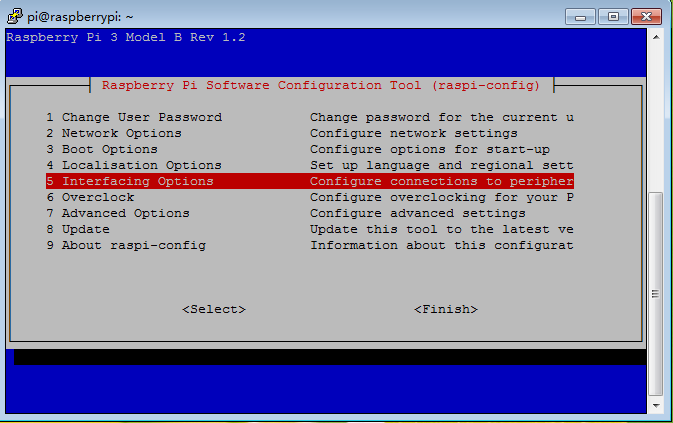
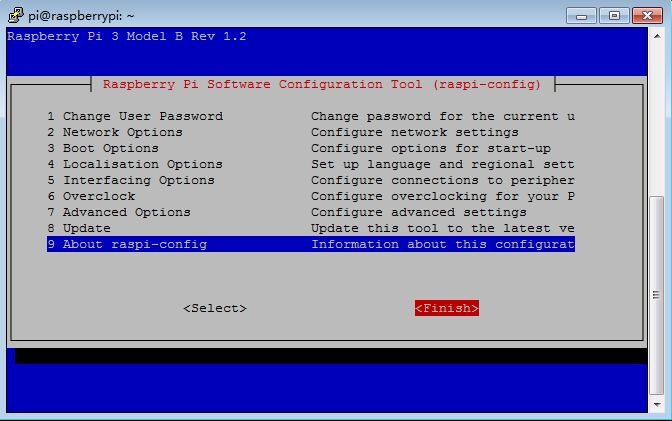
sudo raspi-config
Then select Interfacing Options->SSH->Yes->Ok->Finish
Step 4:Use SSH to connect Raspberry Pi terminal remotely
In order to make the car moving freely, we need disconnect Raspberry Pi from monitor, keyboard/mouse and use SSH to send command to Raspberry Pi terminal remotely.
If you are using Windows to send ssh command. you need download a free software called PuTTy to connect the Raspberry Pi local IP(you got from STEP 1).
If you are using MacBook or other linux computer, please type: ssh [email protected]
ssh your_raspberry_pi_local_ip_address
*your_raspberry_pi_local_ip_address means the wifi IP address you got from STEP 1
When connecting ssh, you need use default user name piand default password raspberryto login to Raspberry Pi.
Now use putty(in windows) or ssh command(in linux or MacBook) to connect raspberry pi, then type or cope the following two commands: