In this lesson, we will teach you how to use mobile APP to control Robot car through UDP protocol. The Raspberry Pi will run a Python program to get UDP packet from APP.
Remember : Keeping all existing wires installed in Lesson 1 -lesson4.
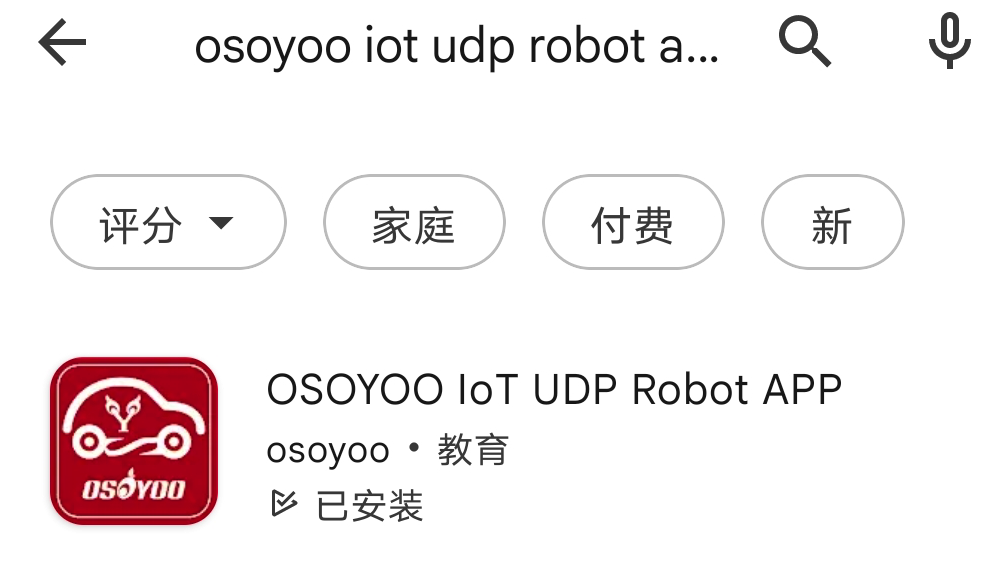
Step 1) Download OSOYOO IOT UDP Robot Car control APP
In Google Play or Apple Store, please search key words “OSOYOO IOT UDP Robot Car”, you will find an orange icon APP as following:
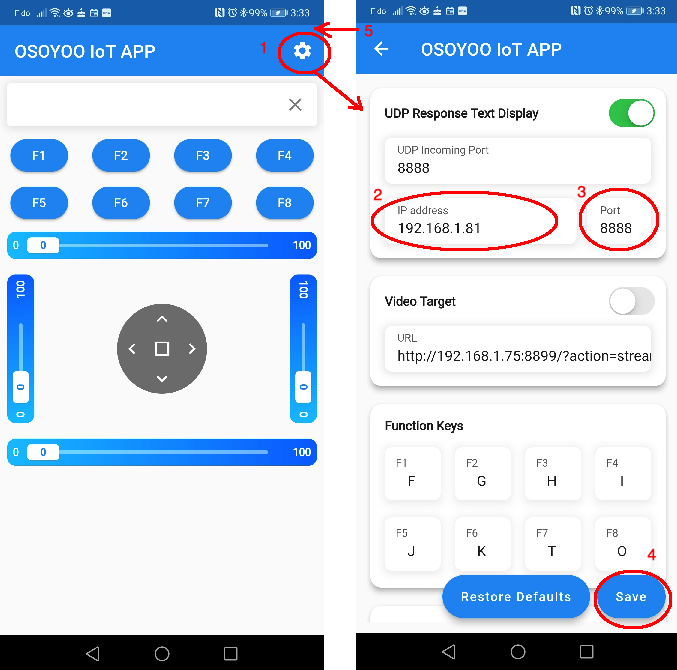
Click Setting icon, you can configure the target raspberry pi robot IP address, click Save button to update the IP address.
Step 2) Make sure you have installed rpi.gpio and adafruit-pca9685 library in lesson 1 .
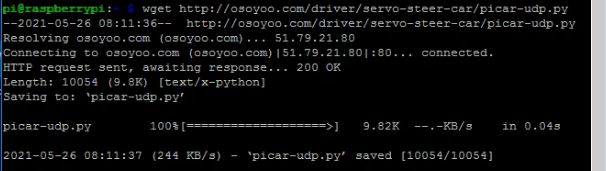
Step 3) Type following command to download the sample code:
Step 4)Type following command to run the sample code:
python wifi-picar.py
or if you want to use Python3, typing:
python3 wifi-picar.py
After above python is running, your car is waiting for command from your cell phone.
Step 5) Control the car
Now your can click the < > ^ v direction keys to make the car move. Use || pause key to stop the car movement.
If you click F7 key, the car will do obstacle avoidance auto driving similar to Lesson 4
If you click F8 key, the car will do link tracking auto driving similar to lesson 3
If you move the top slider, you can actually rotate the steering servo and change car direction.
If you move the left slider, you can change the car default moving speed.
Note: F1~F6 are further development functions in the future.
FAQ about the WIFI UDP APP and sketch Code:
Q 1)How to tune the robot car speed? A: If you want change the speed performance of the robot car, please change values following parameters in line 19-21 in picar-udp-control.py file :
high_speed = 3500  # Max pulse length out of 4096
mid_speed = 1900  # Max pulse length out of 4096
low_speed = 1700  # Max pulse length out of 4096
Q 2)What happened when you press buttons in OSOYOO WiFi UDP Robot Car APP ? A: When you press a button of the APP, APP will send a single-letter message through UDP protocol to target device Raspberry Pi
Button
UDP message
F1
F
F2
G
F3
H
F4
I
F5
J
F6
K
▲
A
▼
B
►
R
◄
L
square
E
F7
O
F8
T
There are four sliders in the APP called SL (left slider), ST (top slider), SR (right slider) and SB(bottom Slider).
When you move a slider, you will send the slider value data by UDP to target device.
For example, when you move top slider to position 33, the the UDP message is ST=33
Q 3)How does Raspberry Pi python program handle the UDP command?
Line 319 to 347 while loop receives UDP data from APP and give it to viable cur_status, ticker function in line 292 – 307 handle the cur_status :
def ticker():
    if cur_status=='R':
    	turnRight(high_speed,0)
    if cur_status=='L':
    	turnLeft(0,high_speed)
    if cur_status=='A':
    	forward(mid_speed,mid_speed)
    if cur_status=='B':
    	backward(mid_speed,mid_speed)
    if cur_status=='E':
    	stopcar()
    if cur_status=='T':
    	line_tracking()
    if cur_status=='O':
    	obstacle_avoid()
For example , when APP ▲ key is pressed , cur_status value is A , then ticker() function call forward(mid_speed,mid_speed) function to make car moving forward.