


| Buy from US |
Buy from UK |
Buy from DE |
Buy from IT |
Buy from FR |
Buy from ES |
ここでご購入を! |
 |
 |
 |
 |
 |
 |
 |
Introduction
In this project, we’ll create a wearable pin using conductive thread to connect a LilyPad LED to a battery holder.
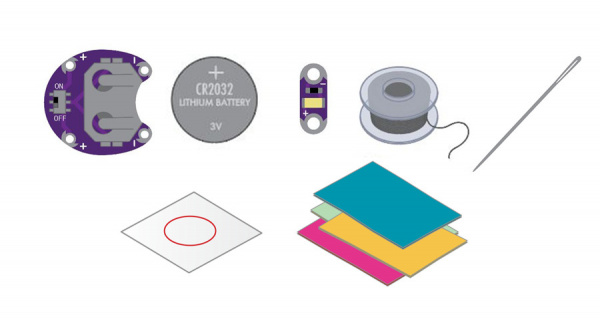
Materials and Tools
• 1x LilyPad Coin Cell Battery Holder
• 1x Coin Cell Battery
• 1x LilyPad LED
• 1x Conductive Thread and Needle
• Felt (you will need at least 3 square inches)
Planning Your Project
For this project, we’ll be using the Glowing Pin template (download below). If needed, download and print the provided template. We’ve also provided some color and black and white designs to use with printable fabric for the top layer of the pin. Right-click the images below and choose “Save Link As” to download the template to your computer.
Click here to download:
Glowing Pin template
GlowingPin_PrintableFabricColor
GlowingPin_PrintableFabricBW
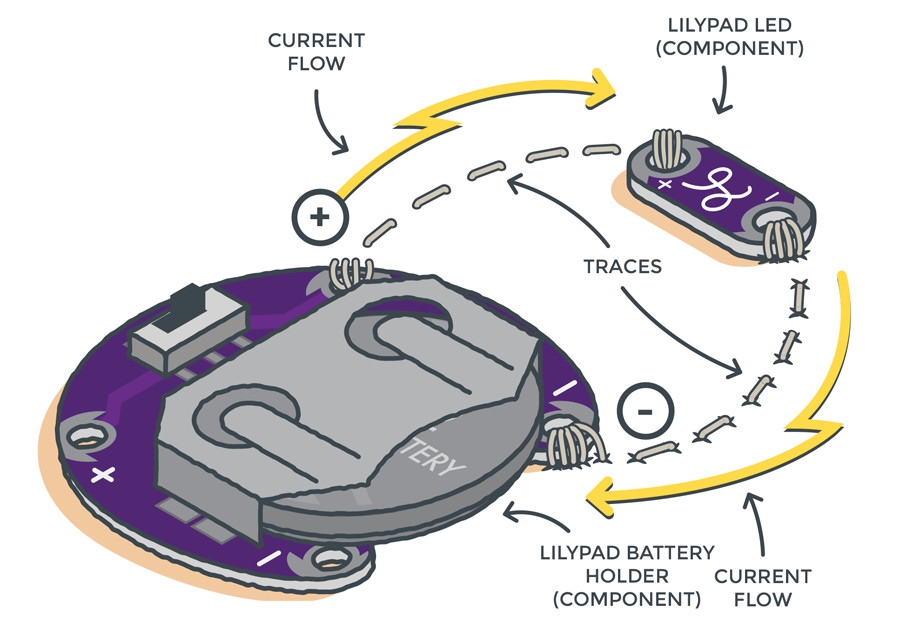
Understanding Your Circuit
This project is an example of a basic circuit – an electrical loop that travels from a power source along a path (called a trace) to a component (or components) that uses the electricity to function, and then back to the power source. For our project, we’ll use an LED (Light-Emitting Diode). When this loop is completed by stitching the pieces together with conductive thread traces, electricity from the power source is able to flow from the positive (+) side of the battery through to the LED (lighting it up) and back to the negative (–) side of the battery. This electric flow is called current. As you build projects with LilyPad pieces, you will learn different ways to design conductive thread circuits and experiment with additional pieces that help control or use the flow of electricity.
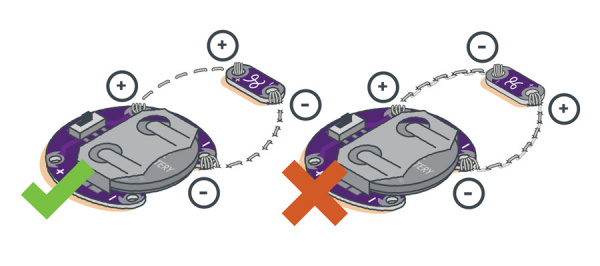
Take a look at the LED and battery holder. Notice that the silver sew tabs are labeled either positive or negative. Many electronic components have polarity, meaning electric current can only flow through them in one direction.
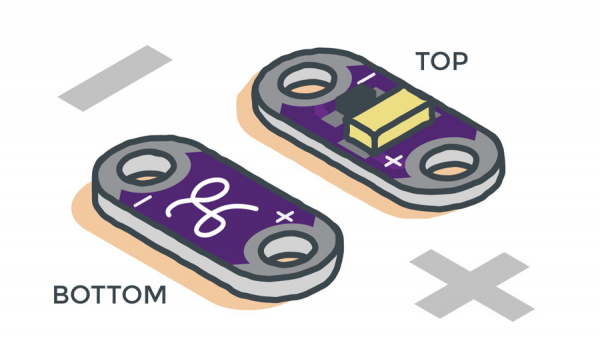
If hooked up incorrectly, they will not light up. The batteries in this kit are also polarized; they have a positive and negative side. Always check the labels on LilyPad pieces to make sure they are correctly oriented before sewing together a circuit.
Stitching It Together
STEP 1:
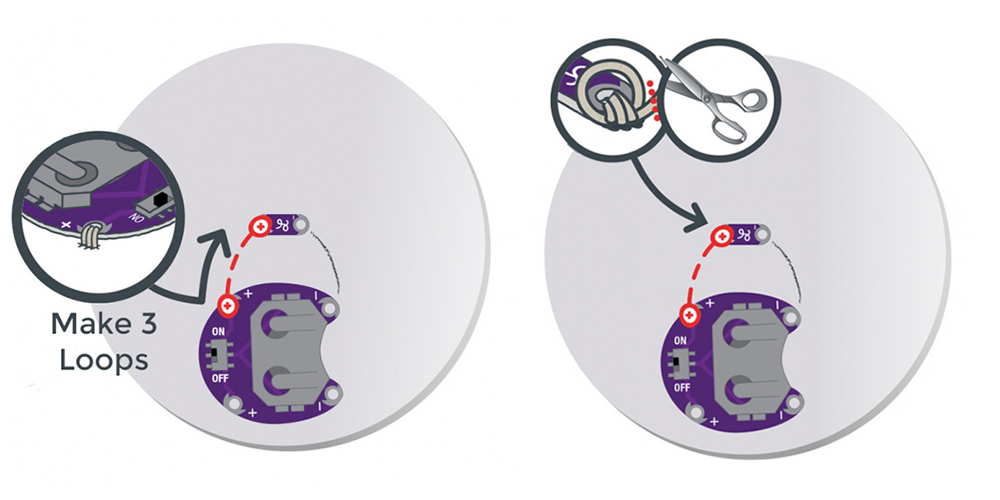
Cut a long piece of conductive thread, thread the needle, and tie a knot at the end. Now, it’s time to connect the LED to the battery holder with the conductive thread. One line of stitching will connect the positive (+) side of the battery holder to the positive end of the LED. A second line of stitching will connect the negative (–) sides of the boards and complete the circuit.
Finish your first line of stitching by tying a finishing knot on the sew tab and trimming your excess thread.
Don’t forget! You’ll need to tie a new knot at the end of your thread before you begin the next section of stitching.
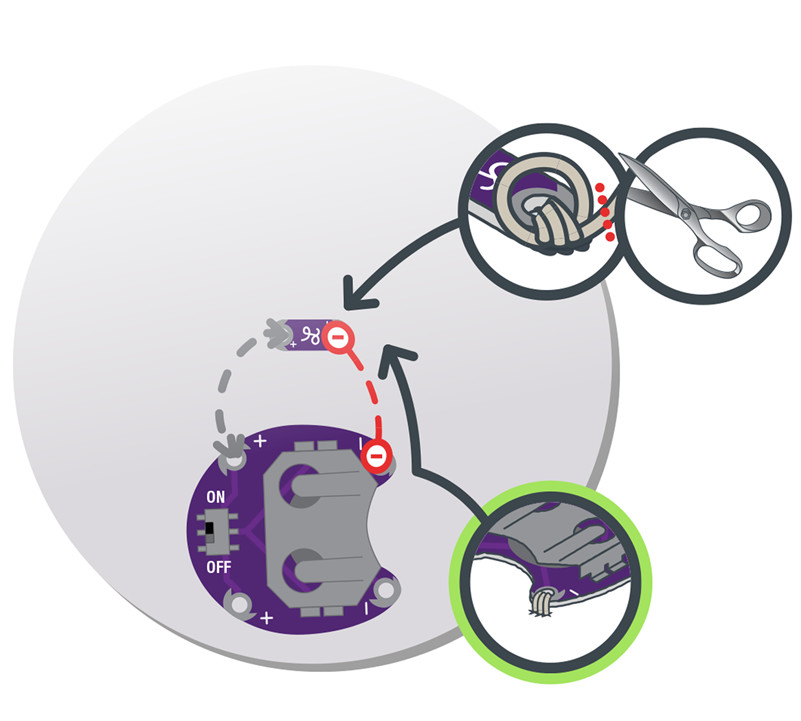
STEP 2:
Repeat the process with a new piece of thread to connect the negative side of the battery holder to the negative end of the LED. Be careful not to let the stitches touch the path used for the positive connections, as that would cause a short circuit. Trim any thread tails before testing. Now, the circuit is complete!
Installing Your Battery and Testing
Insert the coin cell battery with the positive side facing up, labeled as (+), into the opening on the battery holder across from the ON/OFF switch. Turn on the switch to allow current to flow through the circuit. Turn off the switch when not in use to prolong battery life.

Finishing Touches
Always remove your battery when working on your project to avoid damaging your components.
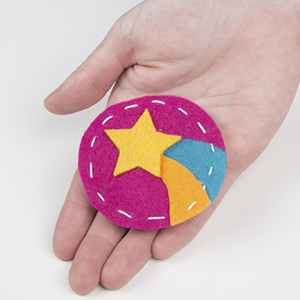
With the battery removed, use a hot glue gun or thread to attach your fabric design over your felt circle so the LED shines through. Draw a design on the fabric, if you’d like. Turn the project over, and attach an adhesive pin back to finish up your wearable art!
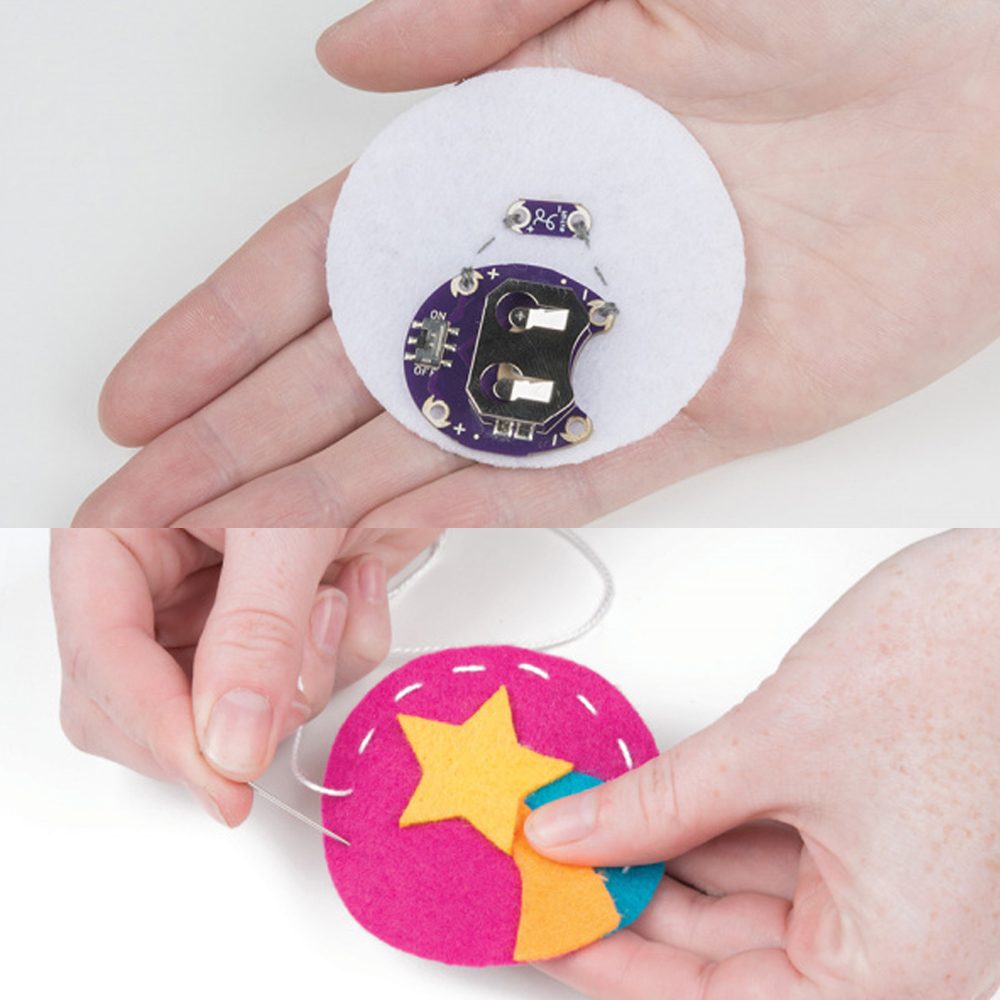
Here are a few examples of creative glowing pins:


~~~~~~~~~~~~~~~~~~~~~~~~~~~~~~~~~~~~~~~~~~~~~~~~~~~~~~~~~~~~~~~~~~~~~~~~~~~
Lilypad Sewable Electronics Projects:
~~~~~~~~~~~~~~~~~~~~~~~~~~~~~~~~~~~~~~~~~~~~~~~~~~~~~~~~~~~~~~~~~~~~~~~~~~~


