1, Install Raspbian OS in your Micro SD card (This tutorial is compatible f the OS: 2020-05-27-raspios-buster-armhf.img)
1) Download Raspbian zip from website: http://downloads.raspberrypi.org/raspios_armhf/images/raspios_armhf-2020-05-28/2020-05-27-raspios-buster-armhf.zip
2) Unzip Raspbian zip file.
3) Prepare an newly formatted Micro SD memory card (TF card) with USB microSD card reader, recommend sizes are 8G, 16G, 32G.
4) Burn the Raspbian image file to SD card
5) Inserting Micro SD card into Raspberry Pi.
2, Download Rapberry Pi 3.5″ Touch LCD Diver
1) Pls open driver download website:https://drive.google.com/drive/folders/1B4RzLAjtJUNOKBrYfgRgPbdloLtNbPCC?usp=sharing
2) Download the correct driver to your computer. (Do not unzip)
3) Copy the driver (.tar.gz file) to another Micro SD card or USB disk
3, Connect Raspberry Pi to HDMI display. (Mouse and keyboard are needed.)
1) Inserting the Micro SD card or USB disk which contains driver (rar file) into Pi.
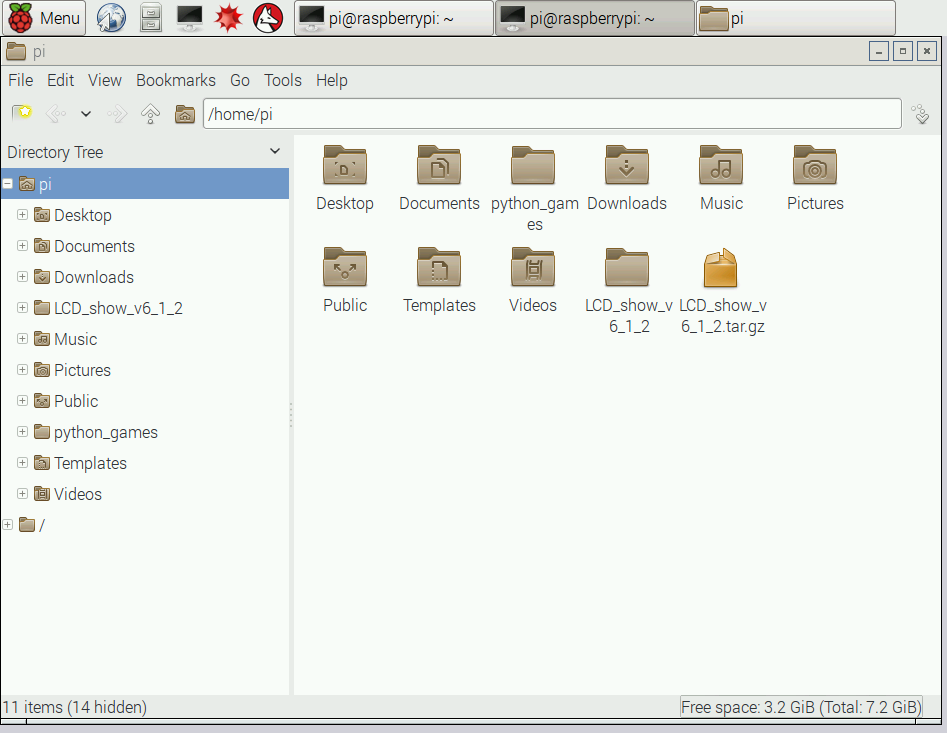
2) Copy the driver to/home/pi
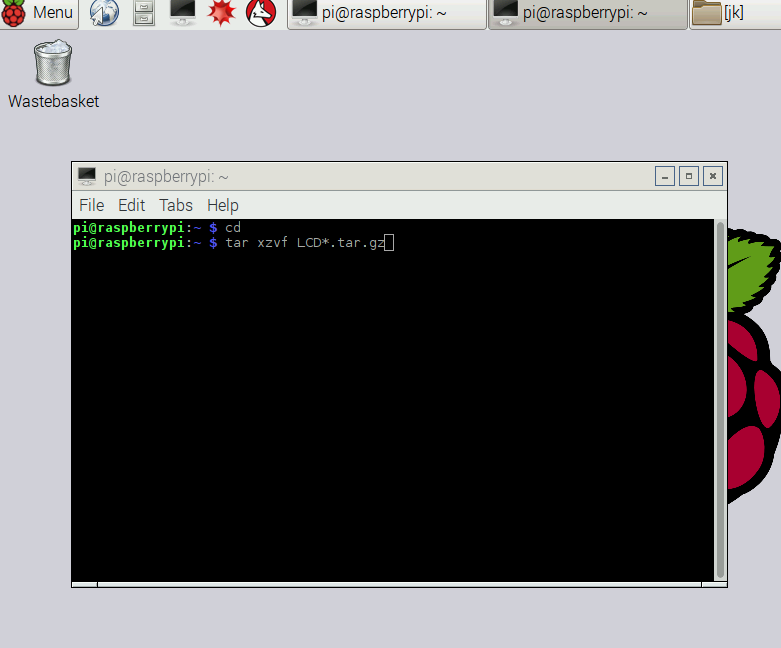
3) Input command: cd, click enter button.
4) Input command: tar xzvf LCD*.tar.gz, click enter button to unzip the driver.
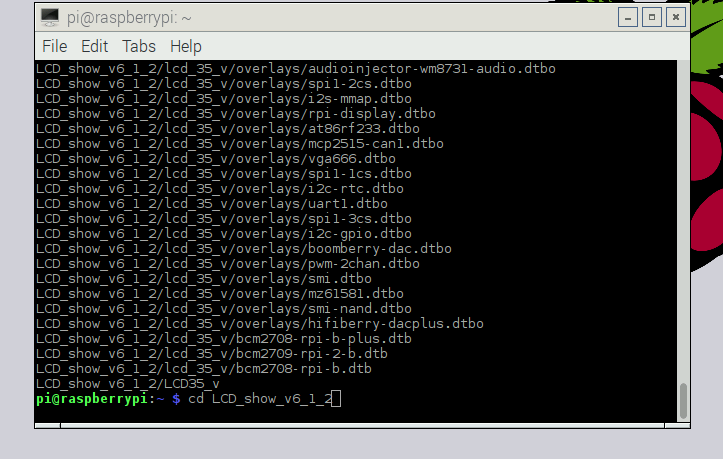
5) Input command: cd LCD_show_v6_1_2, press enter button on keyboard.
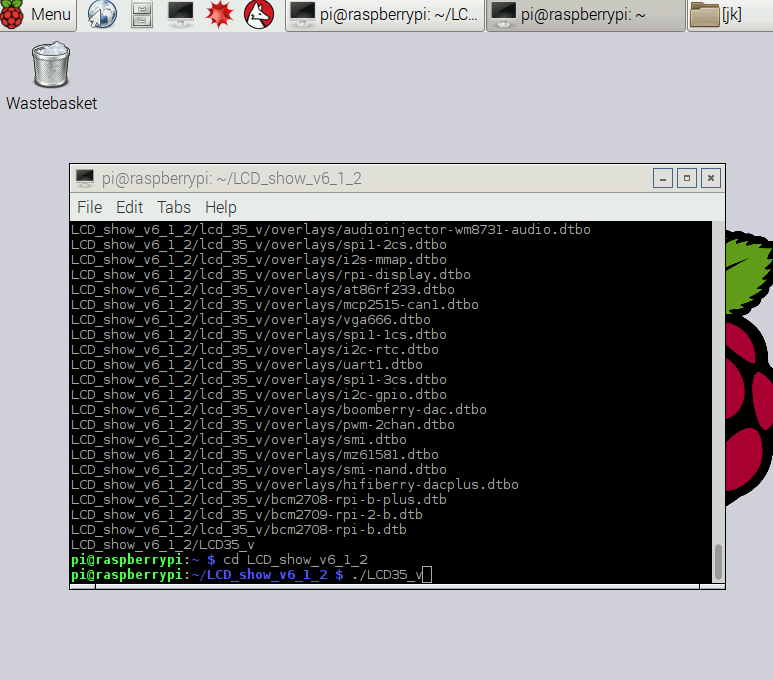
6) Input command: ./LCD35_v, press enter button.
7) The raspberry Pi will reboot
4, You have done the installation, you should see the 3.5’’ LCD display come alive in a few seconds.
5, Change 3.5’’ LCD display to HDMI display:
1) Input command: cd LCD_show_v6_1_2, then press enter button.
2) Input command: ./LCD_dhmi, press enter button.
3) The raspberry will reboot.
4) Your HDMI should be display correctly.
6 ,Change HDMI display to 3.5’’ LCD display.
1) Input command: cd, press enter button.
2) Input command: tar xzvf LCD*.tar.gz, press enter button.
3) Input command: cd LCD_show_v6_1_2, press enter button.
4) Input command: ./LCD35_v, press enter button.
5) The raspberry will reboot.
6) The 3.5’’ LCD display should come alive in a few seconds.


how to enable spi ? ls /dev/spi* result ls: cannot access /dev/spi*: No such file or directory
To enable SPI, pls try to the following way:
1) run shell command: sudo raspi-config
2) Then select Advance Options and enable SPI
thank you for help, I’ve tried not work :/
Do you mean you want to change the SPI value of the LCD? It can’t change, but just to enable SPI when you connect the LCD with your raspberry pi.
HELP! i followed instructions carefully and screen is still white
1) Pls confirm your download the correct drvier(according to the version at the back of the LCD)
2) Pls make sure enter the correct command, as some command has the version for the driver(such as “cd LCD_show_v6_1_2”)
3) pls try to install the image with raspbian and 3.5 driver and try it again: https://osoyoo.com/2016/05/26/osoyoo-lcd-touch-screen-for-raspberry-pi-installation-guide/
Having problems when I input
>cd
>tar Xzvf LCD*.tar.gz
It returns
stdin: unexpected end of file
Child returned status 1
Error is not recoverable: exiting now
Pls help
How can I get the driver source code for v6.2?
pls download the driver on the link: en.kedei.net/raspberry/v6_1/LCD_show_v6_1_3.tar.gz.
This can work with V6.2.
No! I need the source code! I want to use display with HDMI! How to use the display as a fb1?
This LCD can’t use at the same time with HDMI
Why? That LCD uses SPI interface, right? Then I can use it parralell on the other framebuffer. So, where I can download the source code?
I’m sorry that the supplier aren’t willing to give us the source code.
Okay, then the author’s email of the ILI9325 module (in the LCD35 kernel) is correct (in modinfo)?
Hey Nikeron, is the used module really an ILI9325? Maybe we could then traceback the display connection and reverse-engineer it. From that point on when the schematics are released for everyone to build those displays themselfes, we could hack it then and create a free driver?
Hi –
How can I enable a screensaver/blanking so that the screen does not stay on permanently?
Thanks!
No, This LCD don’t have this function.
I have an old LCD that is version 2.0. Where can I download this driver? Thank you.
I’m sorry there is no driver for V2.0.
Hola
Tengo una Raspberry Pi 3 Modelo B
instalado soft 2017-03-02-raspbian-jessie
y una Pantalla Táctil de 3.5″ LCD
el problema es que instalo los drivers LCD_show_v6_1_3.tar.gz
y se me reinicia la Raspberry y se ve bien. El problema es que el puntero del ratón al mover el lápiz óptico no se mueve.
Si me podrian ayudar
gracias
un saludo
Traductor de Goog
Hello
I have a Raspberry Pi 3 Model B
Installed soft 2017-03-02-raspbian-jessie
And a 3.5 “LCD Touch Screen
The problem is that I install the drivers LCD_show_v6_1_3.tar.gz
And it restarts the Raspberry and looks good. The problem is that the mouse pointer when moving the stylus does not move.
If they could help me
Thank you
a greeting
are you willing to use a new TF card to try the instruction:
https://osoyoo.com/2016/05/26/osoyoo-lcd-touch-screen-for-raspberry-pi-installation-guide/
Hello,
I downloaded RetroPie from https://retropie.org.uk/docs/First-Installation/ and have been trying to get my 3.5″ LCD to work. I downloaded the driver from http://kedei.net/raspberry/raspberry.html as described, but whenever I try and extract it with the “tar xzvf LCD_show_v6_1_3.tar.gz” around 50 lines are executed and then the Pi crashes. When I restart it, it goes into a kernel panic every time. I’ve reinstalled my OS multiple times. I cannot download the raspbian distro with the driver because I have been unable to install RetroPie on top of it and have been unable to display it on the LCD.
Thanks!
Solved it. Not enough power being supplied via the cord I was using.
buenas tardes es que le instale el driver pero no me inicia el sistema operativo.
Do you mean you don’t want to install the LCD driver but just install OS? If so, this LCD can’t work, but you can search a 3.5 HDMI LCD in our store and it works with just OS for display function.
Hi, I got version 6.3 of the screen. I tried installing it on the latest Raspbian with latest drivers from kedei.net. But when the Raspberry starts booting, the screen only works for a few seconds before being frozen. ( Raspberry works, only screen is frozen ).
Video: https://youtu.be/PUNhsEEE01A
Are you willing to test the LCD with raspbian before 2017-04-10?
or change a sd card and try it again?
I tried with Raspbian 2017-03-03 and its exactly the same.
Ok, so, before I was using a Raspberry Pi Zero. Now I switched to my Raspberry Pi 3B and it works great. Any idea on why it won’t work on the Zero? The pinout is the same, is it possible that one of my pins isn’t good?
i got my screen working but the colors are inverted ive tried setterm –inversscreen
please help
Are you willing to take a photo and send to my email address: [email protected]
sent you an email thanks
cant figure it out or what?
Is there a driver for a ver. 3.0 screen?
Buenas tardes, yo tengo instalado raspbian en la Raspberry Pi 3 y la pantalla, el modelo que me pone por detrás es XPT2046, siguiendo el tutorial consigo que funcione la pantalla táctil pero no está calibrada.
Alguien tiene solución a esto?.
Muchas Gracias
Does the screen display when you install the driver?
Which part do you want to adjust?
You can leave video to my email: [email protected]
Hello,
The display is working but the touch of the 3.5 touch screen is not working!!
Should i download a driver?
I had this happen initially. To resolve it I DISABLED SPI under raspi-config and then also set the bootup settings to be Desktop. I have a weird keyboard and the CTRL-ALT Fn keys didn’t work right, but normally CTRL-ALT-F1 or F7 change you from terminal to desktop virtual sessions in Linux.
Do you follow the instruction to download and install the driver?
Finally got my whitescreen issue resolved with a loooong processes of a clean headless install of raspberian stretch and the drivers as outlined above. I have no monitor other than this screen. I now have an issue continuing with my project whose first step is to do an update and upgrade. This reverts me to the whitescreen issue again. Can I presume that every time I do an update I also then need to reinstall the driver? What else does the driver install overwrite?
Thanks in advance for your help.
Correction, the driver is actually already “installed” (copied and untar’d). I take it I just need to re-run LCD35_v. What does this do, exactly?
Is there a driver for 1.1 version 2017/2/1??
Pls download the driver according to the version of your LCD
Guys hello!
I have such a screen:
https://cdn1.savepice.ru/uploads/2017/10/8/2007f3f02c7c2d5cc638c9026a5352b2-full.jpg
How to make it work?
Nothing helps(
I can not download the driver, Malinka writes 404 error.
I copied the archive from the flash drive to Malinka, it is not unpacked and does not open at all.
I generally do not understand how to be (
According the pic which you provide,you bought the HDMI type screen.
i’m afraid You have to read the HDMI screen installation guide which in the following link.
https://osoyoo.com/2016/11/20/raspberry-pi-3-5inch-hdmi-touchscreen/
I downloaded from here: http://kedei.net/raspberry/raspberry.html
file: LCD_show_35hdmi_vertical
Through the console, I started the file inside the archive, and the drivers were installed.
But after rebooting the black screen is all the same!
I clicked all the files and still there is no image.
Please Help. I get an error message every time I boot monitor after Install. Monitor works, but the system does not boot up.
[ 3.355280] systemd-fsck[105]: /dev/mmcb1k0p2: clean, 144454/1923472 files, 1259512/7803392 blocks
Locks up at this point.
Used driver LCD_show_v6_1_3 and rpi_35_v6.3_jessie8_kernel_4_4_50 for the image file, then it booted up with no problem and no manual driver install.
If after installing the driver the screen freezes
use sudo raspi-config
and DISABLED SPI
LCD not working anymore after kernel update version:4.9, do you have an update for this driver?
Hi Smat, Please install the version 4.9 raspbian firstly, and then install the suitable version driver according to the isntruction. Please don’t update raspbian directly, as the driver can’t update for this
Hola buenas tengo un problema es que compre esta pantalla Raspberry PI 3 Modelo B 3.5 “pulgadas TFT Lcd con Pantalla Táctil de la interfaz SPI. 480*320 píxeles con lápiz táctil para PI 2
http://s.aliexpress.com/iABj6neU?fromSns=Copy to Clipboard .
(from AliExpress Android)
Yes, you can follow the instruction if you buy the screen from the link: http://s.aliexpress.com/iABj6neU?fromSns=Copy
1).I got my display >>>the Raspberry PI 3 Model B 3.5″inch TFT LCD V6.3 2016/11/1.<<>> RASPBIAN STRETCH WITH DESKTOP<<
https://www.raspberrypi.org/downloads/raspbian/
3).I downloaded the driver for my display from here>>>
http://kedei.net/raspberry/raspberry.html
4).I copied the file >>>LCD_show_v6_1_3.tar.gz<<>/home/pi<>> RASPBIAN STRETCH WITH DESKTOP<<>tar xzvf LCD*.tar.gz<>cd LCD_show_v6_1_3<> ./LCD35_v <>R-pi display to HDMI<> cd LCD_show_v6_1_3 <> ./LCD_hdmi <>./LCD_dhmi<>HDMI to R-pi display<>R-pi display to HDMI<>HDMI to R-pi display<>>!! #I feel like I want to return my display now#.
https://www.aliexpress.com/item/Raspberry-PI-3-Model-B-3-5-inch-TFT-LCD-Display-with-Touch-Screen-by-SPI/32804087006.html?shortkey=iABj6neU&addresstype=600
another disadvantaged: I can not use double display.i can not use HDMI connector with my secondary display at the same time.
this can make bigger sales $$$$ if the creator gives a driver that can solve the problem or show how to enable the HDMI for extended display or double display mode activated function.
or what do you think about it?, elaine.
please contact the creator and help us to have a very good driver- 🙂
1).I got my display >>>the Raspberry PI 3 Model B 3.5″inch TFT LCD V6.3 2016/11/1.<<>> RASPBIAN STRETCH WITH DESKTOP<<
https://www.raspberrypi.org/downloads/raspbian/
3).I downloaded the driver for my display from here>>>
http://kedei.net/raspberry/raspberry.html
4).I copied the file >>>LCD_show_v6_1_3.tar.gz<<>/home/pi<>> RASPBIAN STRETCH WITH DESKTOP<<>tar xzvf LCD*.tar.gz<>cd LCD_show_v6_1_3<> ./LCD35_v <>R-pi display to HDMI<> cd LCD_show_v6_1_3 <> ./LCD_hdmi <>./LCD_dhmi<>HDMI to R-pi display<>R-pi display to HDMI<>HDMI to R-pi display<>>!! #I feel like I want to return my display now#.
https://www.aliexpress.com/item/Raspberry-PI-3-Model-B-3-5-inch-TFT-LCD-Display-with-Touch-Screen-by-SPI/32804087006.html?shortkey=iABj6neU&addresstype=600
another disadvantaged: I can not use double display.i can not use HDMI connector with my secondary display at the same time.
this can make bigger sales if the creator gives a driver that can solve the problem or show how to enable the HDMI for extended display or double display mode activated function.
or what do you think about it?, elaine.
please contact the creator and help us to have a very good driver- 🙂
1).I got my display the Raspberry PI 3 Model B 3.5″inch TFT LCD V6.3 2016/11/1.
2).I installed the ” RASPBIAN STRETCH WITH DESKTOP” on my new Raspberry Pi 3 Model B following all the easy instructions on it from here
https://www.raspberrypi.org/downloads/raspbian/
3).I downloaded the driver “LCD_show_v6_1_3” for my display from here:
http://kedei.net/raspberry/raspberry.html
4).I copied the file “LCD_show_v6_1_3.tar.gz” into directory “/home/pi” of the RASPBIAN STRETCH WITH DESKTOP
5).I executed the command tar xzvf LCD*.tar.gzand all file were decompressed, it takes few minutes.
6). I executed the command cd LCD_show_v6_1_3 then I execute the command “./LCD35_v” and the magic begins to work!!
7). The raspberry Pi will reboot, it does not take “SECONDS” , it takes few MINUTES to reboot. it looks like nothing happen but it is happening!!
8). My display is working with my R-Pi3b module.
9). To change from R-pi display to HDMI I executed the command “cd LCD_show_v6_1_3″ then I executed the command ” ./LCD_hdmi”
“ATTENTION” in the instructions they wrote >>./LCD_dhmi<>HDMI to R-pi display<<: it is just to reinstall the driver again, I need to execute the point 5) through the point 7) again.
this is a bit annoying to change from "R-pi display to HDMI" or "HDMI to R-pi display", if you want to give a public presentation or if you make projects involving the HDMI connector at the same time using a extended display or cloned display or projecting video or images PNG.
This is going to be disadvantaged for new customers and for the business!! #I feel like I want to return my display now#.
https://www.aliexpress.com/item/Raspberry-PI-3-Model-B-3-5-inch-TFT-LCD-Display-with-Touch-Screen-by-SPI/32804087006.html?shortkey=iABj6neU&addresstype=600
another disadvantaged: I can not use double display.i can not use HDMI connector with my secondary display at the same time.
this can make bigger sales if the creator gives a driver that can solve the problem or show how to enable the HDMI for extended display or double display mode activated function.
or what do you think about it?, elaine.
please contact the creator and help us to have a very good driver- 🙂
1).I got my display the Raspberry PI 3 Model B 3.5″inch TFT LCD V6.3 2016/11/1.
2).I installed the ” RASPBIAN STRETCH WITH DESKTOP” on my new Raspberry Pi 3 Model B following all the easy instructions on it from here
https://www.raspberrypi.org/downloads/raspbian/
3).I downloaded the driver “LCD_show_v6_1_3” for my display from here:
http://kedei.net/raspberry/raspberry.html
4).I copied the file “LCD_show_v6_1_3.tar.gz” into directory “/home/pi” of the RASPBIAN STRETCH WITH DESKTOP
5).I executed the command tar xzvf LCD*.tar.gzand all file were decompressed, it takes few minutes.
6). I executed the command cd LCD_show_v6_1_3 then I execute the command “./LCD35_v” and the magic begins to work!!
7). The raspberry Pi will reboot, it does not take “SECONDS” , it takes few MINUTES to reboot. it looks like nothing happen but it is happening!!
8). My display is working with my R-Pi3b module.
9). To change from R-pi display to HDMI I executed the command “cd LCD_show_v6_1_3″ then I executed the command ” ./LCD_hdmi”
“ATTENTION” in the instructions they wrote “./LCD_dhmi” it is a misspelled command that easily can drive you CRAZY.
10).To change from “HDMI to R-pi display”: it is just to reinstall the driver again, I need to execute the point 5) through the point 7) again.
this is a bit annoying to change from “R-pi display to HDMI” or “HDMI to R-pi display”, if you want to give a public presentation or if you make projects involving the HDMI connector at the same time using a extended display or cloned display or projecting video or images PNG.
This is going to be disadvantaged for new customers and for the business!! #I feel like I want to return my display now#.
https://www.aliexpress.com/item/Raspberry-PI-3-Model-B-3-5-inch-TFT-LCD-Display-with-Touch-Screen-by-SPI/32804087006.html?shortkey=iABj6neU&addresstype=600
another disadvantaged: I can not use double display.i can not use HDMI connector with my secondary display at the same time.
this can make bigger sales if the creator gives a driver that can solve the problem or show how to enable the HDMI for extended display or double display mode activated function.
or what do you think about it?, elaine.
please contact the creator and help us to have a very good driver- 🙂
2CreativityForever. Big thank you !
I confirm, your instructions worked
I have Kedei 3.5″
480 X 320
version 6.3 2018/4/3
BUT how did you beat window sizing issue ????
Terminal window simply doesn’t fit the screen????
———————————————-
Hello, I have been able to install the driver and play/switch between LCD & HDMI, now is there any way to turn off the white screed or turn off LCD when Im not using it? Thanks
New way to install 3.5 inch LCD on Raspberry pi : https://youtu.be/Fj3wq98pd20
I have the screen version rpi 6.3 and I wanted to know if you can install the screen in a game system like retropie or recalbox
This screen don’t support retropie or recalbox. You can try our DSI screen: https://www.amazon.com/dp/B07KKB5YS9?ref=myi_title_dp.
hi,I got the 3.5 inch LCD with version 6.3. I want to make the display on os (RASPBIAN STRETCH WITH DESKTOP Kernel version:4.14 the latest version).
after installed os imageon Raspberry Pi 3,
I had downlod the LCD driver(LCD_show_v6_1_3.tar.gz) From here(http://kedei.net/raspberry/raspberry.html),
then execute the command “./LCD35_v” .
Only a quarter of the screen is displayed!
like this(https://youtu.be/escQTmPbKOQ).
need your help.
when I download rpi_35_v6_1_2_3_jessie_kernel_4_4_50.img and installed, that can be worked.
LCD_show_v6_1_3.tar.gz can not work on LCD ver6.3?
Hi – I’ve recently setup my Pi as an OpenVPN server. It has the 3.5″ screen v.6.3.
I downloaded the drivers – and installed as per your instructions.
The screen has come to life – however – all I get is 4 Raspberries in the top left corner.
The LCD doesn’t do anything else. Initially I had the Memory split set to 16MB – but this through up a memory error on the LCD. Setting it higher removes this error – but still nothing else.
The OpenVPN still works – and I can SSH into the Pi3 fine and I can also VNC into it fine.
Any idea why I’m not getting a desktop on the LCD?
Hello,
The link provided (https://drive.google.com/drive/folders/1B4RzLAjtJUNOKBrYfgRgPbdloLtNbPCC?usp=sharing)seems to be an empty folder.
How can I download drivers for a Raspberry Pi screen — the KeDei 3.5 inch SPI TFT LCD (480×320, 16bit/18bit, version 6.3, 2016/11/1, XPT2046) for Raspberry Pi Zero and Bullseye or BookWorm 32 bit OS ?
Thank you
This link is for old version screen. Please follow our new tutorial link:
For 64bit bullseye OS: https://osoyoo.com/2022/12/15/osoyoo-3-5-inch-spi-touch-display-for-rpi/
For bookworm OS: https://osoyoo.com/2025/06/04/3-5spibookworm/
Please follow these new links and try again.
If the screen doesn’t work, please contact with my email address: [email protected]