


| Buy from US |
Buy from UK |
Buy from DE |
Buy from IT |
Buy from FR |
Buy from ES |
Buy from JP |
 |
 |
 |
 |
 |
 |
 |

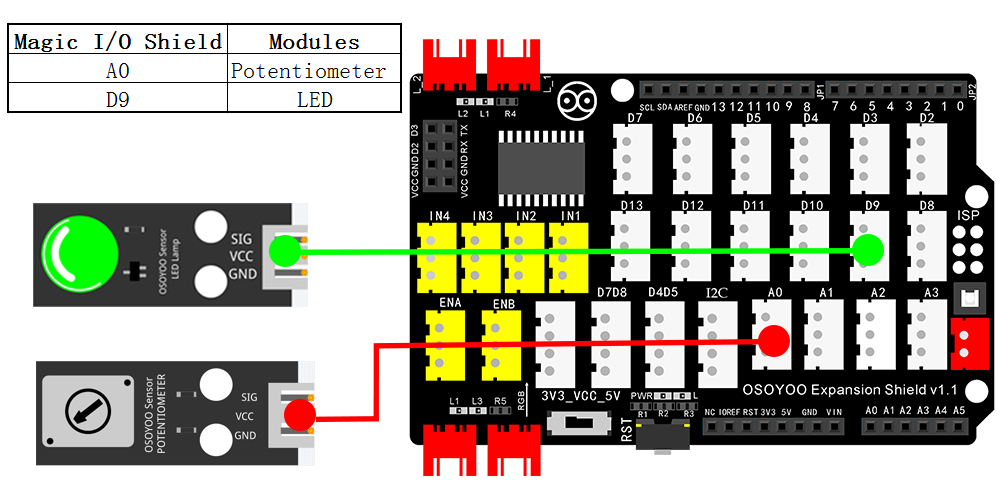
In this lesson, we will learn analog input. We read a potentiometer module data and use the value to control the light brightness of LED module . Both modules are connected to Osoyoo Magic I/O board for Arduino.

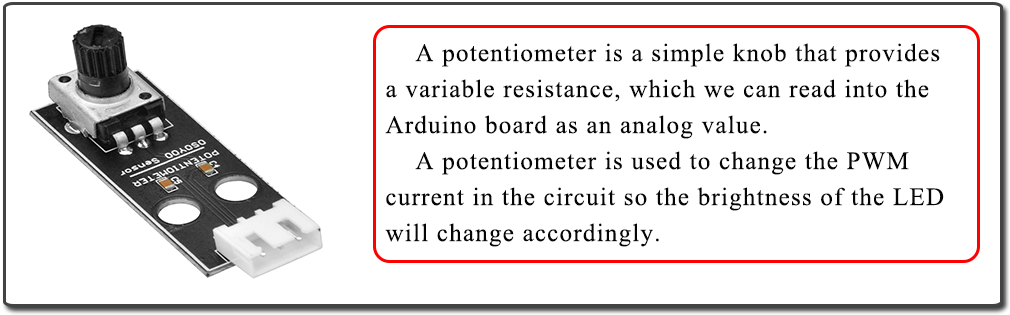
In this lesson, a potentiometer, or pot, is used to change the PWM current in the circuit so the brightness of the LED will change accordingly. And since the pot is an analog device, the current change is smooth, thus the blink brightness will gradually get bigger or smaller instead of going through an obvious stepwise process.
So what’s the difference between an analog value and a digital one? Simply put, digital means on/off, high/low voltage with just two states, i.e. either 0 or 1. But the data state of analog signals is a continuous range, for example, from 1 to 1023; Analog signals include those of light intensity, humidity, temperature, and so on.
What we mean by PWM here is the digitalization of analog signals, which is a process of approaching analog signals. Since the potentiometer inputs analog signals, it should be connected to analog ports, i.e. A0-A5, instead of digital ports.

- OSOYOO UNO Board (Fully compatible with Arduino UNO rev.3) x 1
- OSOYOO Magic I/O Shield for Arduino x1
- OSOYOO Potentiometer Module(10k) x 1
- OSOYOO LED Module x 1
- OSOYOO 3-Pin PNP Cable x 2
- USB Cable x 1
- PC x 1

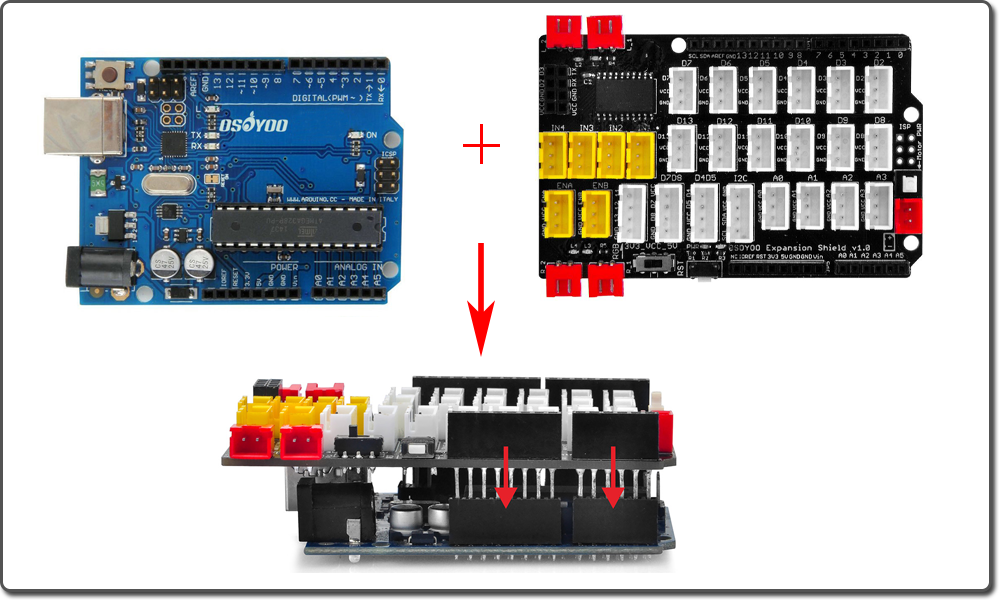
Firstly, please plug Osoyoo Magic I/O shield into UNO board as following:

Step 1) If you haven’t install mBlock software in your PC, please read Lesson 1, download and install the software.
Step 2) Run the mBlock PC software by double click the lovely Panda icon. Drag and Drop osoyoo_uno_mext file(downloaded in Step 1) to mBlock software as following:
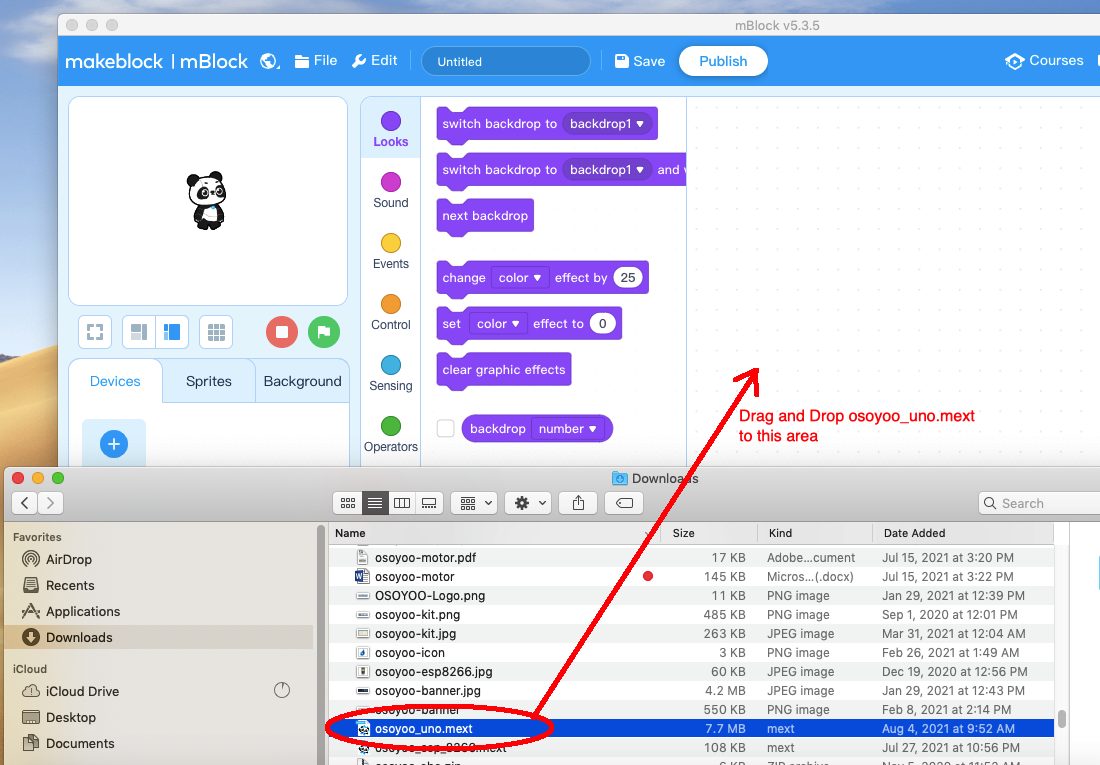
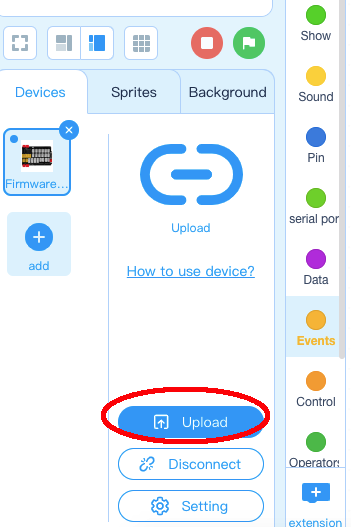
Now you will see a new device firmware in mBlock, see following picture:
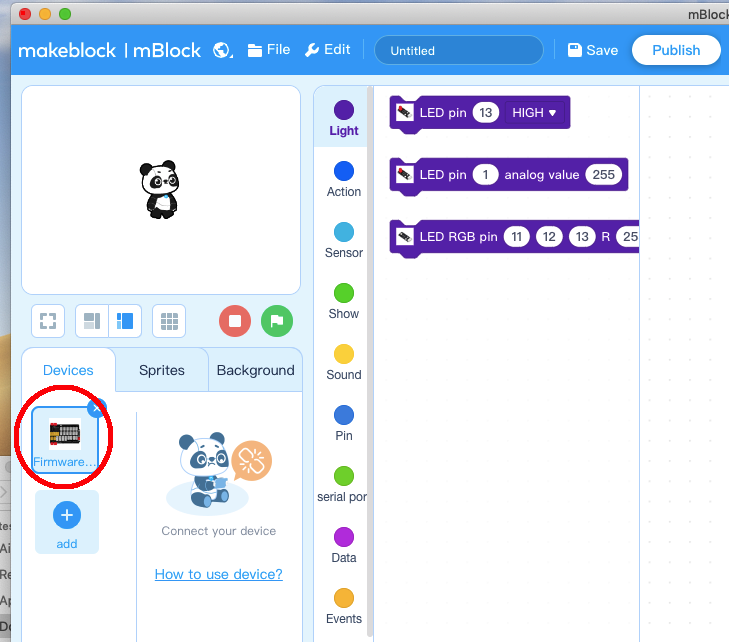
Now mBlock software and OSOYOO_UNO device firmware have been successfully installed in our PC!
Now we will show you how to use blocks to turn above idea into reality.
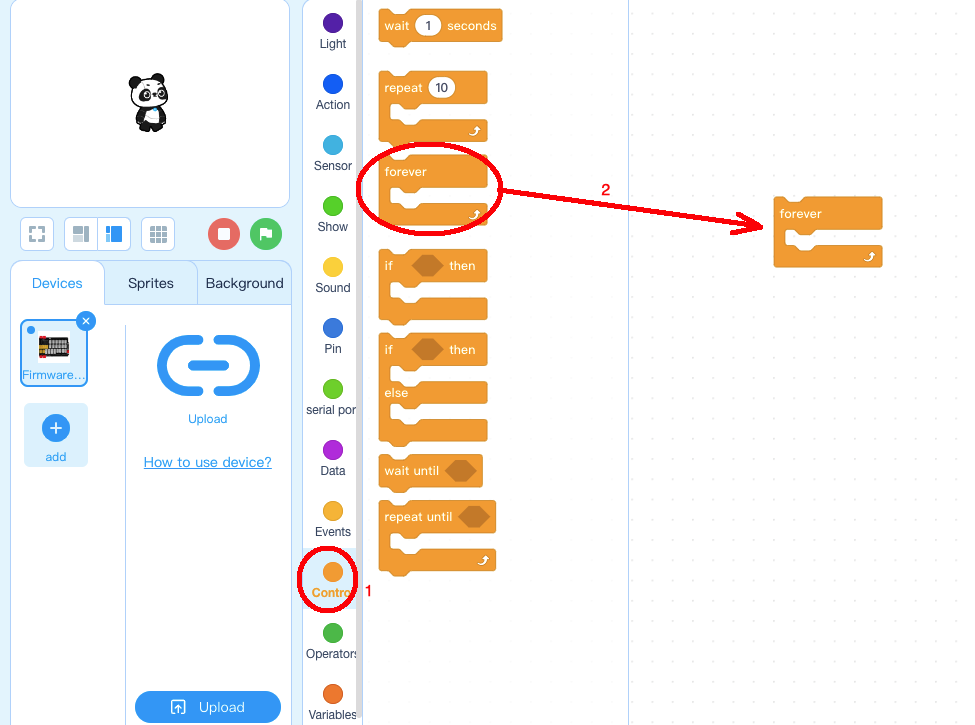
Step 1: Click Control, then Drag and drop Forever block to programming area as following:
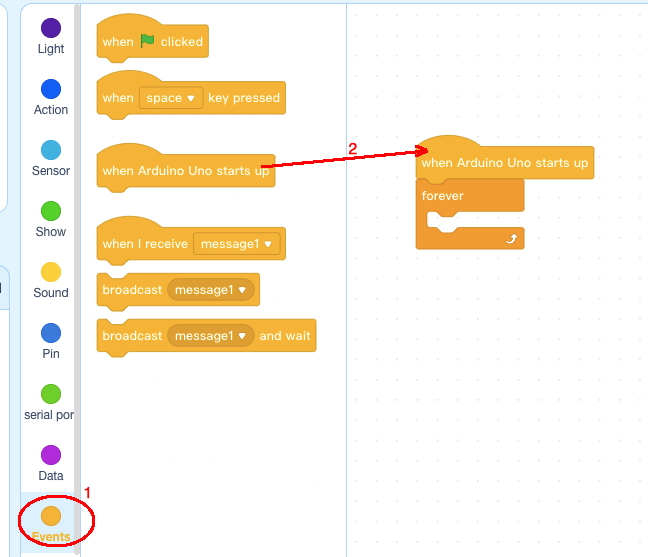
Step 2: Click Events, add when Arduino Uno starts up block to the top:
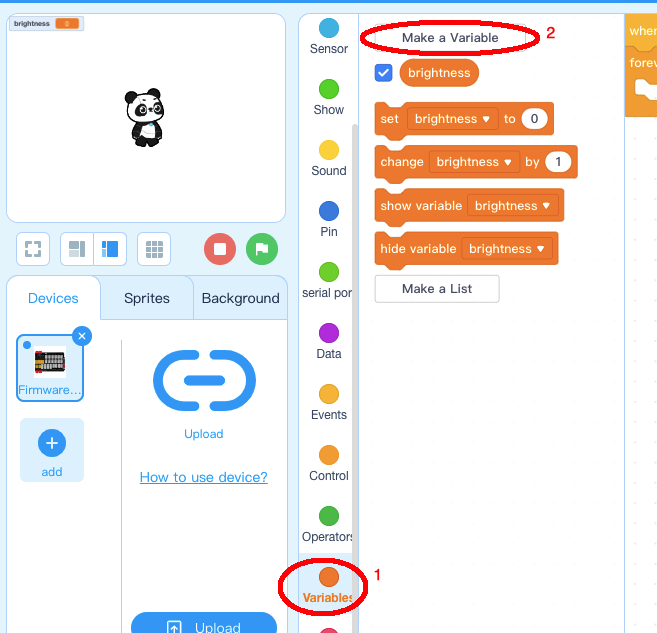
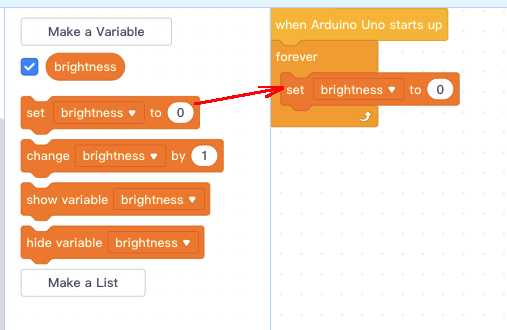
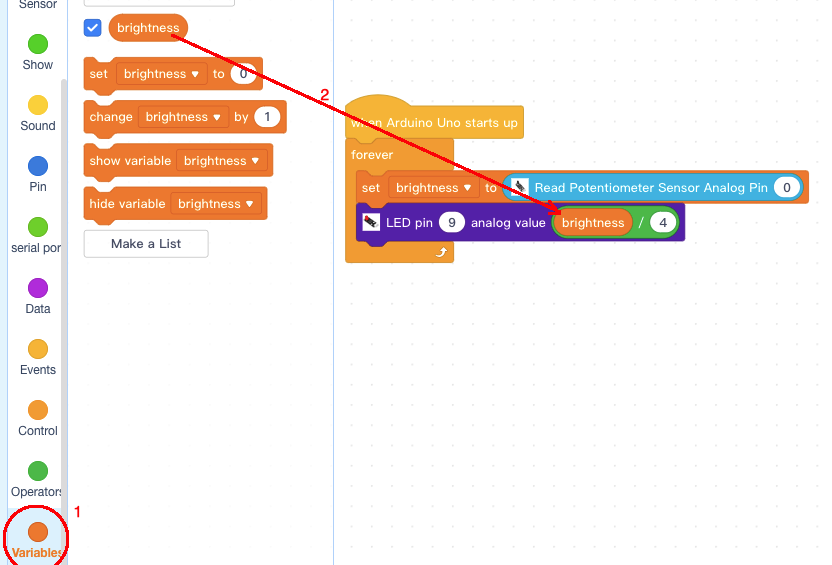
Step 3: Click Variable, make a variable and give it a name brightness:
Step 4: drag a set brightness to 0 block to forever loop:
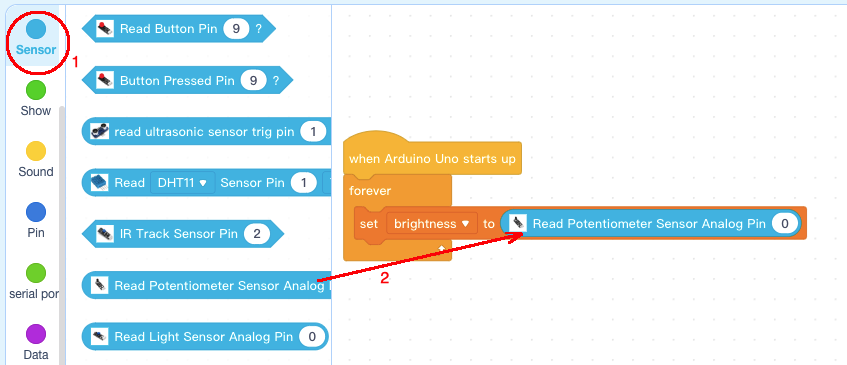
Step 5: Click Sensor category, add Read Potentiometer Sensor block to set brightness block:
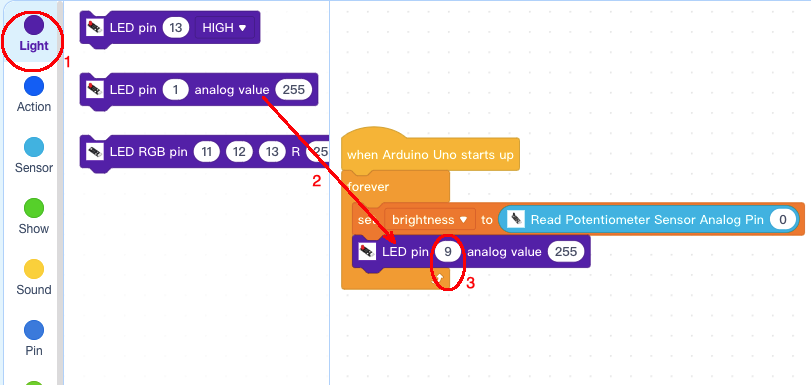
Step 6: Click Light, Add LED pin 1 analog value blocks below set brightness blocks, change pin number to 9:
Step 7: Click Operator, Add “/” divide opertor blocks below set brightness block, then change to denominator field to 4:
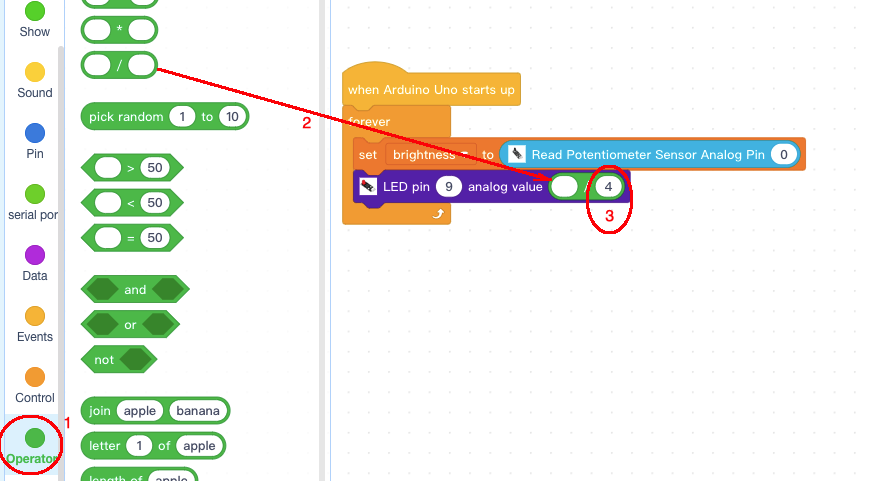
Step 8) Click Variable, then add brightness block numerator field :
Now we have complete the block programming. We can upload the program to Arduino.
Upload the program to Arduino
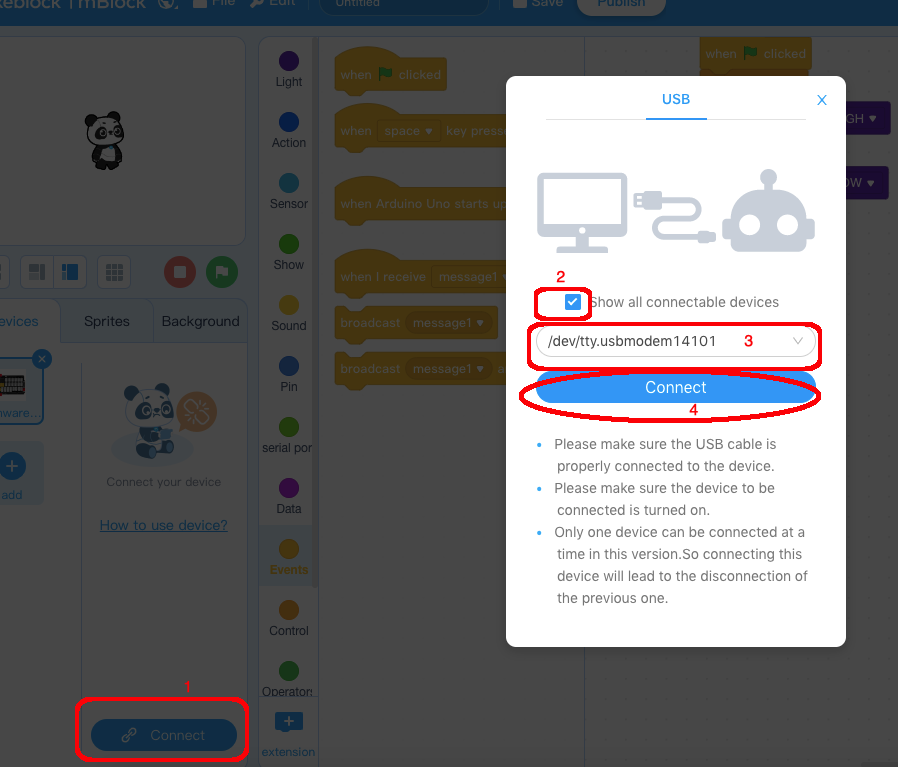
1)you need click the Connect button in the bottom of the mBlock software, you will see a USB window pop up,
2) select Show all connectable device check box , then a device drop-down menu will show up,
3) select your Arduino port from device drop-down menu
4) click Connect button to connect your PC to Arduino
5)After you PC is connected to Arduino UNO board, please click Upload button in the bottom of your software, then the code will be uploaded to Arduino UNO board:
Test the program:
Rotate the Potentiometer in A0 port, you will find the brightness of LED in D9 will change accordingly.


