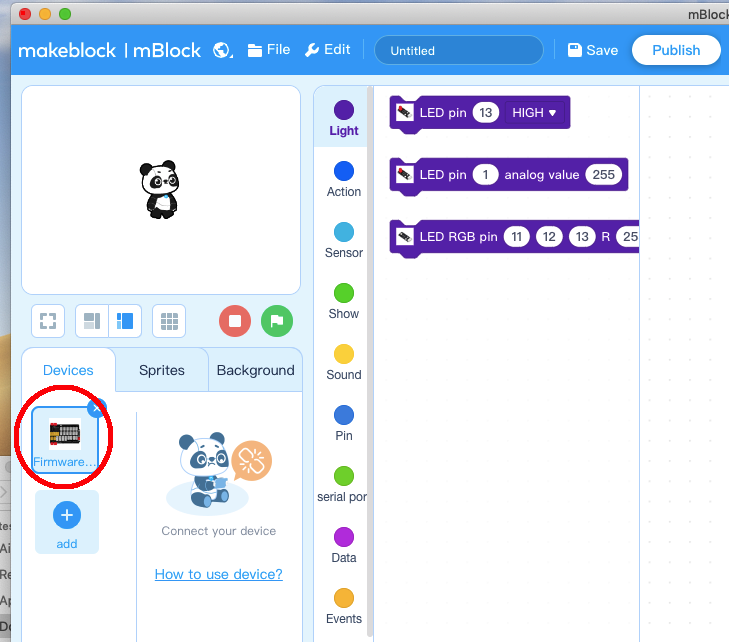
Step 3) Run the mBlock PC software by double click the lovely Panda icon. you will see mBlock UI as following picture. Please delete the default device CyberPi by click the cross in the red circle.
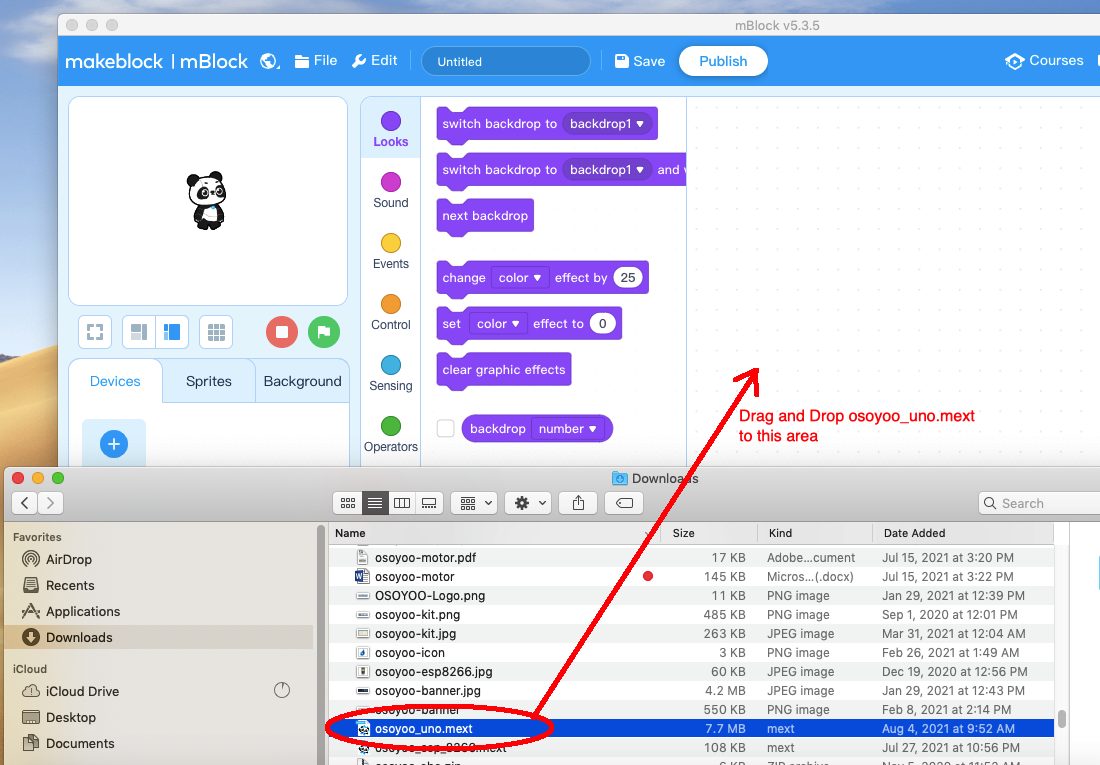
Step 4) Drag and Drop osoyoo_uno_mext file(downloaded in Step 2) to mBlock software as following:
Now you will see a new device firmware in mBlock, see following picture:
Now mBlock software and OSOYOO_UNO device firmware have been successfully installed in our PC!
Now we will show you how to use blocks to turn above idea into reality.
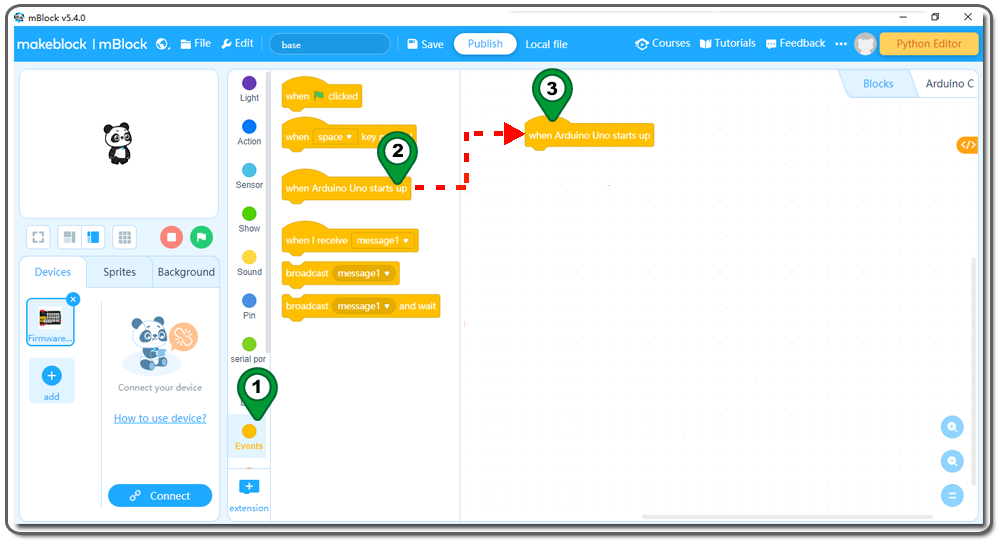
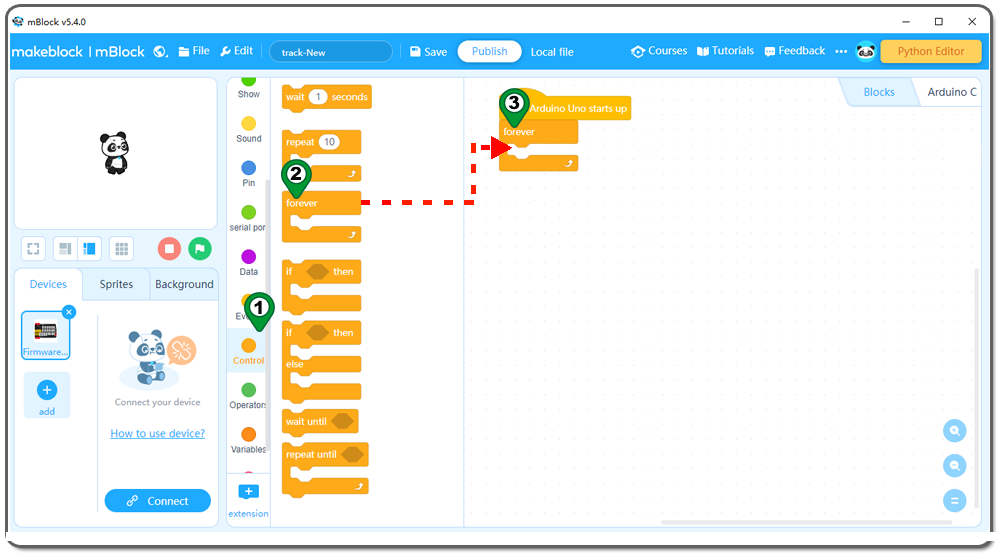
Step 5: Click Events, add when Arduino Uno starts upblock to the top:
Step 6: Click Control, then Drag and drop Forever block to programming area as following:
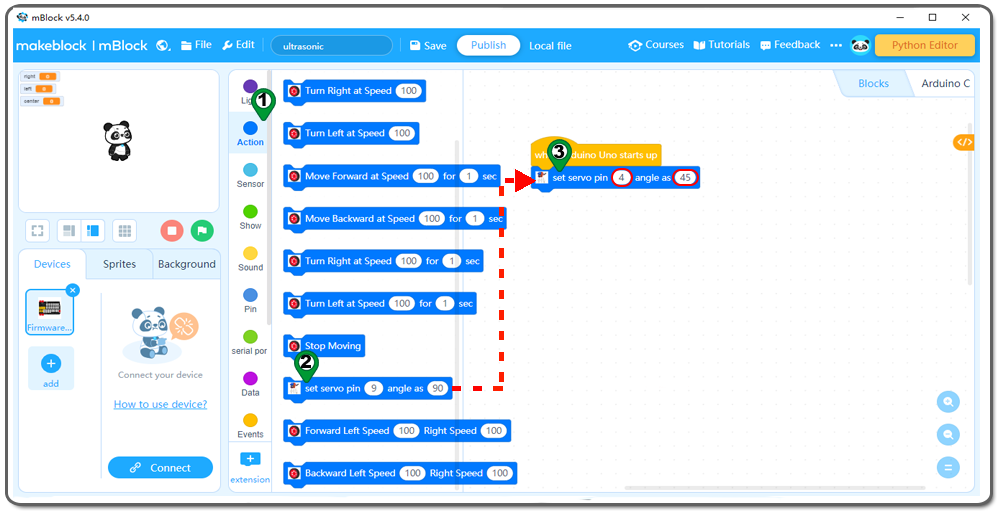
Step 7: Click Action, then Drag and drop set servo pin angle as block to programming area as following
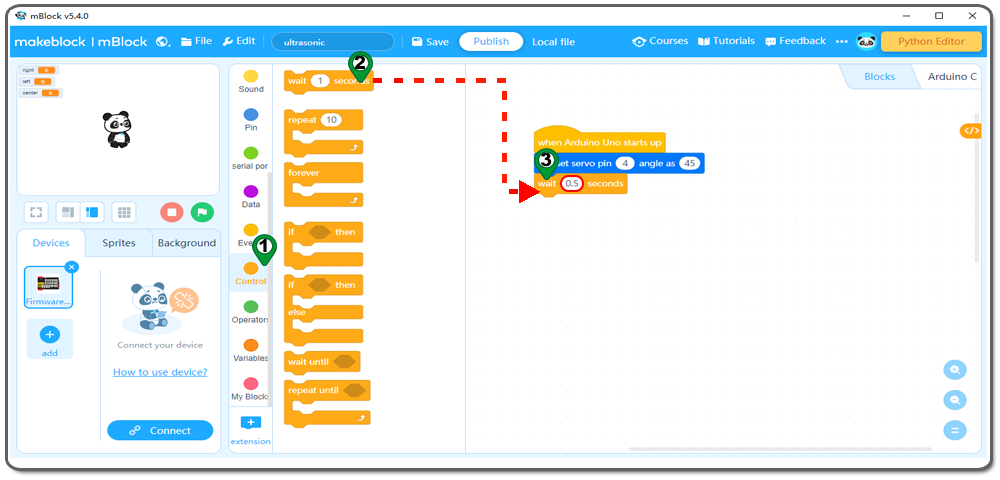
Step 8: Click Control, then Drag and drop wait seconds block to programming area ,writed 0.5 seconds as following:
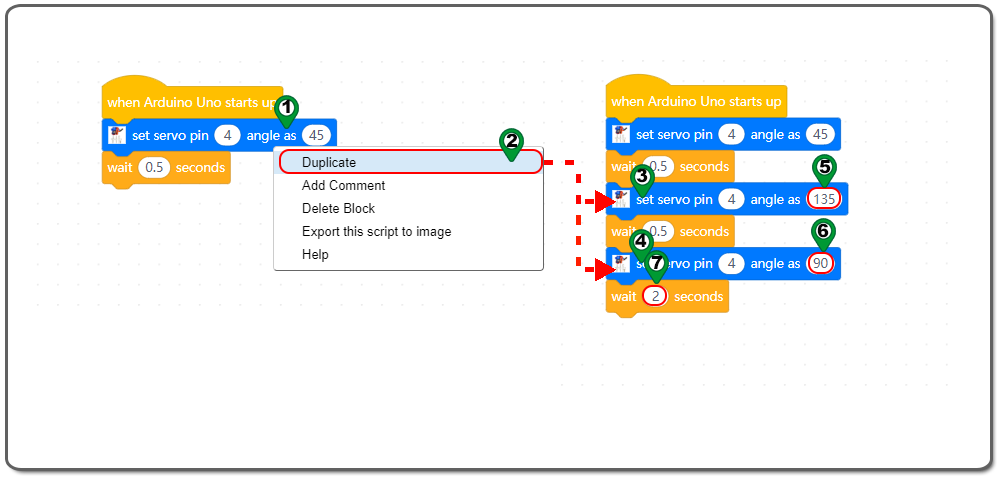
Step 9: Right click set servo pin angle as block ,Click duplicate from the digital write pin to block over . You will get a duplicated block ,and place it behind the wait seconds block .set the 45 to 135 and 90 value as following figure.
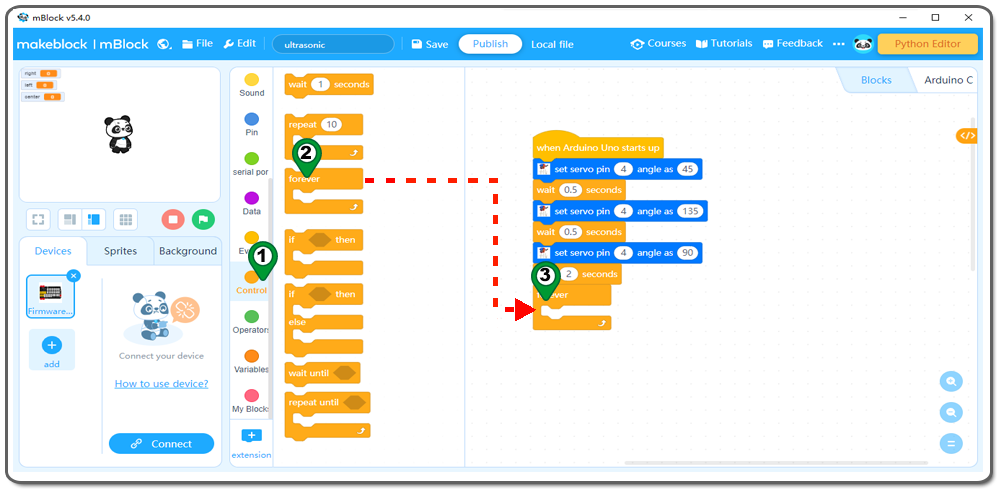
Step 10: Click Control, then Drag and drop forever block to programming area as following:
Step 11: Click Action, then Drag and drop set servo pin angle as block to programming area,change the 90 to 45 value as following;
Step 12: Click Control, then Drag and drop wait seconds block to programming area ,writed 0.5 seconds as following:
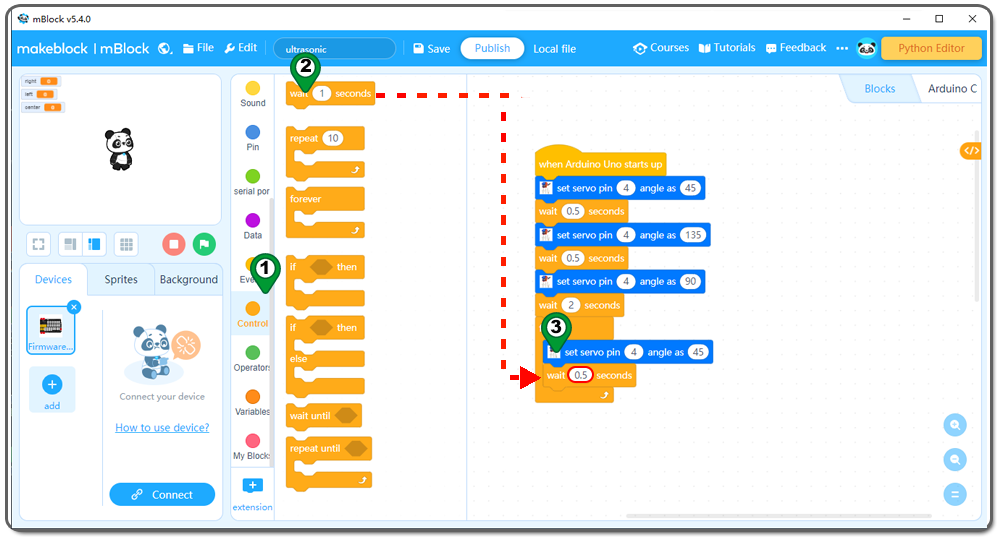
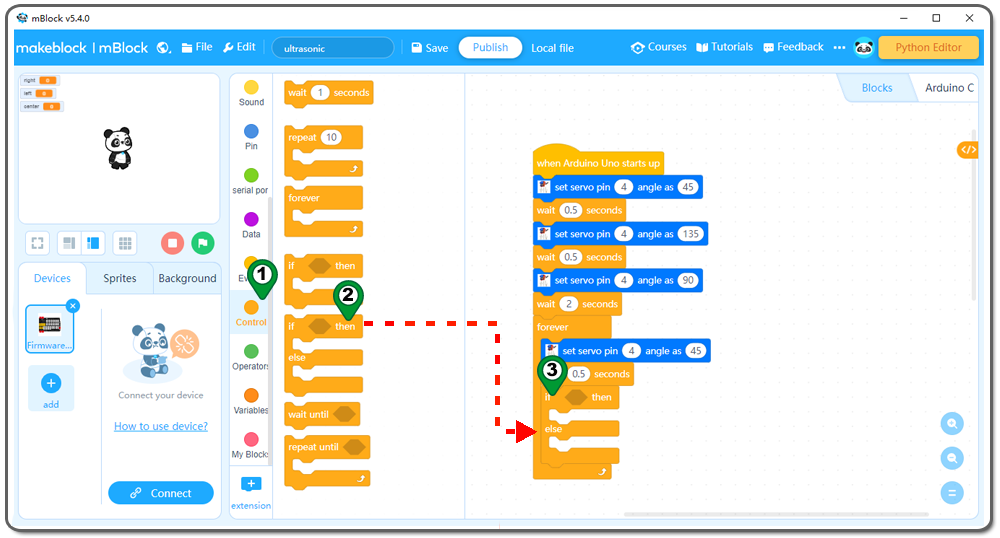
Step 13: Click Control, then Drag and drop if then else block to programming area as following:
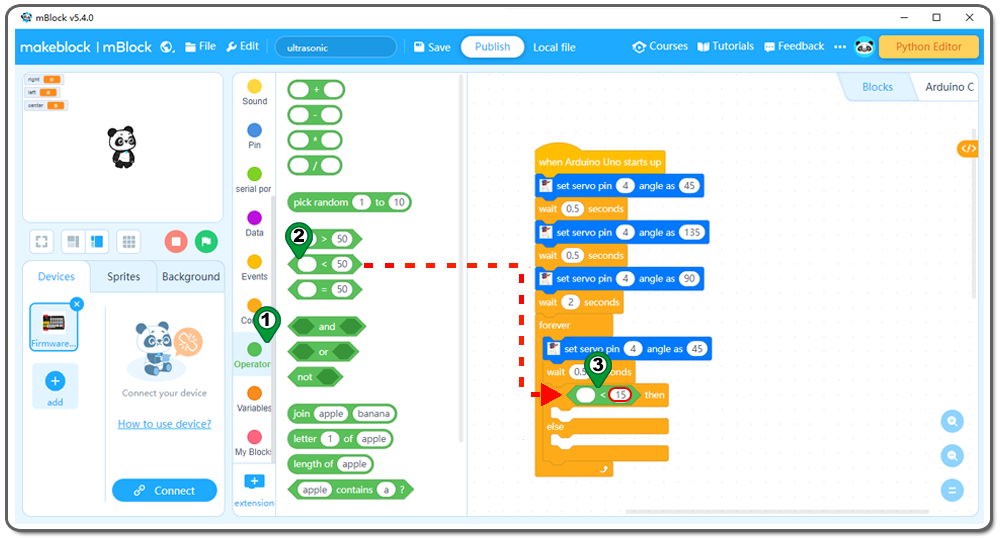
Step 14: Click Operation, then Drag and drop 0<0 block to programming area ,change the 0 to 15 as following:
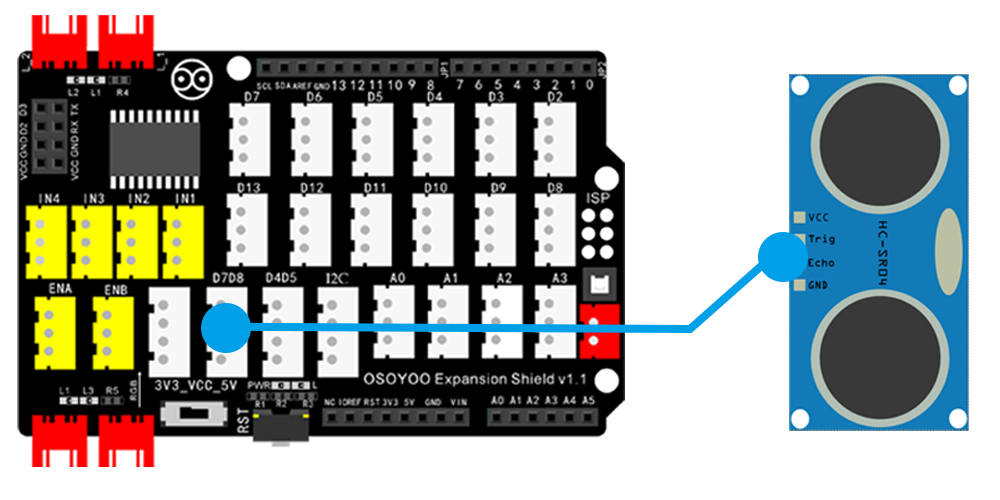
Step 15:Click Sensor, then Drag and drop read ultrasonic sensor trig pin echo pin block to programming area ,writed pin 7 and pin 8 as following;
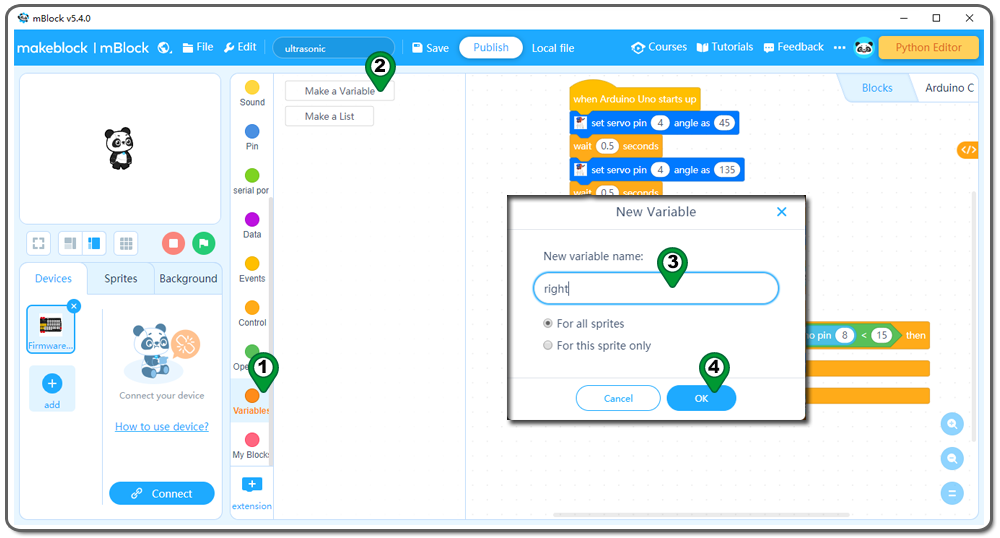
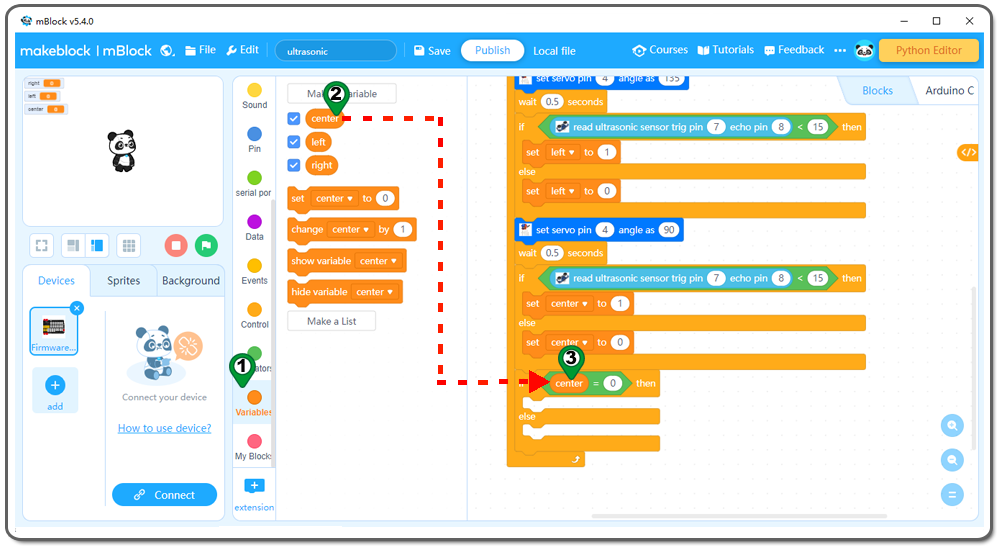
Step 16:Click Variable , then click the make a Variable block ,writed right in the dialog box blank as following. Create left and center variables in the same way;
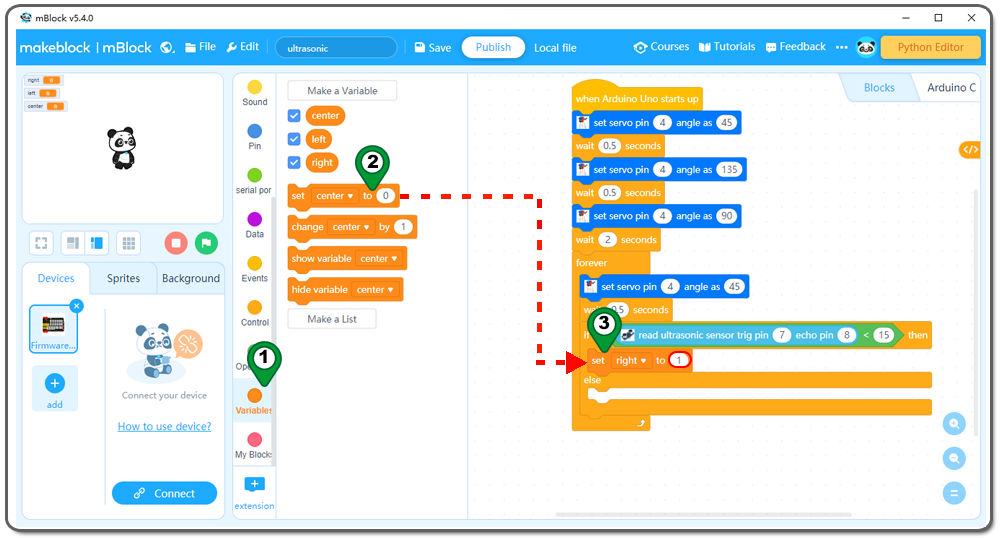
Step 17: Click Variable, then Drag and drop set center to block to programming area ,change the center to right ,writed 0 to 1 value , as following:
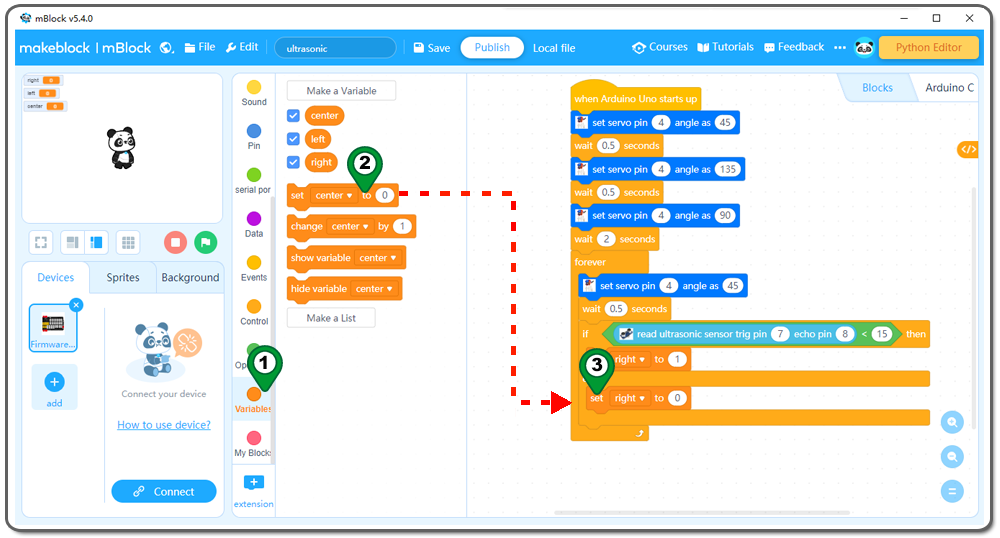
Step 18:Repeat the previous step,change the 1 to 0 as following:
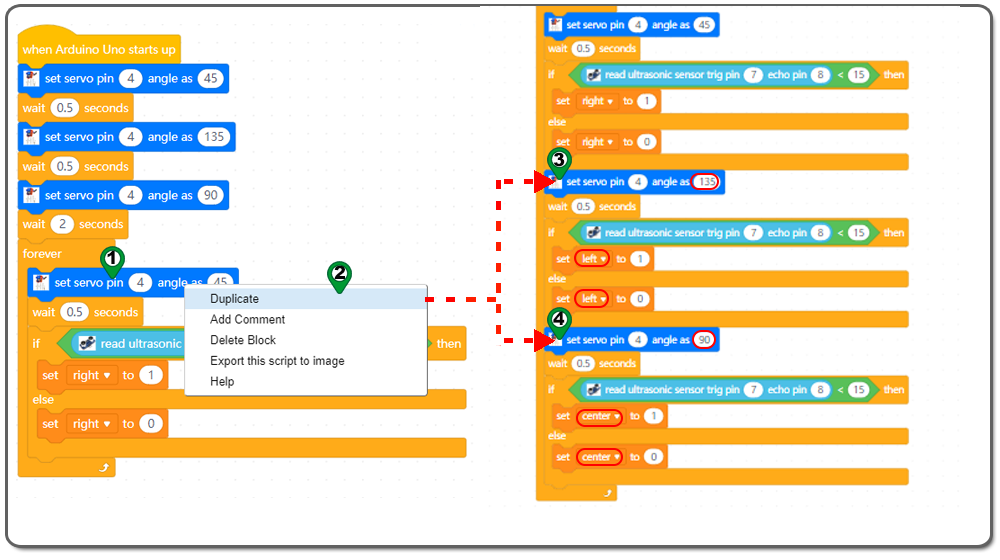
Step 19: Right click set servo pin angle as block ,Click duplicate from the digital write pin to block over . You will get a duplicated block ,and place it behind the wait seconds block .set the 45 to 135 and 90 value,change the right to left and center as following figure.
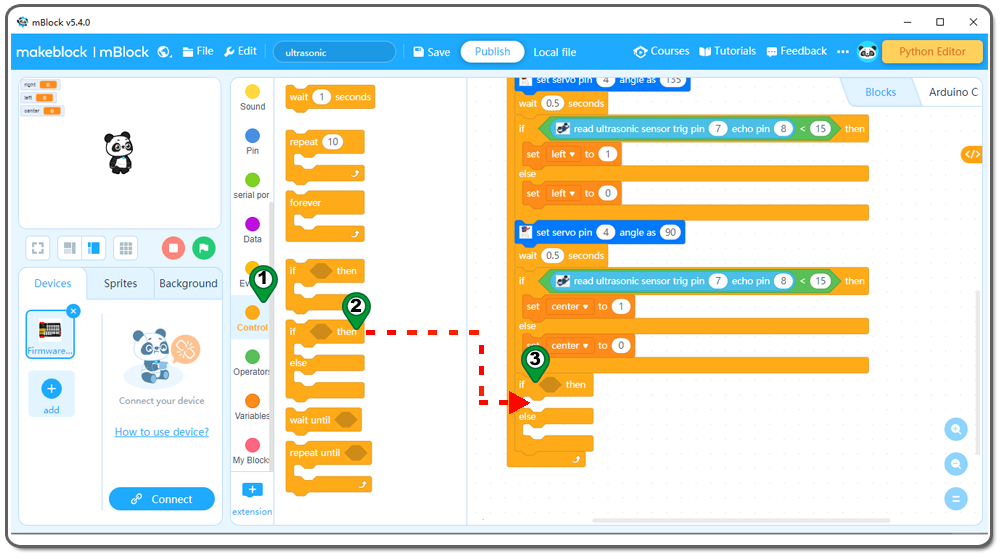
Step 20: Click Control, then Drag and drop if then else block to programming area as following:
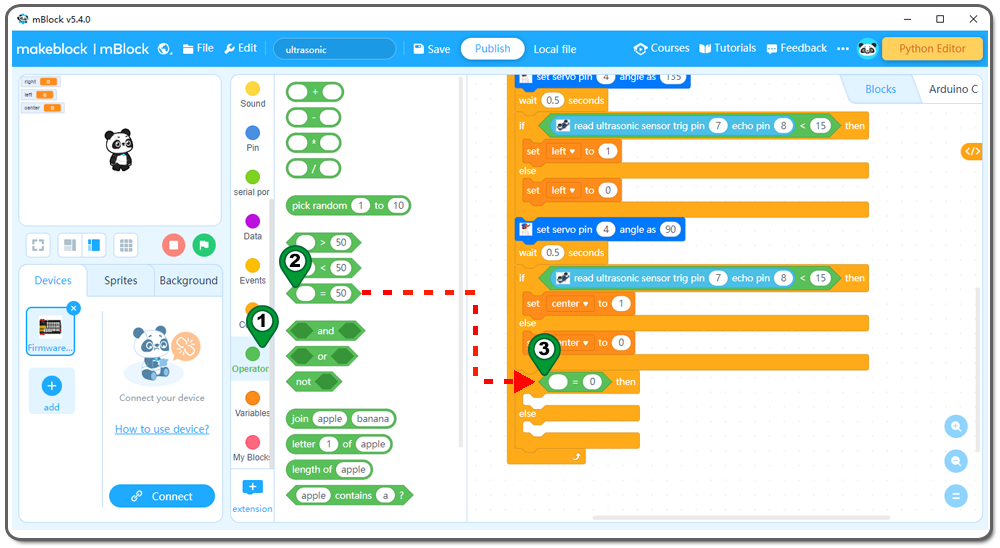
Step 21: Click Operation, then Drag and drop 0=0 block to programming area ,change the 50 to 0 as following:
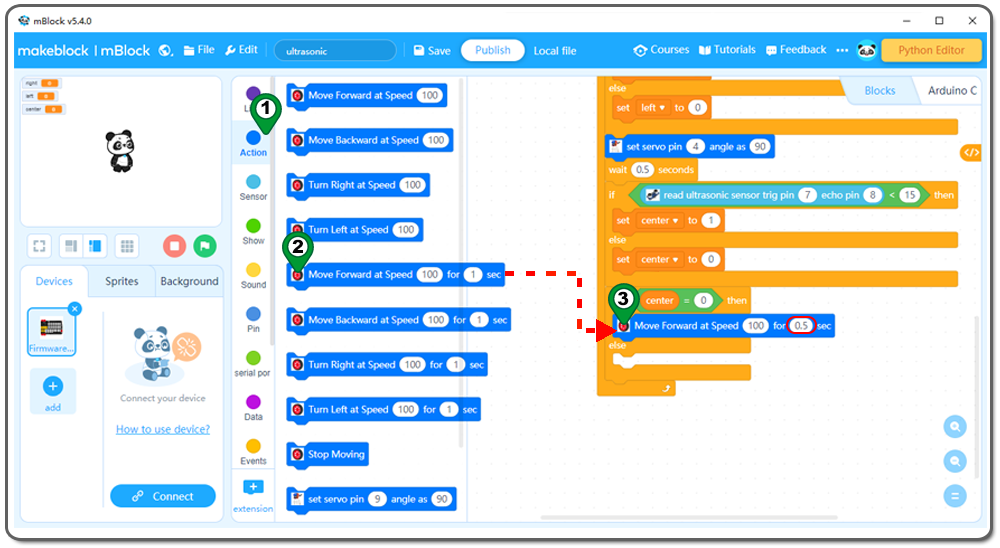
Step 22: Click Variable, then Drag and drop center block to programming area as following:
Step 23: Click Action, then Drag and drop Move forward at speed for block to programming area,change the 1 sec to 0.5 sec as following;
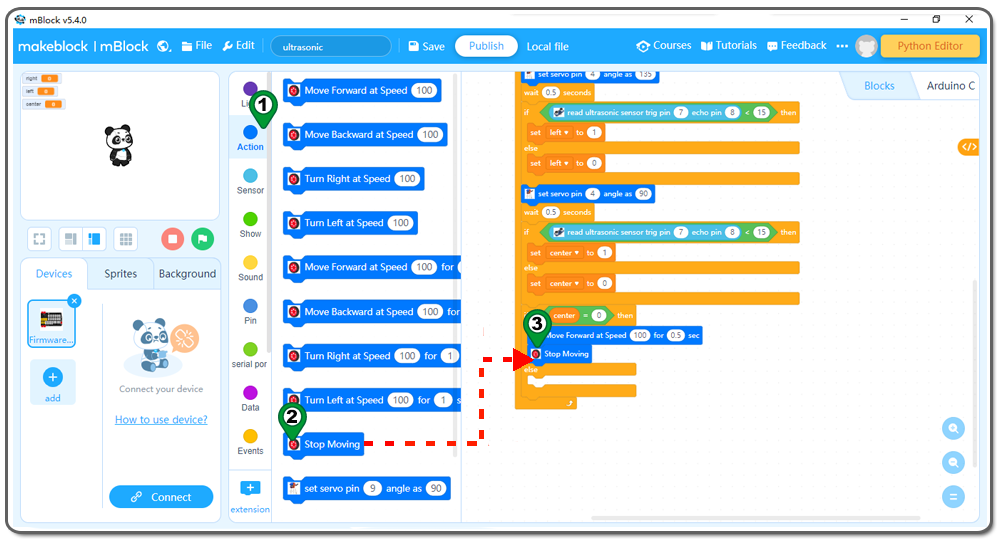
Step 24: Click Action again, then Drag and drop Stop Mowing block to programming area as following;
Step 25: Right click if center =o then block ,Click duplicate from the digital write pin to block over . You will get a duplicated block ,and place it behind Stop Moving block .Change the center to left and right as following figure.
Step 26: Click Action, then Drag and drop Turn Right at speed for block to programming area,change the 1 sec to 1.5 sec as following;
Step 27: Click Action again, then Drag and drop Stop Mowing block to programming area as following;
Now we have completed the block programming. The final blocks look like following:
Now all the programming blocks have been completed! From above picture, the logic is pretty straight forward:
When Arduino is started, computer will enter a dead loop which will check the button status, when button is not pressed, the servo will stop at original position (in my servo 0 degree ) and elevator is in the ground , when button is pressed, the servo arm will rotate from 0 degree position to 180 degree position and the elevator is lifted to the air.
Step 28 Upload the program to OSOYOO basic board
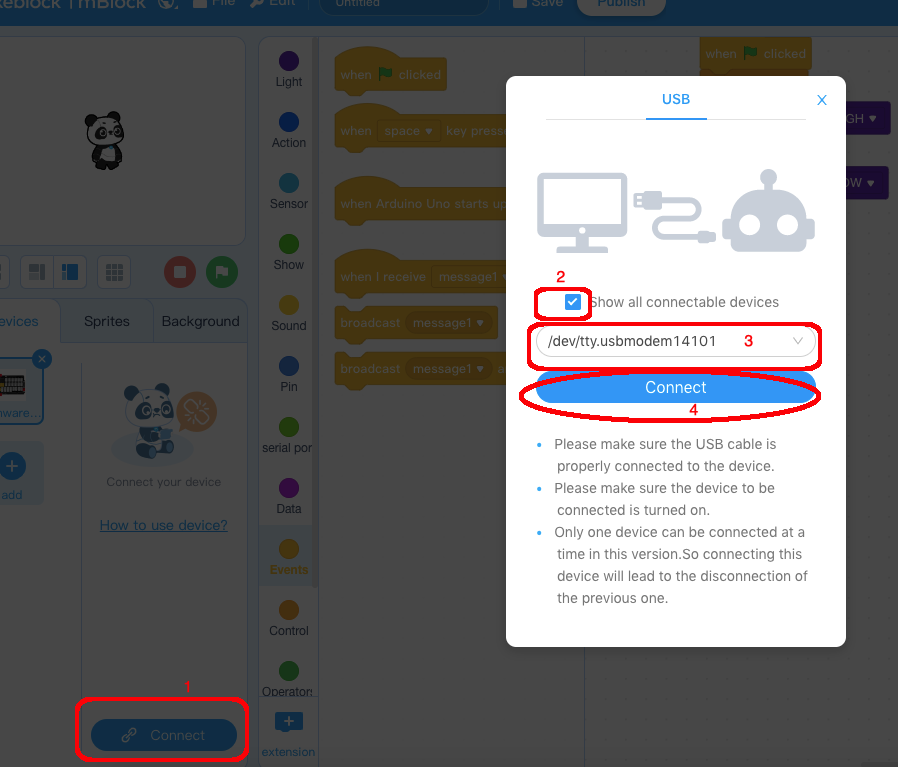
1) Please connect your OSOYOO basic board to your PC with USB cable firstly. Then click the Connect button in the bottom of the mBlock software, you will see a USB window pop up,
2) select Show all connectable device check box , then a device drop-down menu will show up,
3) select your port from device drop-down menu
4) click Connect button to connect your PC to OSOYOO basic board.
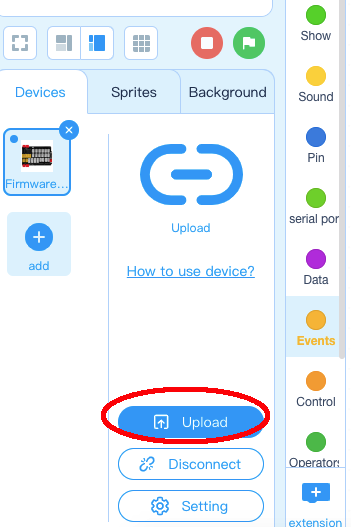
5)After you PC is connected toOSOYOO basic board, please click Upload button in the bottom of your software, then the code will be uploaded to OSOYOO basic board:
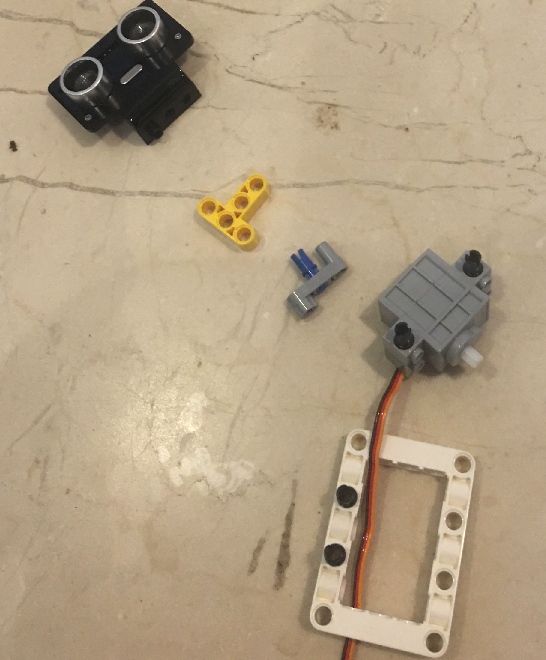
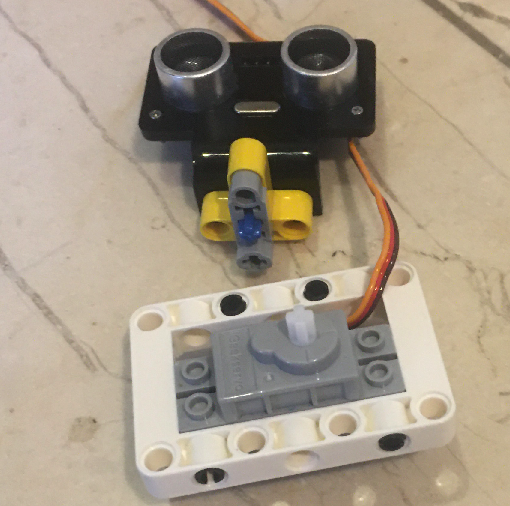
Adjust the Ultrasonic Sensor direction:
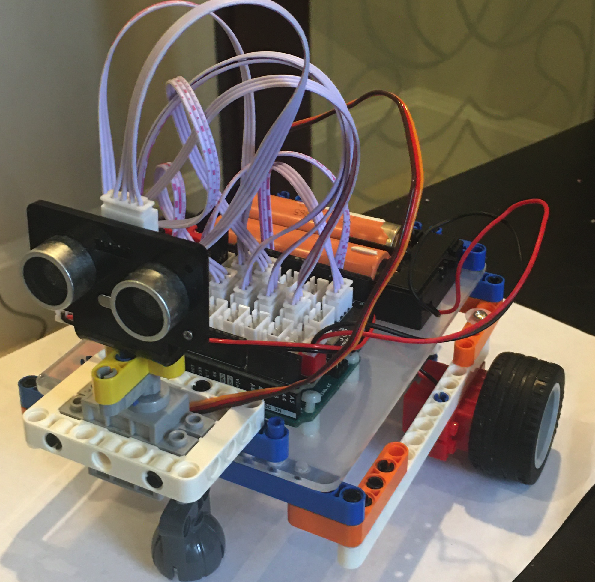
After the code is loaded into robot car, unplug the USB cable from the UNO board and turn on the power switch on the Magic I/O board. Then the ultrasonic sensor will rotate to face the straight forward direction for 5 seconds. If the Ultrasonic sensor is not facing the front position, please turn off the power. Please use a screw driver to adjust the ultrasonic sensor direction and make it facing straight ahead , then turn on the power again and during the early 5 seconds, the sensor should be facing front direction.
After the 5 seconds , the robot car will start to drive and change direction to avoid obstacles automatically.