The installation of this lesson is based on Lesson 1 framework. If you haven’t finished the assembly in Lesson 1, please review https://osoyoo.com/?p=4906 and complete the installation.
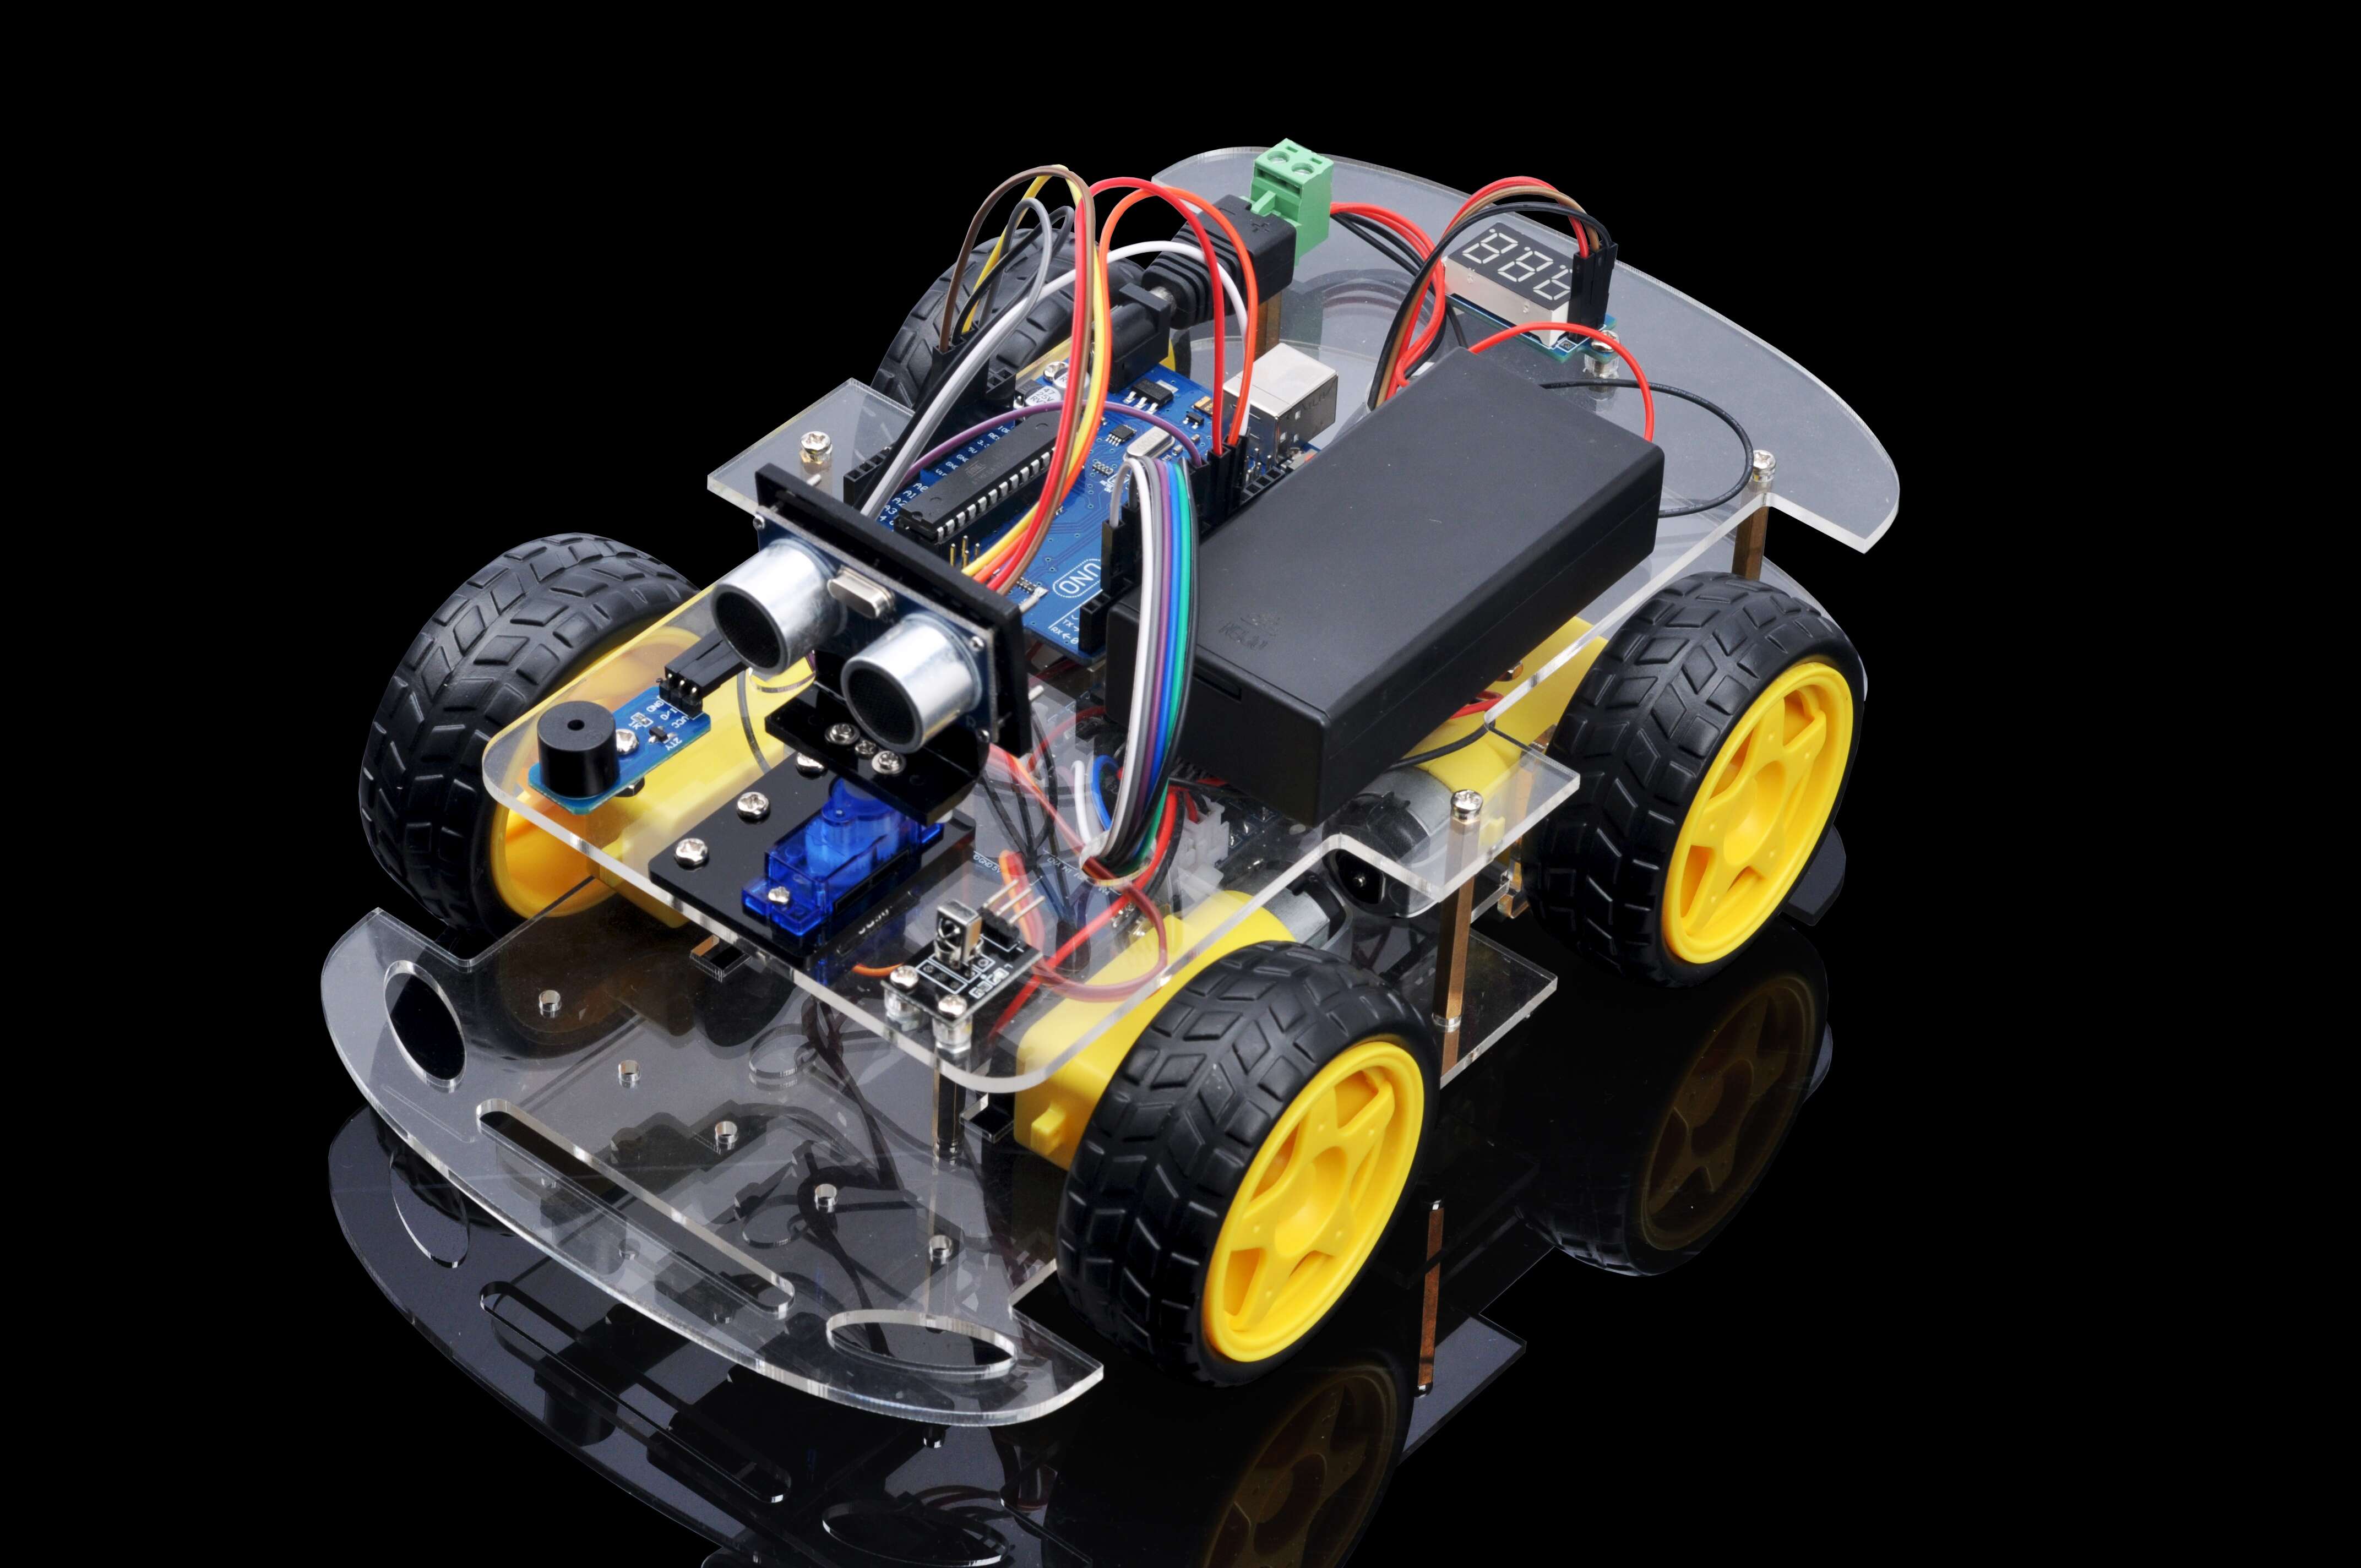
In this lesson, we will add a servo motor, an ultrasonic module and a buzzer onto Lesson 1 framework. With these new devices, the car can “see” obstacle through ultrasonic sensor and measure the distance. If the distance is less than predefined threshold value, the buzzer will beep and the car will turn around from the obstacle automatically.
Parts and Devices
Device Name
picture
qty
Screw Number
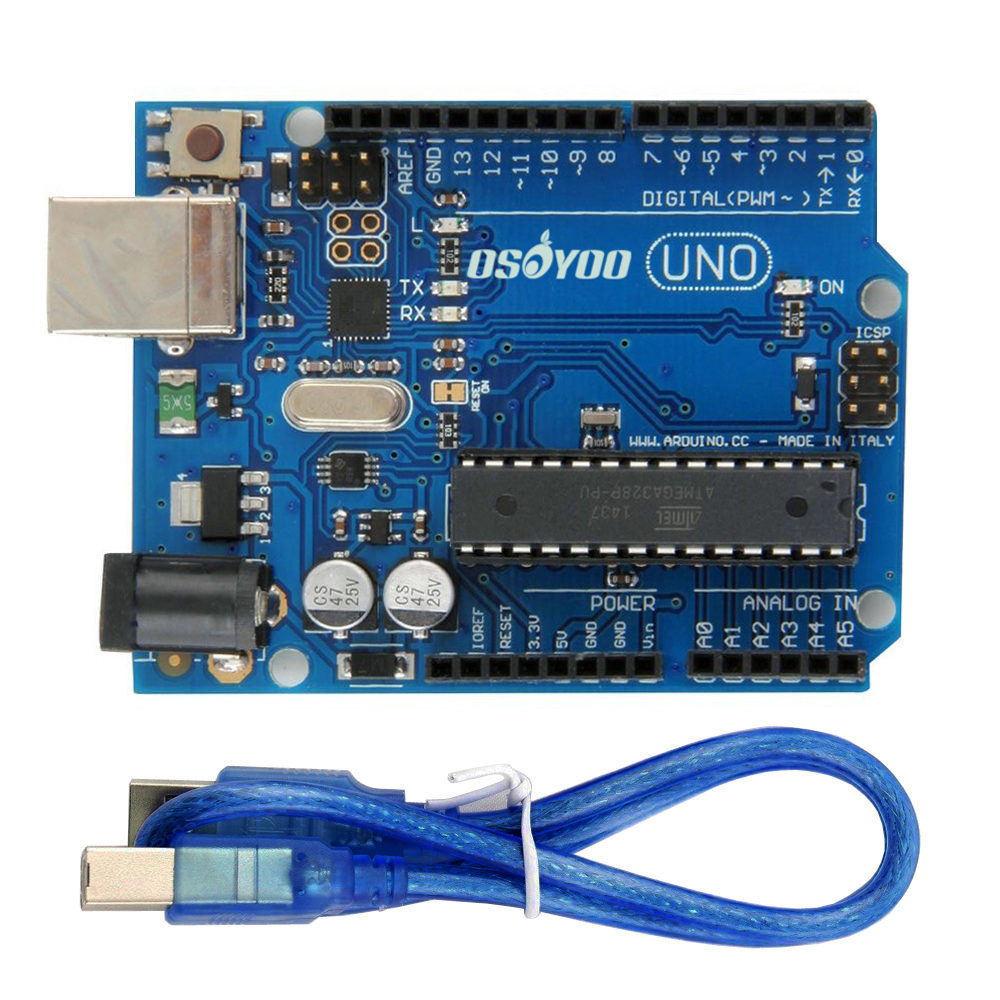
OSOYOO Basic Board for Arduino
1
M3 x 10 Screws and nuts, washer
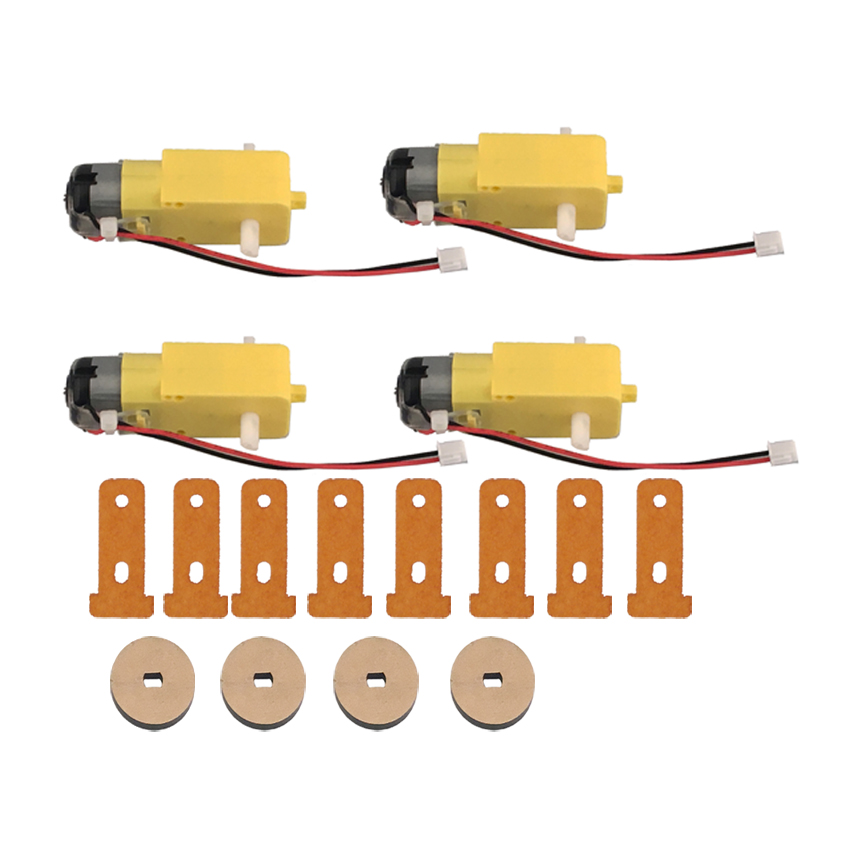
Motor with wires
4
M3 x 30 Screws and nuts
OSOYOO MODEL X MOTOR driver module
1
M3 x 10 Screws and nuts, washers
Box for 18650 3.7V battery+
1
M3 x 10 Screws and nuts
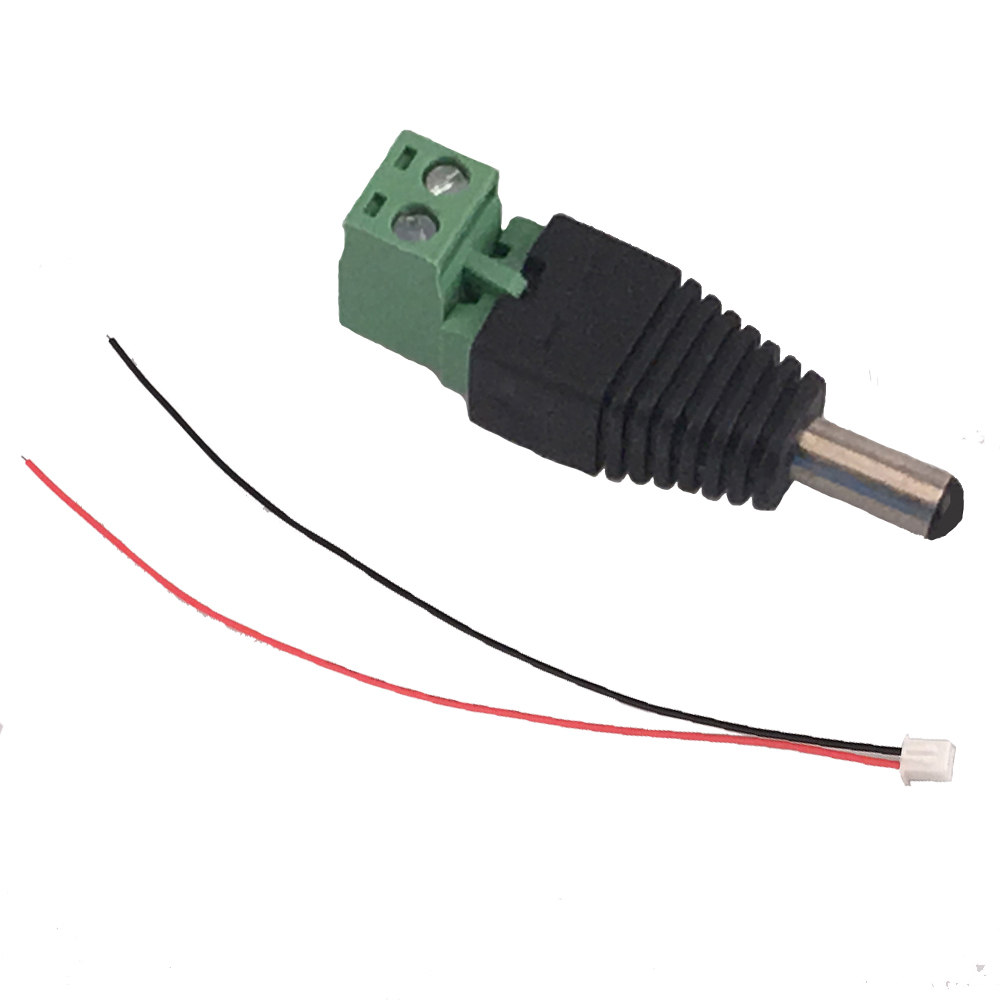
DC power connector
1
voltage meter
1
M3 x 10 Screws and nuts, washers
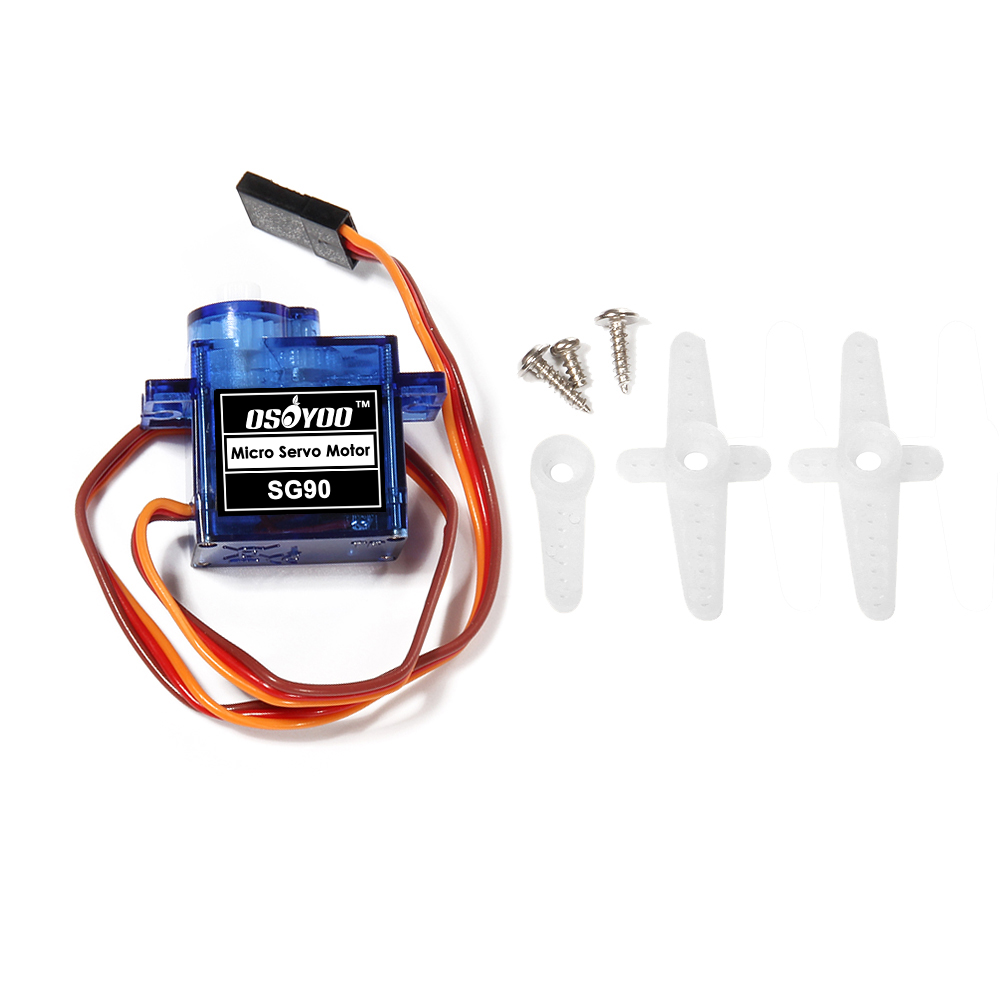
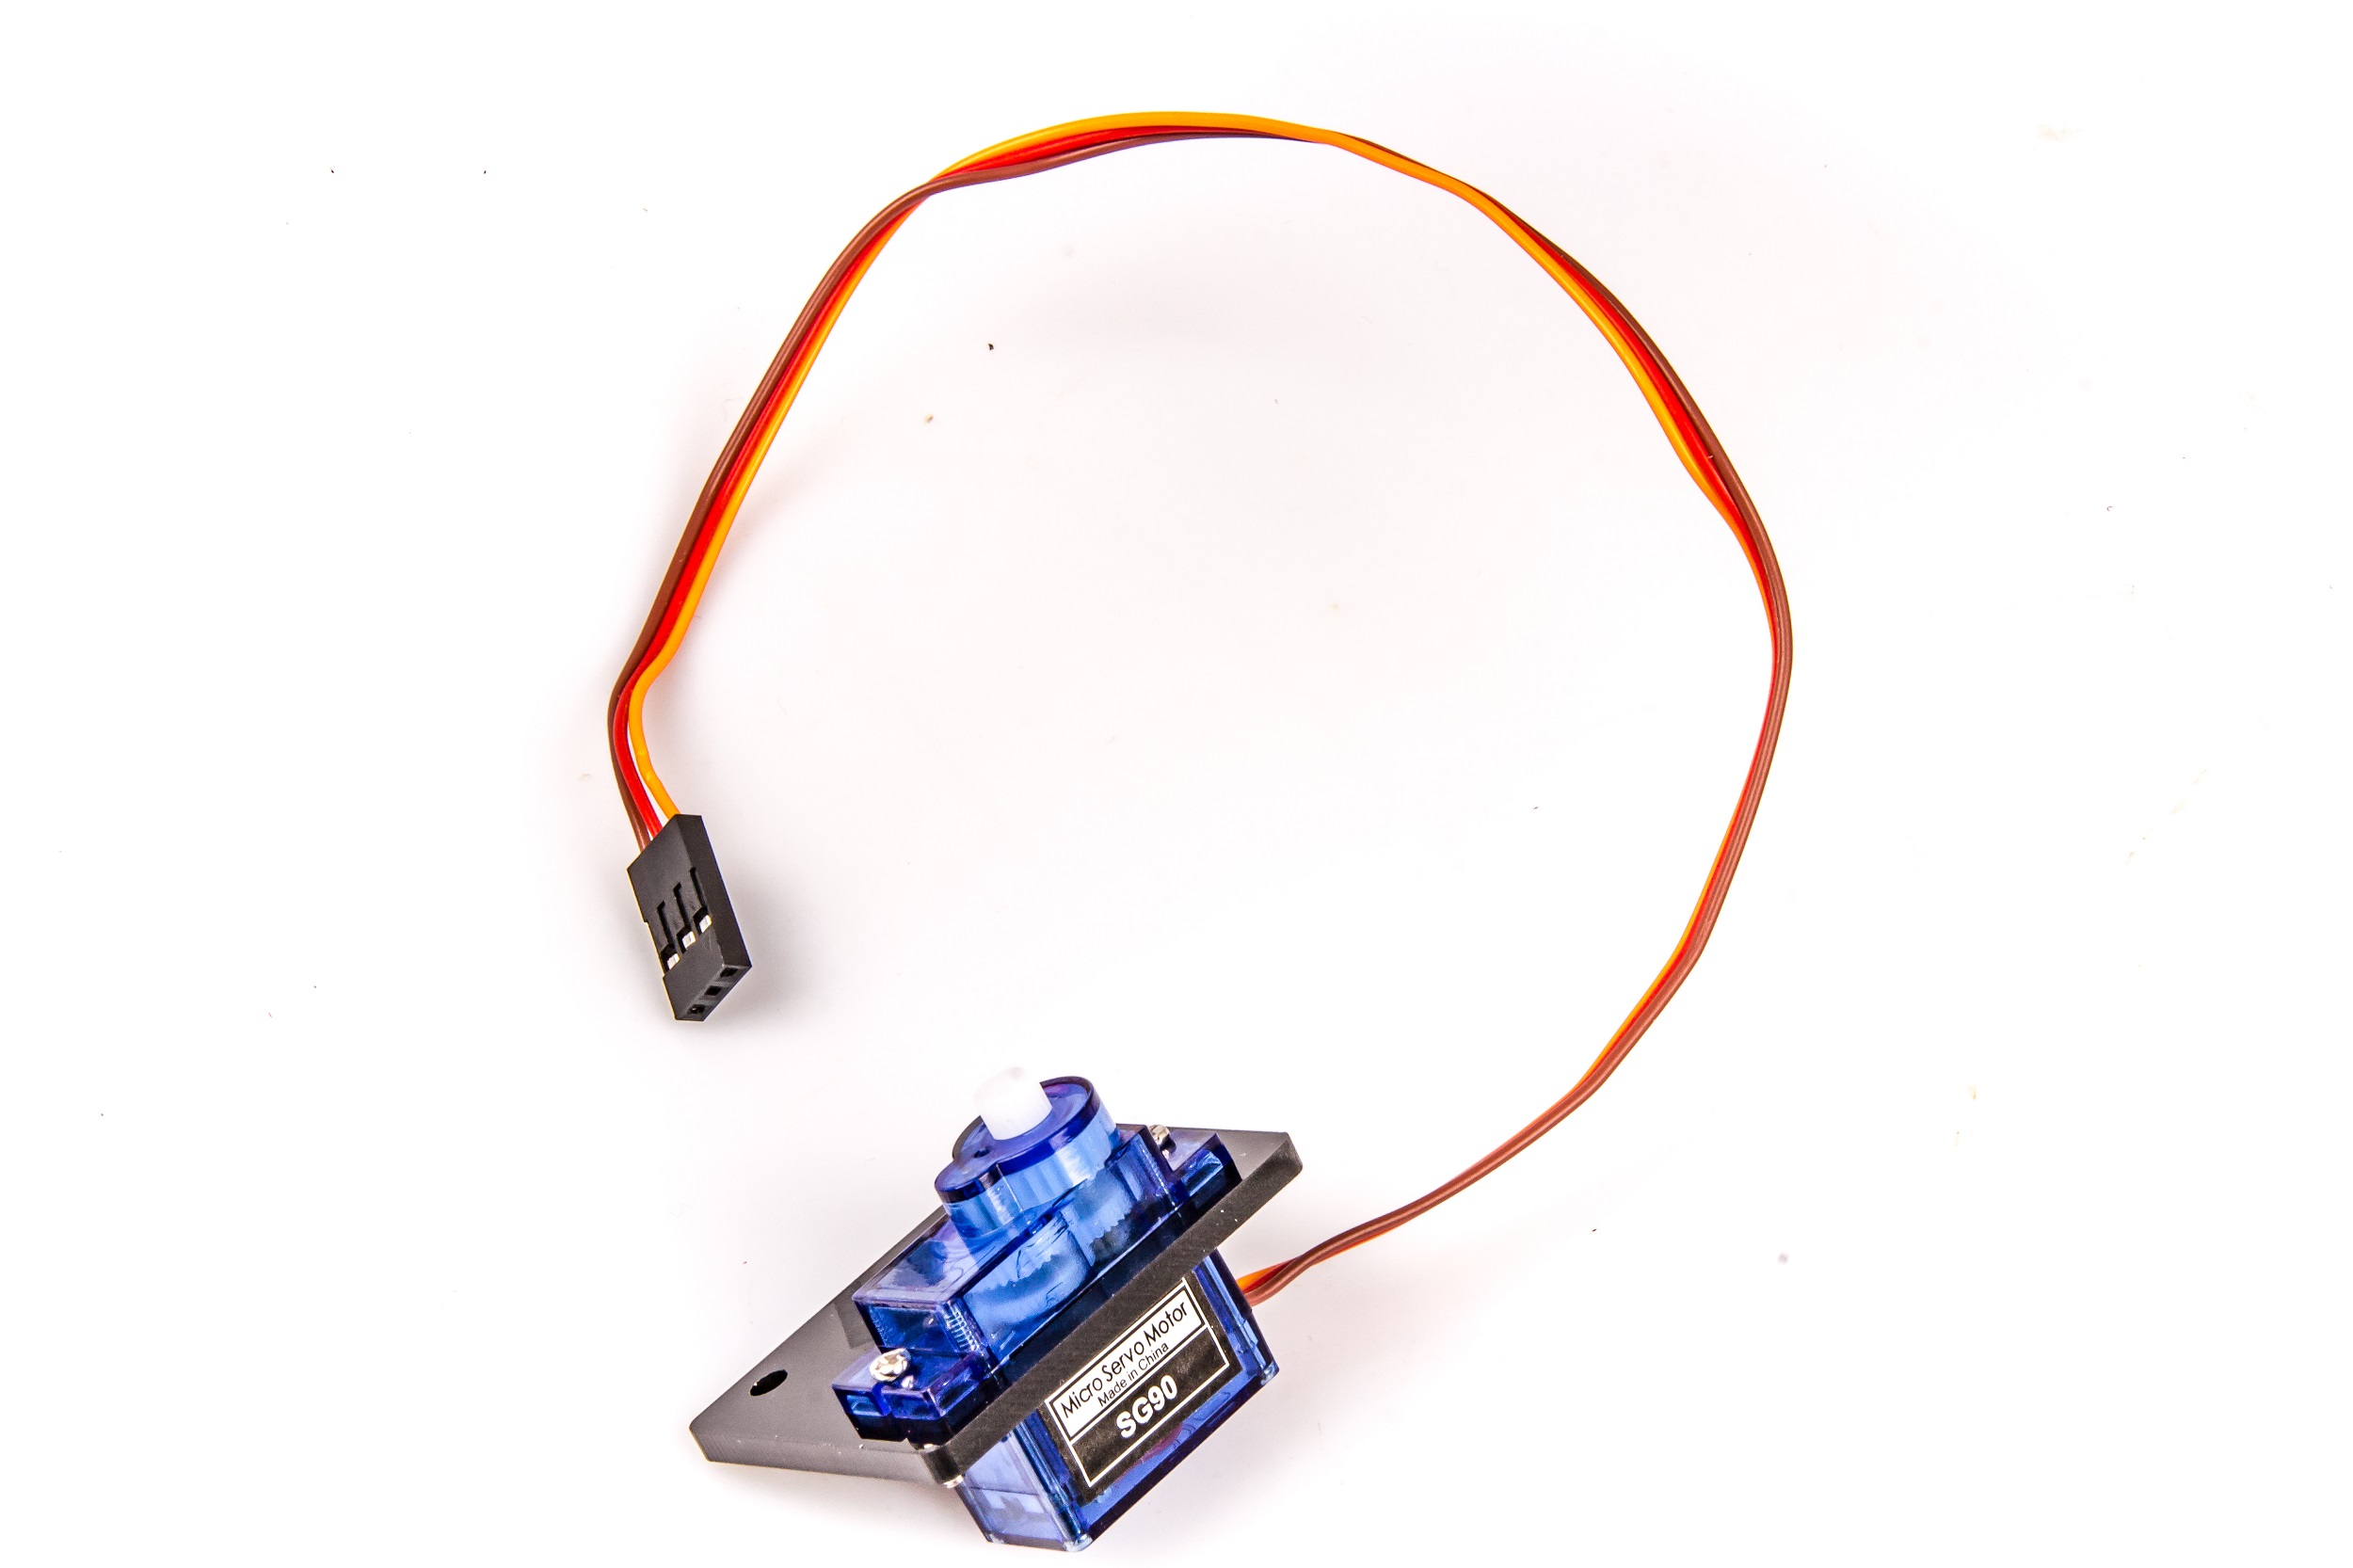
SG90 Servo Motor
1
M3 x 10 Screws and nuts, washers
Ultrasonic module
1
M1.5 x 12 Screws and nuts
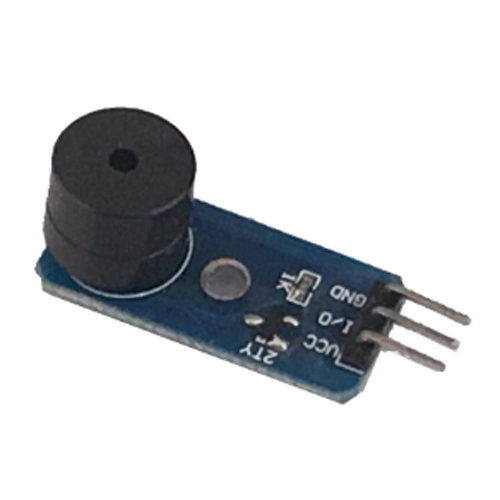
Buzzer Module
1
M3 x 10 Screws and nuts, washers
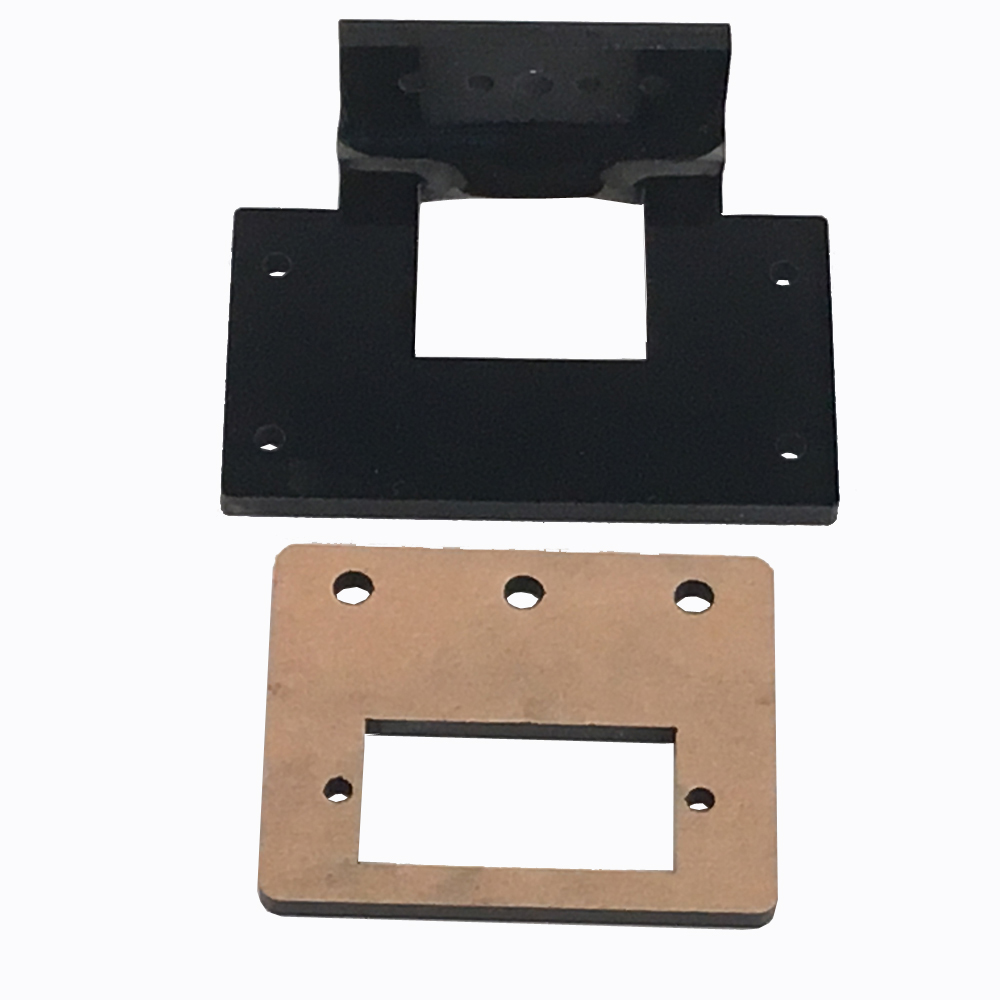
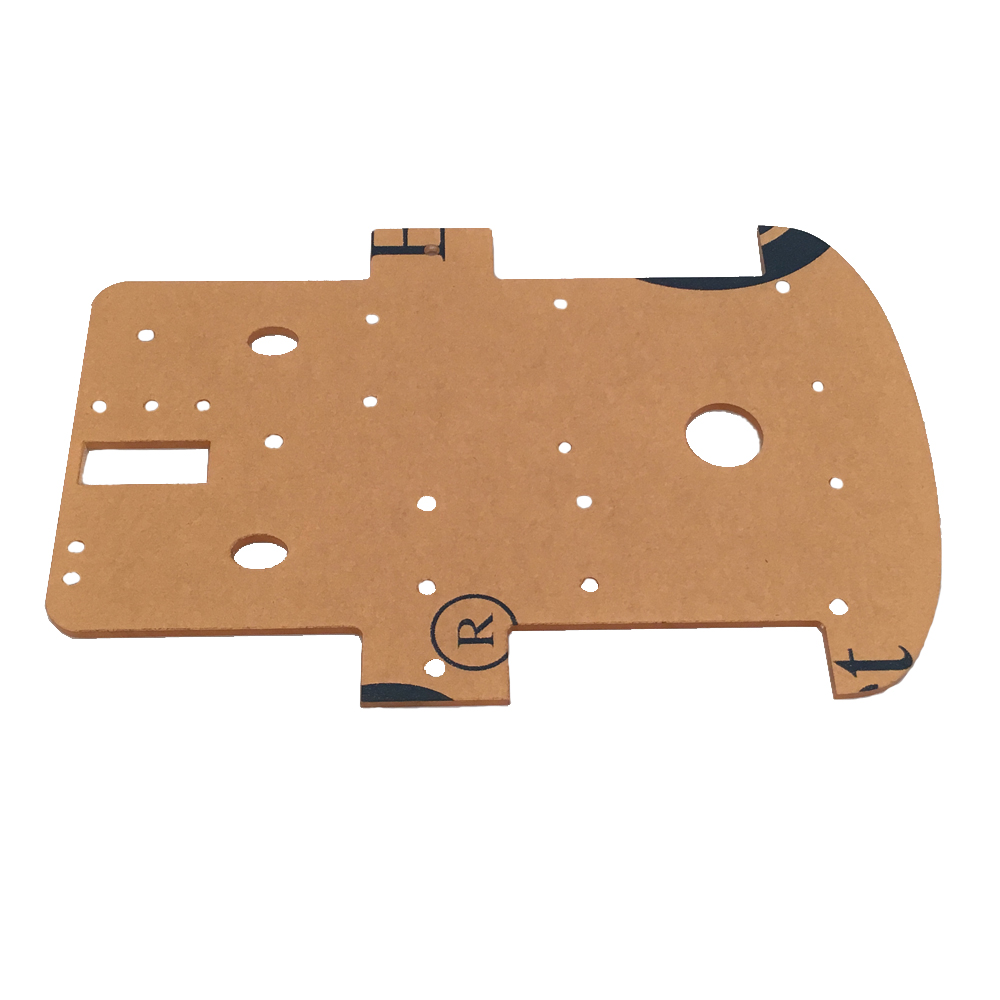
Mount holder for Servo motor
1
M2 x 10 Screws, screws for sg90
Jumper wires(male-female,female-female)
some
lower chassis
1
Copper pillar
upper chassis
1
Copper pillar
Hardware Installation
1) Regarding how to install chassis, Basic board and motors, please refer to Lesson 1:
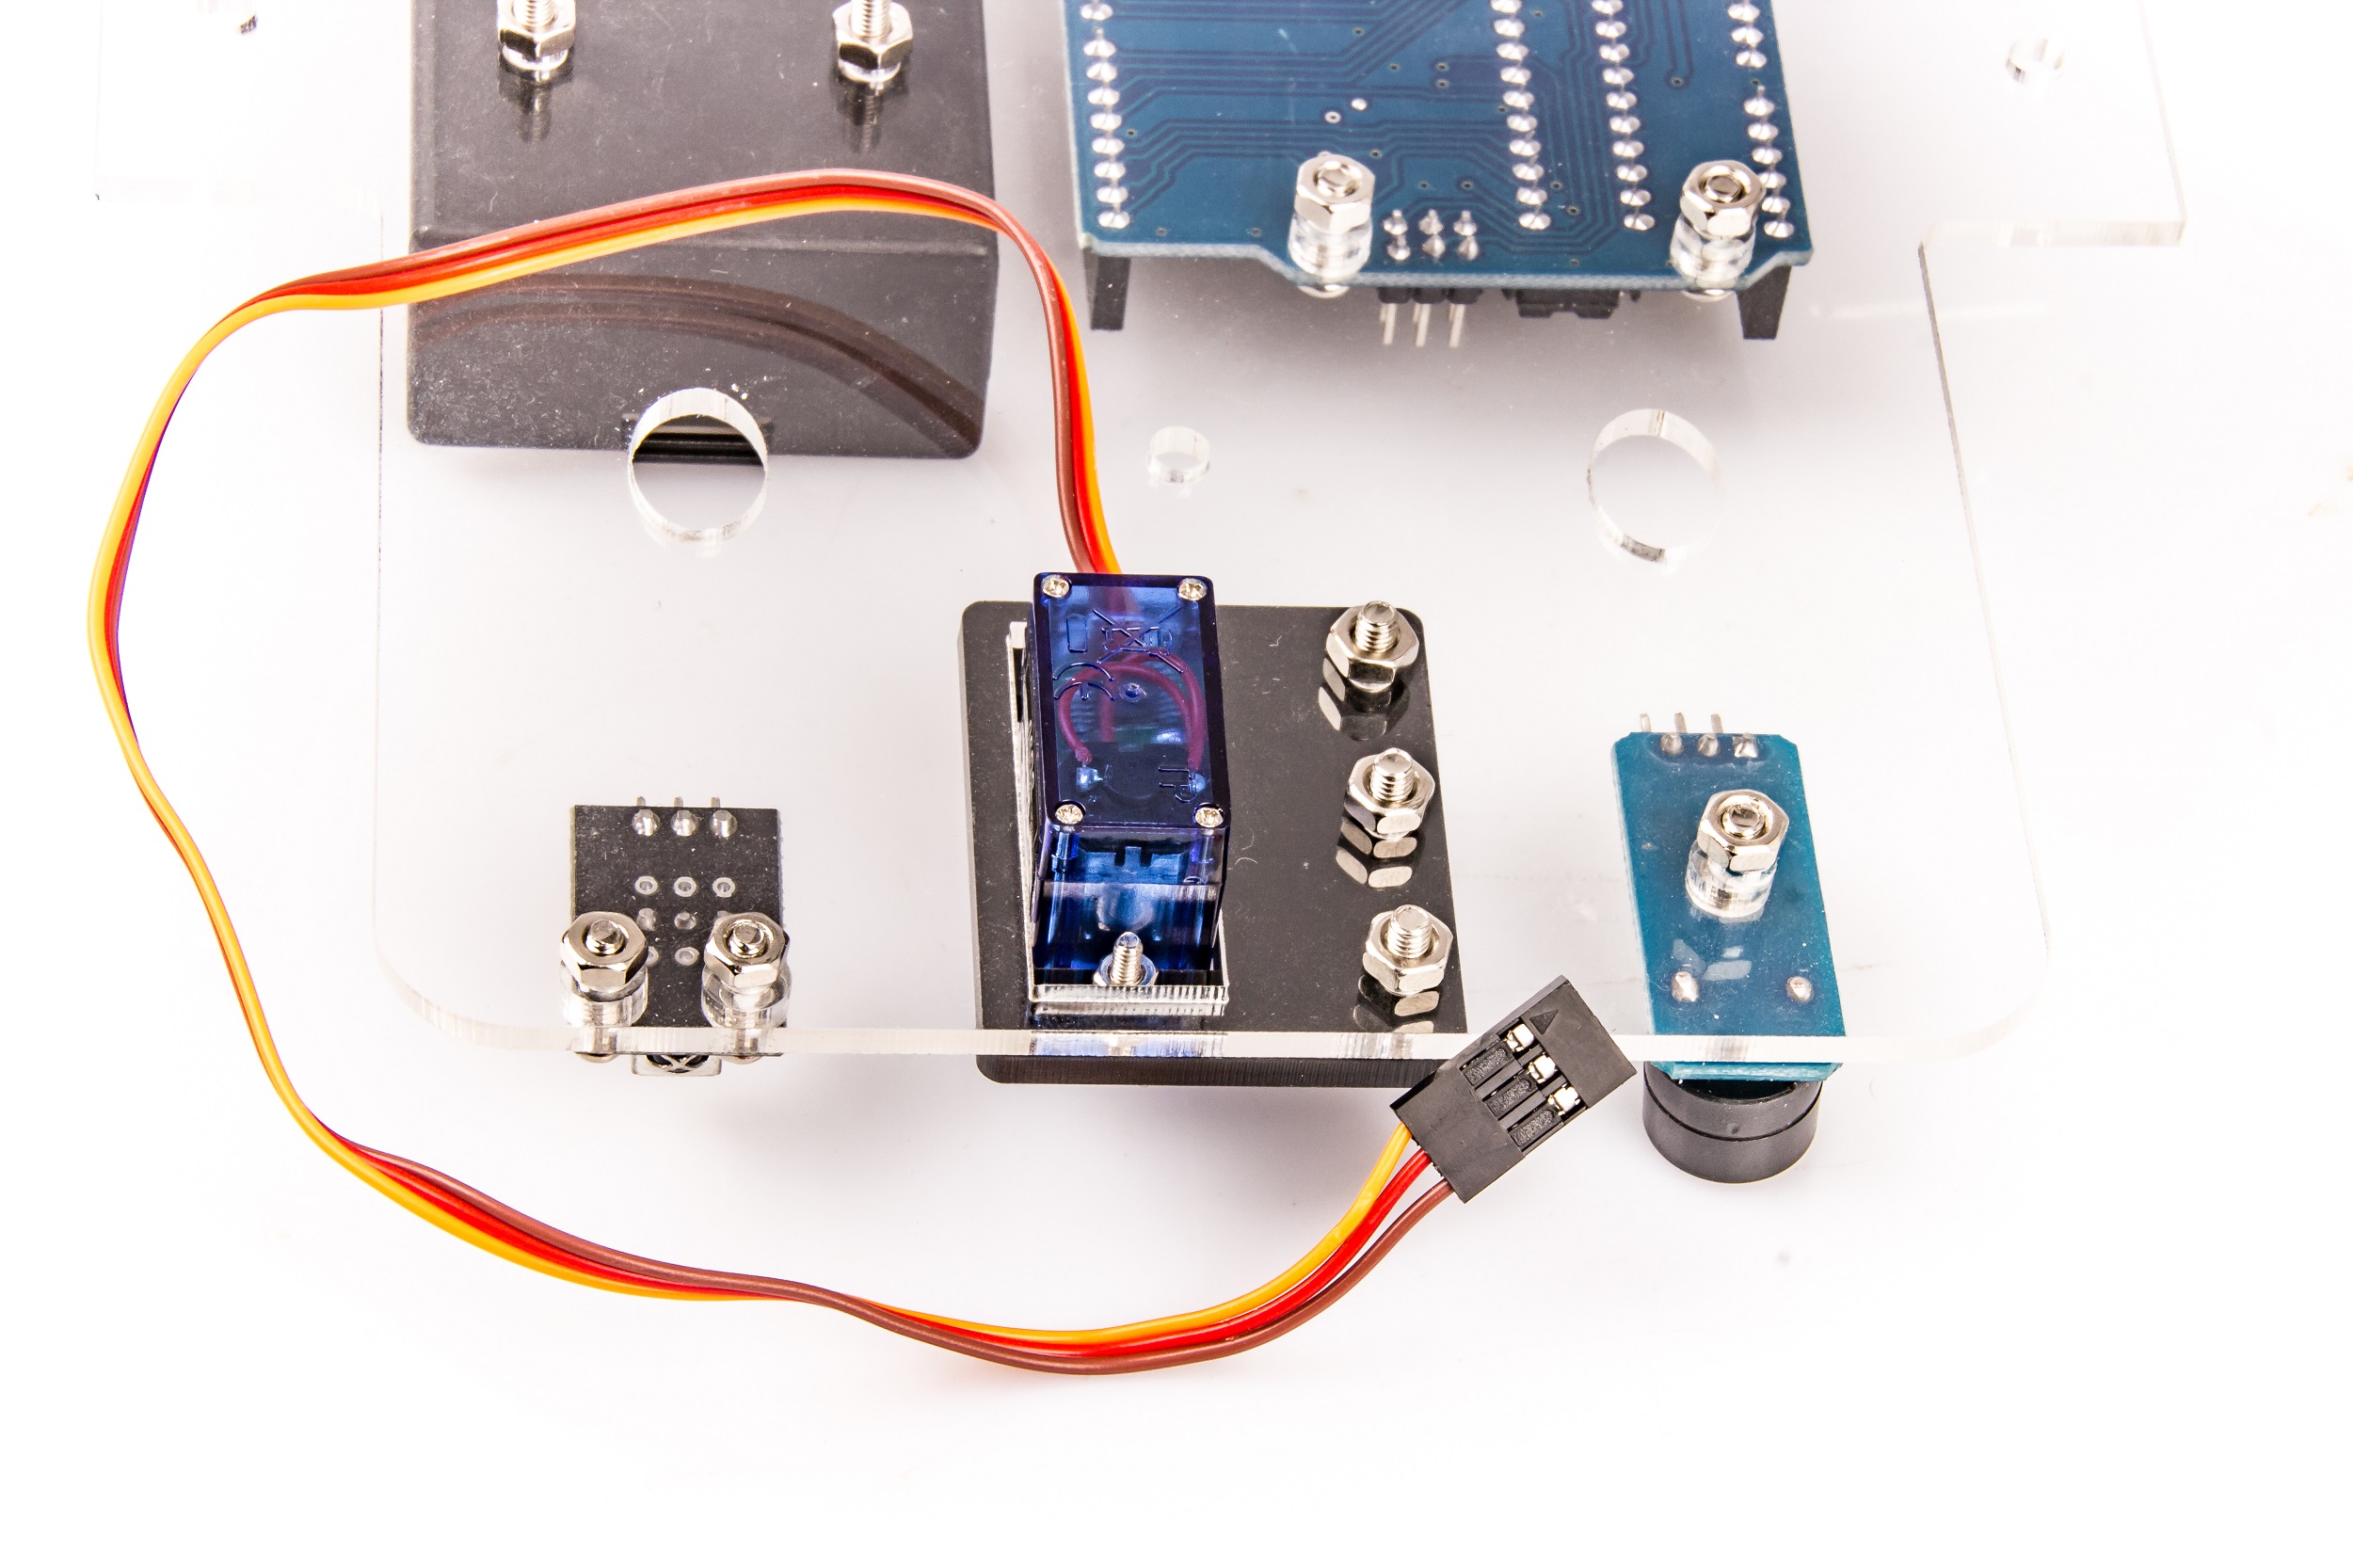
1) Connect the SG90 servo motor to the holder with screw M2 x 10
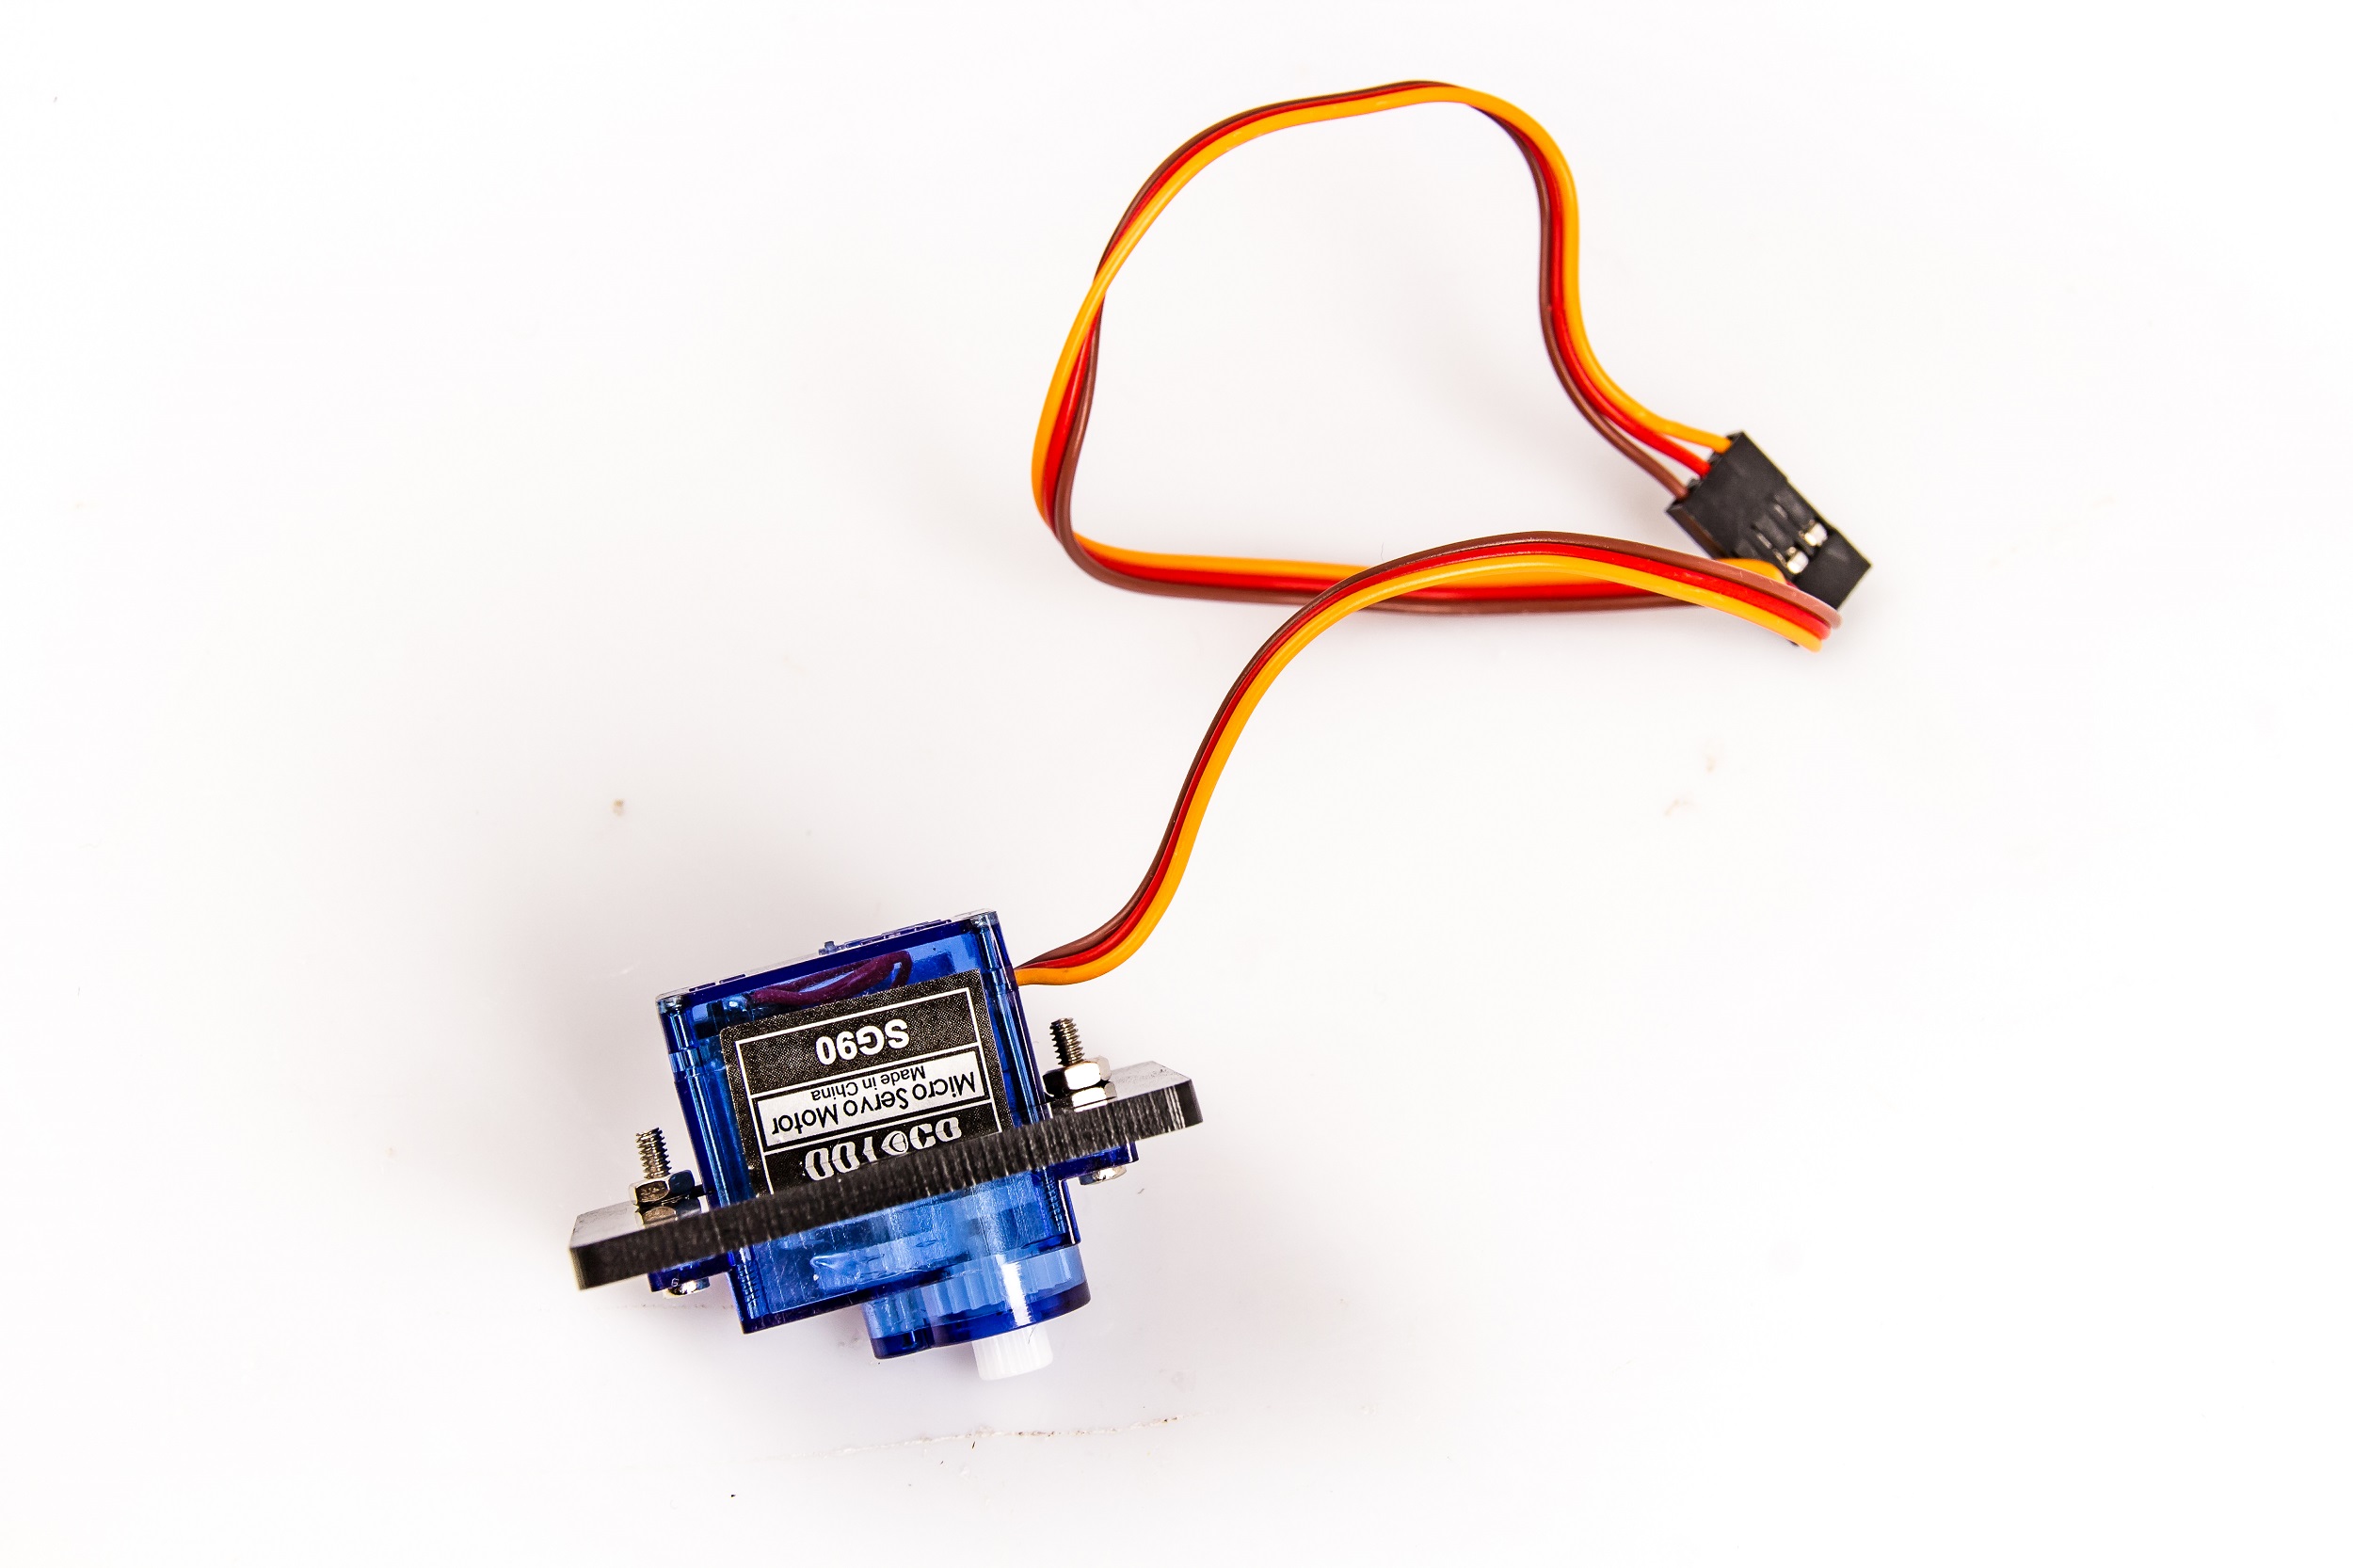
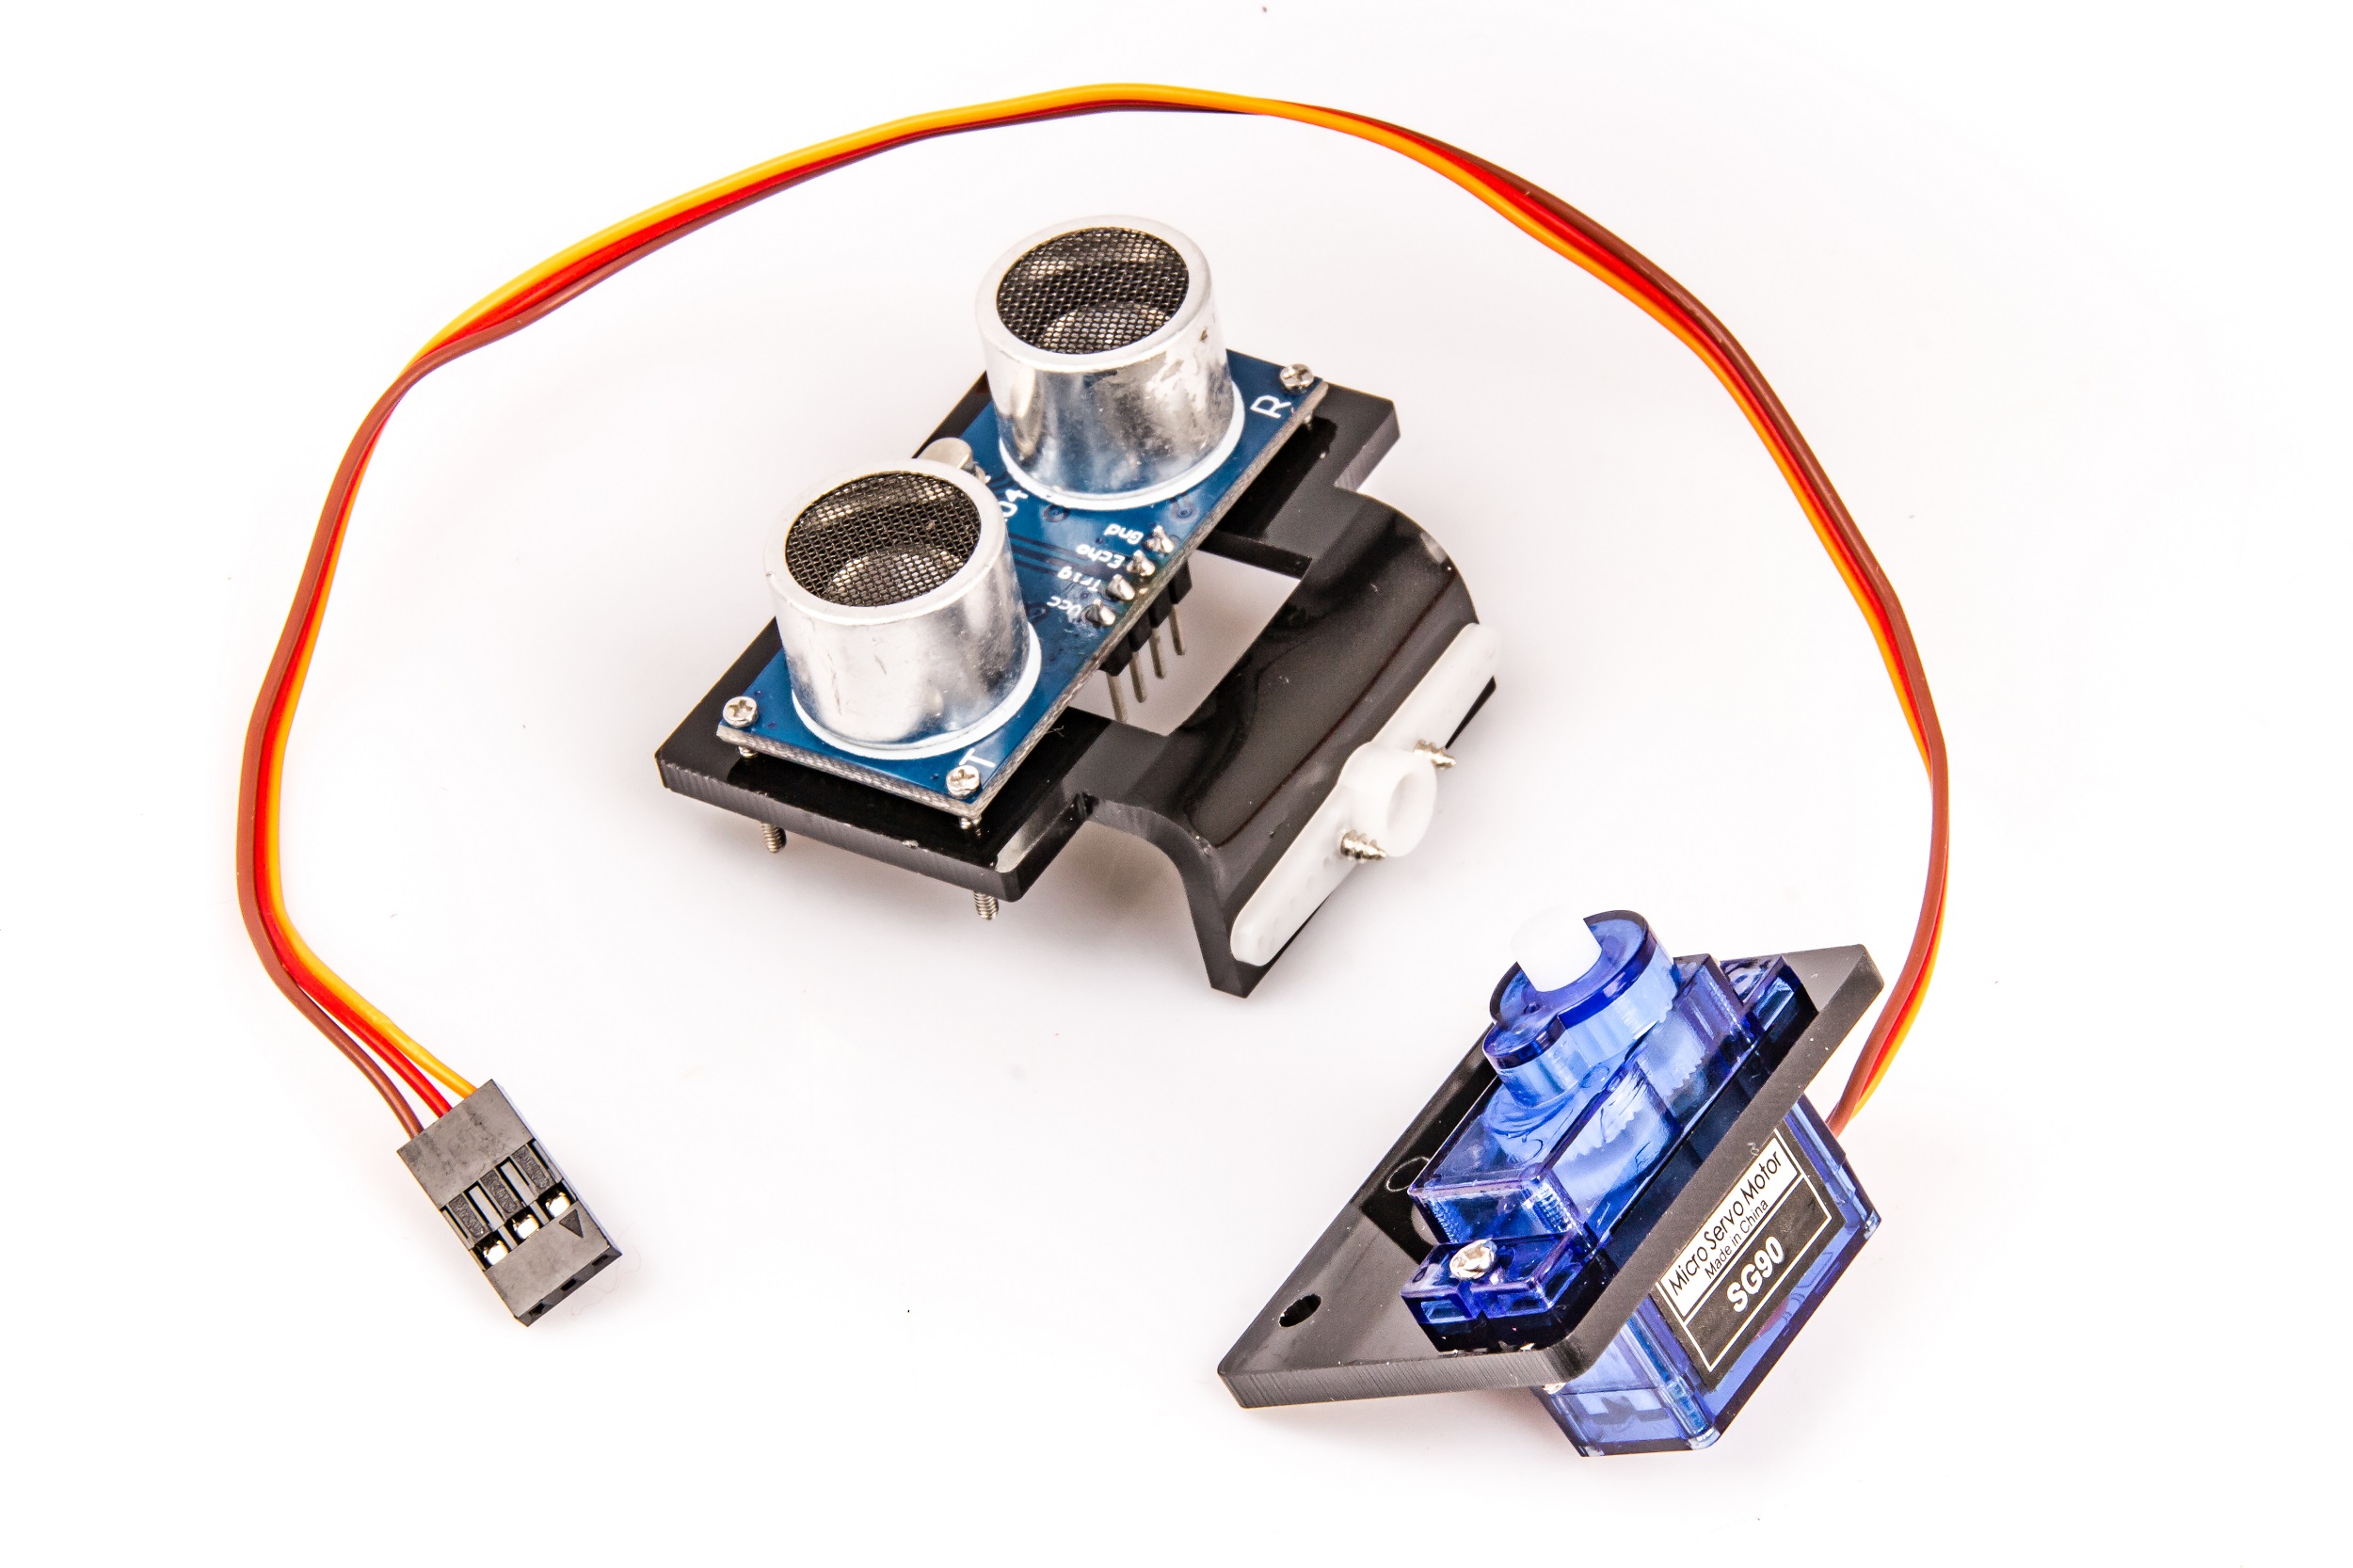
2) Connect the servo motor arm to brakect with 2 x screws which comes with the servo motor, Connect the Ultrasonic Module to bracket with M1.5 x 12 screws and nuts
3)Fix the mount holder for servo motor on upper chassis with M3 x 10 Screws and nuts.
4) Put the arm with ultrasonic module on SG90 servo motor
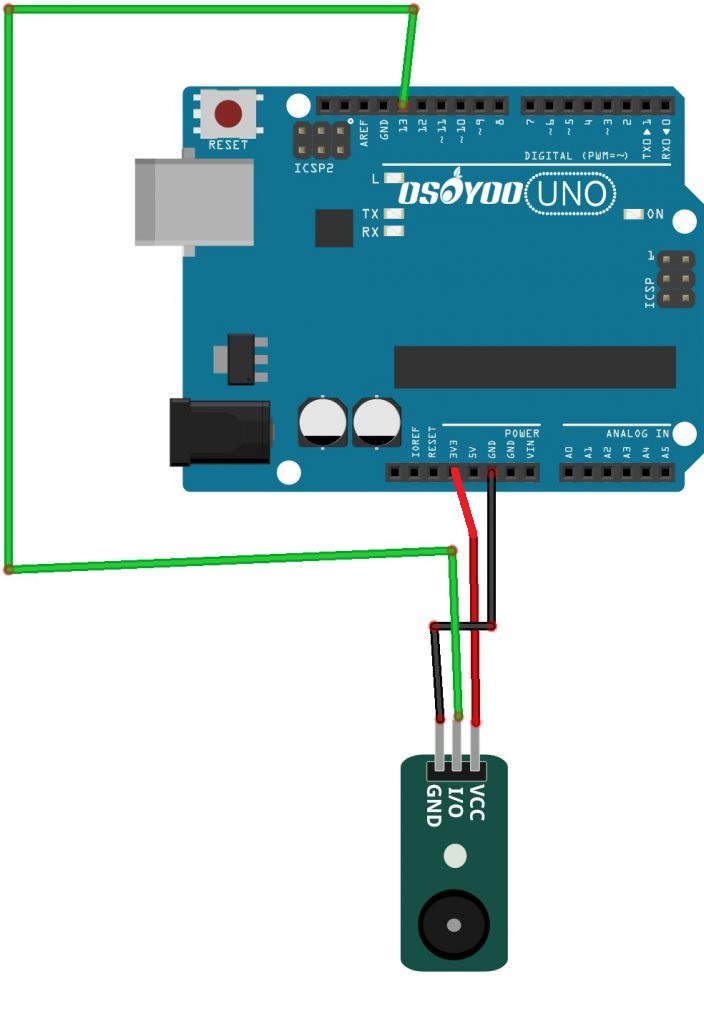
5) Fix the Buzzer module with M3 X 10 screw and nut on upper chassis.
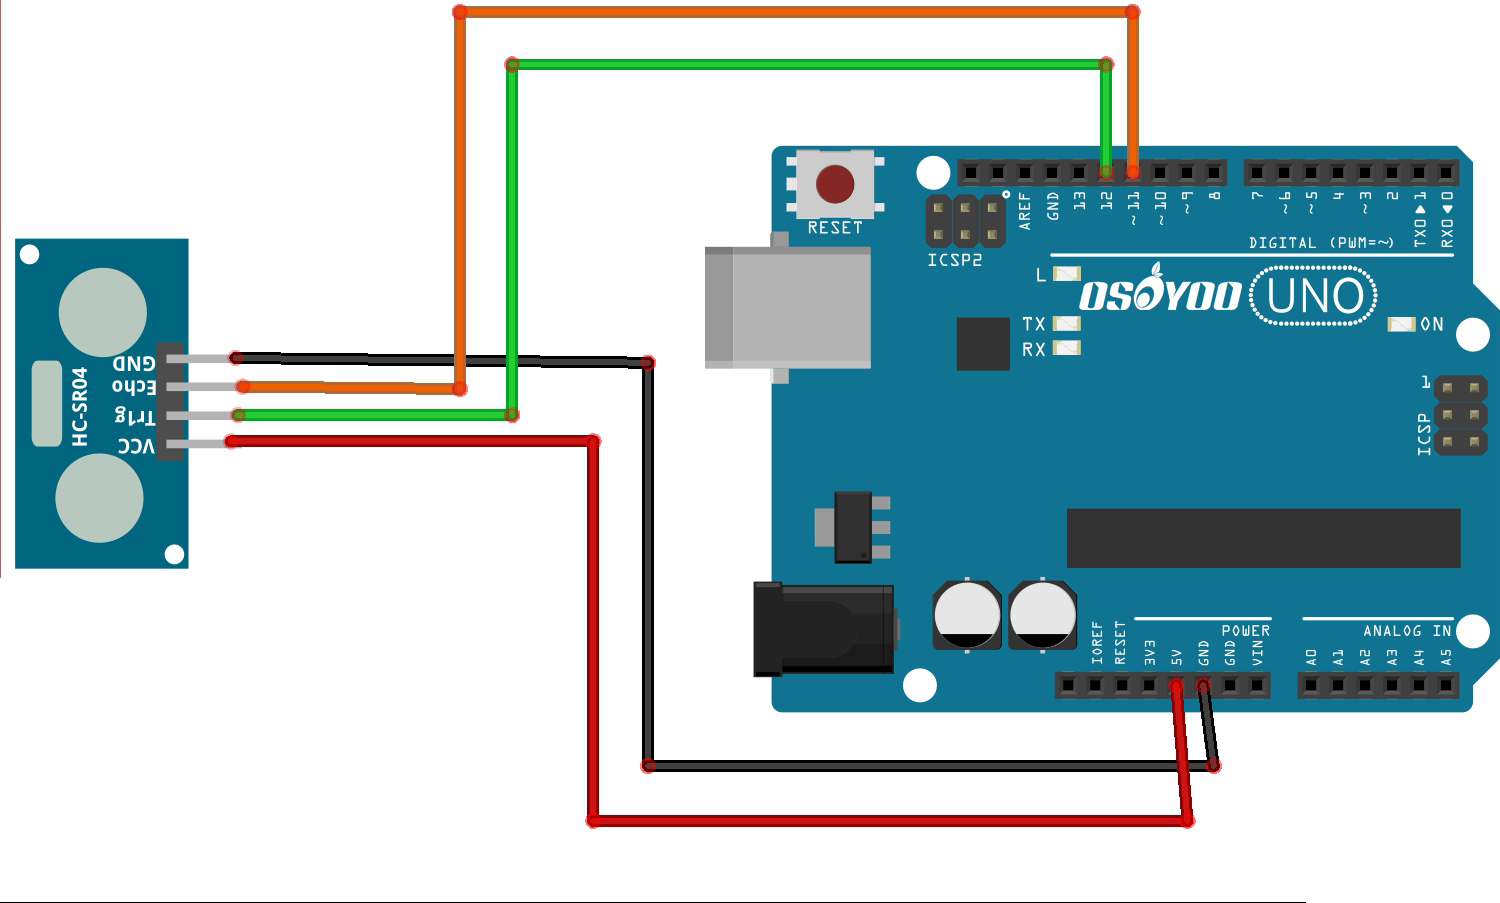
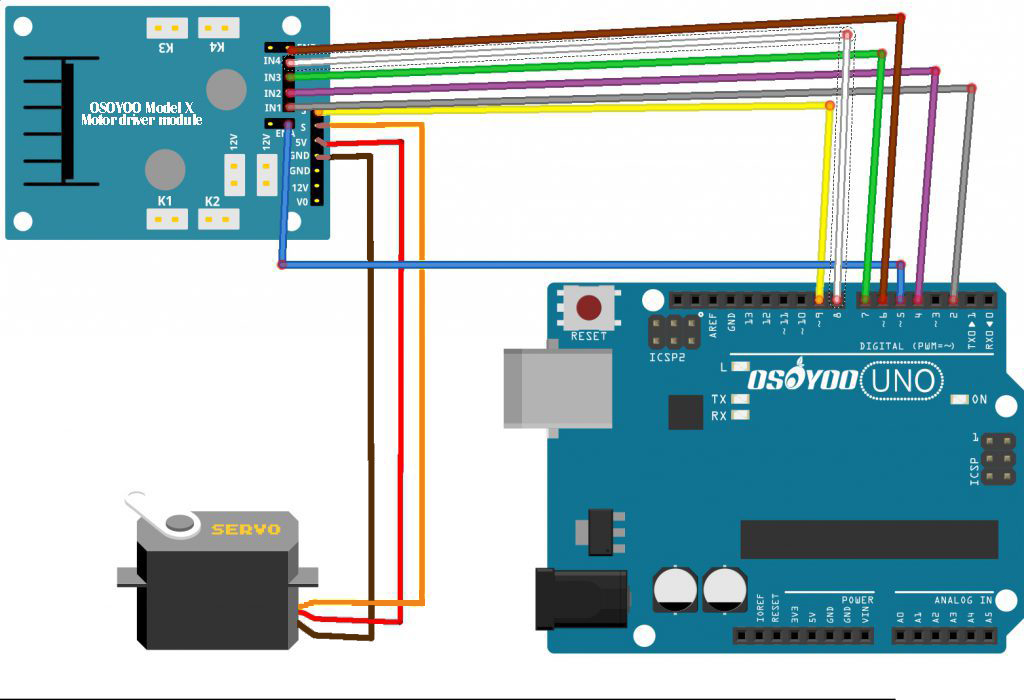
6)Wiring
Connect the buzzer module, ultrasonic module and servo motor as per below connection diagram:
Step 1:Download Lesson One sample code fromhttps://osoyoo.com/driver/smartcar-lesson3.zip , unzip the download zip file smartcar-lesson3.zip, you will see a folder called smartcar-lesson3 .
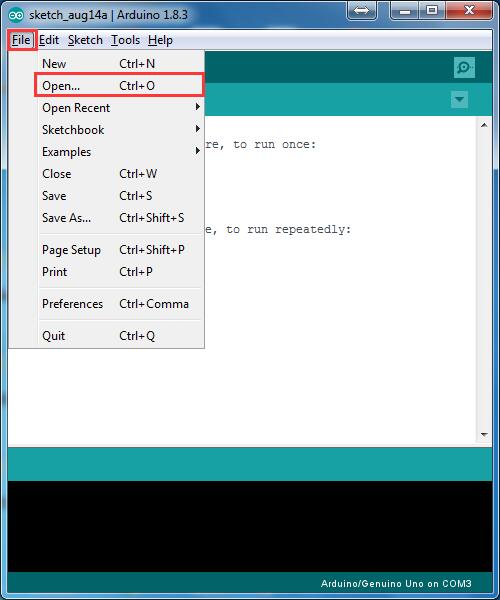
Step 2: Connect Basic board to PC with USB cable, Open Arduino IDE -> click file -> click Open -> choose code “smartcar-lesson3.ino” in smartcar-lesson3 folder, load the code into Basic board.
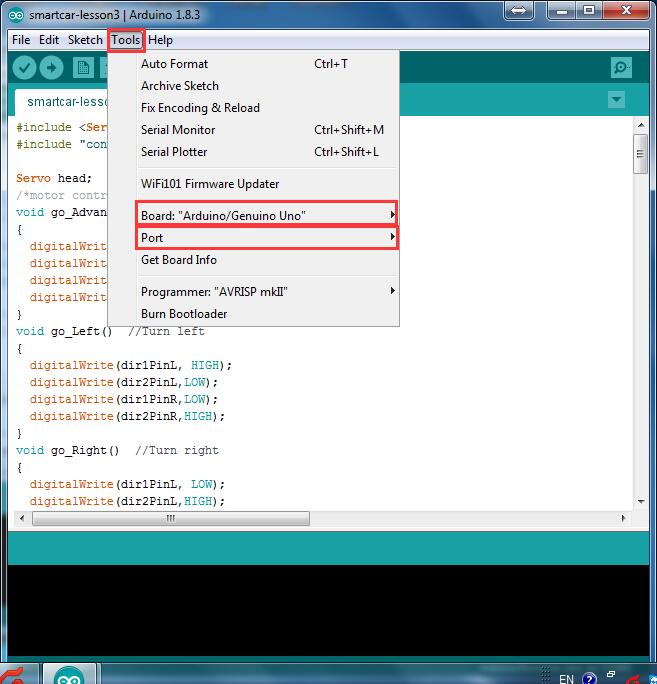
Step 4: Choose corresponding board/port for your project,upload the sketch to the board.
Ultrasonic sensor servo initial direction alignment
After turning on the battery, you will hear a long beep sound, then the servo will make some movement and finally stops at a direction for 5 seconds.
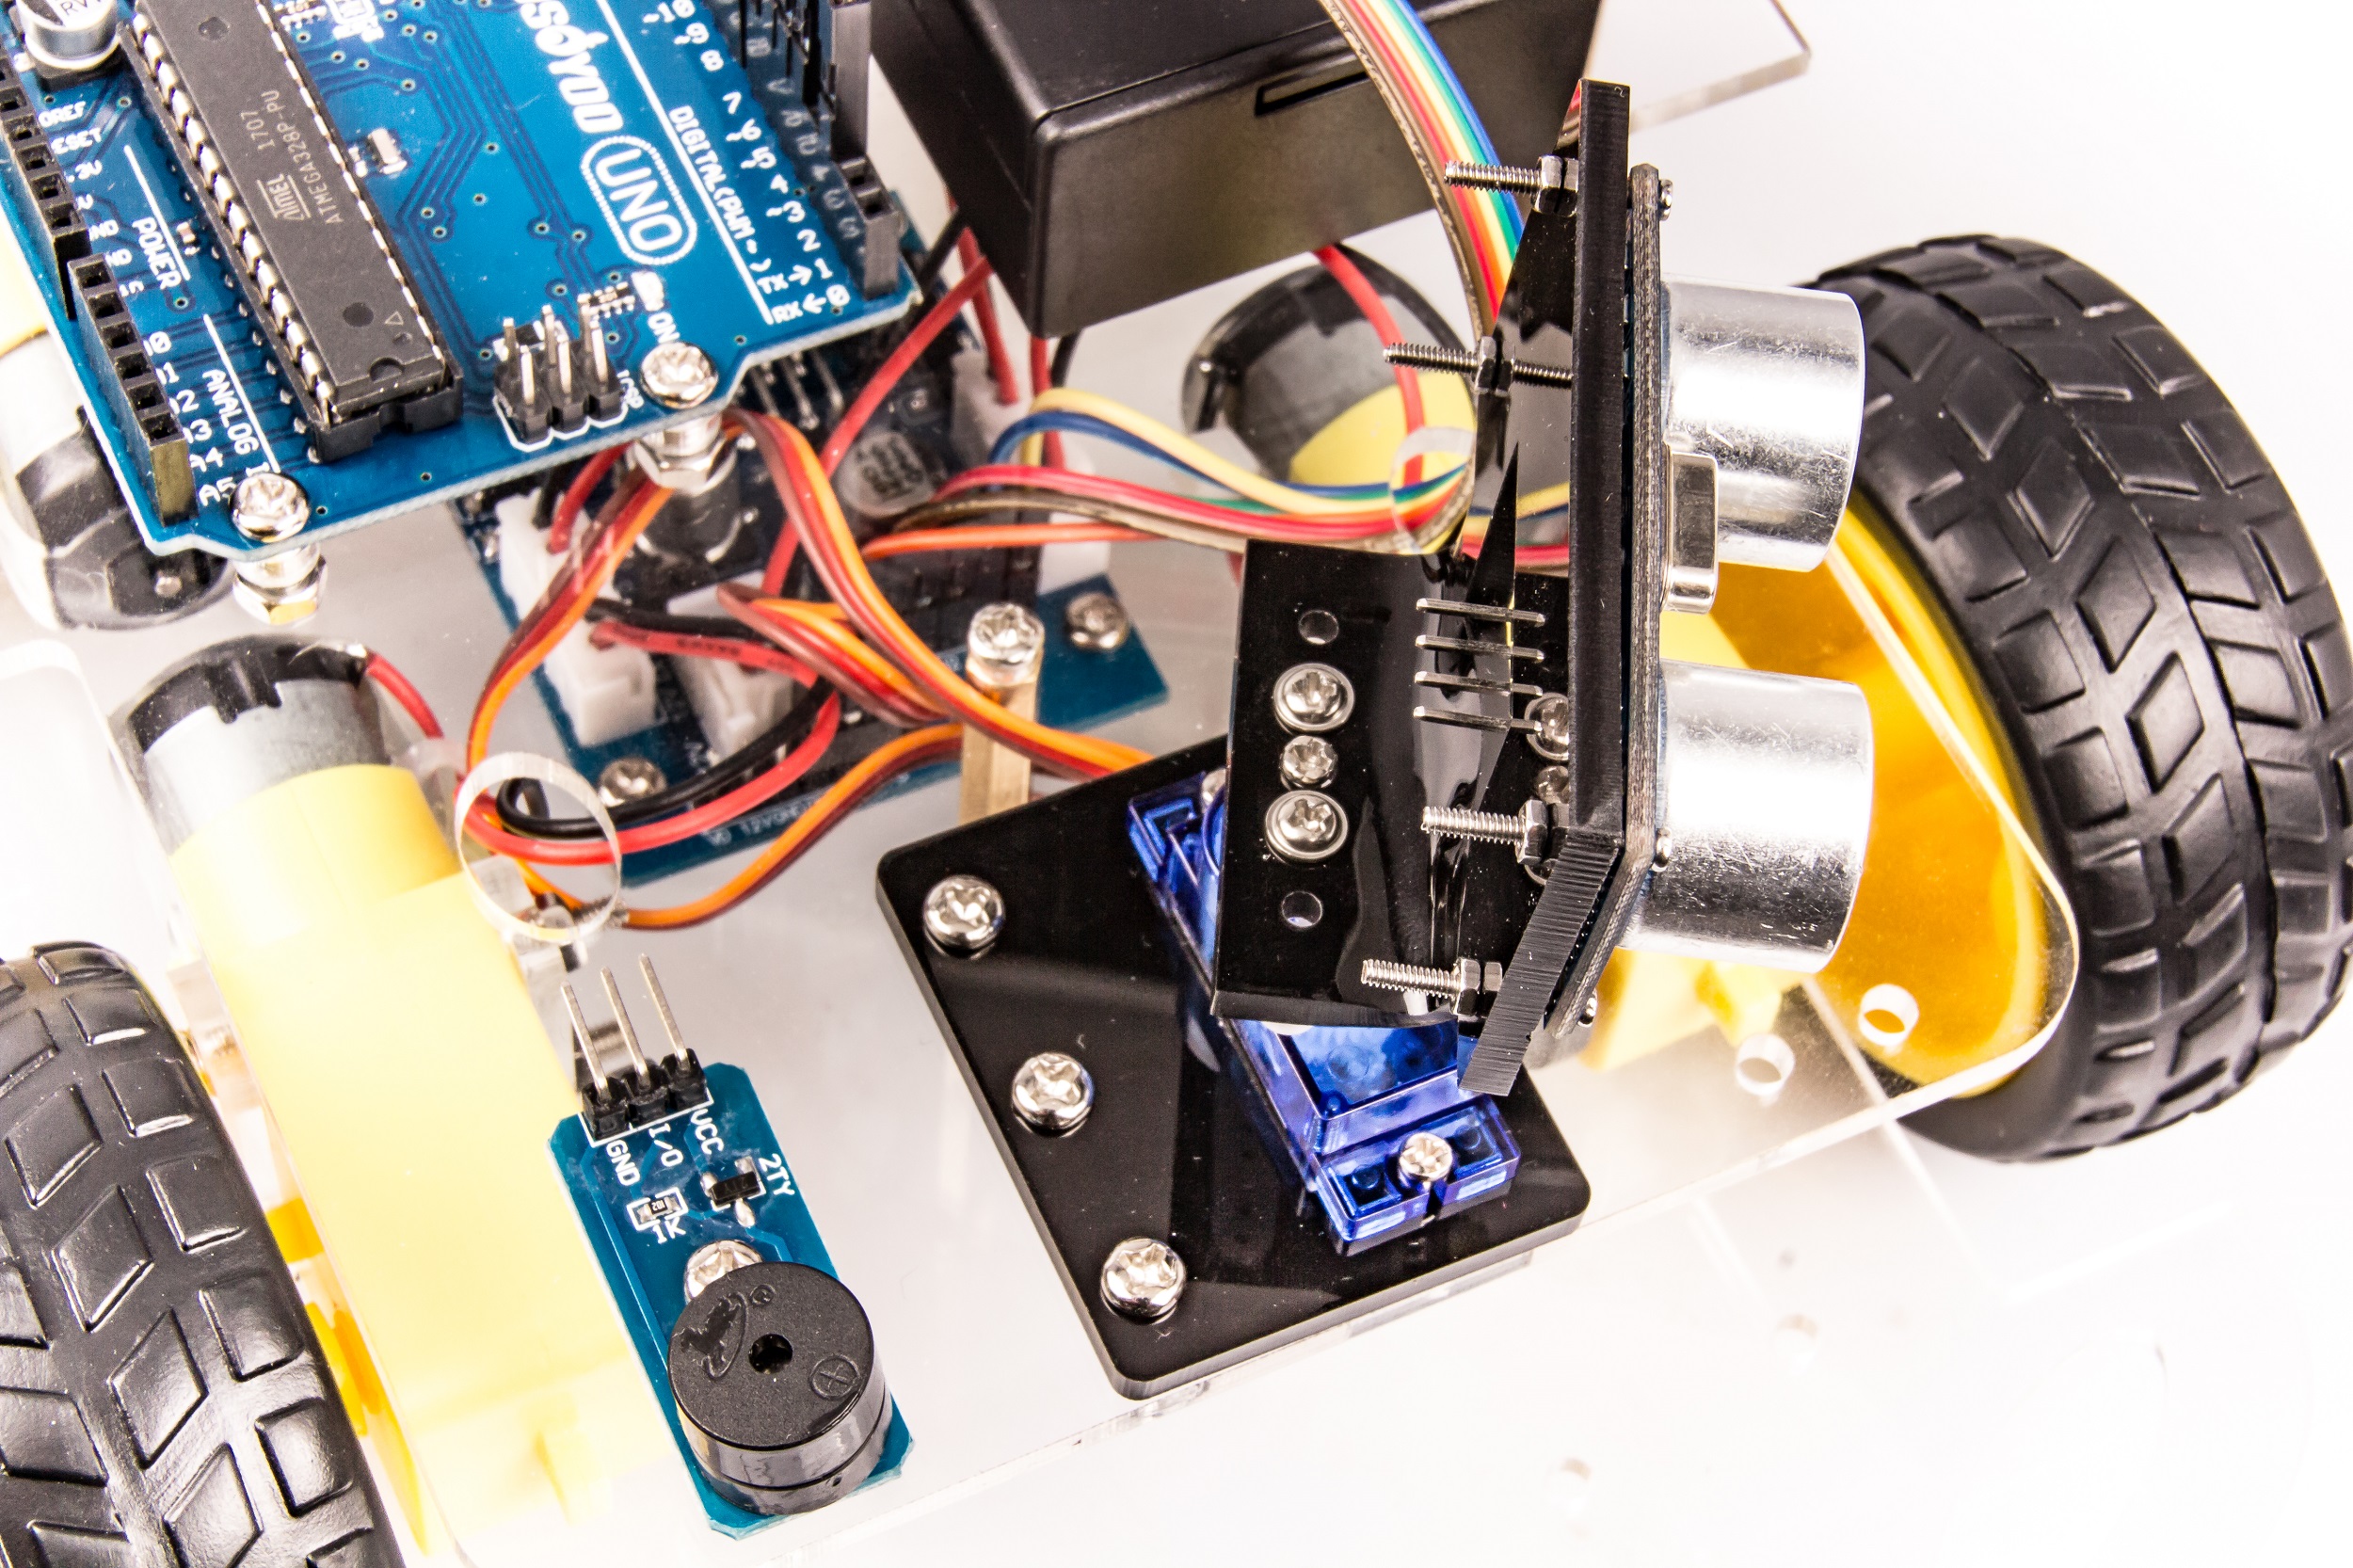
During this first 5 seconds, you must make sure the Ultrasonic sensor(two eyes) is facing straight forward.
If it is not straight forward, you should turn off battery immediately and remove the sensor from servo, reinstall it and make it facing straight forward direction as following picture. Otherwise the obstacle avoidance program will not work properly.
After adjusting sensor direction, turn on battery again. After hearing the long beep, the sensor should face front same as following picture. If its direction is not straight forward, turn off battery and do direction alignment again.
Final Testing :
After Turning on the battery switch on the battery box, if the ultrasonic module turn to front view position, that means you no need adjust sensor position anymore. Just wait 5 seconds. If no obstacle is detected, the car will go forward. If any obstacles is detected, the car will stop, the ultrasonic module will turn from right to left to detect surrounding obstacle. The robot car will decide to make left turn, right turn or backward according to obstacle sensor data and our obstacle avoidance algorithm.
Step 2) Unzip above file and run the servo.ino file in your car.
Your servo will move from left to right and finally stop to center position. If your ultrason sensor is not facing to front direction. Please release your ultrasonic sensor from servo head, re-position its direction to front , then fasten the sensor screw to fix its direction.
Step 3) After you have changed the sensor direction, please run smartcar-lesson3.ino sketch again. Your car will begin to do obstacle avoidance driving.
After mounting my ultrasonic module to my servo, the servo does not work anymore. I believe the servo broke when mounting, is there a way that I can get a new one? Also, my buzzer does not make any noise.
Arduino:1.8.11 Hourly Build 2019/11/11 03:33 (Windows 10), לוח:”Arduino Uno”
smartcar-lesson3:1:10: error: Servo.h: No such file or directory
compilation terminated.
exit status 1
Servo.h: No such file or directory
“Show verbose output during compilation”
It seems that your Arduino IDE version does not support Servo library. Normally Servo library should come with Arduino IDE.
I suggest you install the latest Windows Arduino IDE version and re-compile the sketch again. Do not use Arduino IDE in linux. Linux Arduino IDE might lack many libaries.
In order to make sure beginning orientation of your ultrasonic sensor(two BIG EYES) facing to front, the first two seconds after you turning on the battery, the servo will rotate to 90degree position(stay there for 2 seconds). So if your ultrasonic sensor is not facing the front at the beginning two seconds, you need to turn off the battery. release your ultrasonic sensor from servo and reposition it. Make it facing front and fasten it.
If your ultrasonic sensor does not facing front at the beginning, the car can not properly do obstacle avoidance.


 OSOYOO MODEL X MOTOR driver module
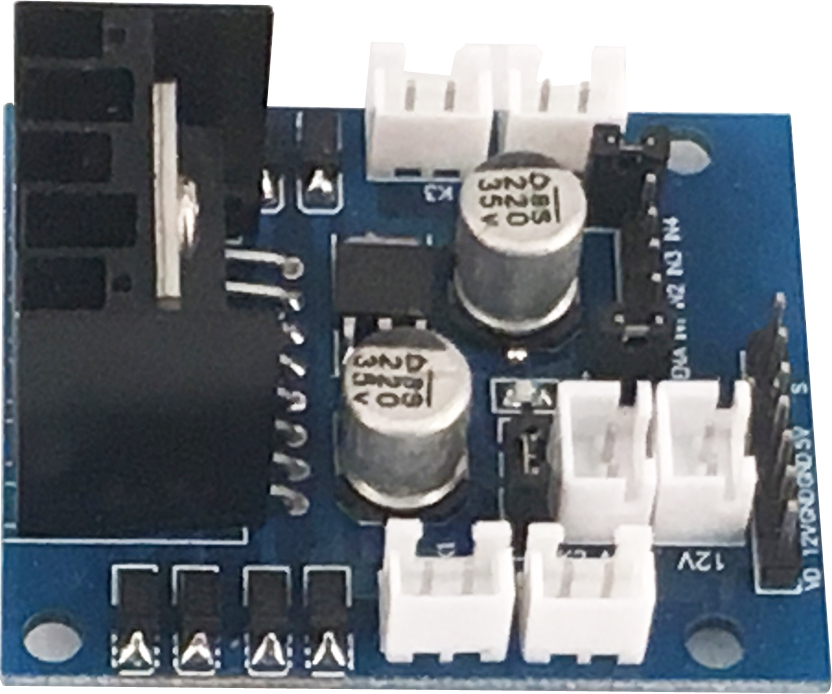


After mounting my ultrasonic module to my servo, the servo does not work anymore. I believe the servo broke when mounting, is there a way that I can get a new one? Also, my buzzer does not make any noise.
Nevermind, the servo works now. Buzzer still does not make noise though
Arduino:1.8.11 Hourly Build 2019/11/11 03:33 (Windows 10), לוח:”Arduino Uno”
smartcar-lesson3:1:10: error: Servo.h: No such file or directory
compilation terminated.
exit status 1
Servo.h: No such file or directory
“Show verbose output during compilation”
Please Download and install the servo library from:
https://osoyoo.com/driver/Servo.zip
Arduino:1.8.11 Hourly Build 2019/11/11 03:33 (Windows 10), לוח:”Arduino Uno”
smartcar-lesson3:1:10: error: Servo.h: No such file or directory
compilation terminated.
exit status 1
Servo.h: No such file or directory
“Show verbose output during compilation”
It seems that your Arduino IDE version does not support Servo library. Normally Servo library should come with Arduino IDE.
I suggest you install the latest Windows Arduino IDE version and re-compile the sketch again. Do not use Arduino IDE in linux. Linux Arduino IDE might lack many libaries.
Thanks a lot for your help everything works fine I’ll continue to the next step
Wired it and uploaded the program, turned it on and it beeped. Then it proceeded to shoot backwards.. how do I troubleshoot this?
does the robot rotate the two big eyes(ultrasonic sensor)?
It moves the eyes once off to the side.
In order to make sure beginning orientation of your ultrasonic sensor(two BIG EYES) facing to front, the first two seconds after you turning on the battery, the servo will rotate to 90degree position(stay there for 2 seconds). So if your ultrasonic sensor is not facing the front at the beginning two seconds, you need to turn off the battery. release your ultrasonic sensor from servo and reposition it. Make it facing front and fasten it.
If your ultrasonic sensor does not facing front at the beginning, the car can not properly do obstacle avoidance.