In this lesson, we will show how to use the OSOYOO ESP8266 Wi-Fi Shield and the OSOYOO Basic Board (fully compatible with Arduino UNO) to work as a web server and display the message “Hello World!” in a browser.
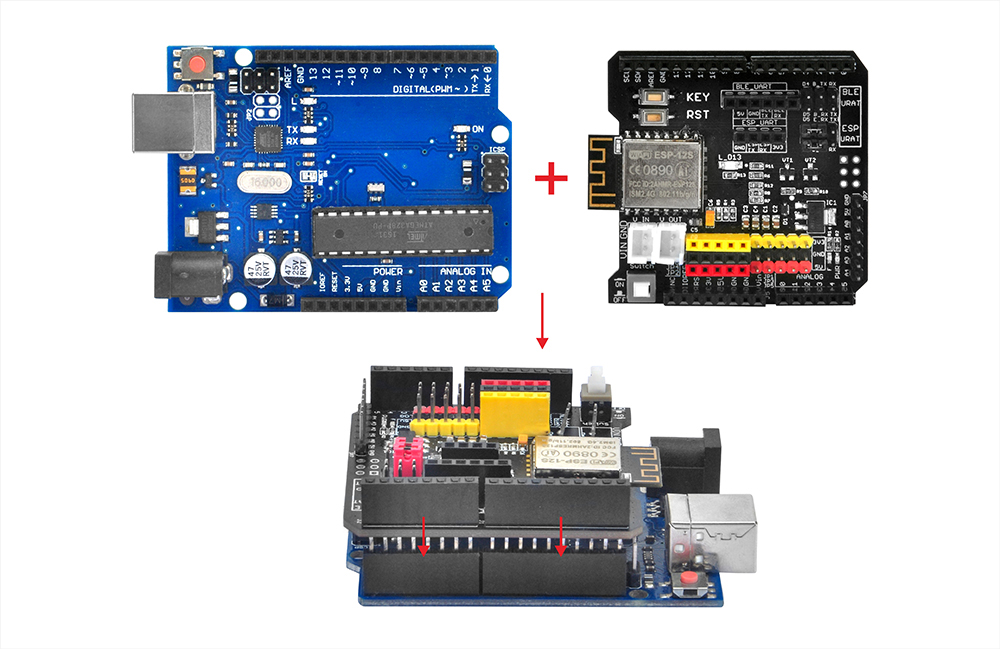
OSOYOO Basic board x 1
OSOYOO ESP8266 Wi-Fi Shield x 1
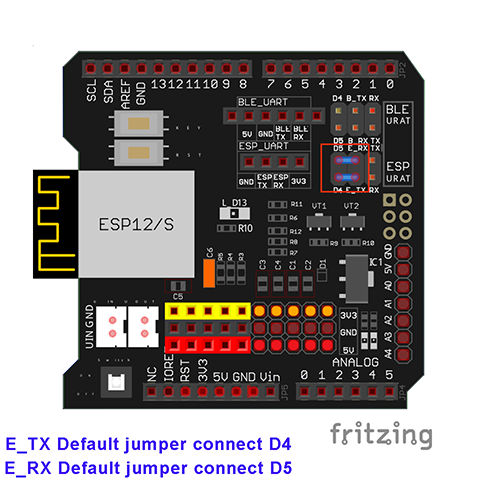
Simply insert the OSOYOO ESP8266 Wi-Fi Shield into the OSOYOO Basic Board and use a jumper cap to connect E_TX to D4 and E_RX to D5, as shown in the following picture.
Note: If you want to use the above Wi-Fi Shield on a Leonardo Board instead of the OSOYOO Basic Board, you will have to remove the jumper cap between D4 and E-TX. Then use a jumper wire to connect E-TX to D8 pin on the Leonardo Board. You will also need to set the Software Serial RX pin to D8 instead of D4 in your sketch code.
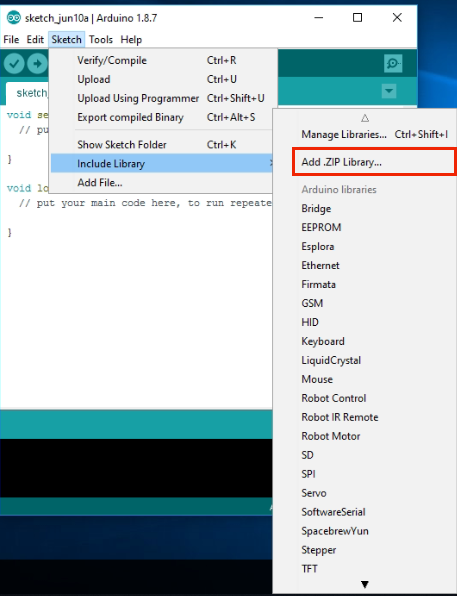
Step B) The WifiESP Library is required to run the OSOYOO ESP8266 shield sketch code. If you have already installed this library, please skip this step.
Then, in your IDE, go to Sketch > Include Library > Add .ZIP Library and select the WiFiEsp-master.zip file that you just downloaded. Upload it to the IDE.
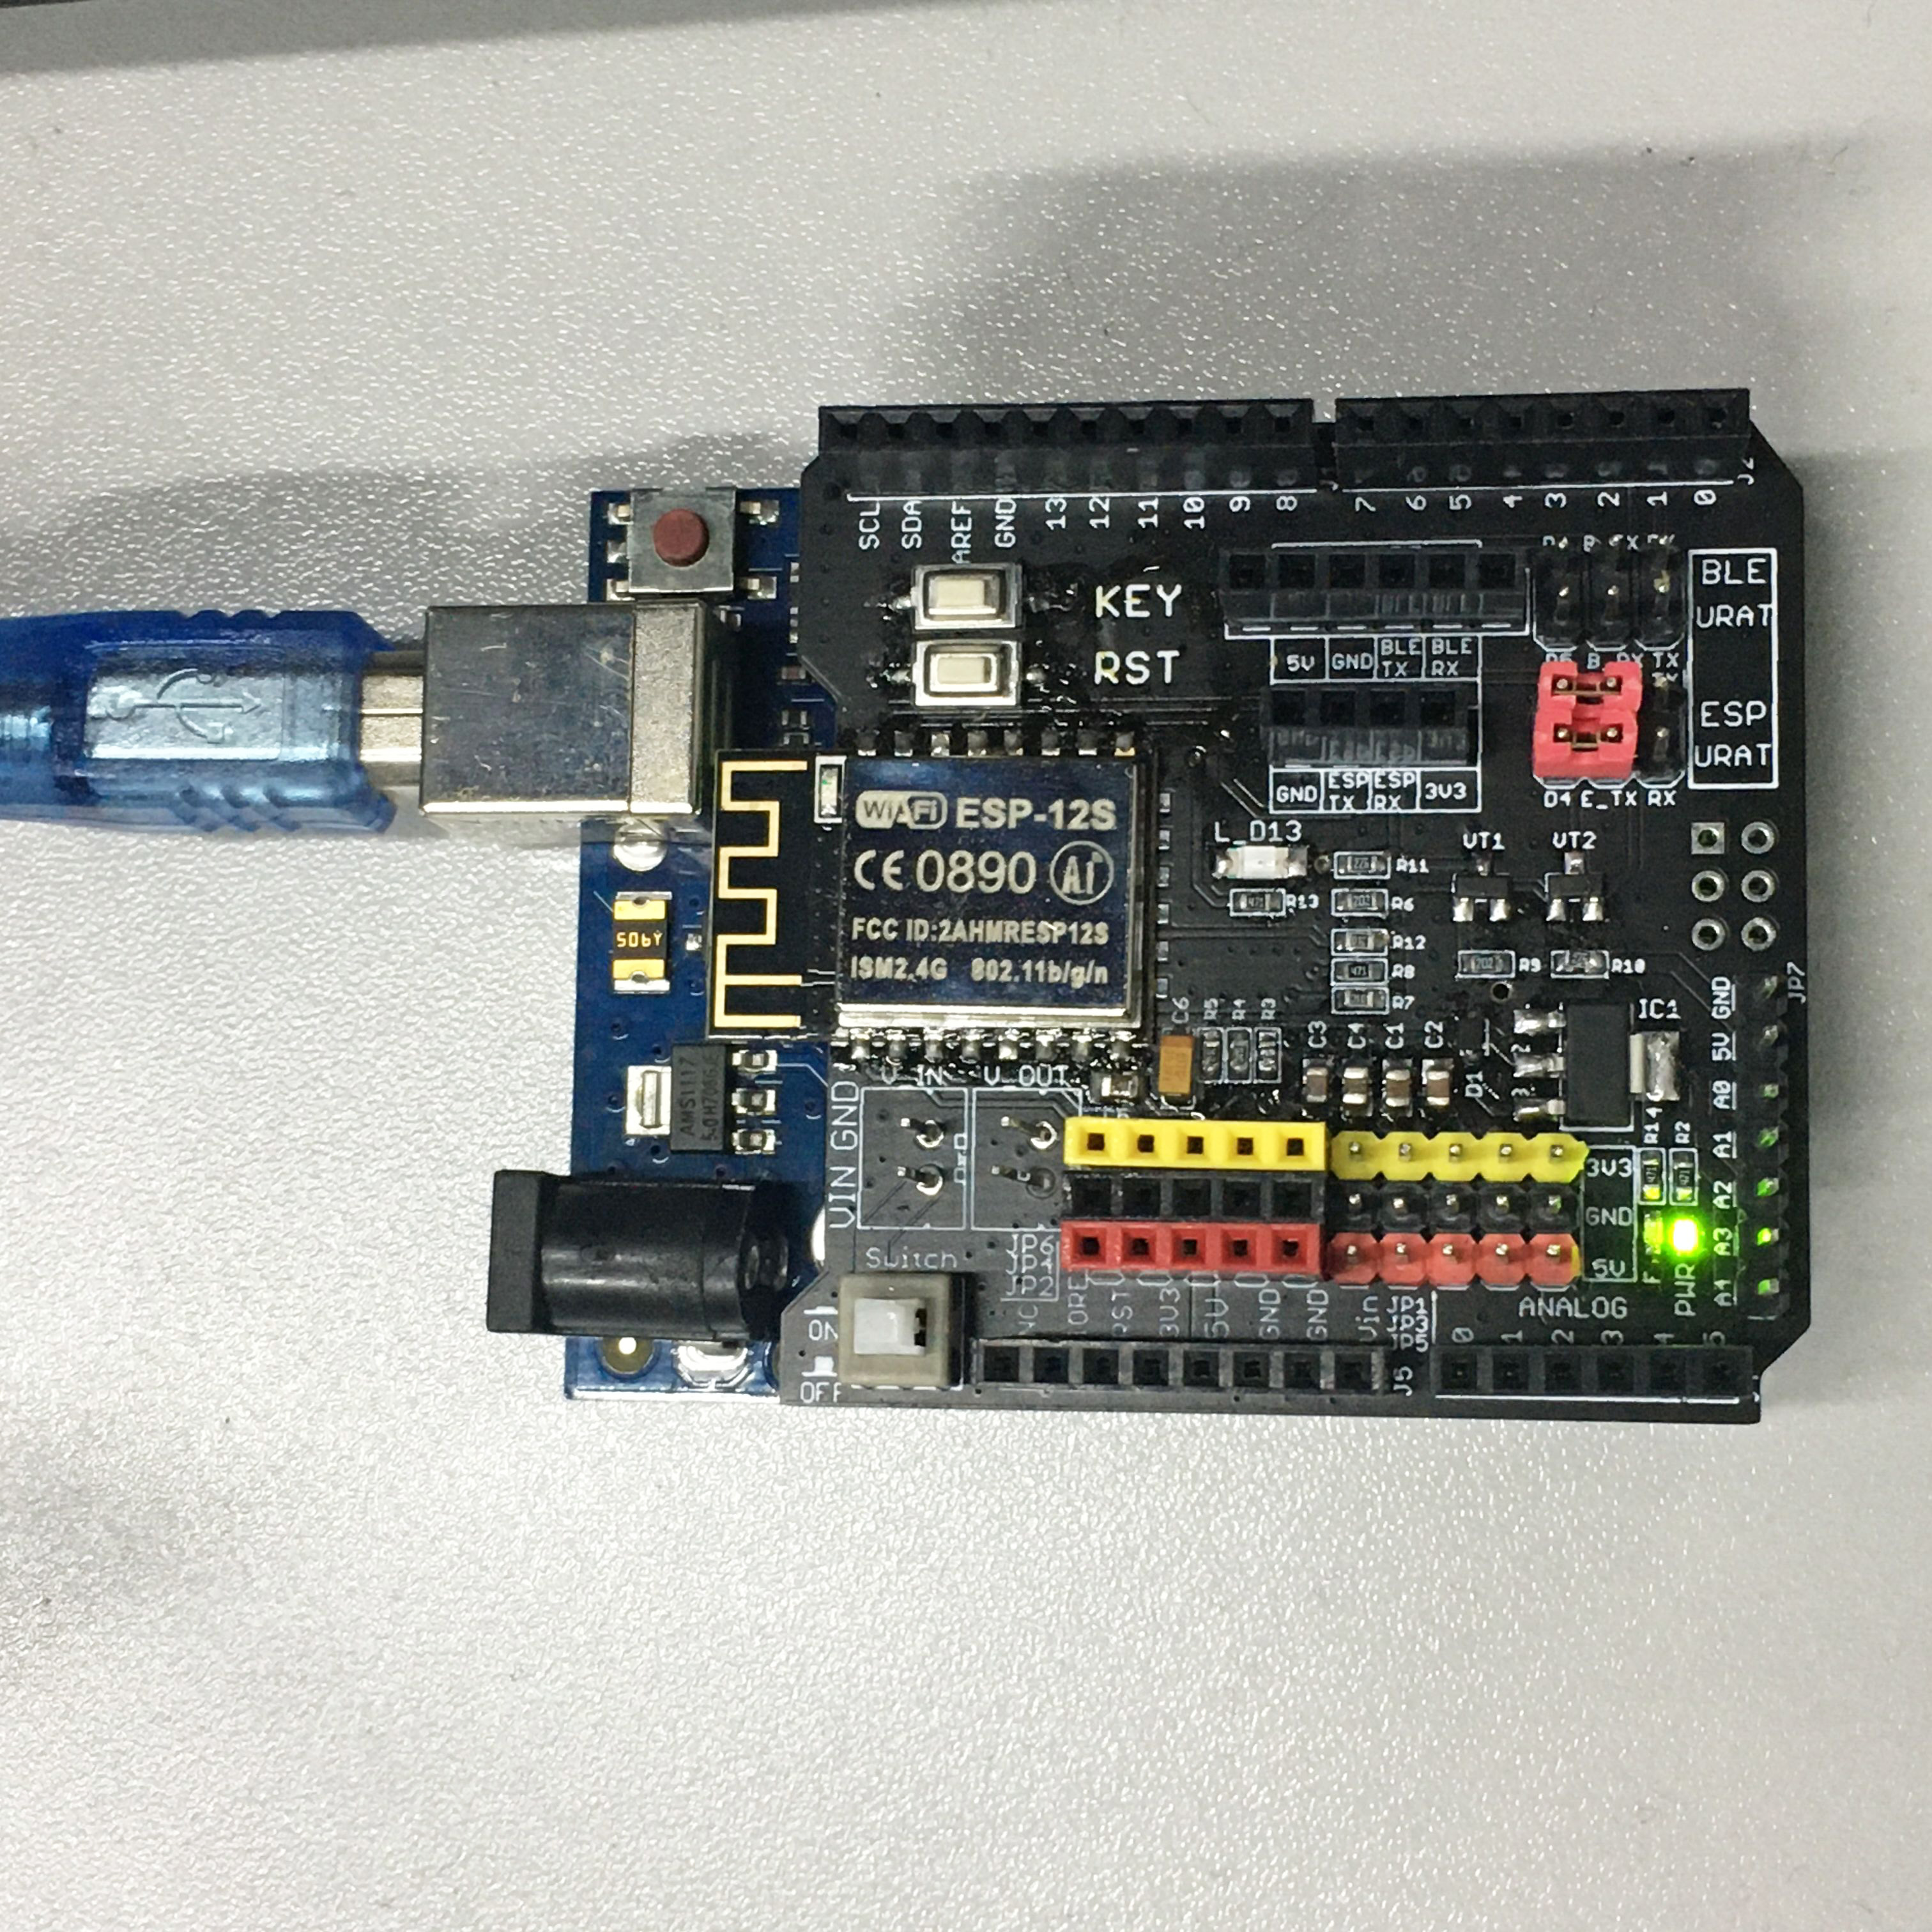
Step D) Connect the OSOYOO Basic board to the computer via a USB cable.
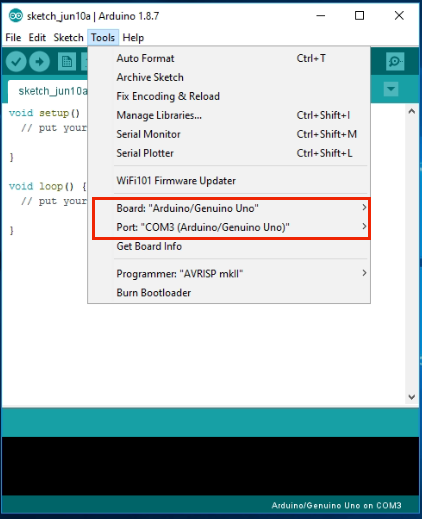
Step E) Open the IDE and choose the corresponding board type and port type for your project.
Board:”Arduino/Genuino UNO”
Port: Choose your own Serial Port for your mainboard
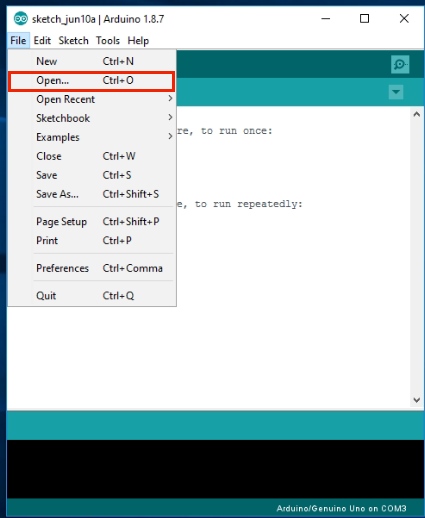
Step F) IDE: Click File > Open > Choose the code “esp8266-lesson1” and load the sketch onto your IDE.
In the sketch, find the following lines:
char ssid[] = "******"; // your network SSID (name)
char pass[] = "******"; // your network password
Please replace the "******" with your correct Wi-Fi SSID and password. Otherwise, your project
cannot connect to the Internet.
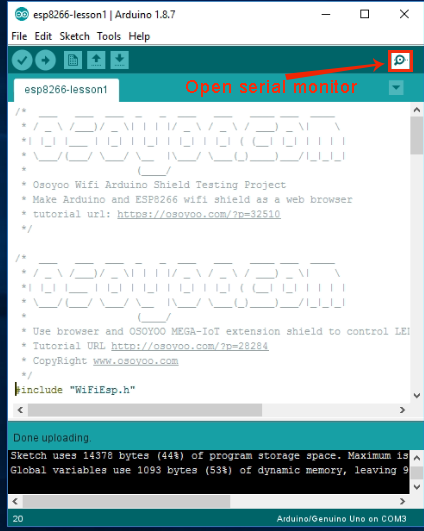
After loading the sketch to the IDE, open the serial monitor in the upper-right corner of the IDE.
You will see the following message.
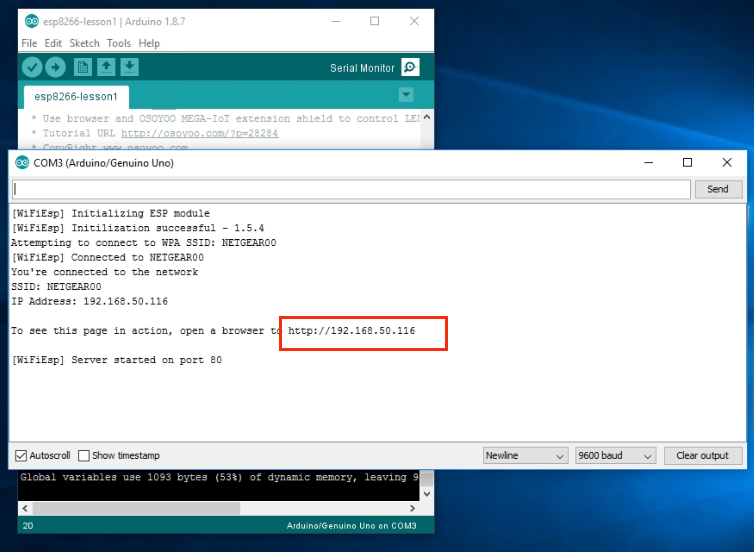
From the serial monitor, you can see the IP address of your OSOYOO Basic board in the red circle (in the above picture, 192.168.50.116).
Then use your browser to visit the website, http://192.168.50.116. You will see the following result.
Following directions step by step receives an ERROR “WiFi shield not present” – Also when using this link next to that part above “https://osoyoo.store/products/esp8266-wifi-shiled-osoyoo-wifi-internet-of-things-learning-kit-for-arduino-uno?variant=31955252215919” you get a 404 Web Page Not Found Error. Why are things sold that don’t work when the directions are followed as they are presented and why can you not keep your site working for links to try to fix the issue? Not a thing here for what to do with regards to it NOT PRESENT, what do I do from here?
The correction is as follows: when the items arrived the two jumpers on the shield were on the other 6 pins not the correct ones. You have to look at it real close because the first image you show has ZERO Jumpers, the second image has jumpers that can been seen as bein g the lower set of 6 not the top set but only if you enlarge the image to see this. The image with the circle on it needs to be set to an angle not straight down and use some better colored jumpers that can be seen. The best thing I have to say though is this. You are the fourth “set” for noobies I have purchased to follow and you with a few minor things have actually worked. The other three Failed miserably due to libraries not found in the version of IDE they have you download, I am using 1.8.10 as shown in the image. Granted some of the benefits of the never 2.3.0 version are missing yours works. I can’t wait to move on and act like a noob to see if the rest of your classes work. I believe the only thing that was going to cause an issue I have fixed and have great expectations for the rest.


Following directions step by step receives an ERROR “WiFi shield not present” – Also when using this link next to that part above “https://osoyoo.store/products/esp8266-wifi-shiled-osoyoo-wifi-internet-of-things-learning-kit-for-arduino-uno?variant=31955252215919” you get a 404 Web Page Not Found Error. Why are things sold that don’t work when the directions are followed as they are presented and why can you not keep your site working for links to try to fix the issue? Not a thing here for what to do with regards to it NOT PRESENT, what do I do from here?
Correct Wifi shield purchase link is https://osoyoo.store/products/esp8266-wifi-shiled-for-arduino-uno?_pos=1&_sid=60037375f&_ss=r
We have updated the article. thanks for your help!
The correction is as follows: when the items arrived the two jumpers on the shield were on the other 6 pins not the correct ones. You have to look at it real close because the first image you show has ZERO Jumpers, the second image has jumpers that can been seen as bein g the lower set of 6 not the top set but only if you enlarge the image to see this. The image with the circle on it needs to be set to an angle not straight down and use some better colored jumpers that can be seen. The best thing I have to say though is this. You are the fourth “set” for noobies I have purchased to follow and you with a few minor things have actually worked. The other three Failed miserably due to libraries not found in the version of IDE they have you download, I am using 1.8.10 as shown in the image. Granted some of the benefits of the never 2.3.0 version are missing yours works. I can’t wait to move on and act like a noob to see if the rest of your classes work. I believe the only thing that was going to cause an issue I have fixed and have great expectations for the rest.