Note: For LGT-Nano Board V1.0, you cannot directly connect it to your computer or cell phone with TYPE C to TYPE C cable, you need to use OTG cable to perform related operations.
Installing the AVR core
The classic Arduino boards, including the favorites UNO, Nano and Mega, requires the AVR core to be installed to compile and upload sketches to your board.
LogicGreen’s LGT8F328P is an instruction set compatible with AVR and Atmega328P chips. After rigorous testing, it is found that it is 99% compatible with Arduino IDE. The classic IDE does not have the LGT8F328P core pre-installed. This means that we need to download and install the editor, and then install an Arduino IDE package that supports OSOYOO LGT-Nano before we can start programming with the Arduino IDE. Please make sure you have installed the CH340 driver…
In this tutorial, we will simply show how to select the right board, choose the right port, and how to upload the classic blink example to our board, a simple program that makes your LED blink every second.
After we have installed the Arduino IDE and the LGT-Nano support package, we can restart the IDE and start the next journey.
Choosing the board
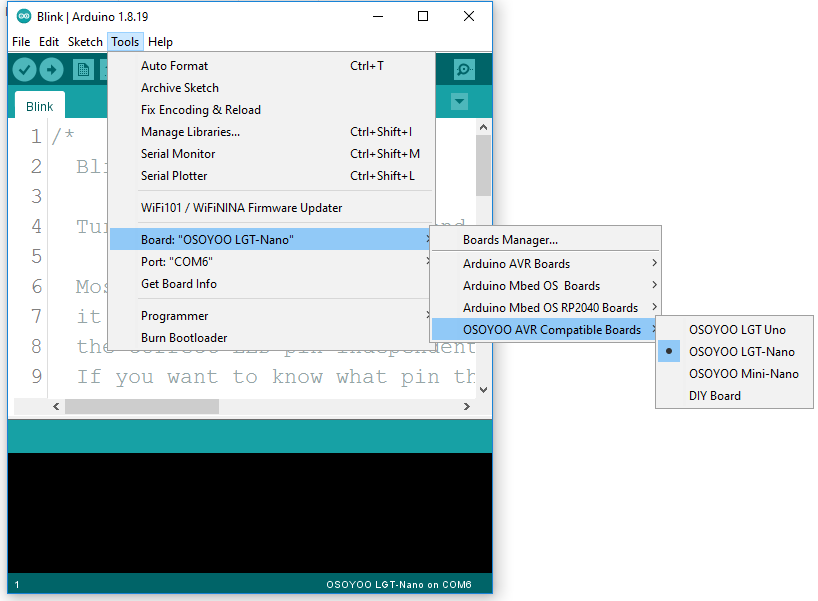
First, we need to select the right core & board. This is done by navigating to Tools > Board > Arduino AVR Boards > Board. Make sure you select the board OSOYOO LGT-Nano.
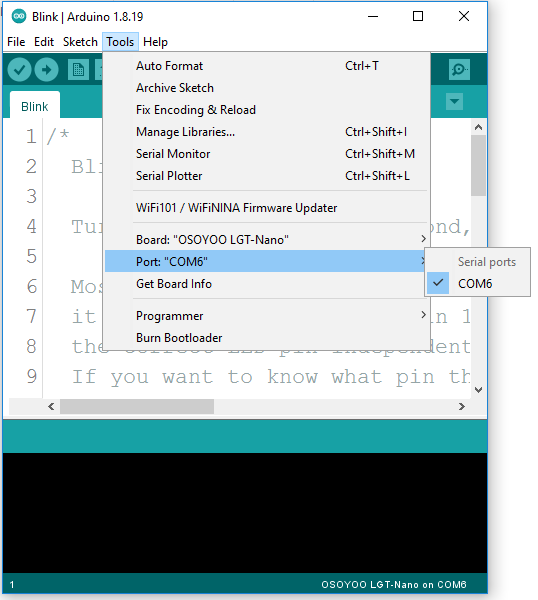
Now, let’s make sure that our board is found by our computer, by selecting the port. Regardless what kind of program we are uploading to the board, we always need to choose the port for the board we are using. This is simply done by navigating to Tools > Port, where you select your board from the list. Selecting the right board and port.
This will look different depending on what kind of operative system you are using.
For Windows users, it could look like this:
<COM4>
For MAC users, it could look like this:
/dev/cu.usbmodem14112
Uploading a simple example
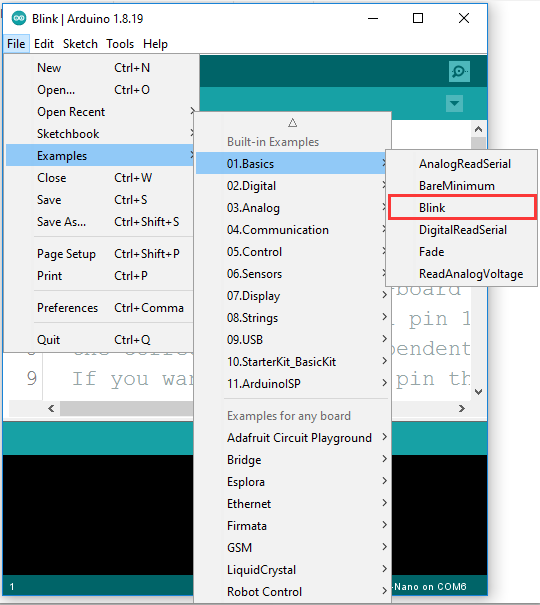
You are now ready to start using your board! The easiest way to check that everything is working, is to upload just a simple blink example to your board. This is done by navigating to File > Examples > 01.Basics > Blink.
Selecting the blink example.
To upload the sketch, simply click on the arrow in the top left corner. This process takes a few seconds, and it is important to not disconnect the board during this process.
Uploading the sketch.When the code is uploaded, the text"Done uploading."is visible in the bottom left corner.
If you look closely at your board, you will notice an orange LED blink with an interval of one second. This means you have successfully uploaded a program to your board.