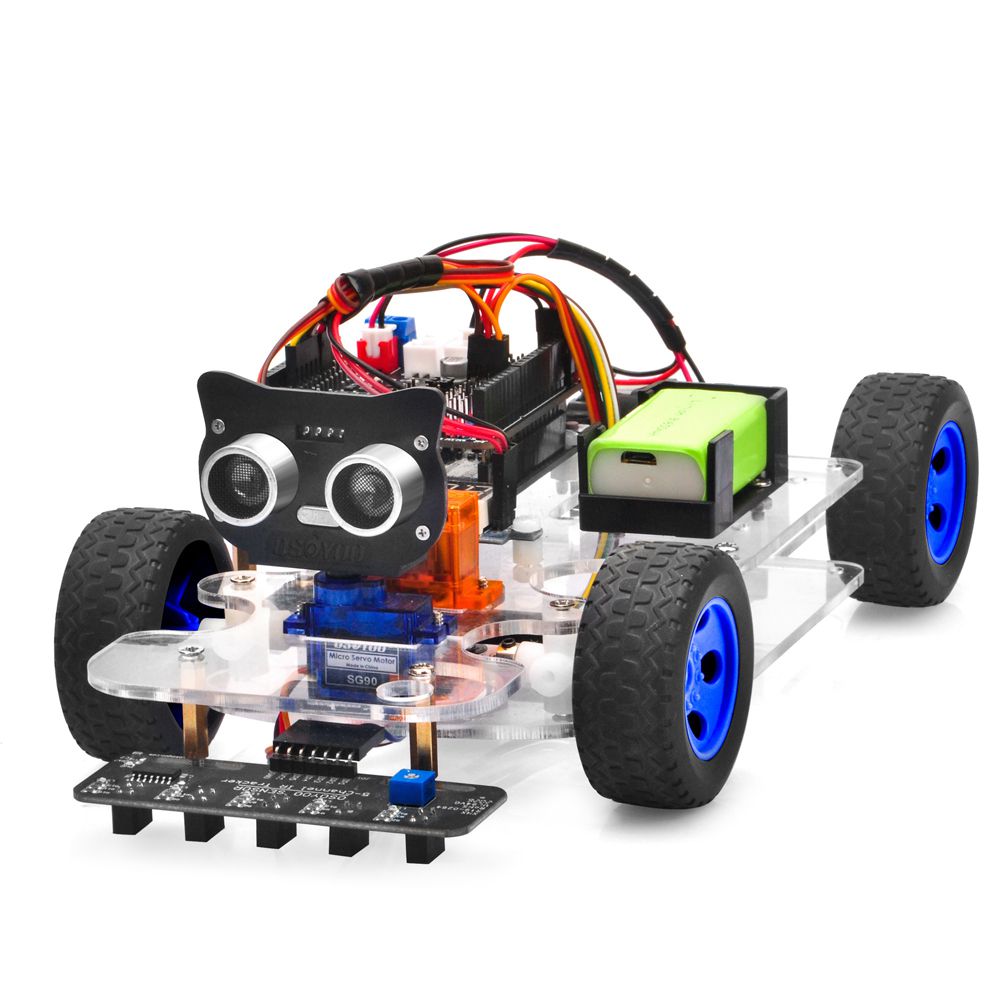
Welcome to the first lesson of OSOYOO Sport Car for Arduino!
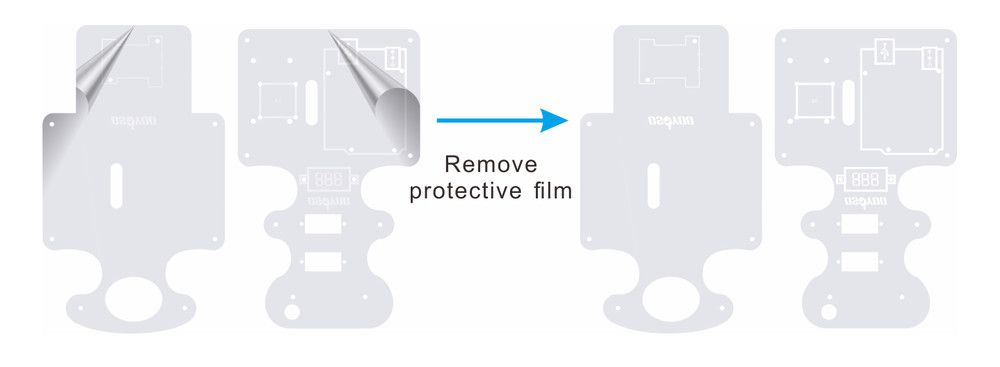
In this lesson, we will install the framework of the robot car and align the steering servo to make the car face to front
As your experiments in future lessons are all based on the framework of Lesson 1, it is very important to test the installation and sample code in this Lesson properly.
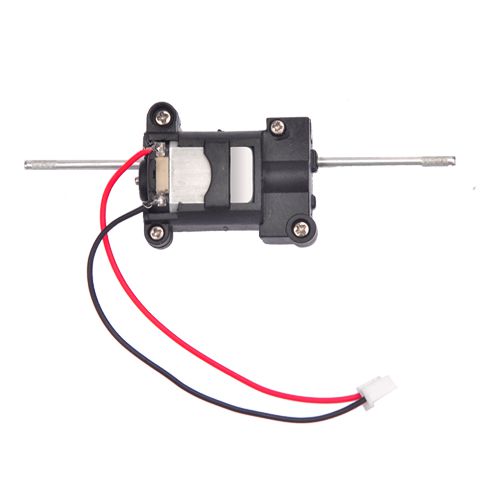
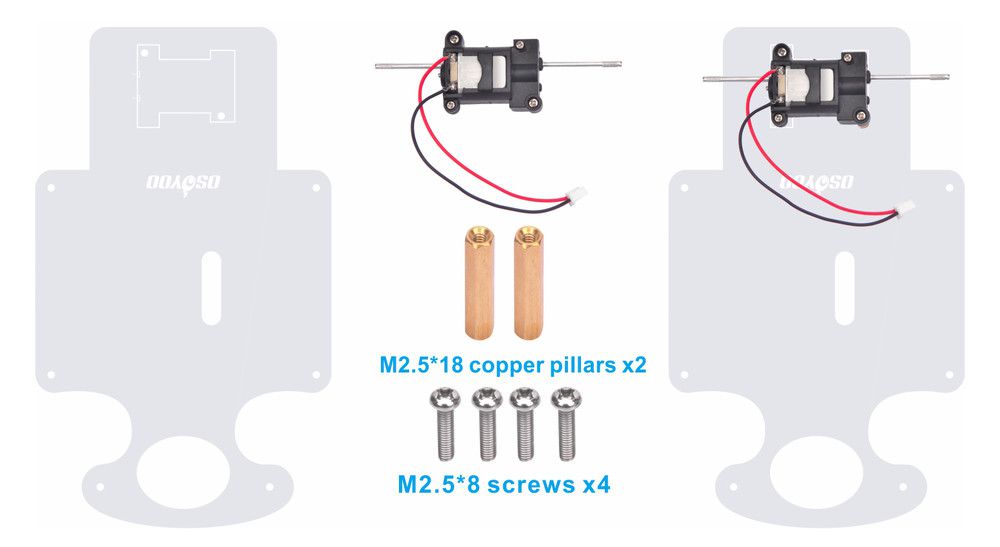
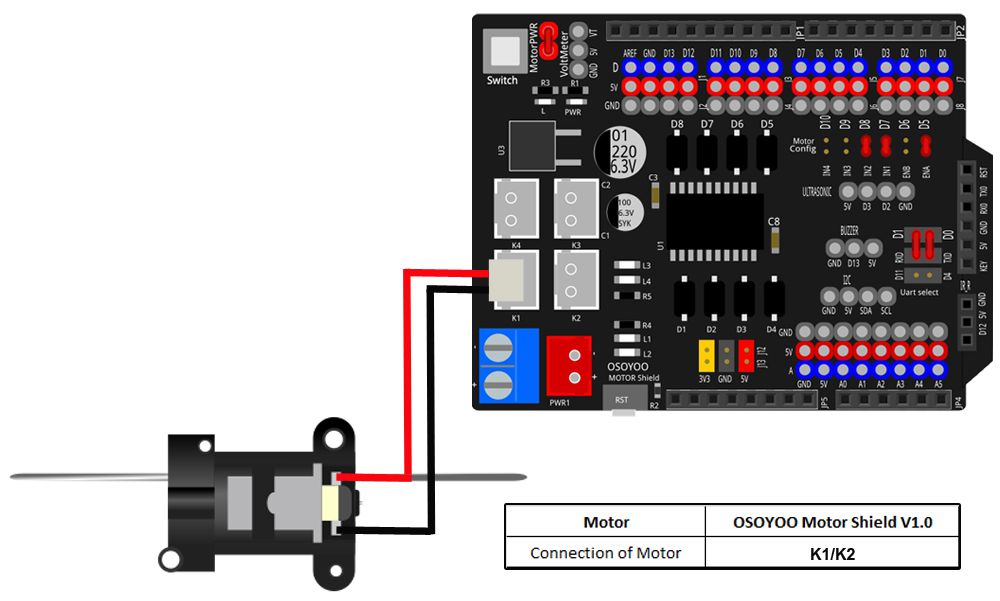
2. Fix the motor on the lower chassis with 2pcs M2.5*18 copper pillars and 4pcs M2.5*8 screws as follows:
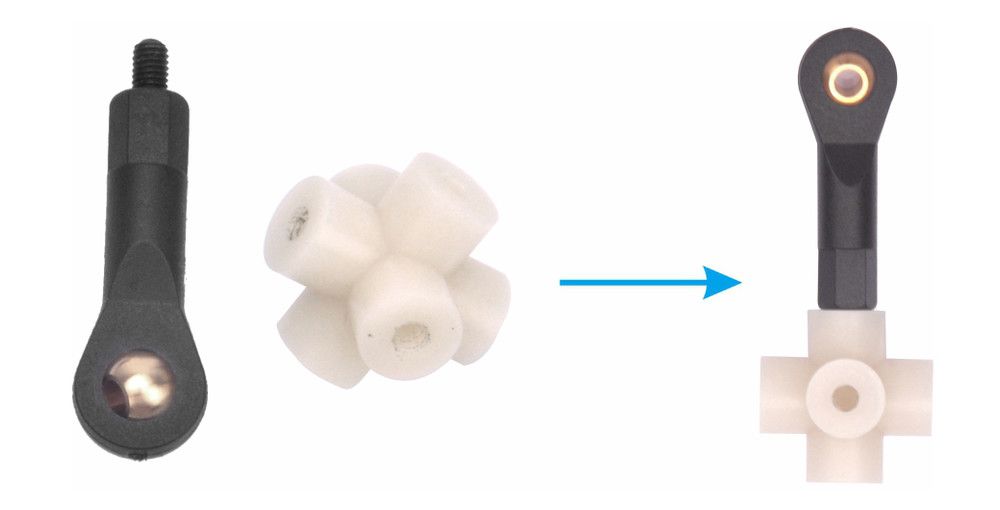
3. Connect steering cup with Rod End Bearing as follows (Attention: Two holes which can be crossed from one side to other side are used to fix wheel, please don’t install parts on these two holes) :
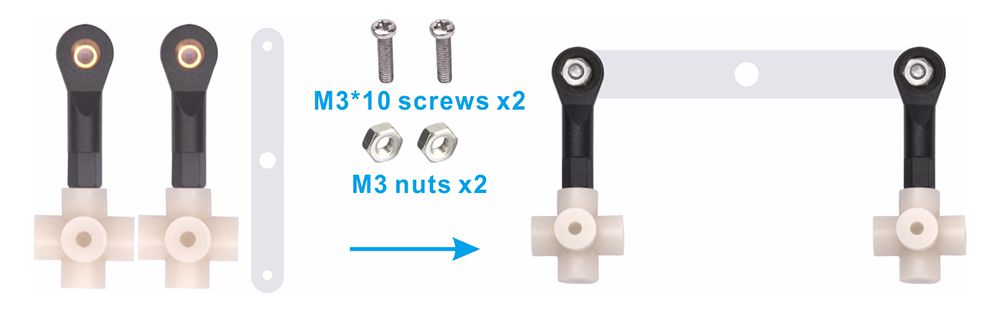
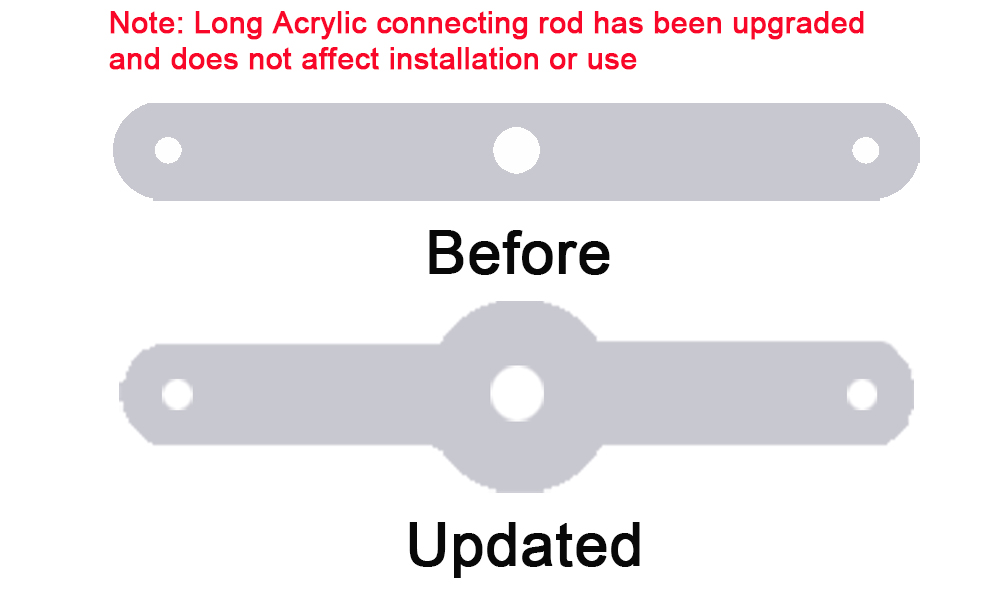
4. Install 2pcs Rod End Bearings on the long Acrylic connecting rod as follows (Note: Long Acrylic connecting rod has been upgraded and does not affect installation or use):
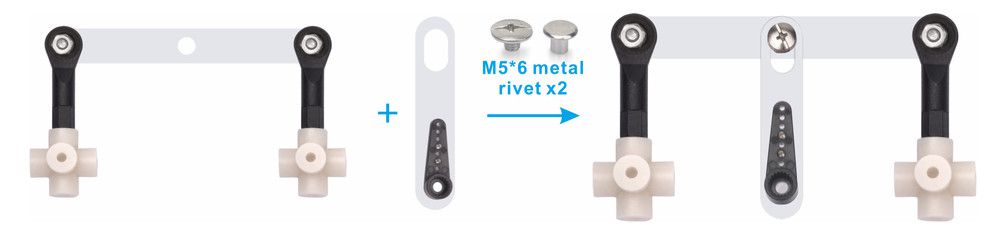
5. Install black servo horn (from the package of orange servo motor) on the short Acrylic connecting rod as follows:
6. Install the short Acrylic connecting rod on the long Acrylic connecting rod with M5*6 metal rivet as follows:
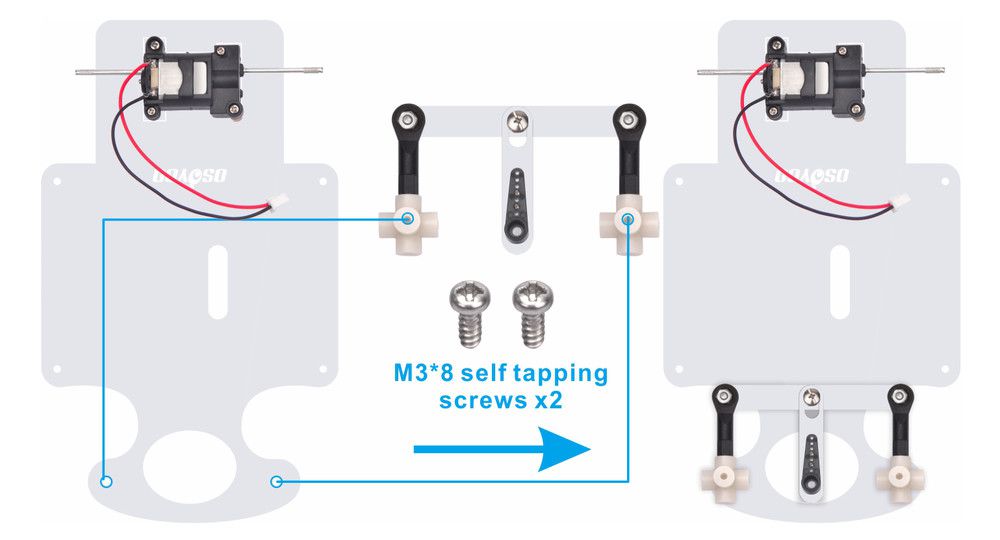
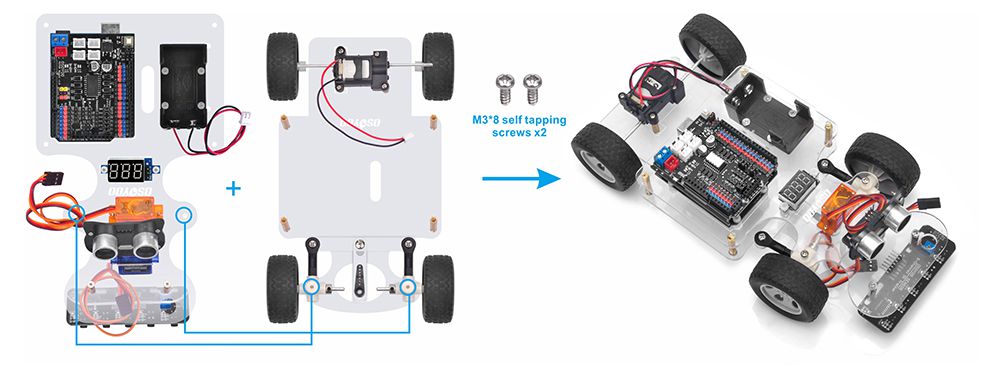
7. Fix the 2pcs steering cup on the lower chassis with 2pcs M3*8 self-tapping screws as follows:
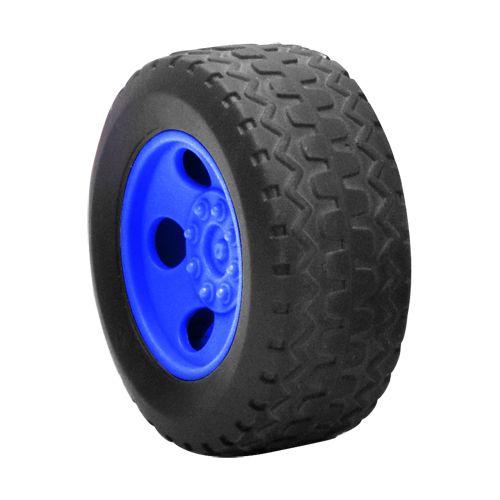
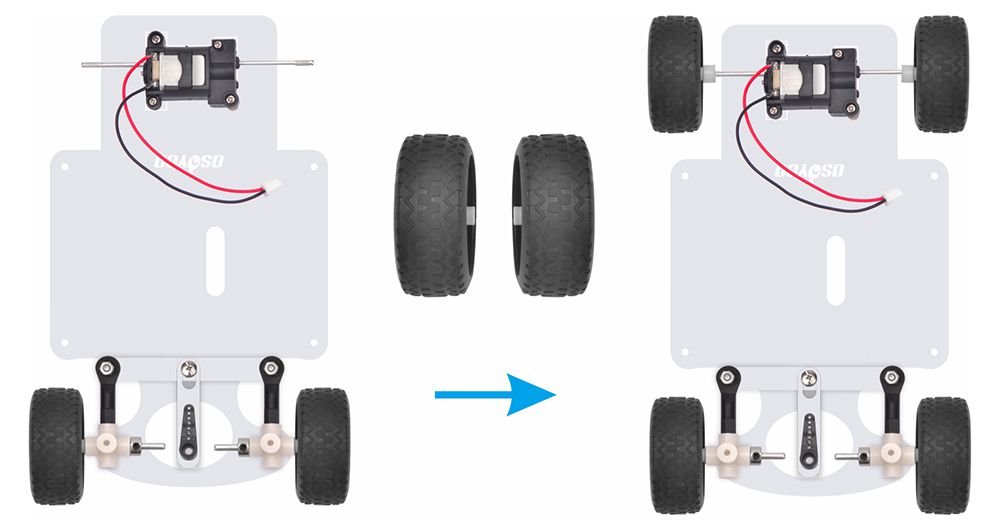
8. Install 2pcs wheels on metal rod as follows:
9. Cross 2pcs wheels through steering cup and use L type Wrench to fix these with metal sleeve as follows:
10. Install the other 2pcs wheels on the motor as follows:
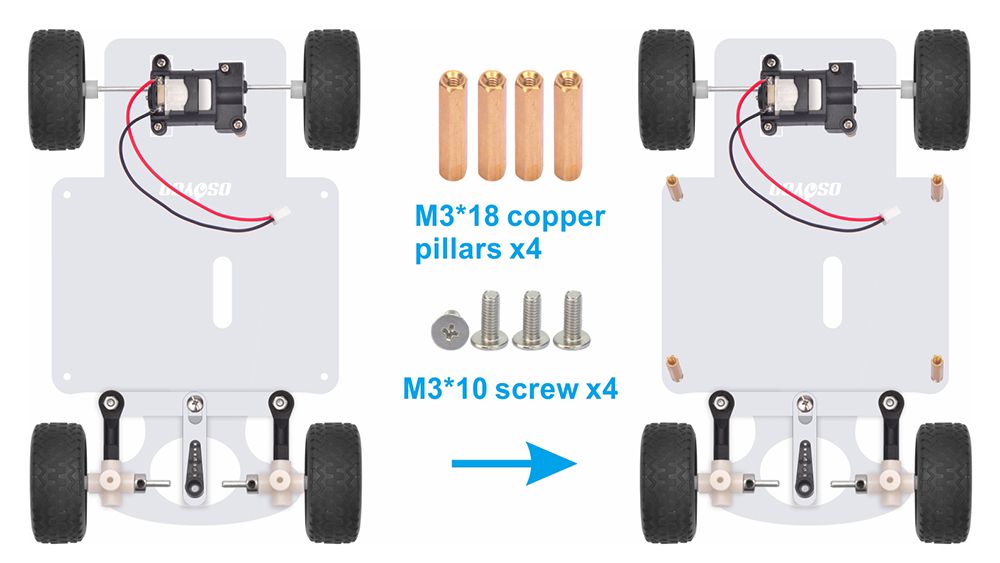
11. Install 4pcs M3*18 copper pillars on the lower car chassis with M3*10 screws as follows:
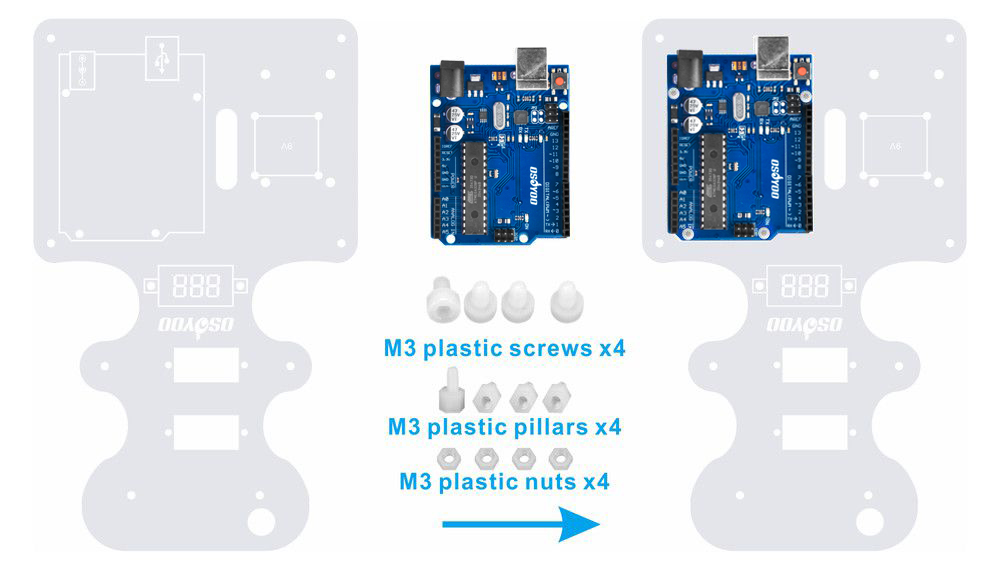
12. Use hex screwdriver to install OSOYOO UNO Board on the upper car chassis with M3 plastic screws, pillars and nuts as follows:
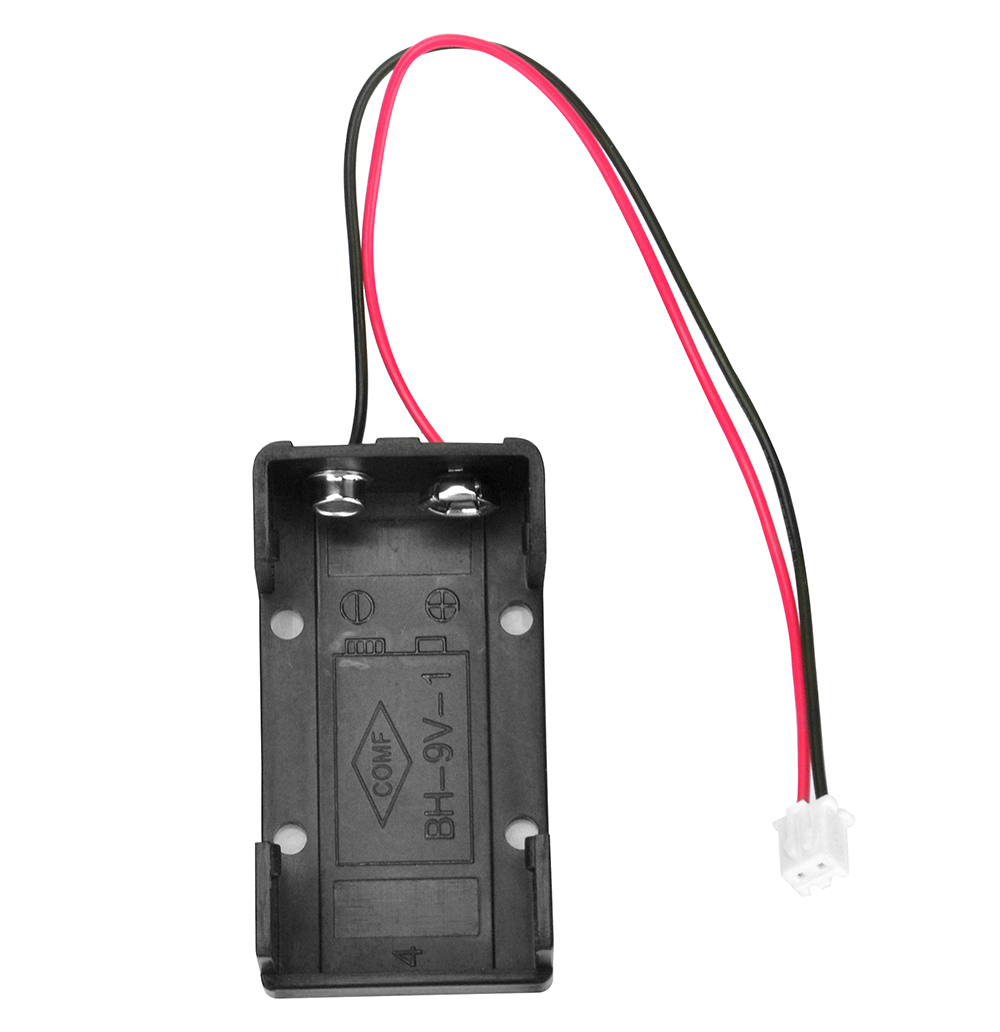
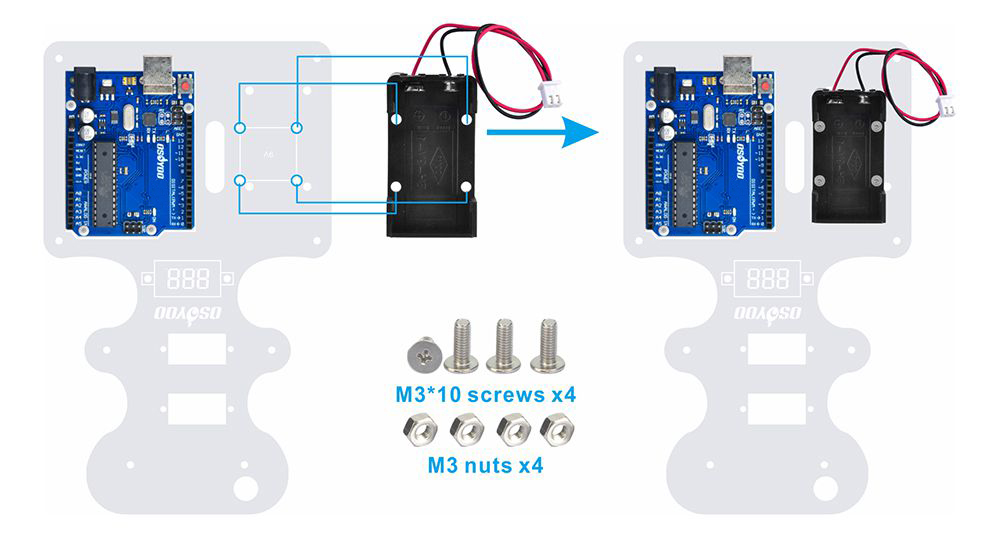
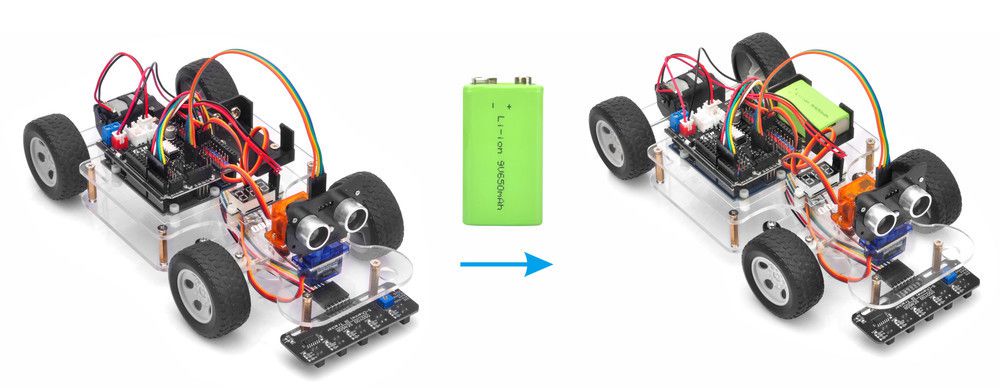
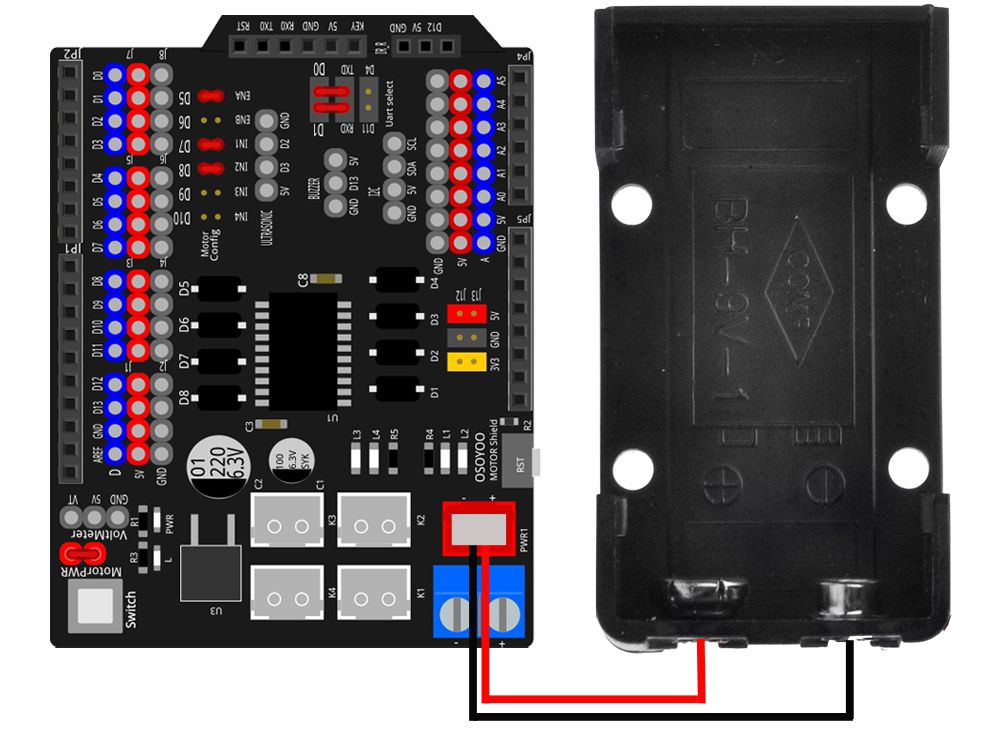
13. Install the 9V battery box on the chassis with M3 Phillips screws and nuts as follows:
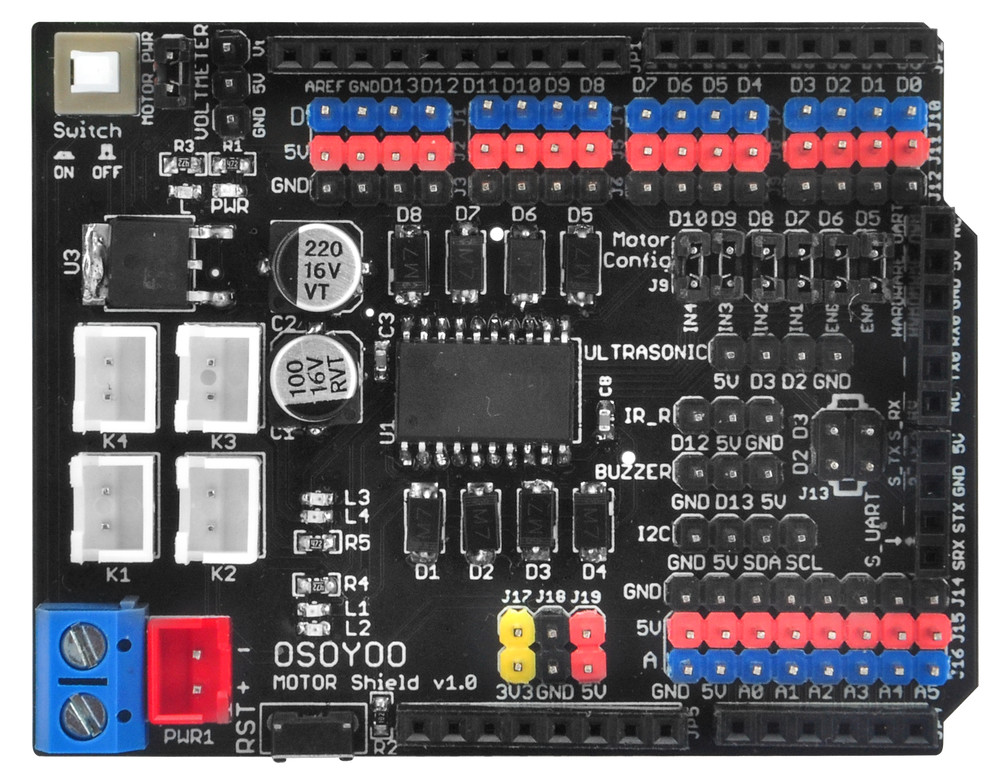
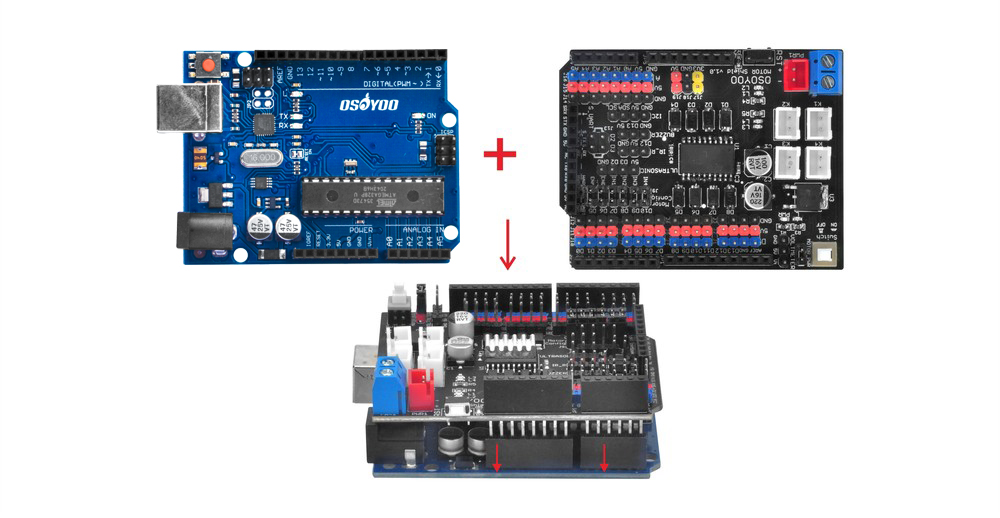
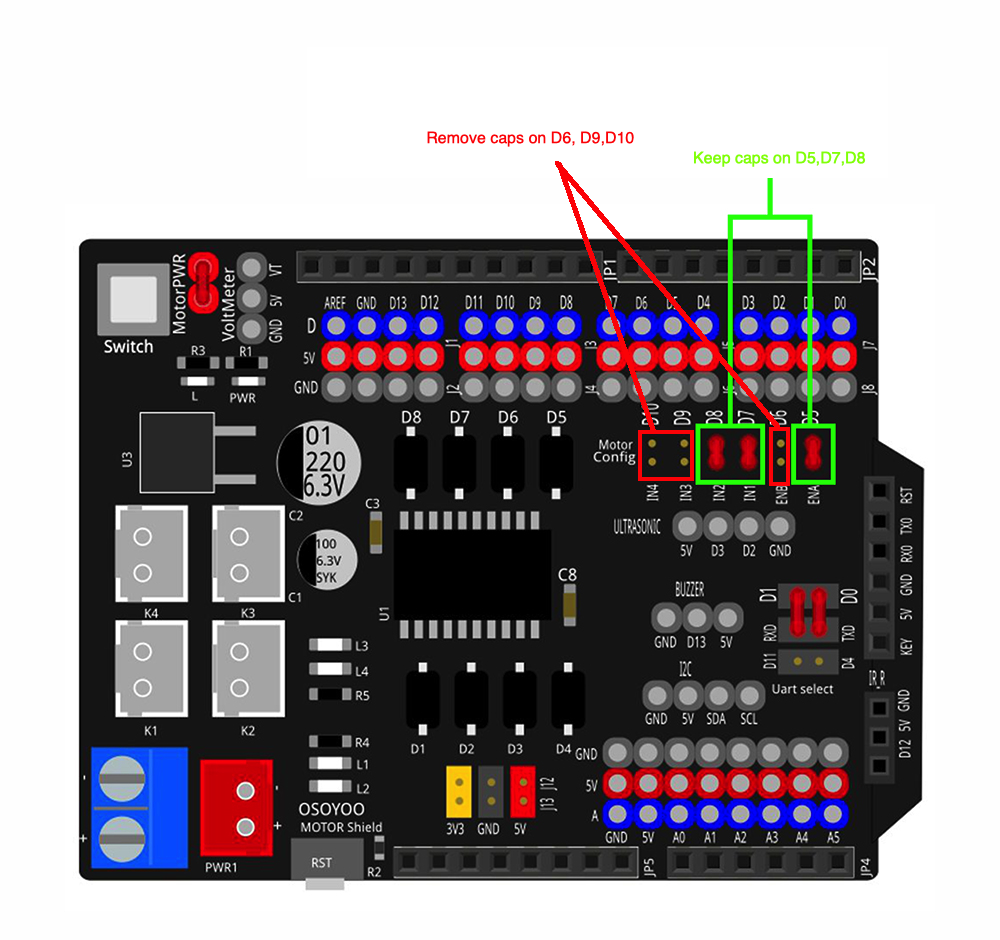
14. Plug the OSOYOO Motor Shield Board in OSOYOO UNO board as follows
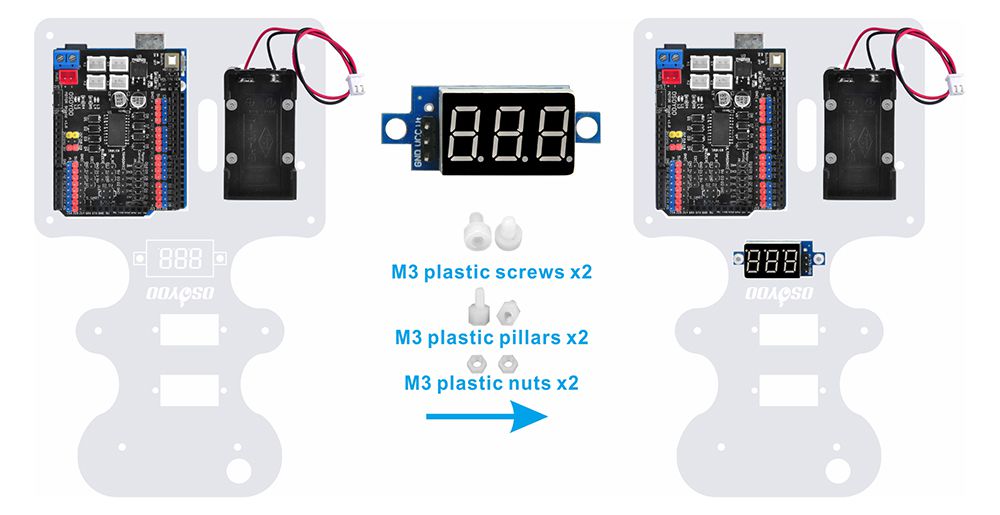
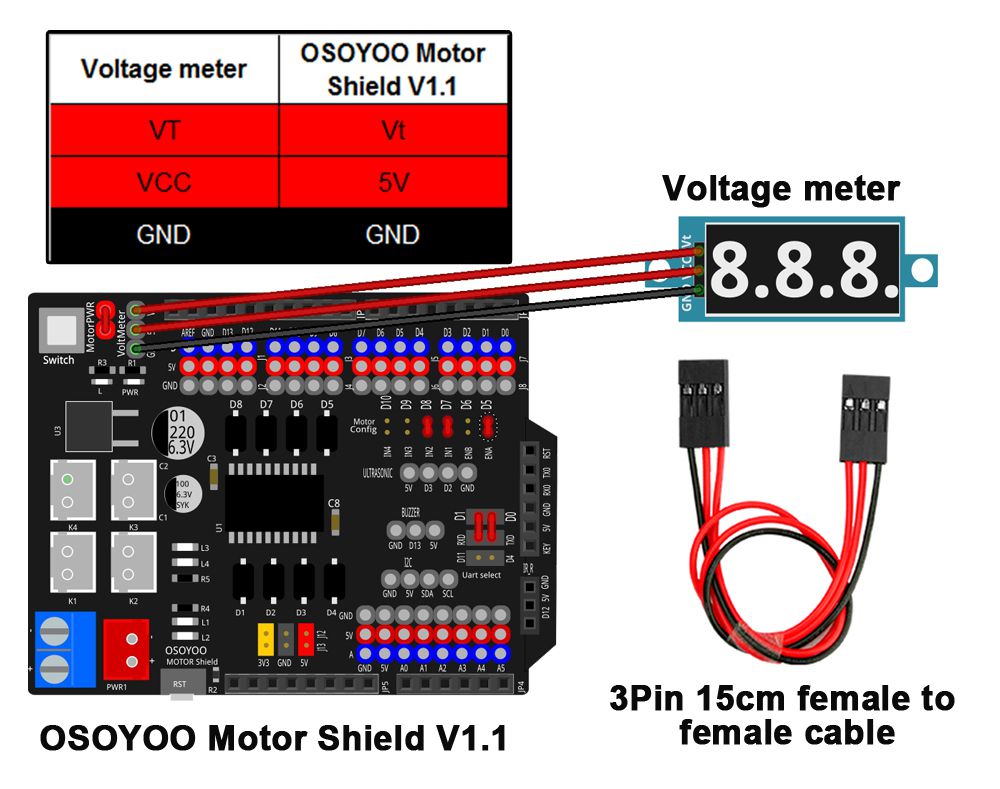
15. Install the voltage meter on the chassis with M3 plastic screws, pillars and nuts as follows:
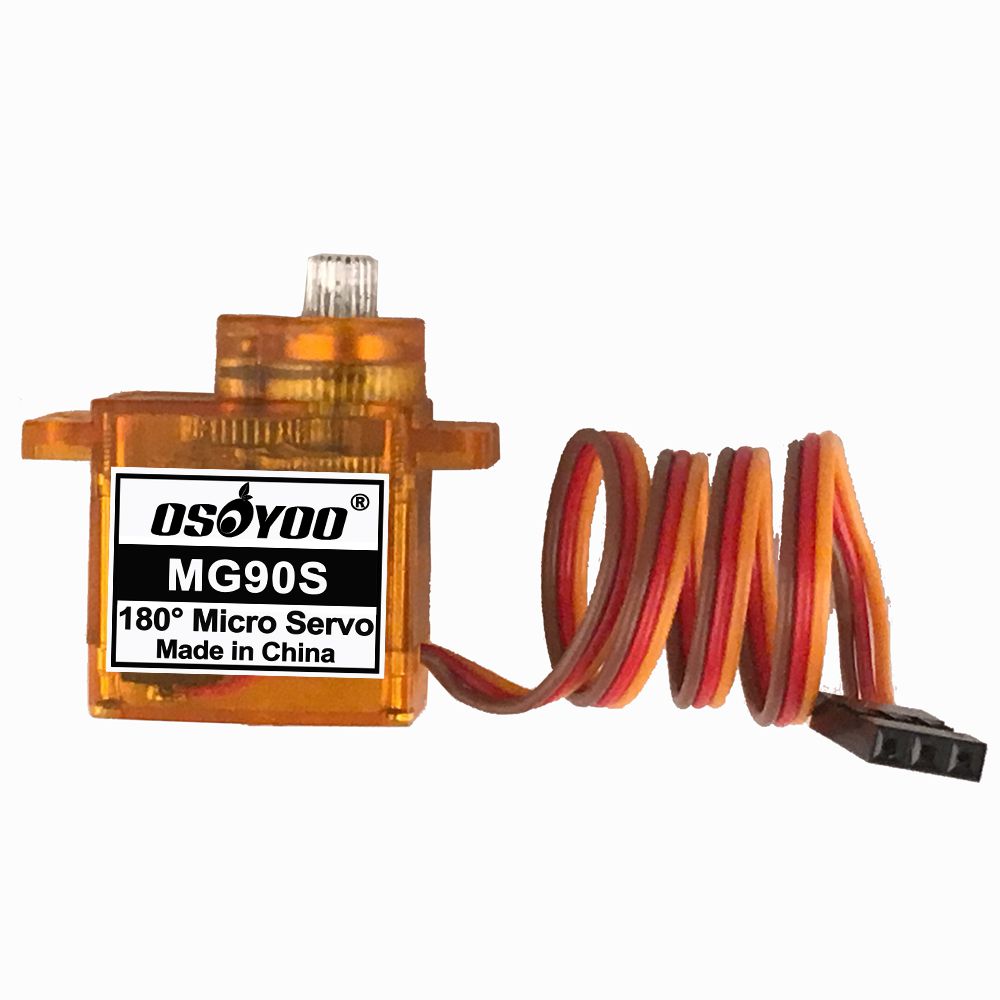
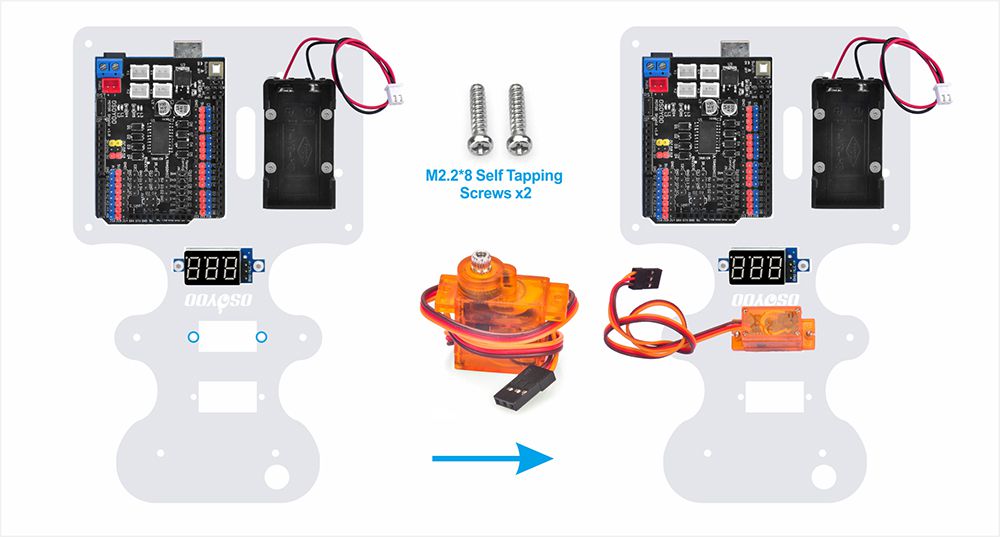
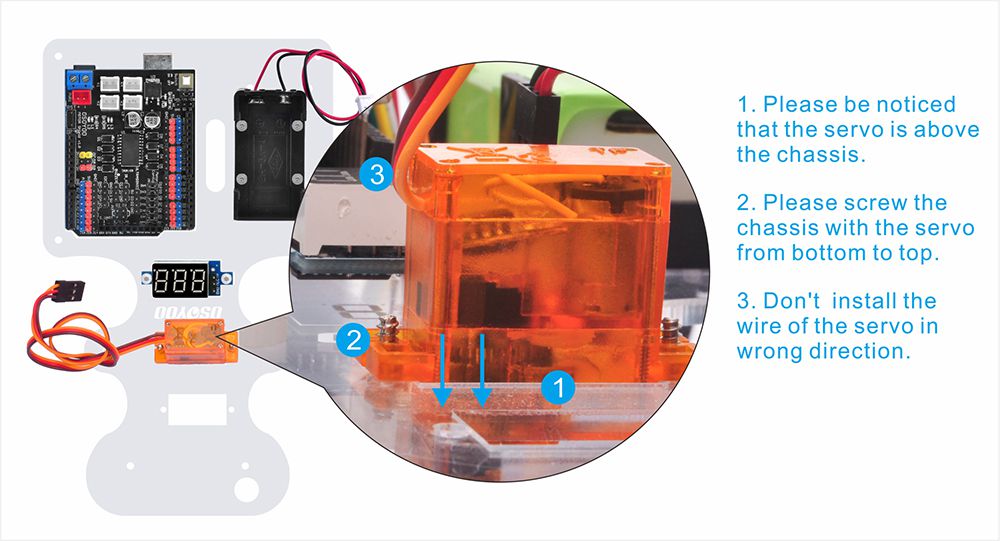
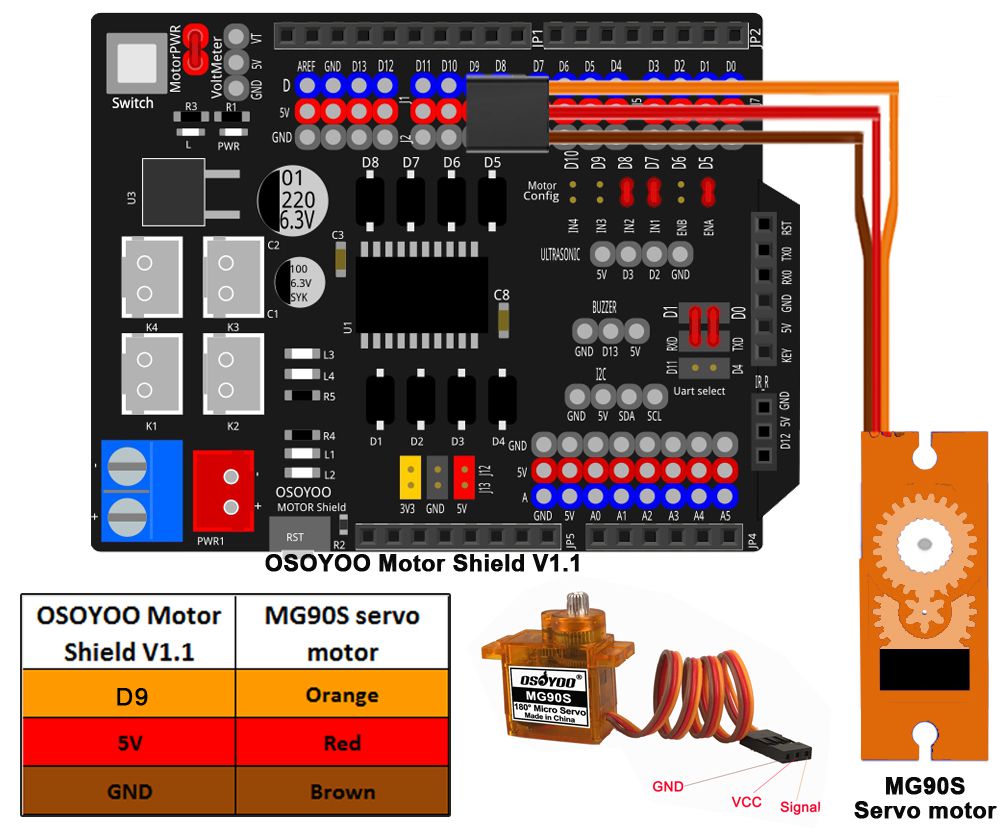
16. Install MG90S servo motor (orange) on the upper car chassis from top to bottom with 2pcs M2.2*8 Self Tapping Screws as follows:
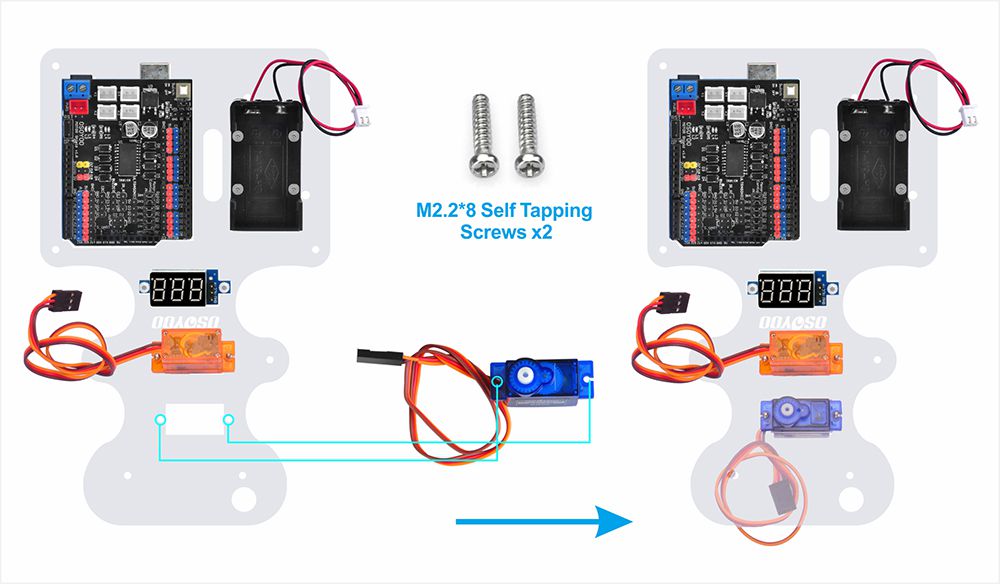
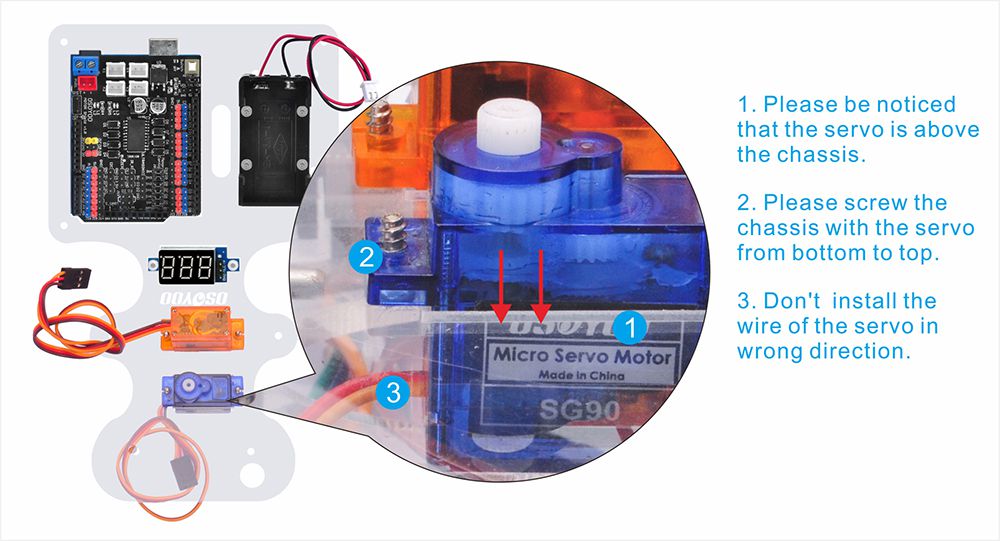
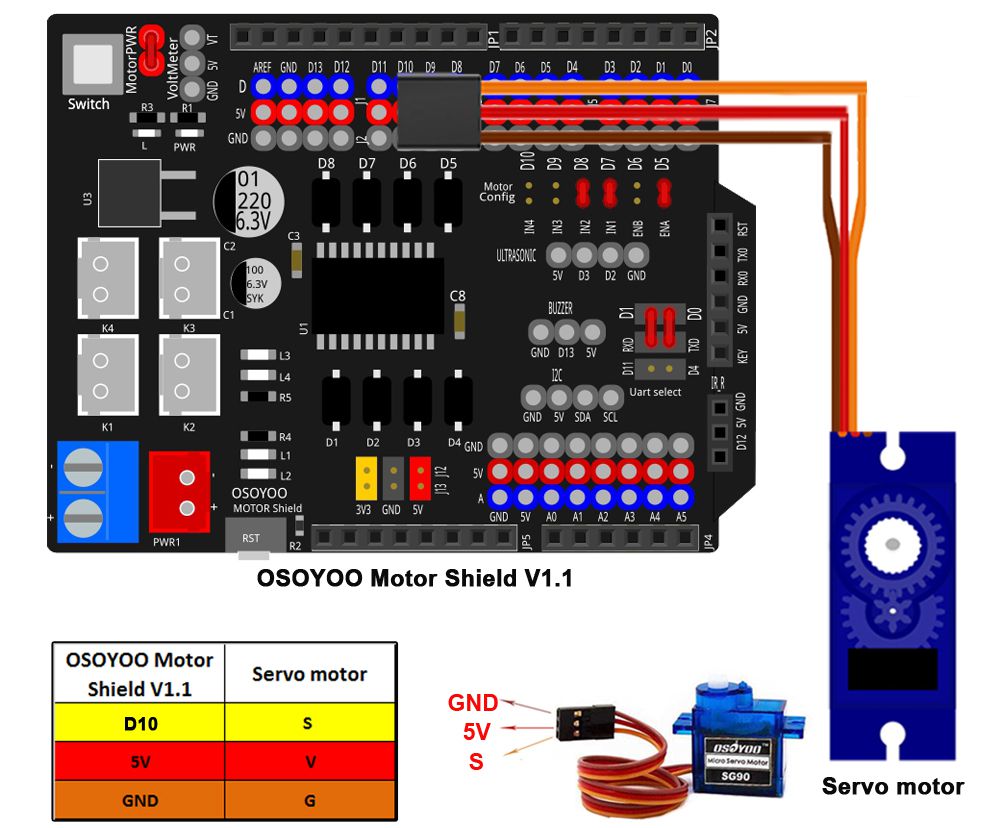
17. Install servo motor (blue) on the upper car chassis from bottom to top with 2pcs M2.2*8 Self Tapping Screws as follows
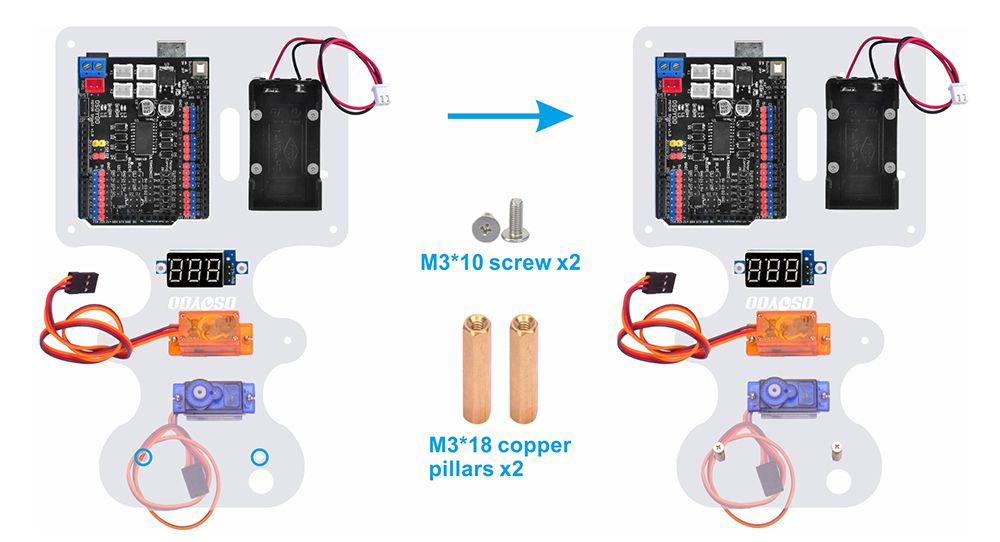
18. Install 2pcs M3*18 copper pillars under the upper car chassis with 2pcs M3*10 screws as follows
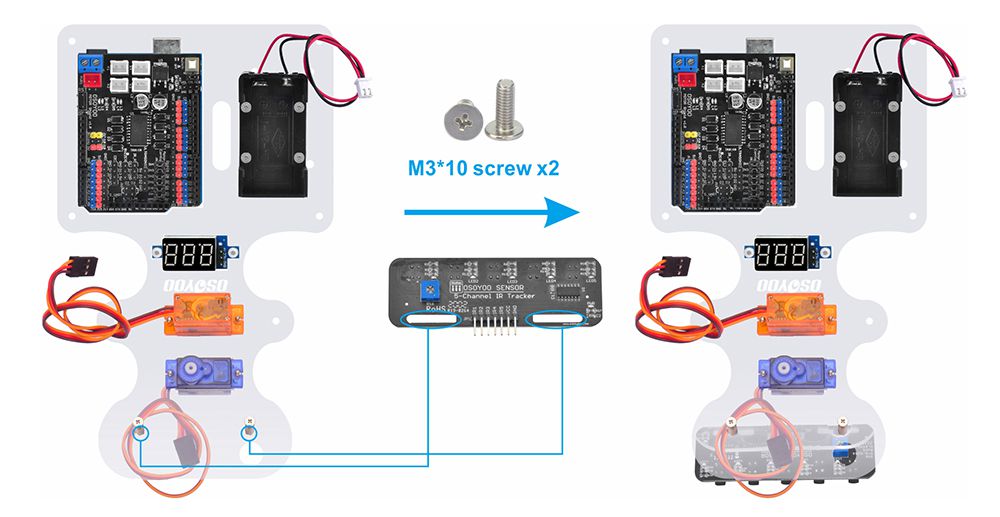
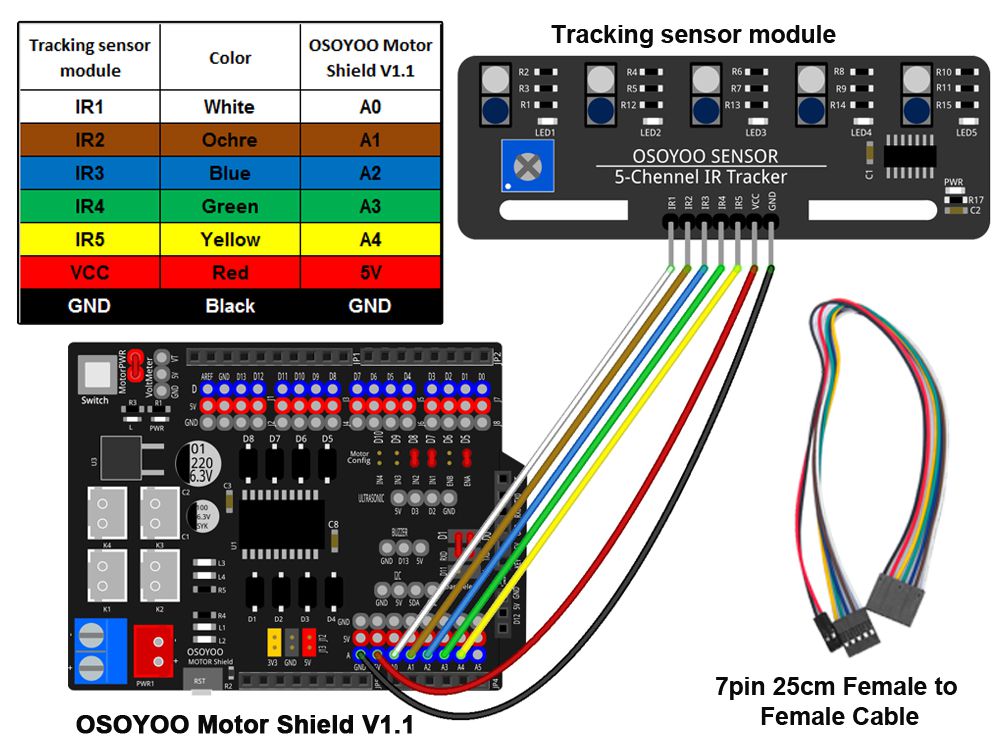
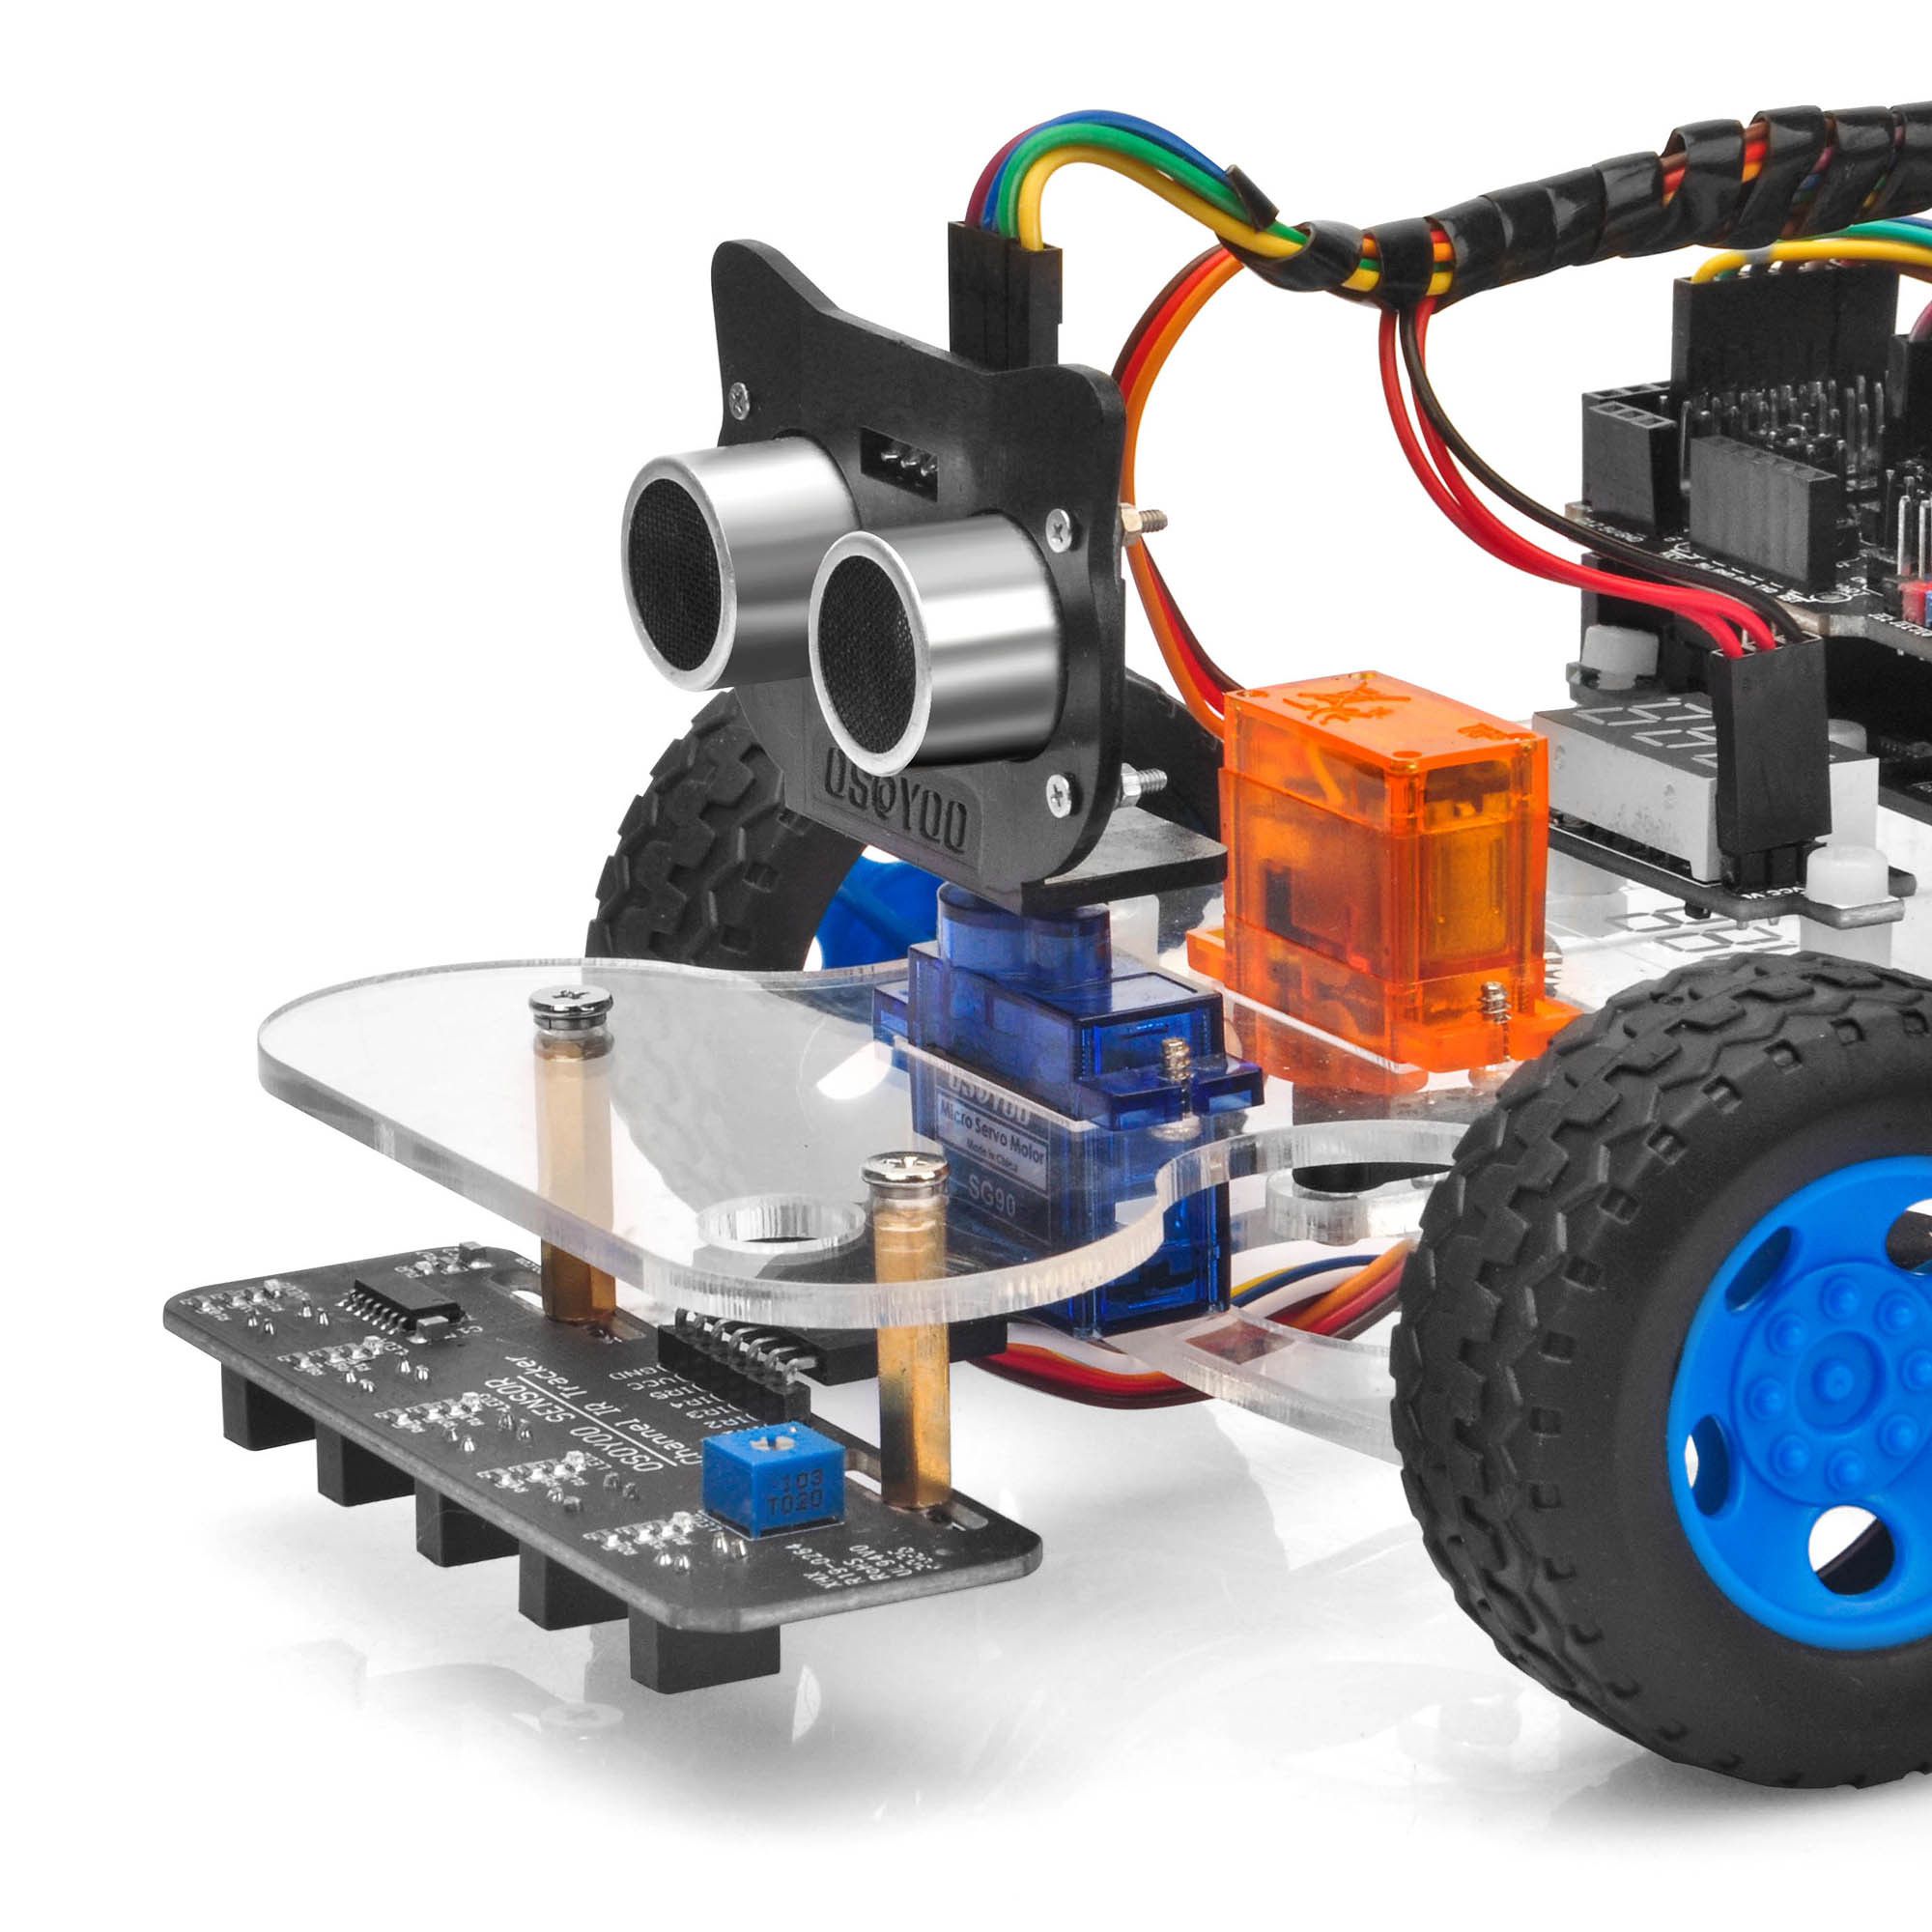
19. Install tracking sensor module under the M3*18 copper pillars with 2pcs M3*10 screws as follows
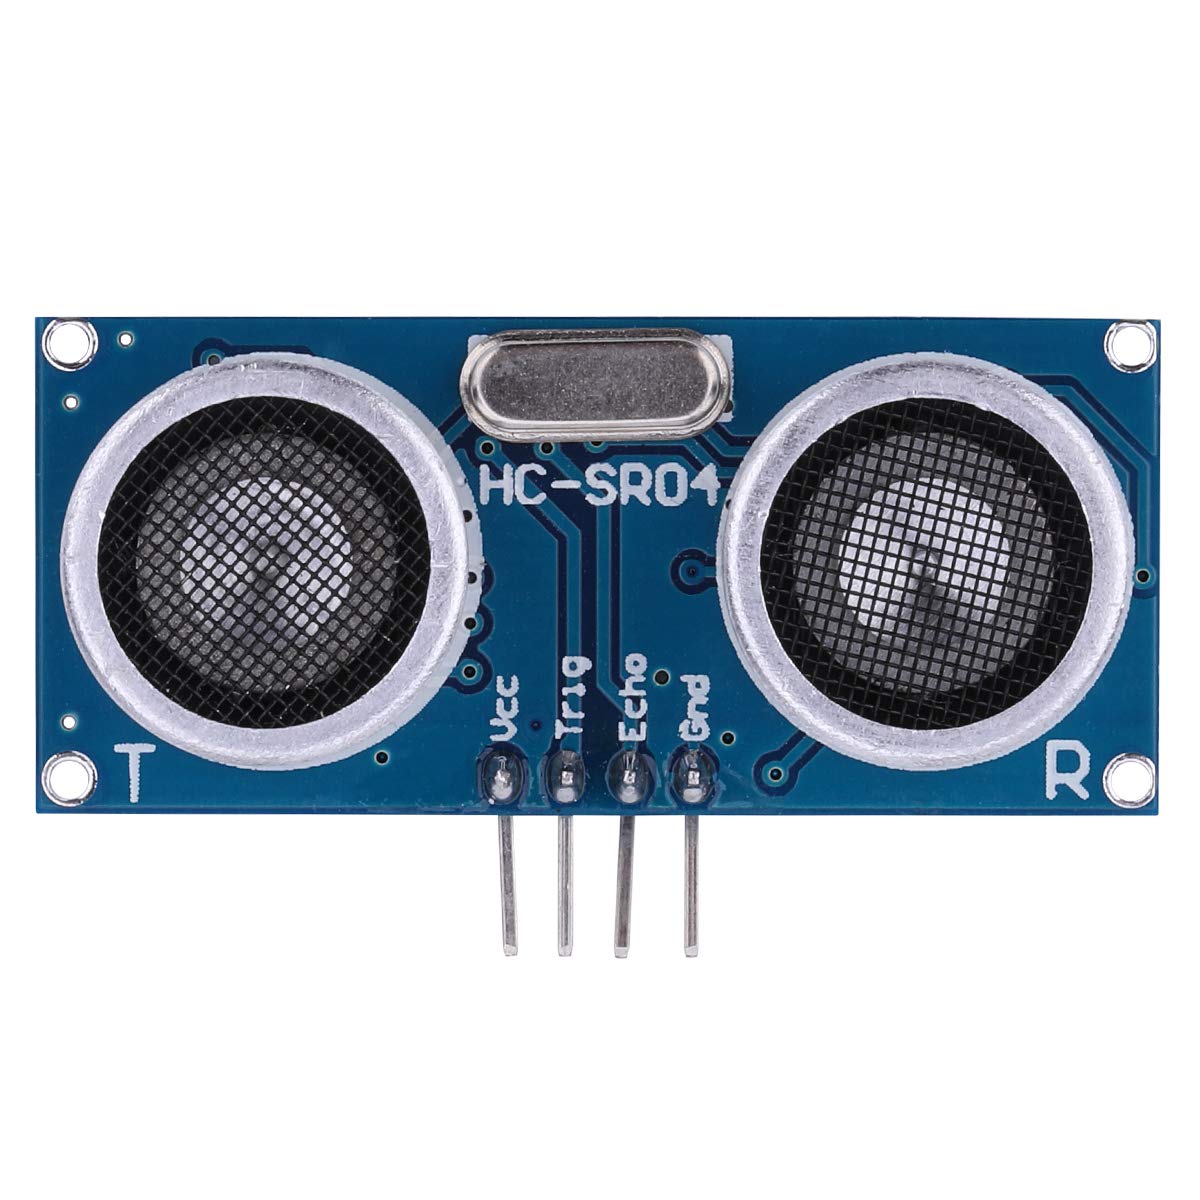
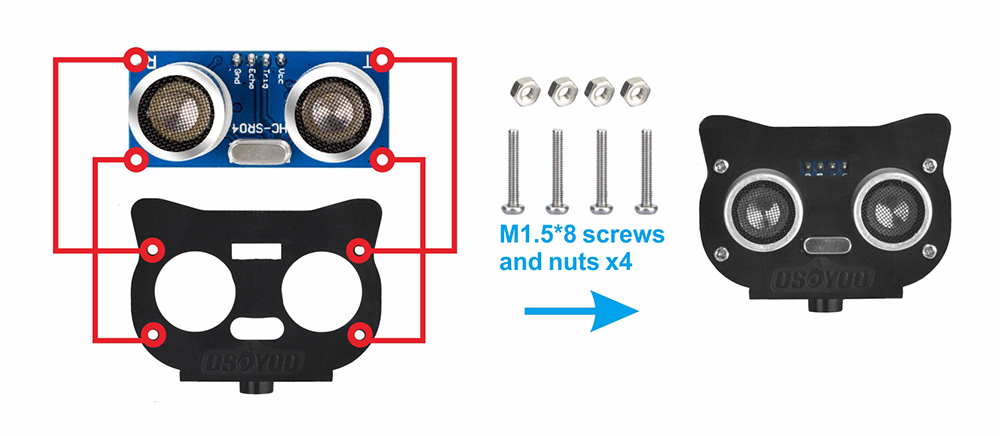
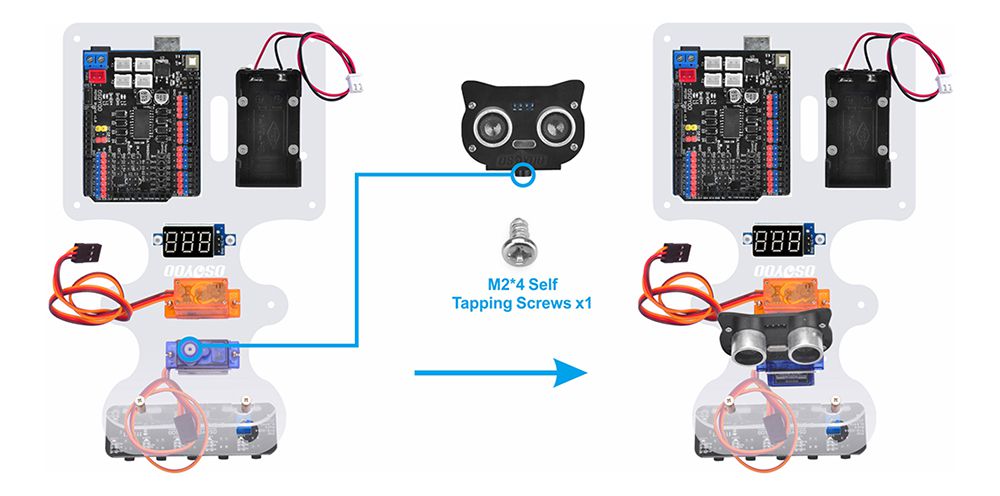
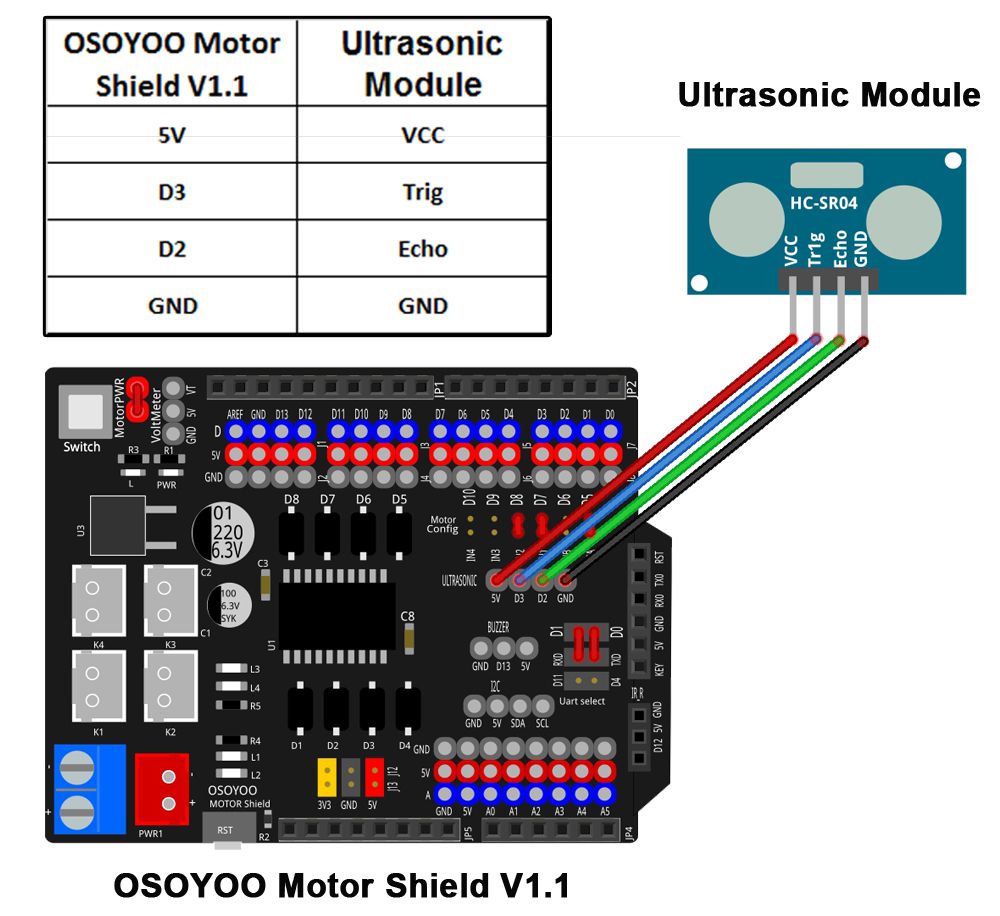
20. Install ultrasonic module to mount holder with 4pcs M1.5*8 screw and M1.5 nuts as follows
21. Install mount holder for Ultrasonic Module on servo motor with M2*4 Self Tapping screw as follows
22. Fix steering cup under upper car chassis with 2pcs M3*8 self-tapping screws as follows (Note: after fixing the steering cup at the upper chassis, it must still be possible to easily rotate the steering cup around the screw axis) :
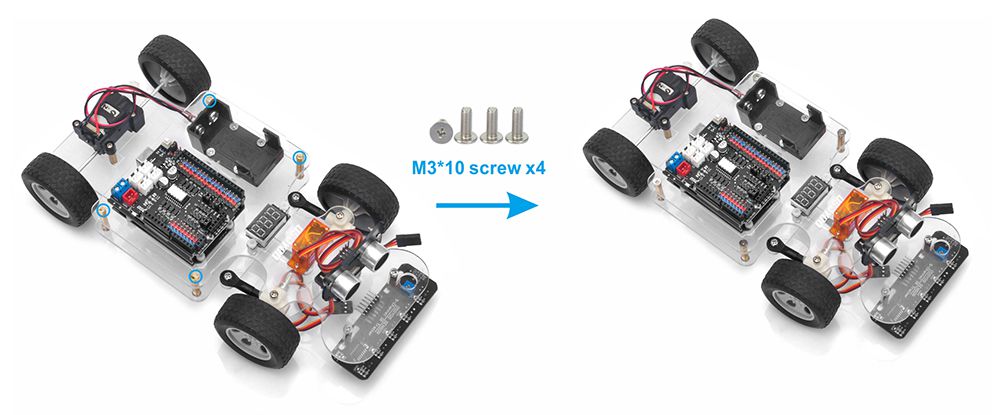
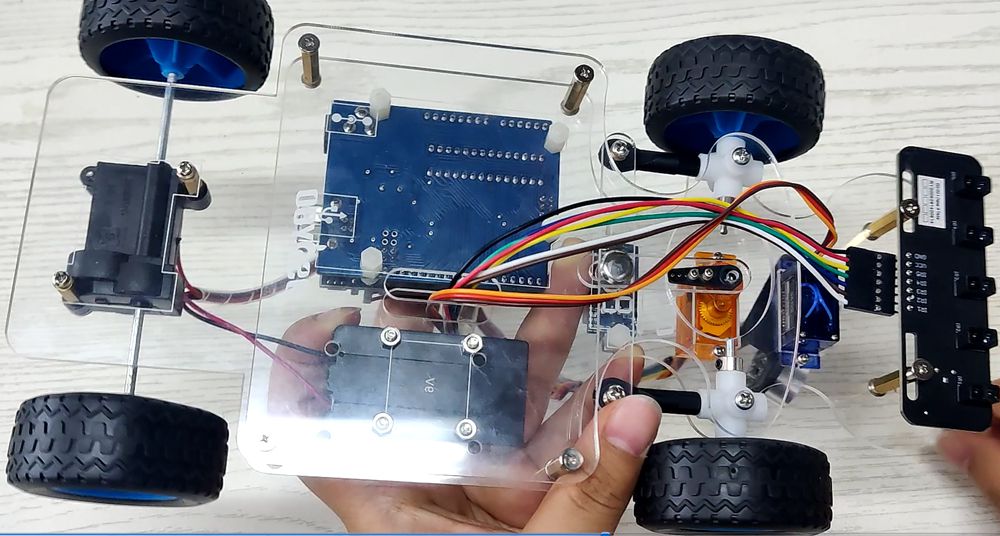
23. Fix upper car chassis and lower car chassis with 4pcs M3*10 screws as follows
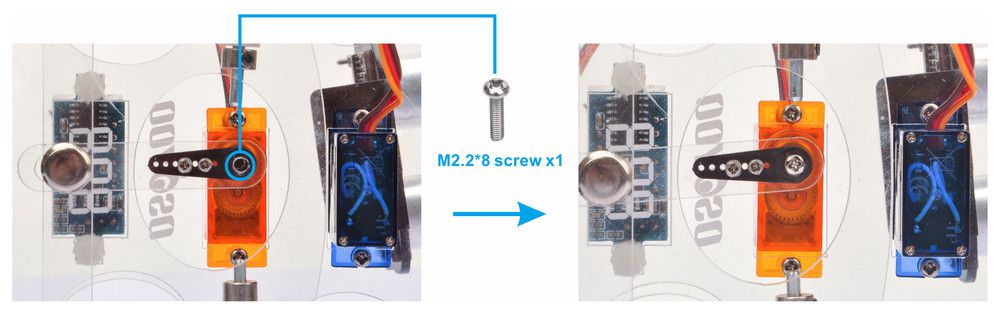
24. Fix MG90S servo motor (orange) on black servo horn with 1pc M2.2*8 Self Tapping Screws as follows
Install latest Arduino IDE (If you have Arduino IDE version after 1.1.16, please skip this step). Download Arduino IDE from https://www.arduino.cc/en/software, then install the software.
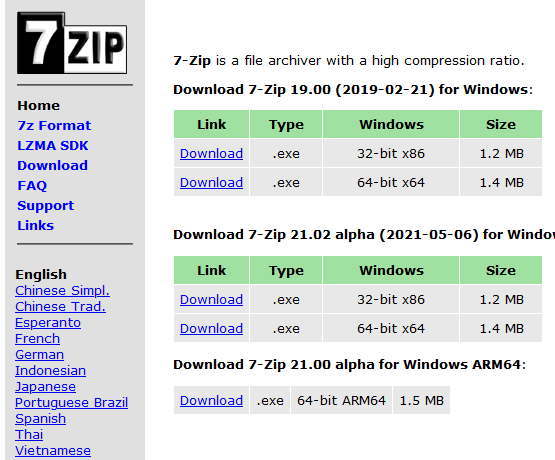
2. Install a zip utility to unzip the code file, such as 7 zip
Steering Servo Alignment
Before you run the sample sketch code, please test the steering servo direction firstly.
Now you can download and install the lesson 1 servo test sketch file (steering.ino)
Step 2. Unzip this file, you will see a folder named servo, enter this folder, you will find a steering.ino file.
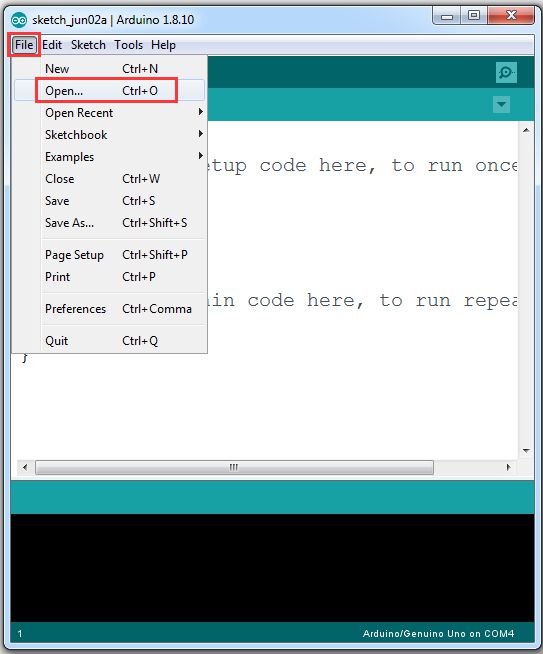
Step 3. Connect UNO R3 board to PC with USB cable, Open Arduino IDE → click file → click Open → choose code “steering.ino” in steering folder, load the code into OSOYOO Basic Board for Arduino
Notice: Shut off your battery or unplug your power adapter when upload sketch code to OSOYOO Basic Board for Arduino.
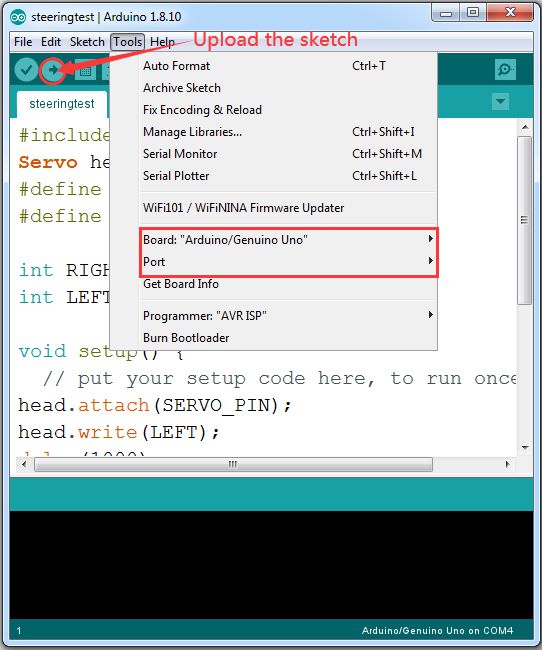
Step 4. Choose the corresponding board/port for your project, upload the sketch to the board.
Step 5. If your steering servo does not face to centre front direction, then you have two options: Option 1) Use a screwdriver to release the steer arm from servo, re-align the wheel direction manually, and then fasten the arm onto servo again.
Option 2) You can change the default value of line 4
#define FRONT 90
if your steering wheels tend to left, increase the value from 90 to 95,100,105 …
If your steering wheels tend to right, decrease the value from 90 to 85,80,75 …
Run the sketch again until your steering wheels finally faces to the front.
Then write down the FRONT value, we will use this value to change the lesson2,3,4,5,6 sketch code and make steering servo always facing front at default FRONT value.
Je suis bloqué sur la leçon 2. La leçon 1 fonctionne très bien. Le programme est bien téléchargé de la leçon 2 mais la voiture sur le sol n’avance pas alors que lorsque je la tiens dans la main, les roues tournent normalement et rapidement.
J’ai l’impression que le moteur manque de puissance. Pourriez-vous m’aider ?
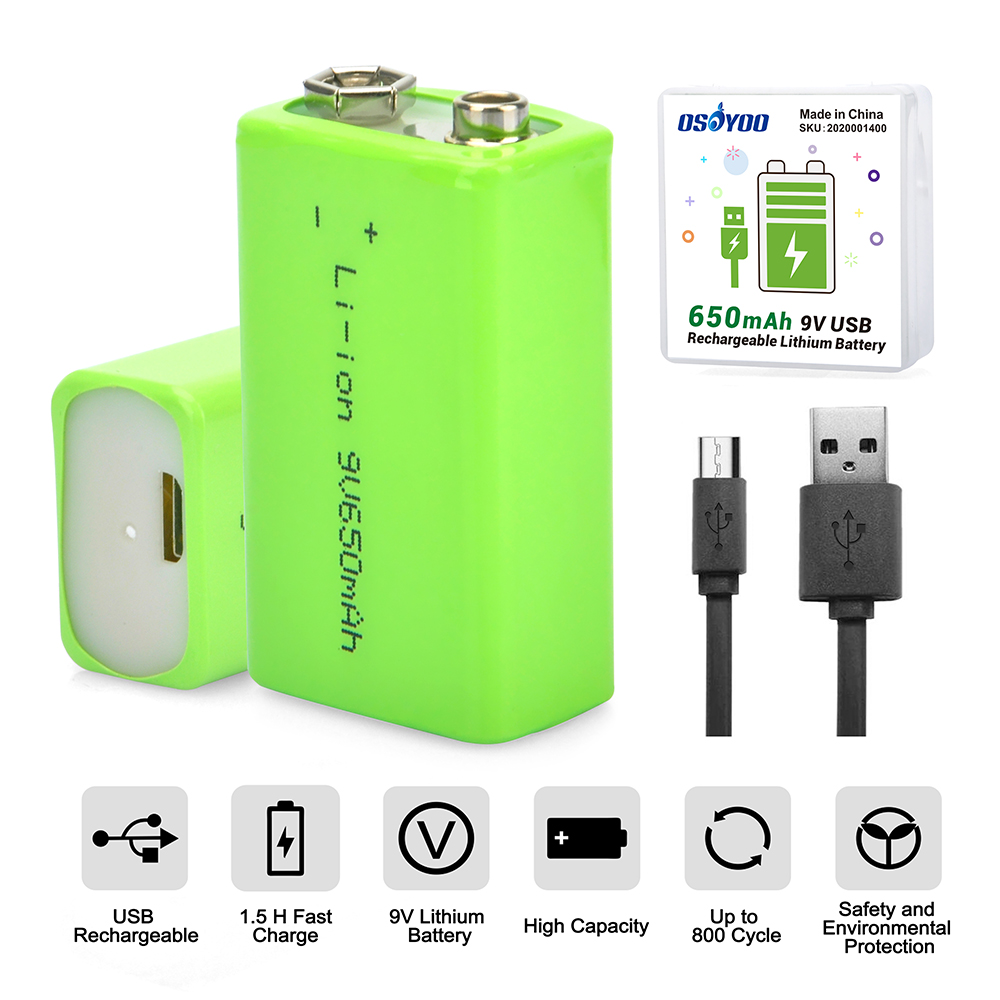
1)please double check if the battery is enough. If battery lower than 8V, please recharge the battery or buy a new 9V battery
2)please make sure very parts is not suck, especially in front steering structure.


Bonjour,
Je suis bloqué sur la leçon 2. La leçon 1 fonctionne très bien. Le programme est bien téléchargé de la leçon 2 mais la voiture sur le sol n’avance pas alors que lorsque je la tiens dans la main, les roues tournent normalement et rapidement.
J’ai l’impression que le moteur manque de puissance. Pourriez-vous m’aider ?
Cordialement,
Noah
1)please double check if the battery is enough. If battery lower than 8V, please recharge the battery or buy a new 9V battery
2)please make sure very parts is not suck, especially in front steering structure.