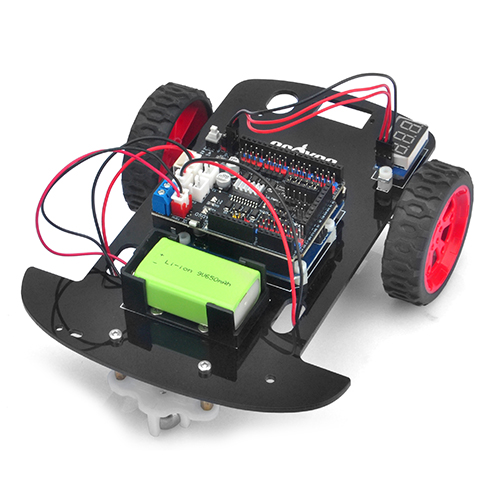
Willkommen zur ersten Lektion des Osoyoo Model-3 Roboter Lernkits!
In dieser “Hallo Welt” Version Lektion werden wir das wichtigste Framework des Roboterautos installieren und das Auto programmieren, um einige einfache Bewegungen auszuführen. Wenn Sie die Testbewegungen dieser Lektion bestanden haben, bedeutet dies, dass Hauptplatine, Motorsteuerungsmodul, Motoren, Batterien, Chassis und Drahtverbindungen zwischen diesen Teilen alle gut funktionieren.
Da Ihre Experimente in zukünftigen Lektionen alle auf dem Framework von Lektion 1 basieren, ist es sehr wichtig, die Installation und Beispielcode in dieser Lektion ordnungsgemäß zu testen.
Hardware Installation
1. Entfernen Sie die Schutzfolie vom Chassis:
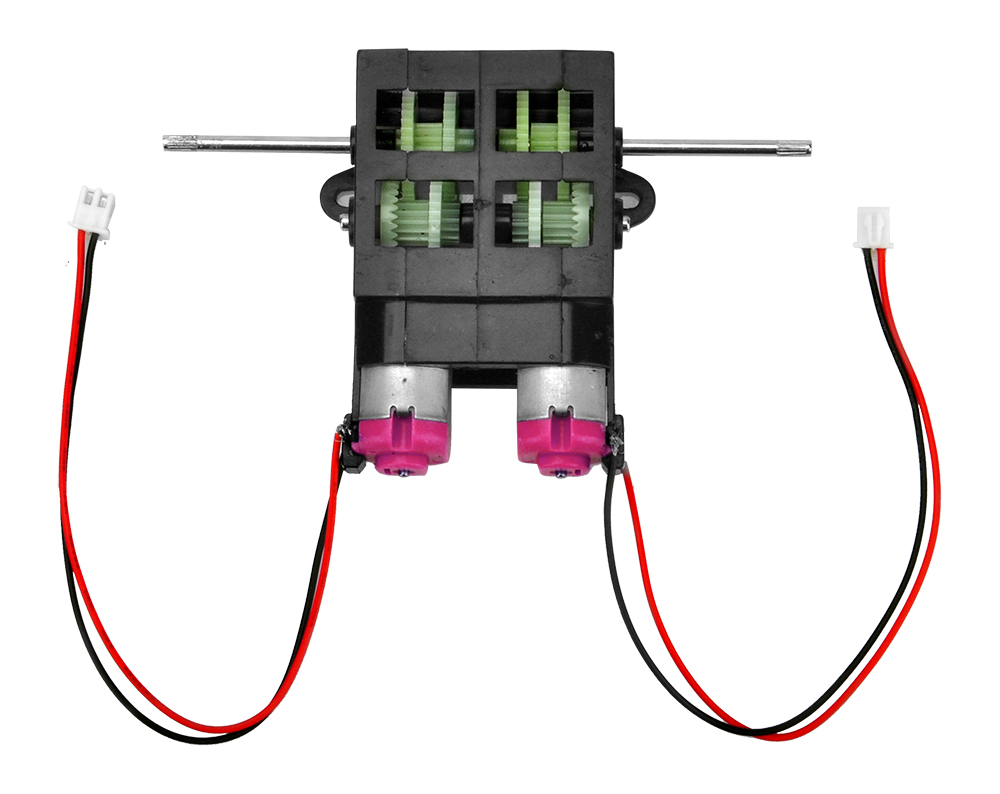
2. Installieren Sie den Motor unter dem Chassis mit M3 Hex-Schrauben und Muttern wie folgt:
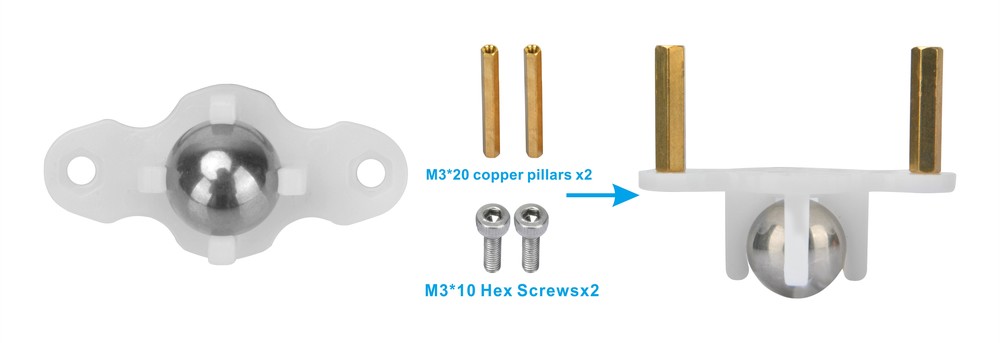
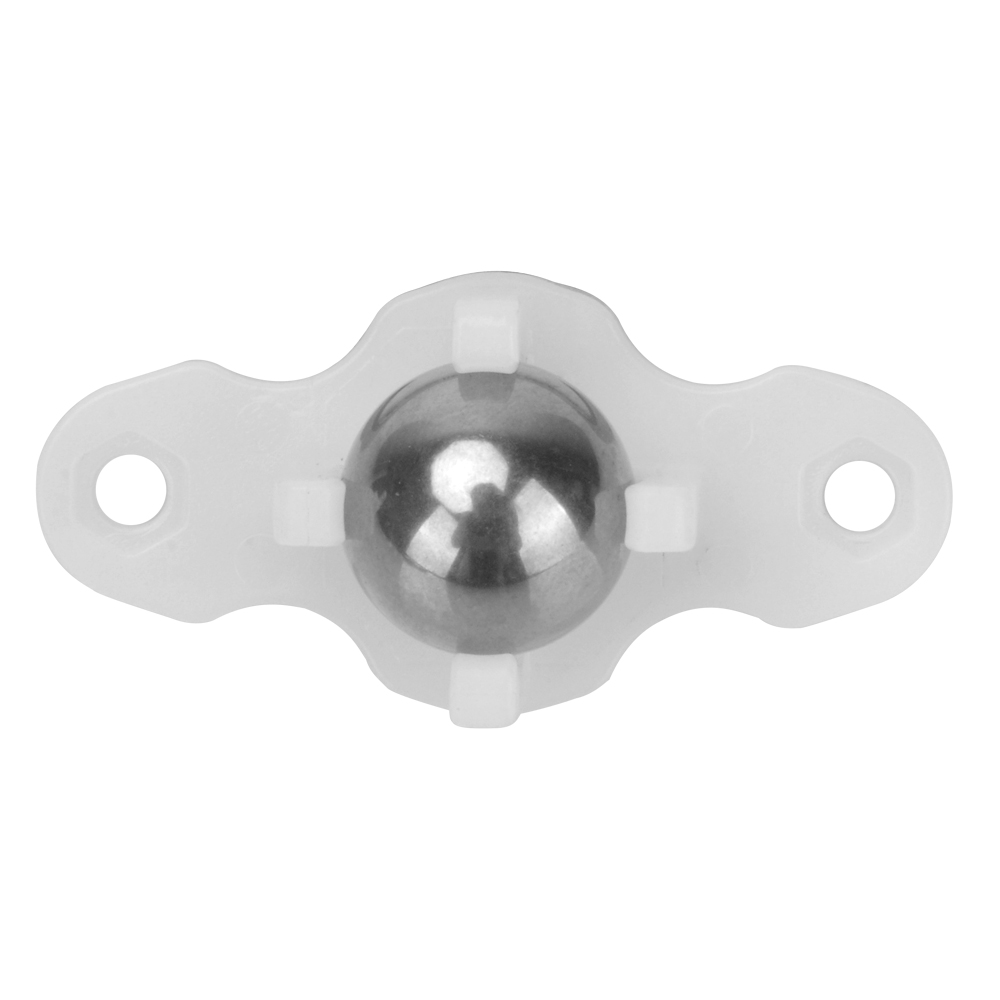
3. Installieren Sie das Universalrad mit den M3 Hex-Schrauben und Kupfersäulen:
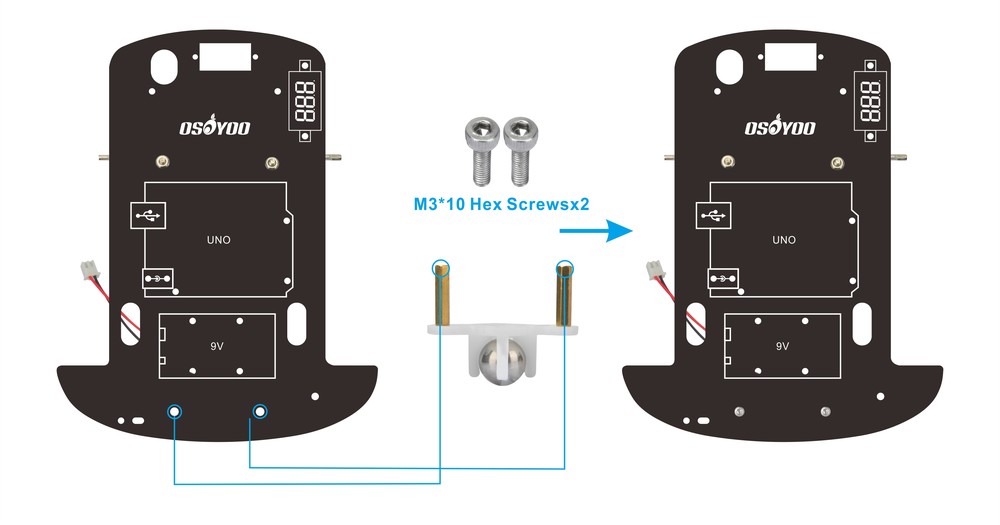
4. Installieren Sie das Universalrad unter dem Chassis mit den M3 Hex-Schrauben:
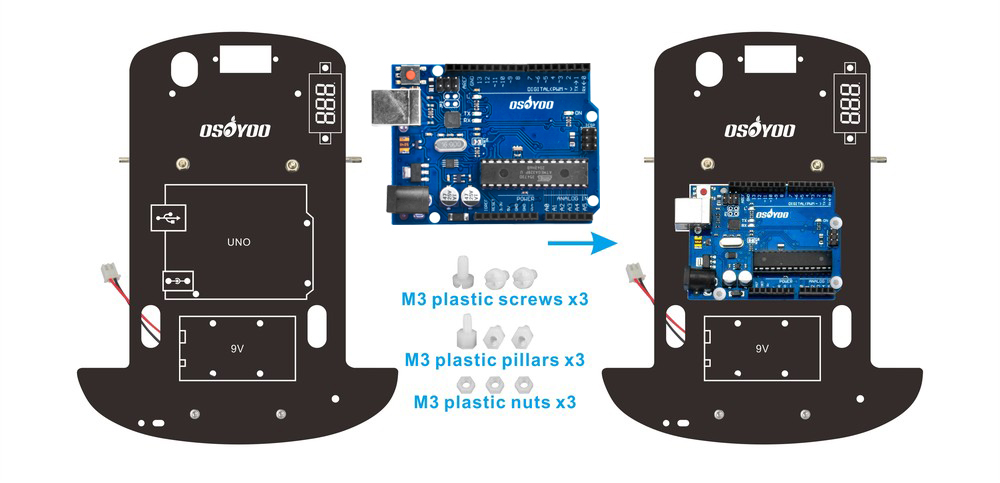
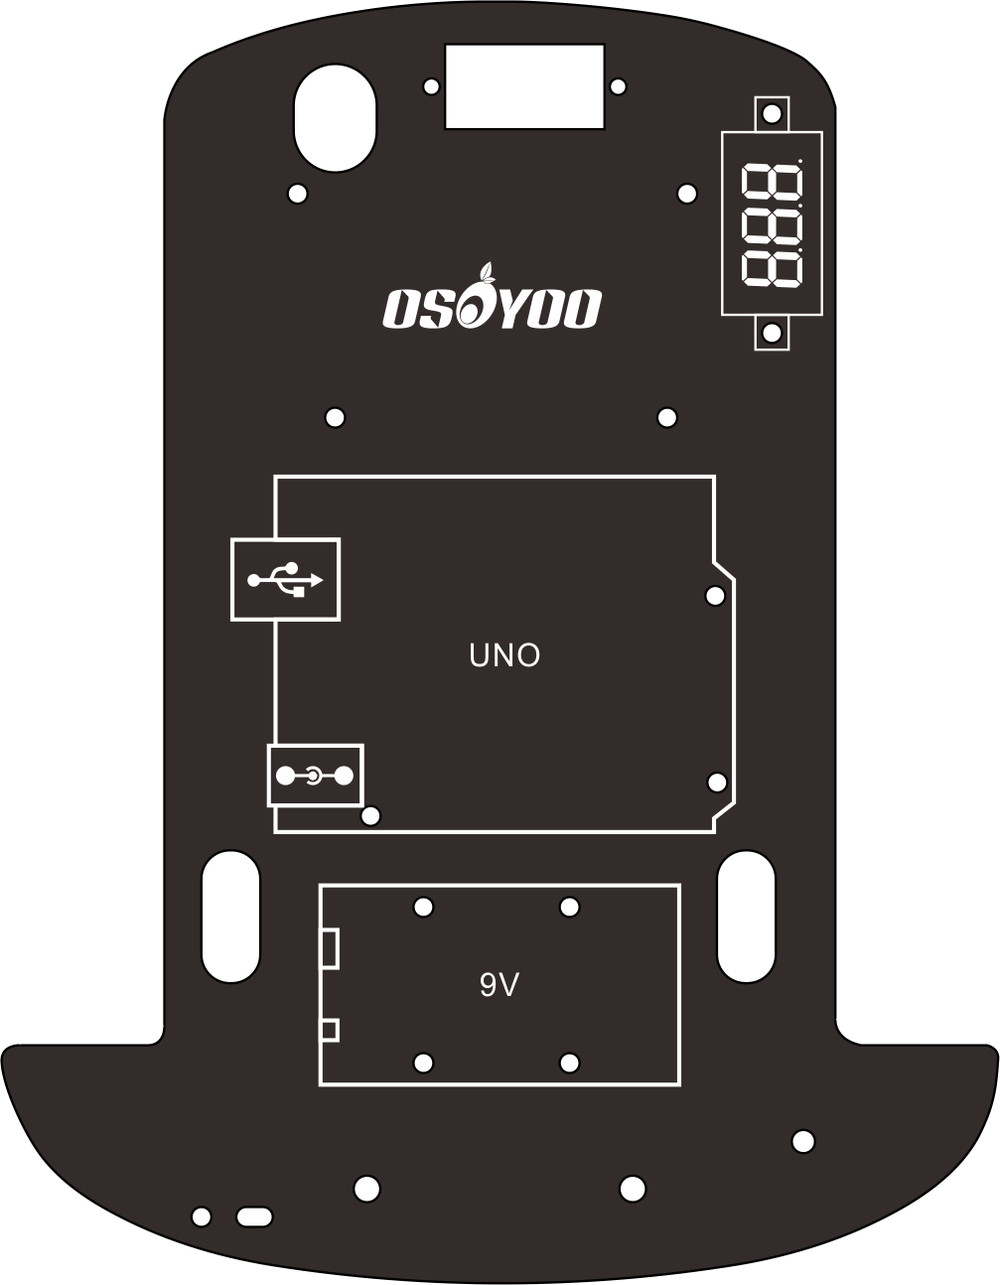
5. Installieren Sie das OSOYOO UNO Board auf dem Chassis mit M3 Kunststoffschrauben, Säulen und Muttern:
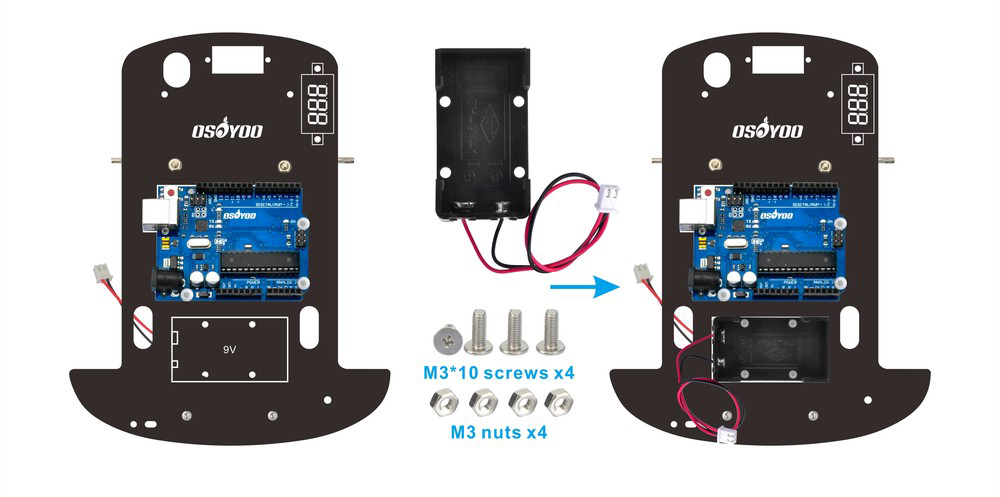
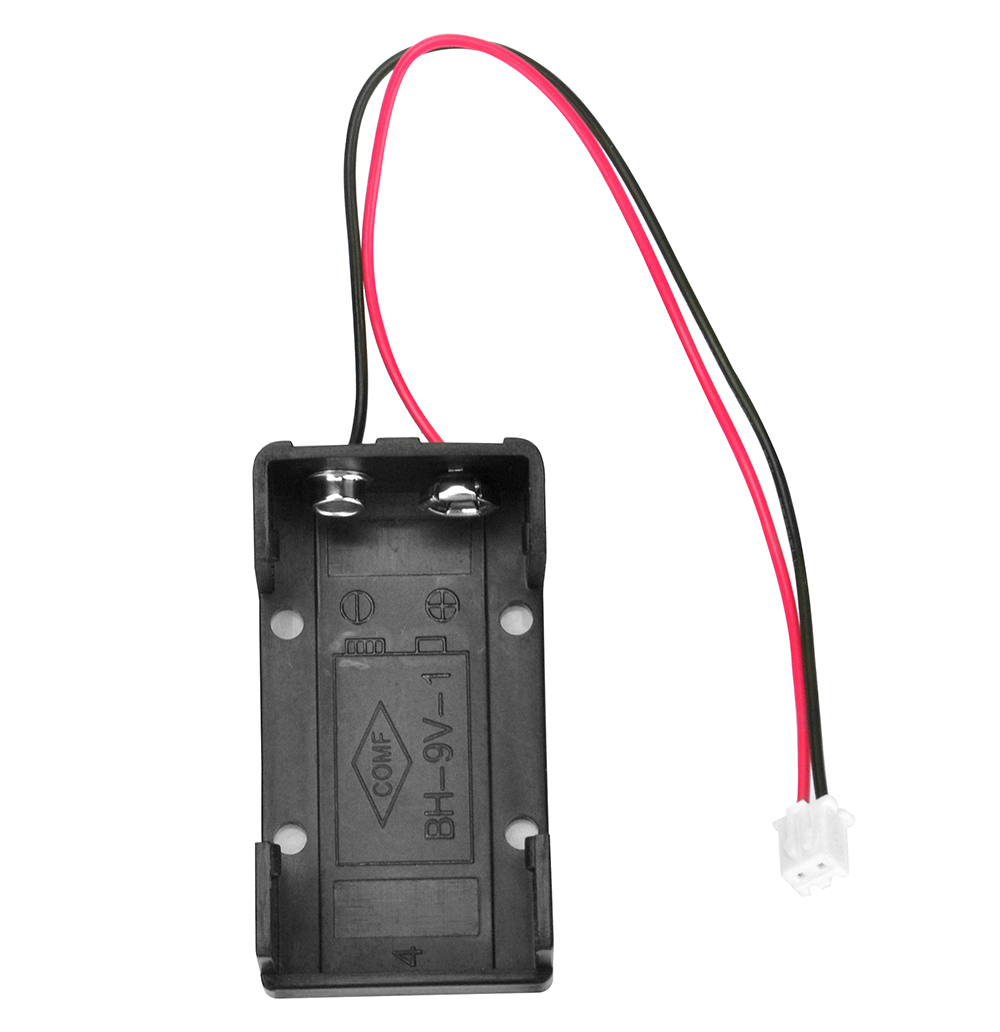
6. Installieren Sie die Batteriebox auf dem Chassis mit M3 Phillips-Schrauben und Muttern:
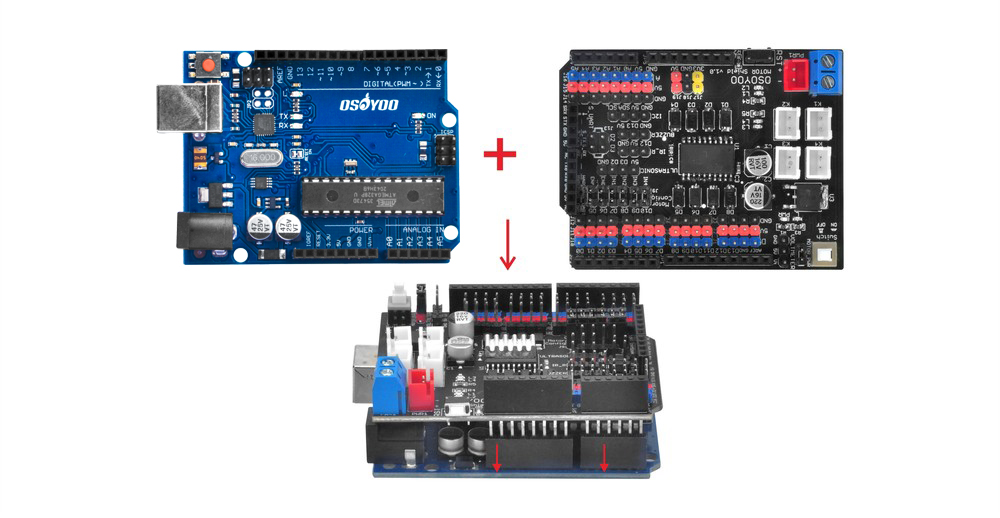
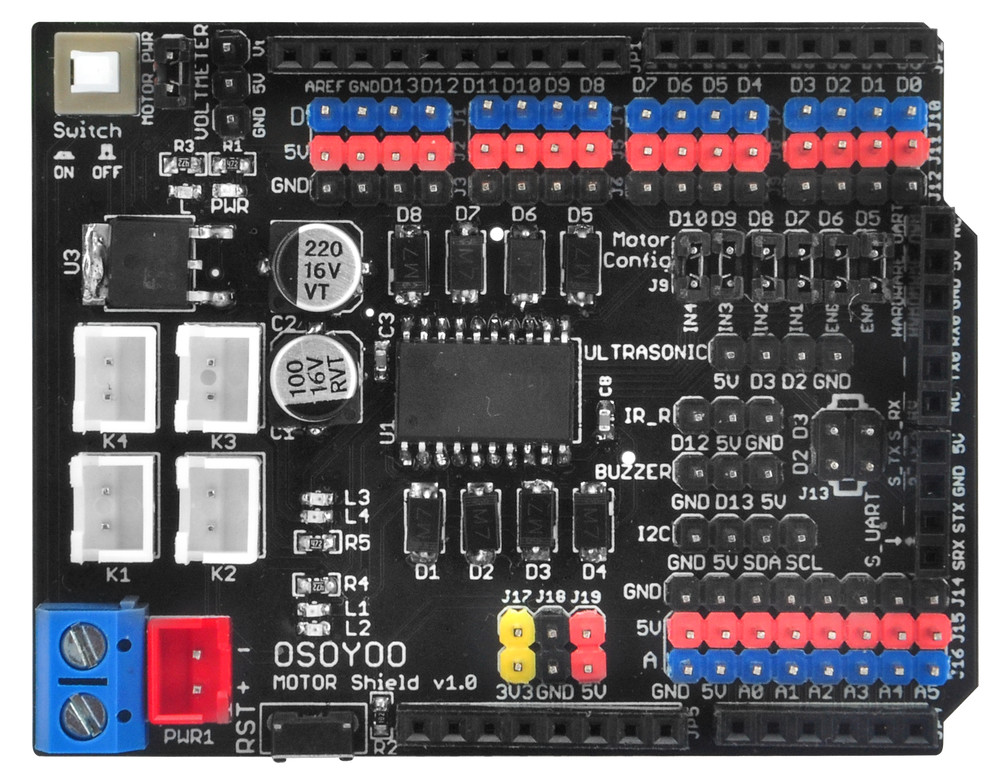
7. Stecken Sie das OSOYOO Motor Shield Board in das OSOYOO UNO Board:
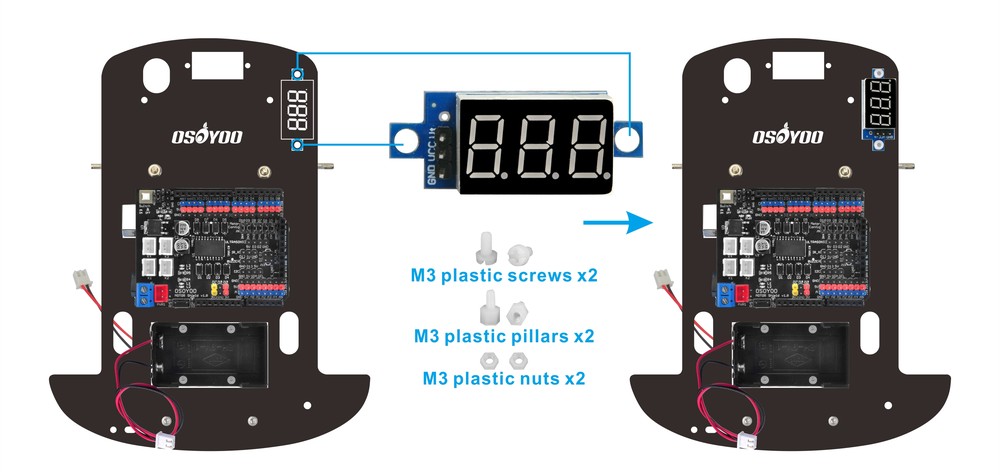
8. Installieren Sie den Spannungsmesser auf dem Chassis mit M3 Kunststoffschrauben, Säulen und Muttern:
Verbindung
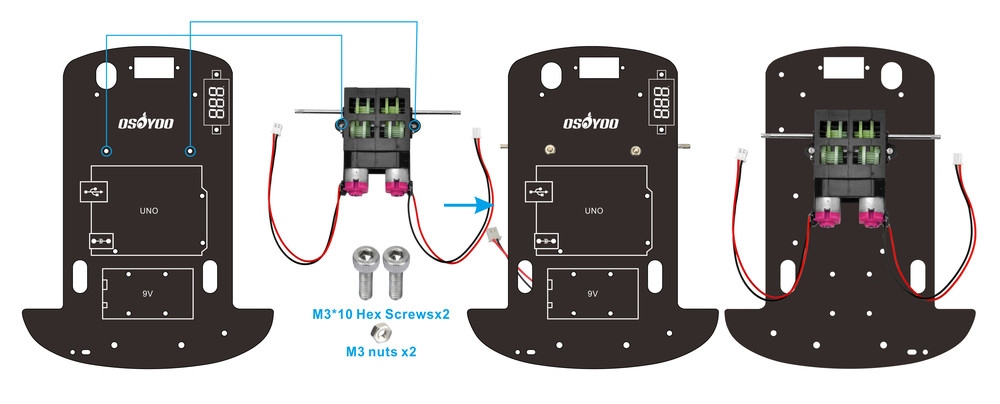
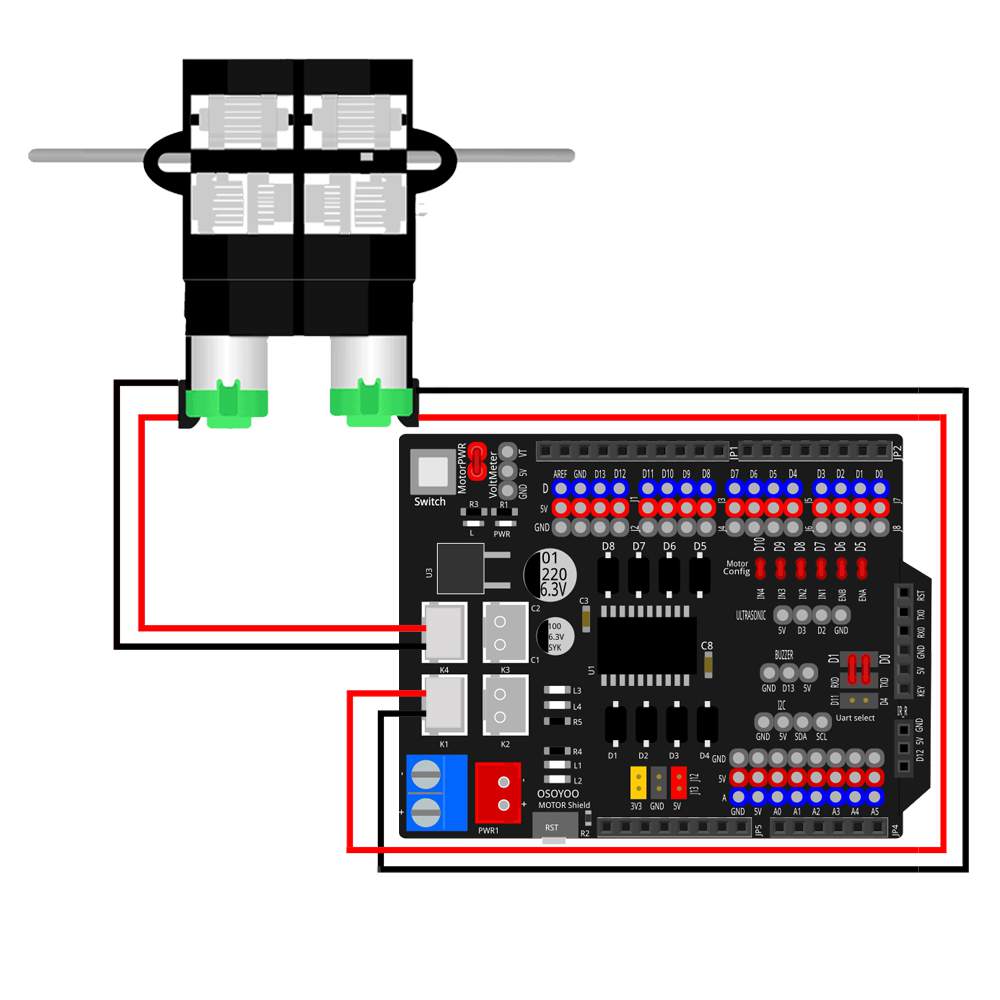
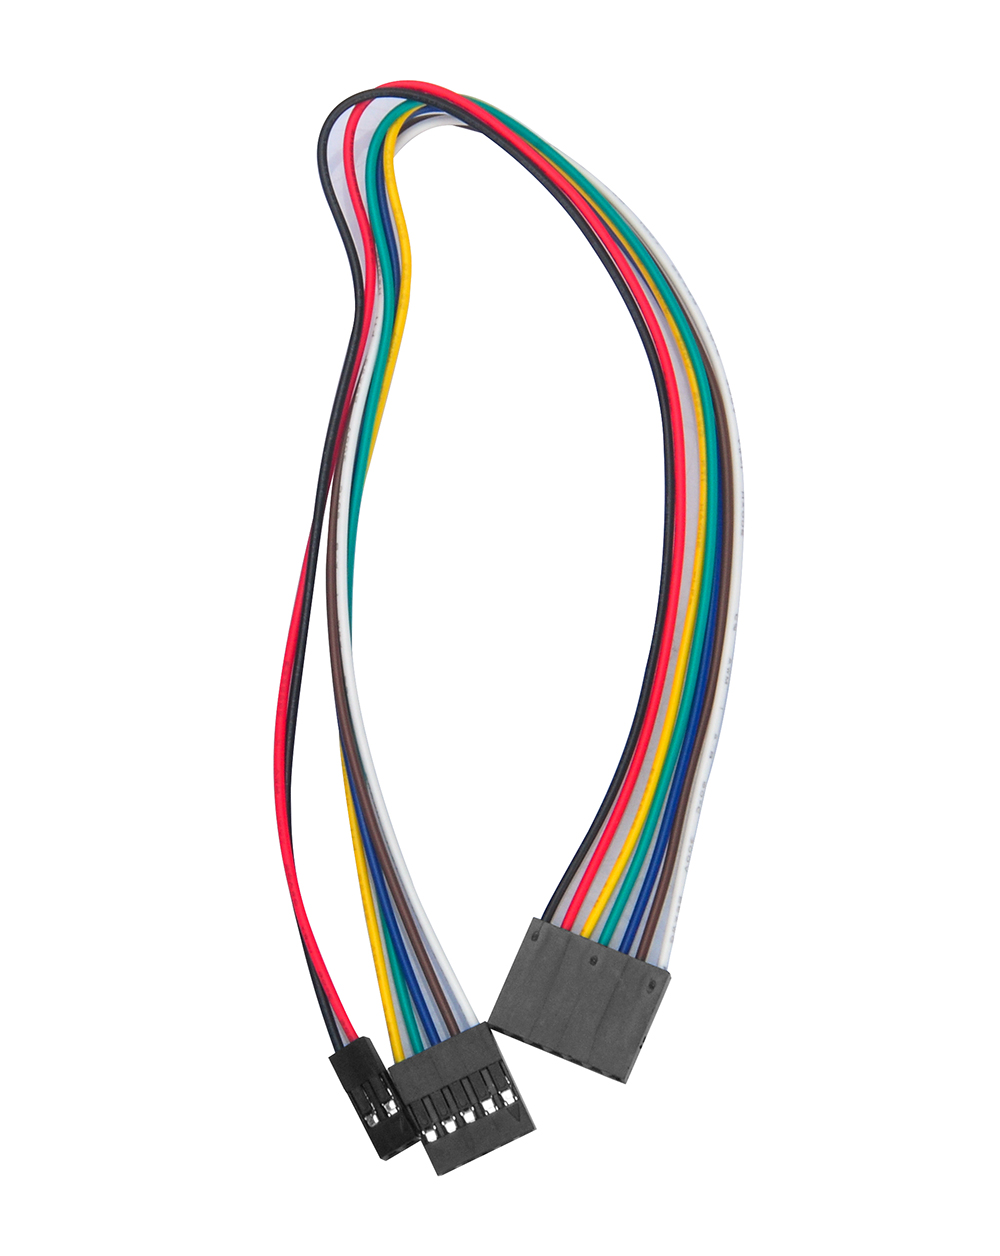
1)Verbinden Sie das OSOYOO Motor Shield mit dem Motor:
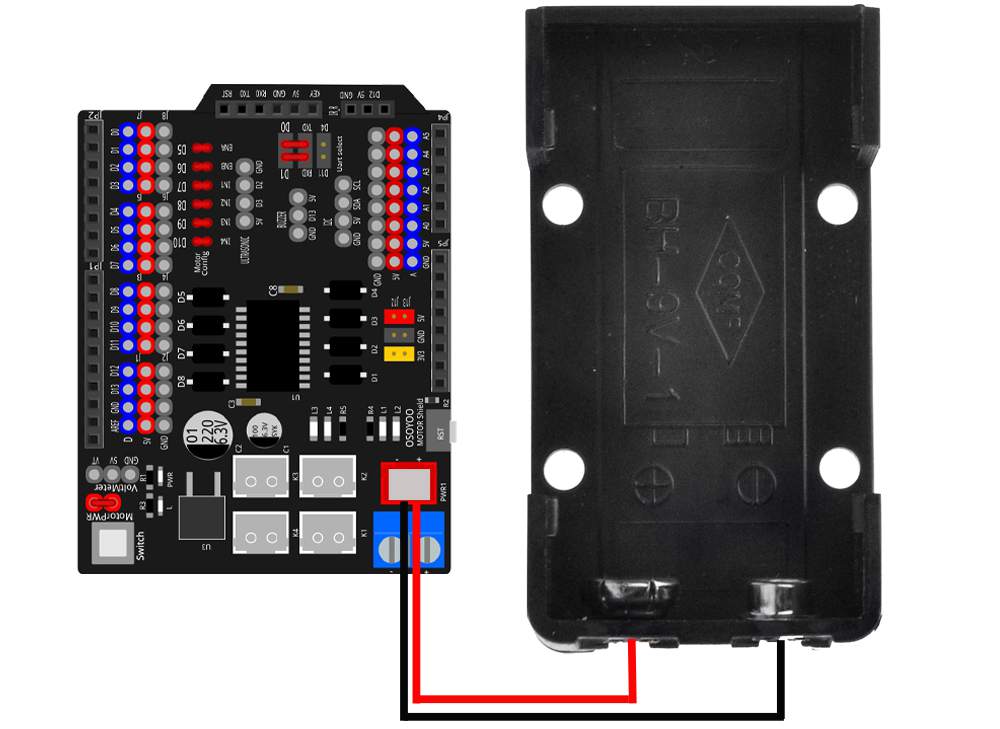
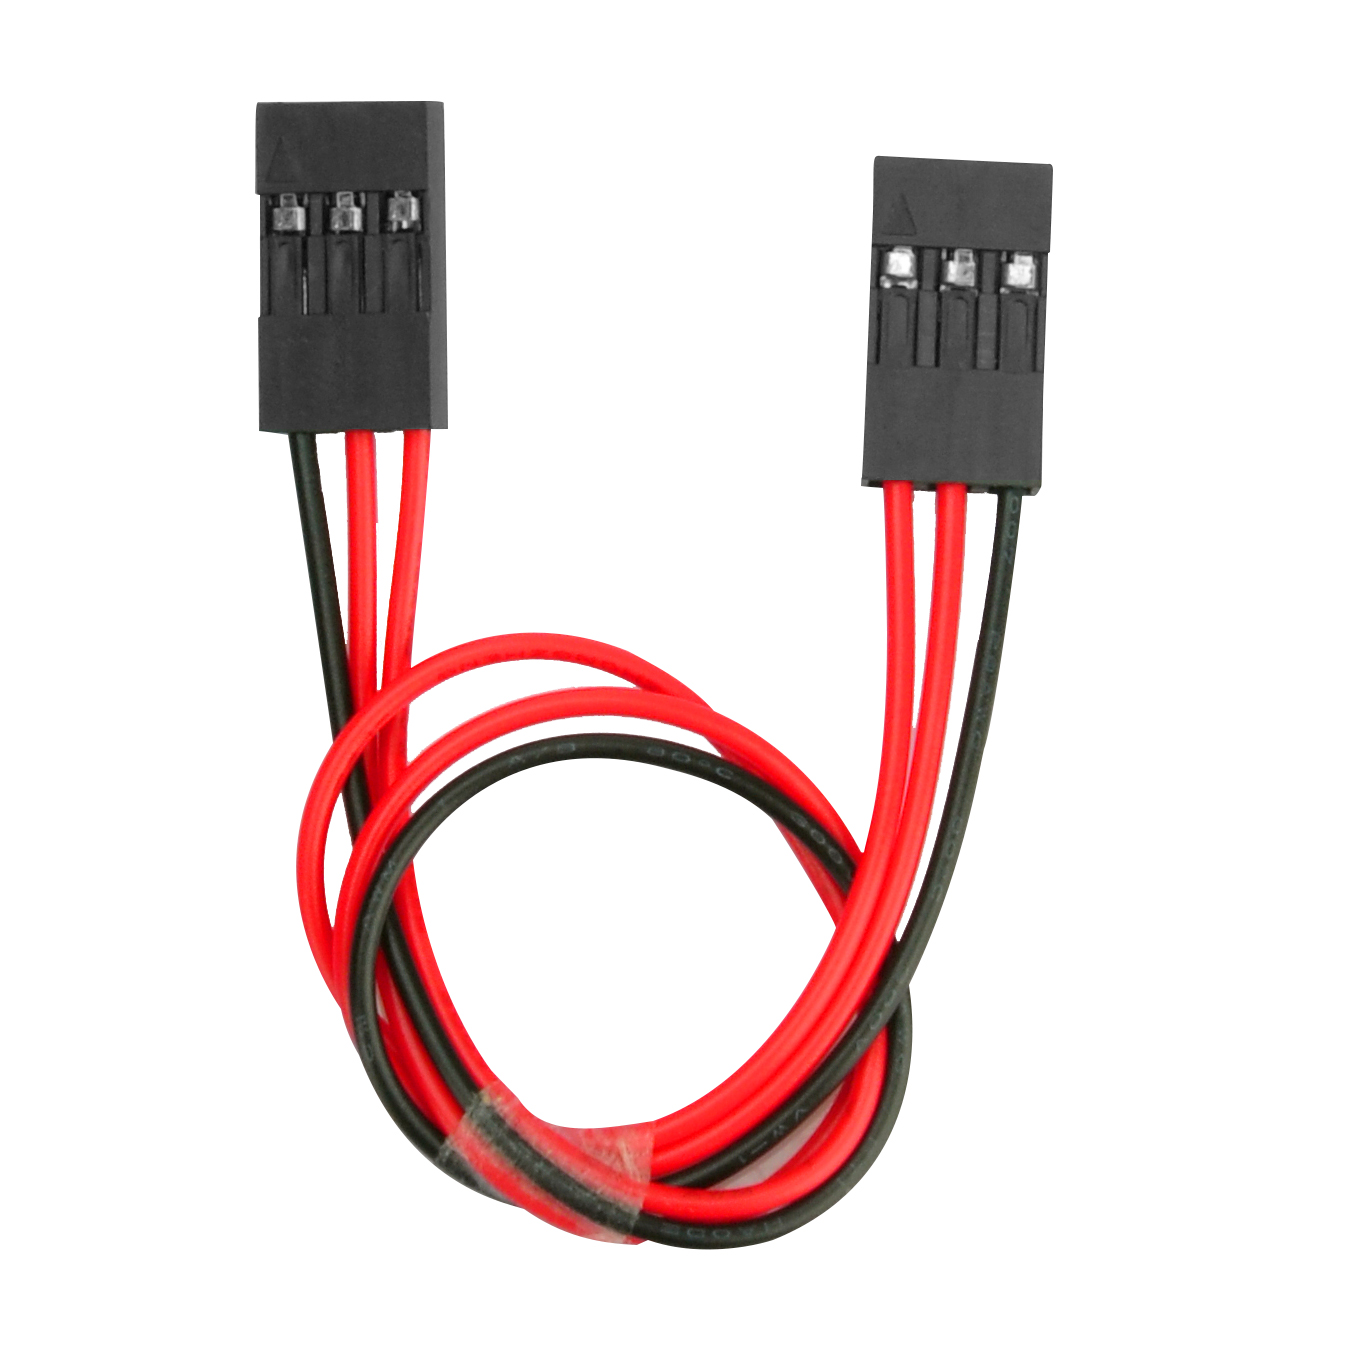
2) Verbinden Sie das OSOYOO Motor Shield mit der Batteriebox:
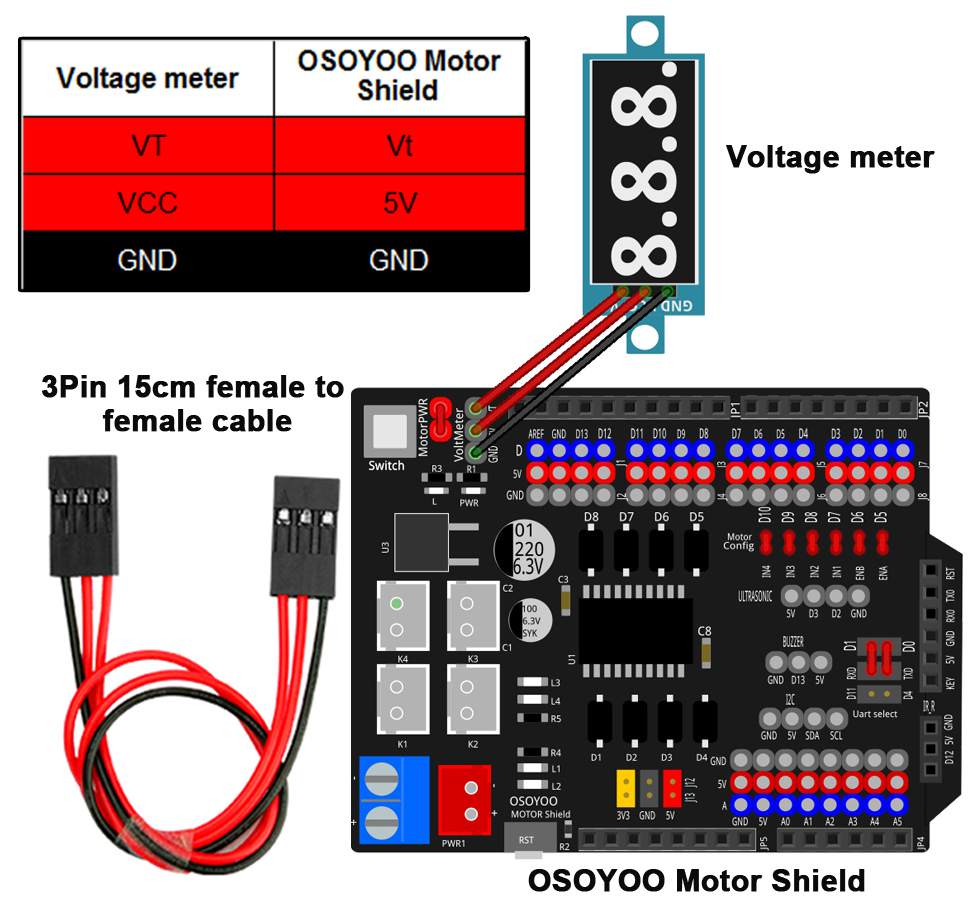
3) Verbinden Sie das OSOYOO Motor Shield mit dem Spannungsmesser:
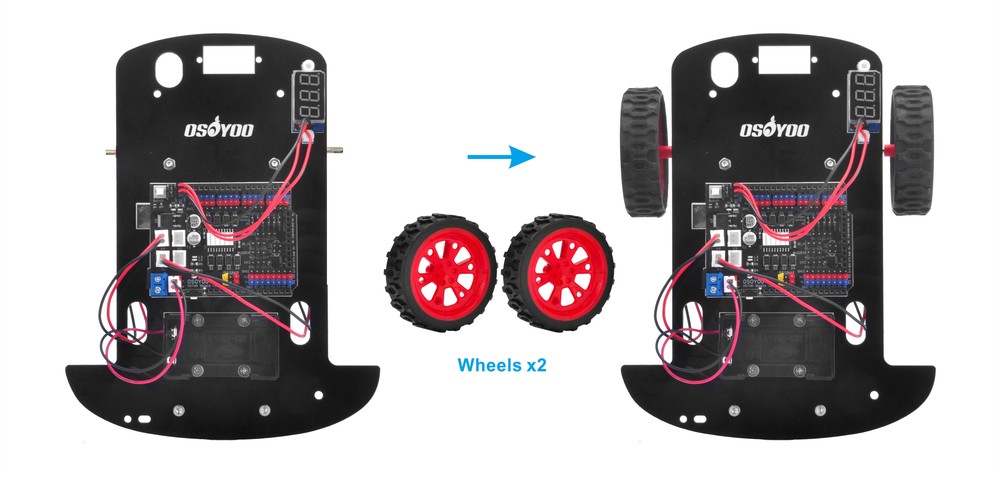
4) Installieren Sie die Räder:
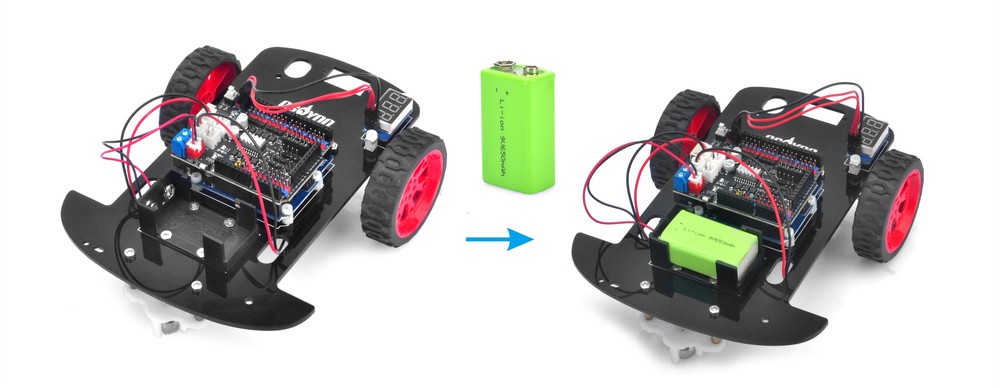
Jetzt ist die Hardwareinstallation fast abgeschlossen. Bevor wir die Batterie in die Box einlegen, müssen wir zuerst den Beispielcode in das OSOYOO Basic Board for Arduino hochladen.
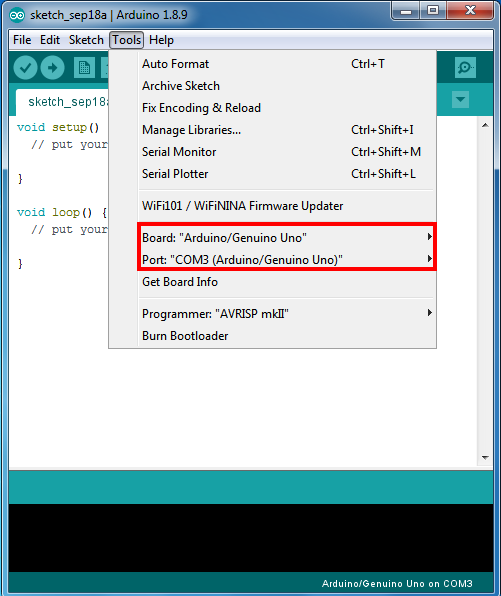
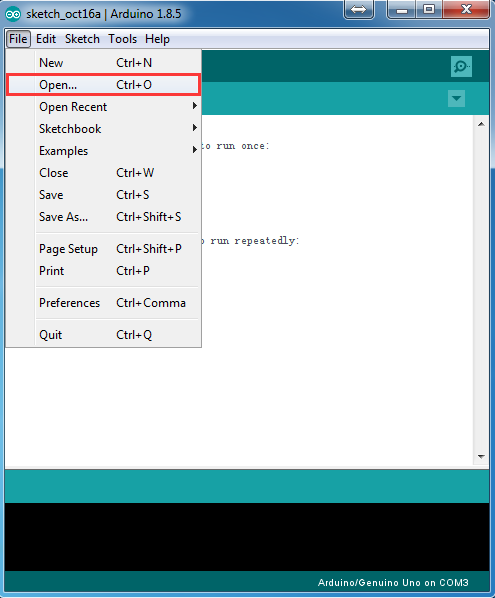
Verbinden Sie das UNO R3-Board über das USB-Kabel mit dem PC, öffnen Sie die IDE und wählen Sie das entsprechende Board/Port für Ihr Projekt.
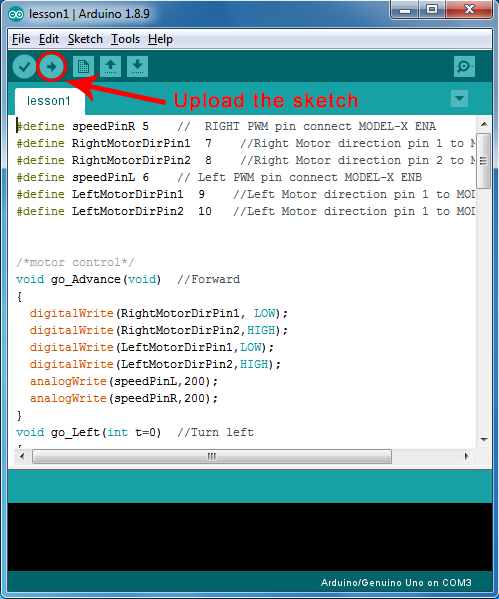
Hinweis: Schalten Sie Ihre Batterie aus oder ziehen Sie Ihren Netzadapter aus, wenn Sie den Sketch-Code auf das OSOYOO Basic Board für Arduino hochladen.
Schritt 4:
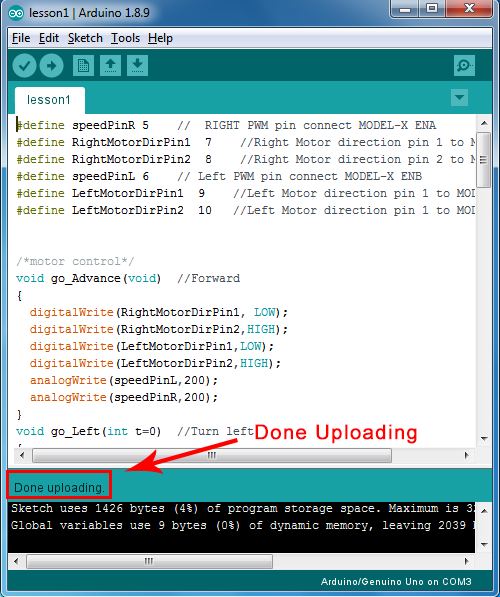
Klicken Sie auf Datei -> Öffnen -> wählen Sie den Code “lesson-1.ino”, laden Sie den Code in das OSOYOO Basic Board für Arduino und laden Sie dann den Sketch auf das Board hoch.
Testing
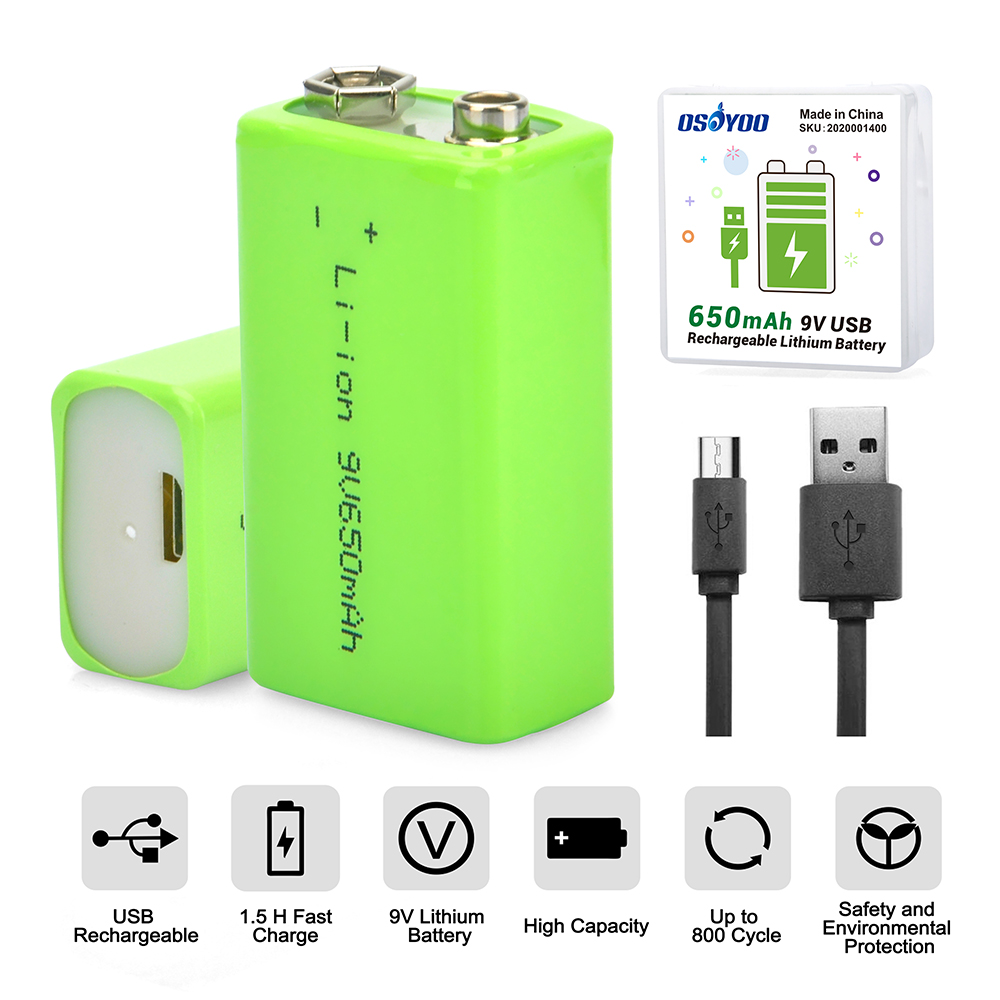
Trennen Sie das OSOYOO Basic Board für Arduino vom PC. Stellen Sie sicher, dass der Netzschalter des OSOYOO Motor Shield ausgeschaltet ist. Legen Sie eine 9V-Batterie in das Batteriefach ein.
(Stellen Sie sicher, dass die Polrichtung korrekt ist, da sonst Ihr Gerät zerstört werden und ein Brandrisiko entstehen kann).
Stellen Sie das Auto auf den Boden, schalten Sie den Schalter des OSOYOO Motor Shield ein. Das Auto sollte vorwärts fahren, dann rückwärts fahren, dann links abbiegen, dann rechts abbiegen und dann anhalten.
Wenn das Auto nicht wie oben beschrieben fährt, sollten Sie Ihre Kabelverbindung, die 7 Jumper-Kappen auf dem OSOYOO Motor Shield und die Batteriespannung (muss über 7,2 V liegen) überprüfen.
Just completed a Model-3 Robot Learning Kit. All good apart from two issues :
1 One of the wheel motors never starts unless it’s manually turned. Once it’s running it’s OK .. until the next time. Then it needs to be given a push again.
2 Lesson 6, driving with the Android bluetooth remote control, it starts OK but as soon as the wheels are turning it produces “Error 516 – broken pipe”, and control is lost. I’ve discovered that with the motors unplugged you don’t get this error.
Hi, I’m just doing lesson 1, and am trying to Connect the UNO R3 board to my PC. The instructions say that I should select Board ‘Arduino/ Genuino Uno’ and Port Com3 (Arduino/ Genuino Uno) on the IDE app. However, these aren’t coming up as options. Can I select a different option?
In Windows OS computer, please right-click on “computer” icon, then select “manage”, click “device manager” below “system tools”, when you connect the board with your computer, you can find the “ComX” under “Ports(COM & LPT).
Hi, I want to try and program this robot on another high-level IDE so I have more control over it’s features, however it requires me to define the motors with
their PWM pins and direction pins (pin 1 and 2). So can you please tell me which pins these are?
I’m sorry to respond you later.
There are one wheels for replacement in the package, you can try to replace the broken wheel with this one.
Could you help me to confirm whether the expansion board is defective or not?
If you find this board is defective, please provide your order No. and address, I’ll send the replacement to you ASAP.
I am setting up a new Model-3 robot car kit. I have followed all of the instructions, the only wheel only work when connected to K1 and K2, the wheel connected to ports K3 & K4 do not work. All jumpers are in place. Please advise how to resolve the issue.
Our model is going the wrong way round.
I never realised before but getting to lesson 3, clearly somethign was wrong.. now I went back to lesson 2 and 1, and from start our model goes the wrong direction (forward instead of backward and vice versa).
ANy help please?
Can be only coming from the programm innit?
Thanks
Hello, my Arduino Uno Board is unable to connect to my computer. On the IDE, it says that the board is not connected, and when I connect to the Bluetooth-incoming Port, it doesn’t work either. I have tested this on two computers, both macs. I have also emailed you (from the email [email protected]). Do you have any suggestions?
Hey, so I followed the video and I downloaded the sketch and everything but it won’t turn on even after I click the button, it’s not like it doesn’t move, it doesn’t turn on (the voltage meter doesn’t glow). It did when I had it plugged in to my computer though so I’m not sure about what the issue is. (Yes, the battery’s in and I’ve tried two times)
there is also a switch in the battery holder, please make sure to turn on the switch to the ON position. Once battery is turn on the LED in the wifi shield will have light. If you need any support, please send email to [email protected]
Hi! Got it for my child but got an issue. I upload the different programs and they work fine if connected to the computer with the provided cable. But when disconnected and turned on independently (disconnected from the computer) it does not move. The voltage displayed when disconnected is good at 8 V but nothing else happens. Any input?
It seems that your battery power didn’t go to UNO board. If your USB is connected , the power comes from your PC, if disconnected, then no power to UNO board.
when you turn on battery power, can you see an LED in the UNO board is turned ON (see following picture pink circle)?
If this LED is not ON, then it means you didn’t plug the IO board into UNO board properly. Please remove the I/O board and re-insert into UNO board again. Make sure EVERY pin is inserted properly.
Hi. Here am I again. After everything was working fine and after attempting to load another program (Lesson 4) the car has stopped to work. When pressing the switch to turn it on it just does not light, not even the voltage display. I have tried to press the switch in the motor control board but nothing lights on either. When connecting it to the computer both boards show activity, leds on, emits sounds and all the sensors light up as well. But disconnect it from the computer and try again with the battery and everything goes dead. I have measured the voltage coming out of the battery and it is stable at 7.6 V. I have also reconnected the boards, checked that they are properly switched but nothing. Any clue what may be happening?
7.6V is a little bit low for the small battery, not enough current to provide power. Please recharge the battery and make it to 8.5 to 9V, the higher the better.
Just tested my robot per the instruction and it goes forward to the right about a foot, then backs up, then to the left about 6″, then right about 6″ and stops. But it is not always consistant in that pattern. It is not exactly the same pattern as the video. How can I troubleshhot, or is OK to move on to lesson 2? Voltage is 7.8V so it should not be the battery.
This cart uses a toy motor and battery, so its precision and consistency can’t really compare to industrial-grade motors. As long as your car can move forward, backward, turn left, turn right, and stop, you’re good to go—it means both the software and hardware are working perfectly.


no hacia alante y e hecho todo lo que dice el video
Hello, Do you mean the robot don’t move or other issue?
Please take a video or some photos and send to my email address:[email protected]?
Thanks.
Just completed a Model-3 Robot Learning Kit. All good apart from two issues :
1 One of the wheel motors never starts unless it’s manually turned. Once it’s running it’s OK .. until the next time. Then it needs to be given a push again.
2 Lesson 6, driving with the Android bluetooth remote control, it starts OK but as soon as the wheels are turning it produces “Error 516 – broken pipe”, and control is lost. I’ve discovered that with the motors unplugged you don’t get this error.
Hello, please give me your order No and address to my email address: [email protected], and I’ll send a motor to you.
please tell me how many mAh the battery you use.
I check the official forum about Error 516 – broken pipe”. it may be due to the innsuficent power coming from the power source.
If you have another power battery, please try it again.
Will do both, thanks. HB
Hello,
My names is Donato, I buyded the model 3 robot.
I HAVE A PROBLEM WHIT THE 1 LESSON:MOVE JUST ONE wheel.
I am having the same problem. Did you fix it?
Please change the motor port to another motor port, so to confirm whether the motor is defective or not.
The 2 motors are working
I’m having the same issues.
Hi, I’m just doing lesson 1, and am trying to Connect the UNO R3 board to my PC. The instructions say that I should select Board ‘Arduino/ Genuino Uno’ and Port Com3 (Arduino/ Genuino Uno) on the IDE app. However, these aren’t coming up as options. Can I select a different option?
I have checked the new version of IDE, The board you need to select “Arduino UNO”, and select the correct port of your UNO.
how do I know which is the correct port??
I’m sorry to respond you later.
In Windows OS computer, please right-click on “computer” icon, then select “manage”, click “device manager” below “system tools”, when you connect the board with your computer, you can find the “ComX” under “Ports(COM & LPT).
Elaine
Hi, I want to try and program this robot on another high-level IDE so I have more control over it’s features, however it requires me to define the motors with
their PWM pins and direction pins (pin 1 and 2). So can you please tell me which pins these are?
Please visit this link know about Motor shield: https://osoyoo.com/2020/08/06/osoyoo-motor-shield/.
I checked it and both motors perfectly work
I’m sorry to respond you later.
There are one wheels for replacement in the package, you can try to replace the broken wheel with this one.
Could you help me to confirm whether the expansion board is defective or not?
If you find this board is defective, please provide your order No. and address, I’ll send the replacement to you ASAP.
Motors seem to not be working. Need help to resolve.
When the robot is connected to the computer, the motors make a high pitch noise as if they are trying to work but the wheels aren’t turning.
I am setting up a new Model-3 robot car kit. I have followed all of the instructions, the only wheel only work when connected to K1 and K2, the wheel connected to ports K3 & K4 do not work. All jumpers are in place. Please advise how to resolve the issue.
Hi,
Our model is going the wrong way round.
I never realised before but getting to lesson 3, clearly somethign was wrong.. now I went back to lesson 2 and 1, and from start our model goes the wrong direction (forward instead of backward and vice versa).
ANy help please?
Can be only coming from the programm innit?
Thanks
Hello, my Arduino Uno Board is unable to connect to my computer. On the IDE, it says that the board is not connected, and when I connect to the Bluetooth-incoming Port, it doesn’t work either. I have tested this on two computers, both macs. I have also emailed you (from the email [email protected]). Do you have any suggestions?
Hey, so I followed the video and I downloaded the sketch and everything but it won’t turn on even after I click the button, it’s not like it doesn’t move, it doesn’t turn on (the voltage meter doesn’t glow). It did when I had it plugged in to my computer though so I’m not sure about what the issue is. (Yes, the battery’s in and I’ve tried two times)
there is also a switch in the battery holder, please make sure to turn on the switch to the ON position. Once battery is turn on the LED in the wifi shield will have light. If you need any support, please send email to [email protected]
Hi! Got it for my child but got an issue. I upload the different programs and they work fine if connected to the computer with the provided cable. But when disconnected and turned on independently (disconnected from the computer) it does not move. The voltage displayed when disconnected is good at 8 V but nothing else happens. Any input?
It seems that your battery power didn’t go to UNO board. If your USB is connected , the power comes from your PC, if disconnected, then no power to UNO board.
when you turn on battery power, can you see an LED in the UNO board is turned ON (see following picture pink circle)?

If this LED is not ON, then it means you didn’t plug the IO board into UNO board properly. Please remove the I/O board and re-insert into UNO board again. Make sure EVERY pin is inserted properly.
Morning! Yeah. That was the problem. Good catch! it is working perfectly now. Thank you very much for the support.
could you please leave us a nice review in Amazon. thanks a lot!
I will surely do. But the best thing is that I am purchasing more stuff from you guys. Until next issue! 😉
Hi. Here am I again. After everything was working fine and after attempting to load another program (Lesson 4) the car has stopped to work. When pressing the switch to turn it on it just does not light, not even the voltage display. I have tried to press the switch in the motor control board but nothing lights on either. When connecting it to the computer both boards show activity, leds on, emits sounds and all the sensors light up as well. But disconnect it from the computer and try again with the battery and everything goes dead. I have measured the voltage coming out of the battery and it is stable at 7.6 V. I have also reconnected the boards, checked that they are properly switched but nothing. Any clue what may be happening?
Thanks
7.6V is a little bit low for the small battery, not enough current to provide power. Please recharge the battery and make it to 8.5 to 9V, the higher the better.
Ok. Will do this afternoon. Thanks!
Just tested my robot per the instruction and it goes forward to the right about a foot, then backs up, then to the left about 6″, then right about 6″ and stops. But it is not always consistant in that pattern. It is not exactly the same pattern as the video. How can I troubleshhot, or is OK to move on to lesson 2? Voltage is 7.8V so it should not be the battery.
This cart uses a toy motor and battery, so its precision and consistency can’t really compare to industrial-grade motors. As long as your car can move forward, backward, turn left, turn right, and stop, you’re good to go—it means both the software and hardware are working perfectly.