Dans les leçons précédentes, nous avons appris à utiliser Micro Python pour programmer Raspberry Pi Pico. Python est un langage de programmation puissant et convivial pour les débutants. Cependant, si vous avez de l’expérience en programmation Arduino, vous voudrez peut-être utiliser l’IDE Arduino pour programmer Pico.
Heureusement, l’IDE Arduino prend désormais en charge Raspberry Pi Pico. Vous pouvez donc facilement utiliser les bibliothèques Arduino pour programmer la carte Pico et vous faire gagner beaucoup de temps de codage et de recherche.
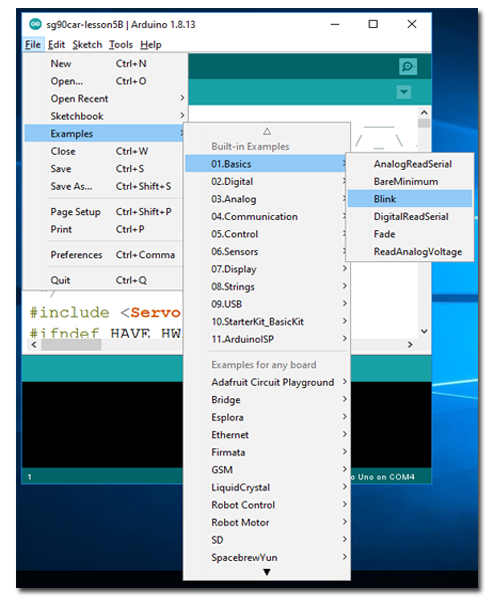
Dans cette leçon, nous vous montrerons comment utiliser l’IDE Arduino pour programmer Pico et exécuter le programme d’exemple Blink Arduino sur Pico en tant que démonstration.
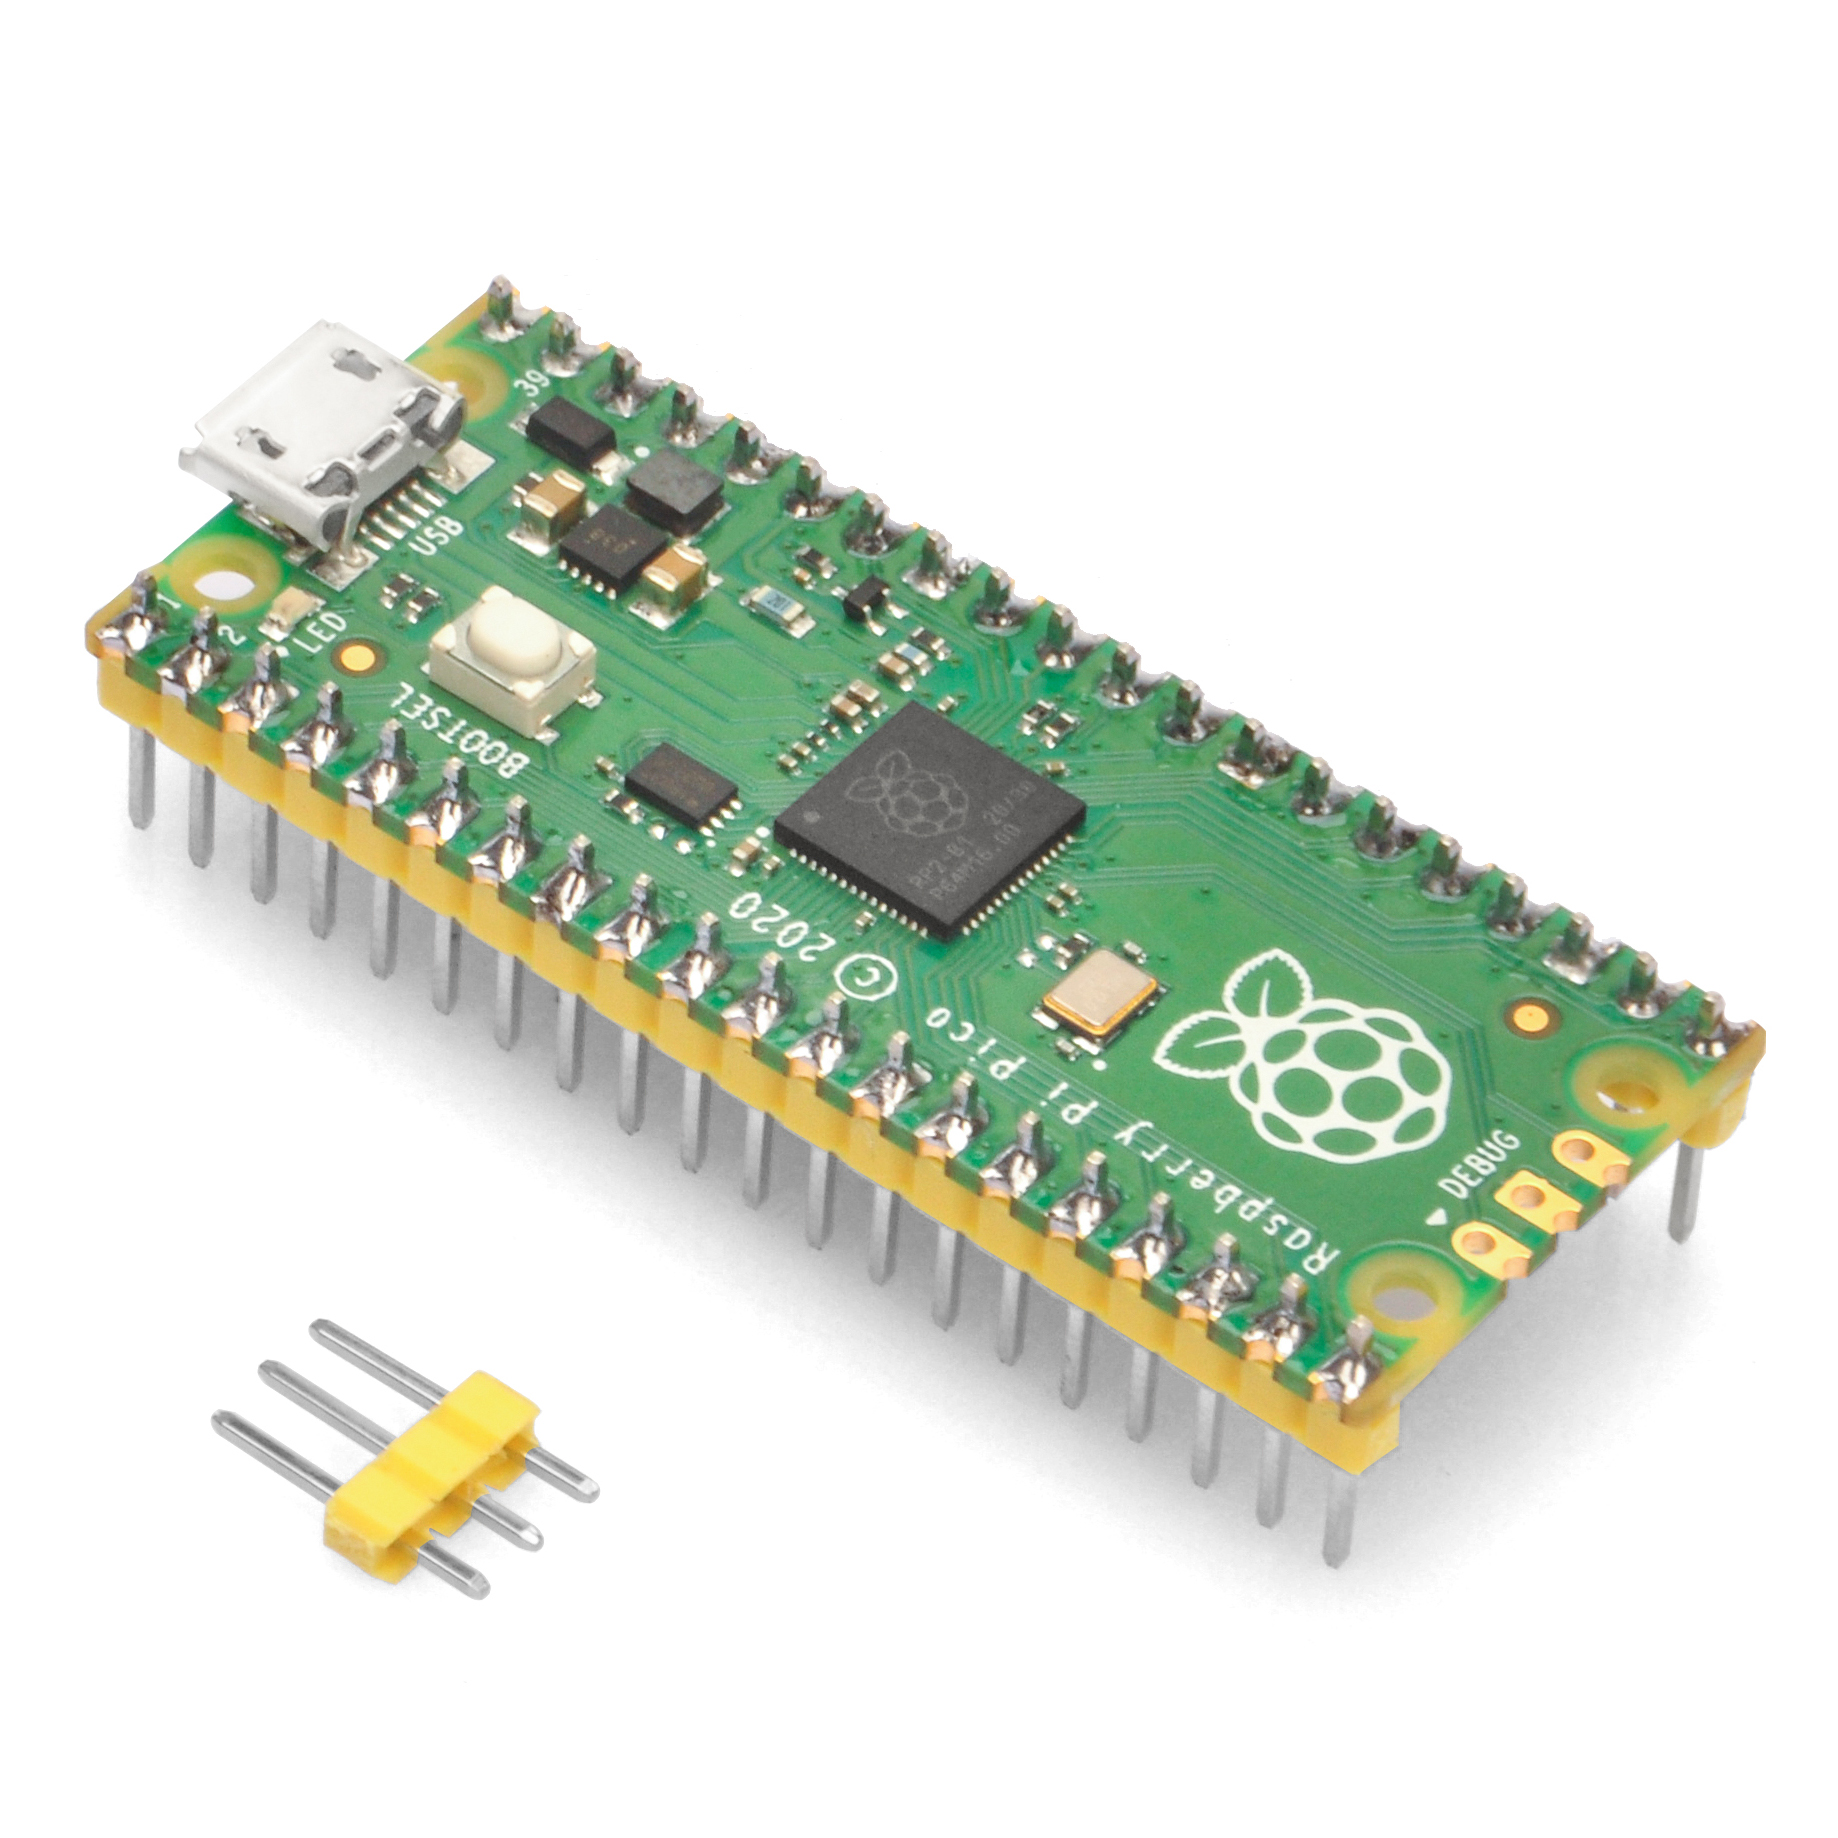
Carte Raspberry Pi Pico et câble microUSB
Un ordinateur pour exécuter l’IDE Arduino
Installer l’IDE Arduino
Si vous n’avez jamais installé l’IDE Arduino, veuillez lire ce tutoriel pour installer l’IDE Arduino sur votre PC.
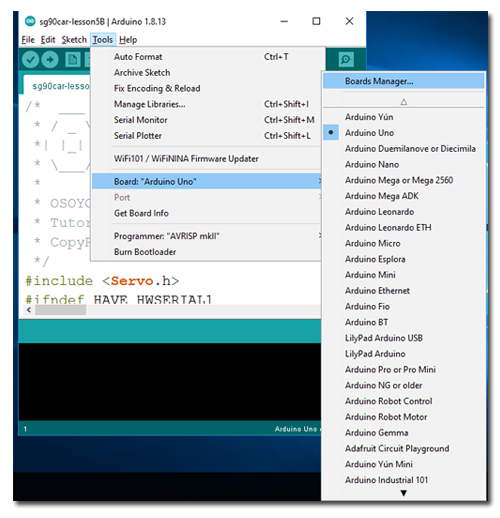
Installer la carte Arduino Mbed OS RP2040 pour prendre en charge Pico :
Ouvrez l'IDE Arduino -> Outils -> Gestionnaire de cartes

Dans la barre de recherche, recherchez "pico", et vous verrez une carte nommée "Arduino Mbed OS RP2040 board".
Cliquez sur le bouton Installer pour installer cette carte dans l'IDE.

Il peut prendre quelques minutes pour installer le logiciel dans l'IDE Arduino.
Connectez la carte Pico à votre PC
Étape 1 : Appuyez sur le bouton BOOTSEL de votre carte Pico et connectez le Pico au port USB de votre PC.
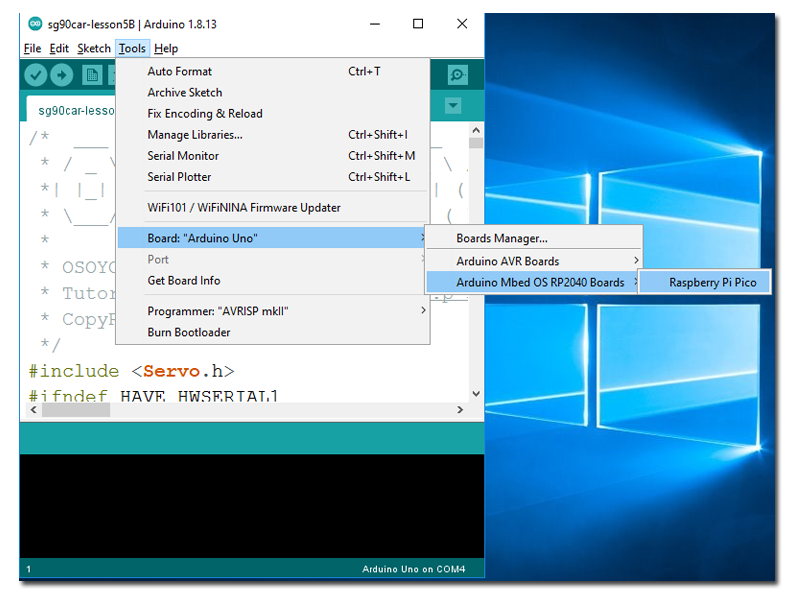
Étape 2 : Dans l’IDE Arduino, sélectionnez : Outils -> Carte -> Arduino Mbed OS RP2040 Boards -> Raspberry Pi Pico.
Contrairement aux véritables cartes Arduino (UNO, Nano, etc.), la carte Pico n’a pas besoin de sélectionner les ports dans l’IDE.
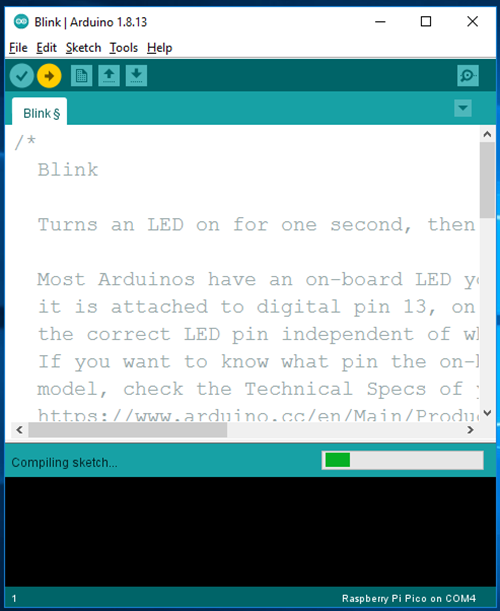
Étape 4 : Appuyez sur le bouton Téléverser. Maintenant, l’IDE Arduino va compiler le code et téléverser le sketch sur la carte Pico.
Si vous rencontrez des erreurs de téléversement, cela signifie que votre Pico n’est pas correctement connecté au PC. Veuillez répéter l’étape 1.
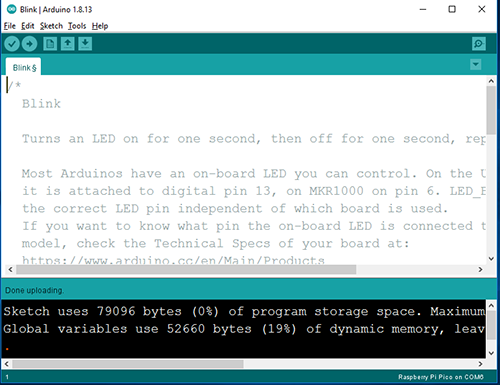
Après que l’IDE affiche “Téléversement terminé”, cela signifie que le programme Blink s’exécute sur la carte Pico. Vous verrez la LED sur la carte Pico clignoter en continu, comme nous l’avons vu dans la leçon 1.


 Installer l’IDE Arduino
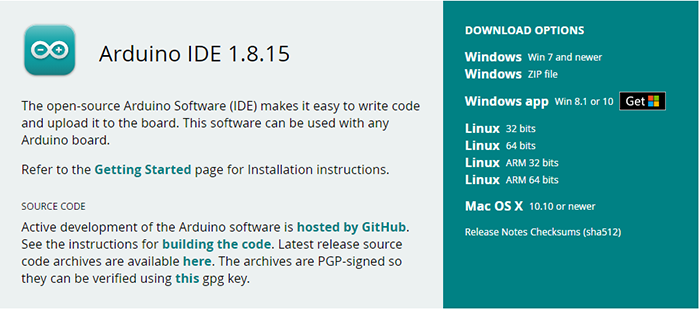
 Dans la barre de recherche, recherchez "pico", et vous verrez une carte nommée "Arduino Mbed OS RP2040 board".
Cliquez sur le bouton Installer pour installer cette carte dans l'IDE.
Dans la barre de recherche, recherchez "pico", et vous verrez une carte nommée "Arduino Mbed OS RP2040 board".
Cliquez sur le bouton Installer pour installer cette carte dans l'IDE.
 Il peut prendre quelques minutes pour installer le logiciel dans l'IDE Arduino.