Dans cette leçon, nous vous guiderons à travers l’installation et la configuration du système d’exploitation Raspberry Pi, ainsi que des logiciels et bibliothèques nécessaires pour contrôler votre Voiture Robot à Roues Mecanum OSOYOO.
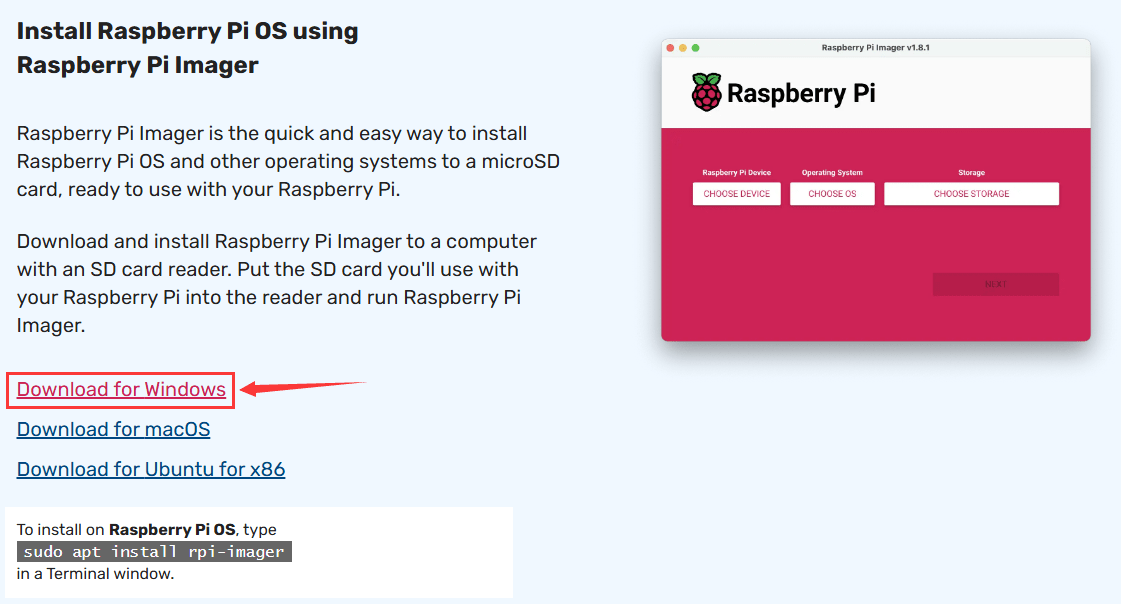
Note : nous prenons ici Raspberry Pi Imager v1.8.5 comme exemple pour installer le système d’exploitation ; d’autres versions peuvent présenter des différences. (Appareil : Raspberry Pi 4B)
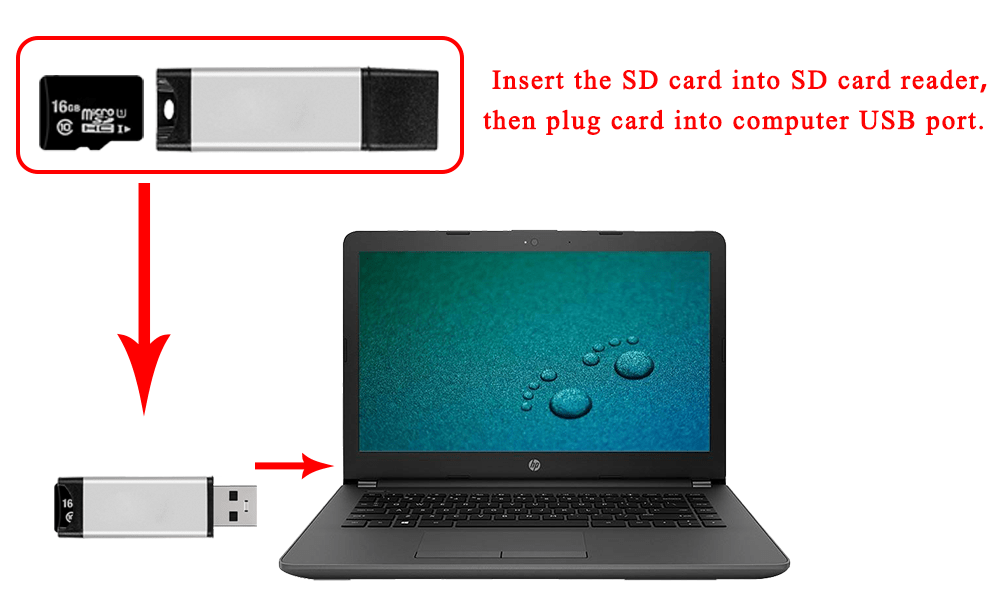
Étape 1 : Préparez une carte microSD (carte TF) nouvellement formatée avec un lecteur USB de cartes microSD ; les tailles recommandées sont 16 Go, 32 Go. (Ignorez cette étape si votre carte SD a une image du système d’exploitation Rasbian préinstallée). (Ignorez cette étape si votre carte SD a une image du système d’exploitation Rasbian préinstallée).
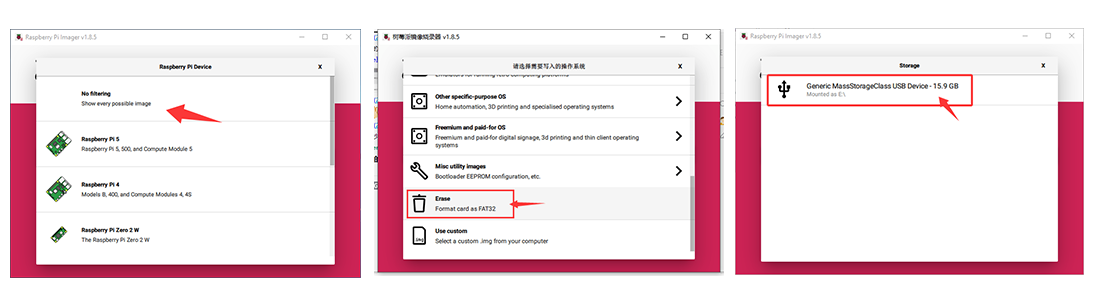
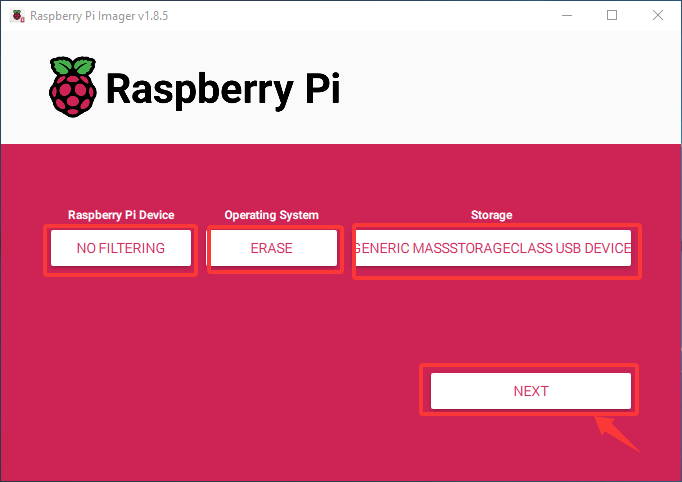
Étape 3 : Formatez votre carte microSD : Exécutez Raspberry Pi Imager et sélectionnez “Effacer” dans le champ Système d’exploitation et “votre carte microSD” dans le champ Stockage.
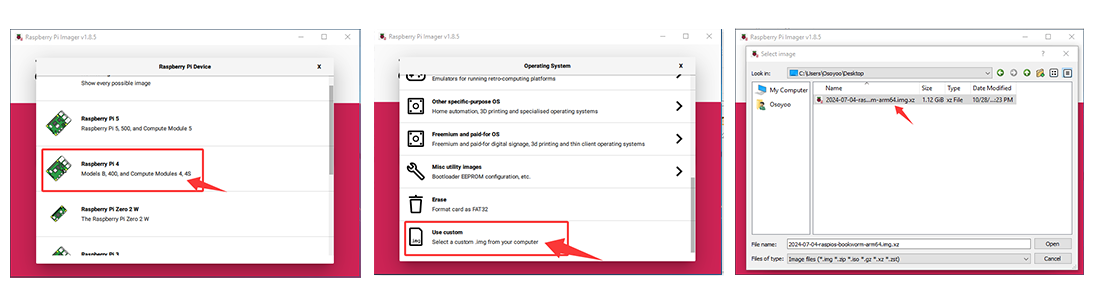
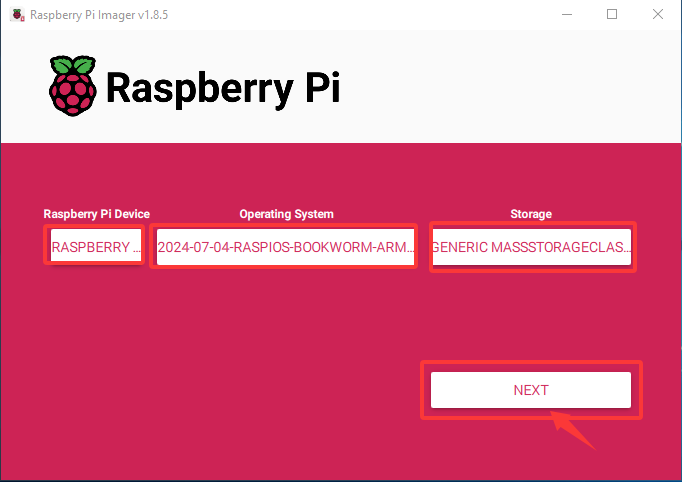
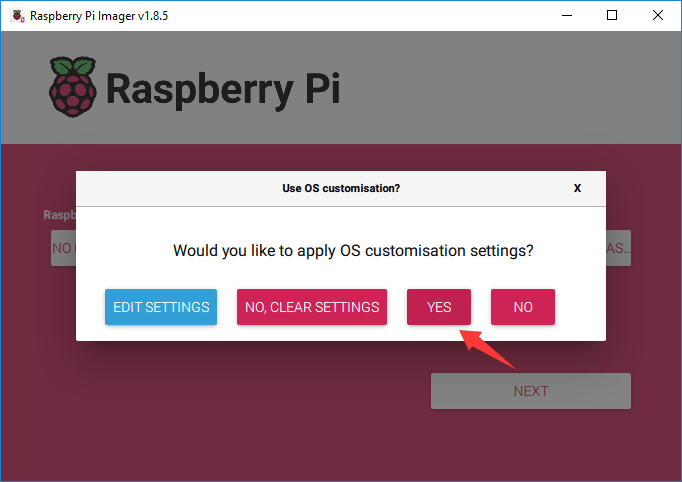
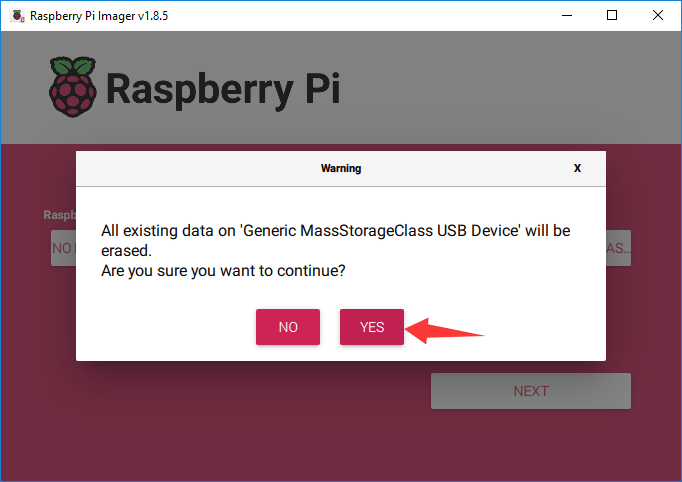
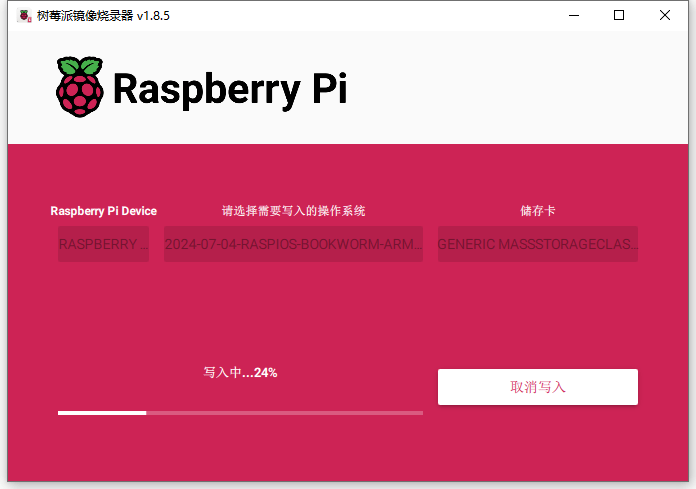
Étape 4 : Exécutez Raspberry Pi Imager, sélectionnez votre Raspberry Pi 4 dans le champ Appareil, puis sélectionnez “Utiliser personnalisé” dans le champ Système d’exploitation, naviguez vers le “Raspberry Pi OS” que vous avez téléchargé, puis sélectionnez “votre carte SD” dans le champ Stockage. (Si vous avez déjà gravé Raspberry Pi OS sur votre carte SD, ignorez les étapes 2 à 5)
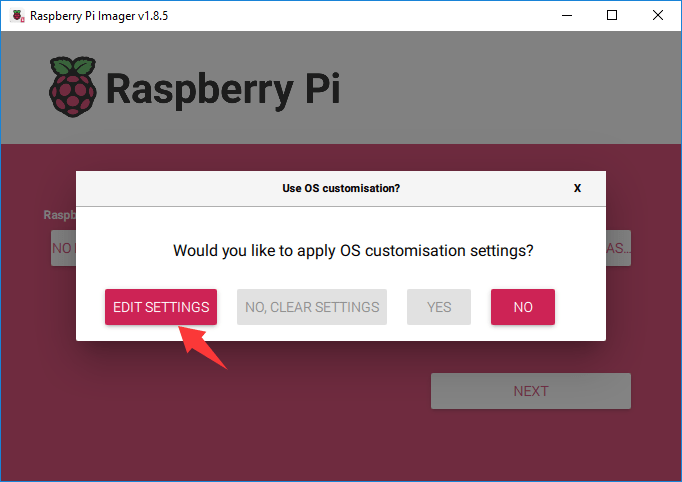
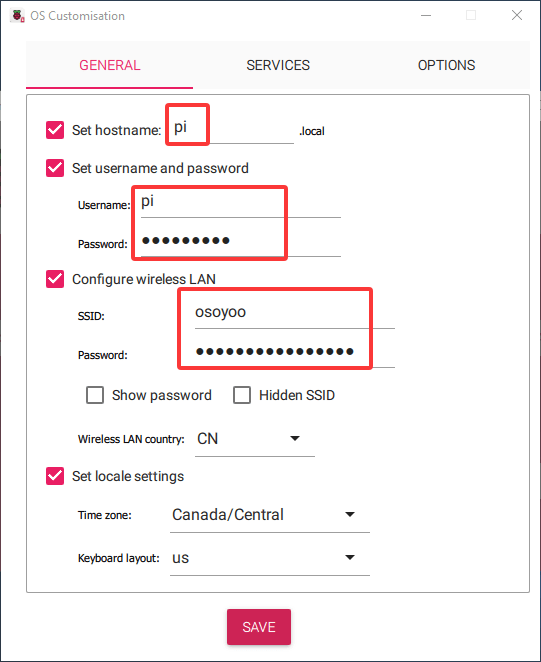
Étape 5 : Cliquez sur “MODIFIER LES PARAMÈTRES” pour configurer le nom d’utilisateur et le mot de passe (nous utilisons “pi” comme nom d’utilisateur et “raspberry” comme mot de passe dans cet exemple) et configurez le réseau LAN sans fil, puis cliquez sur SERVICES pour activer SSH, enfin cliquez sur “ENREGISTRER”.
Contrôle à Distance du Raspberry Pi
Étape 1 : Trouver l’adresse IP
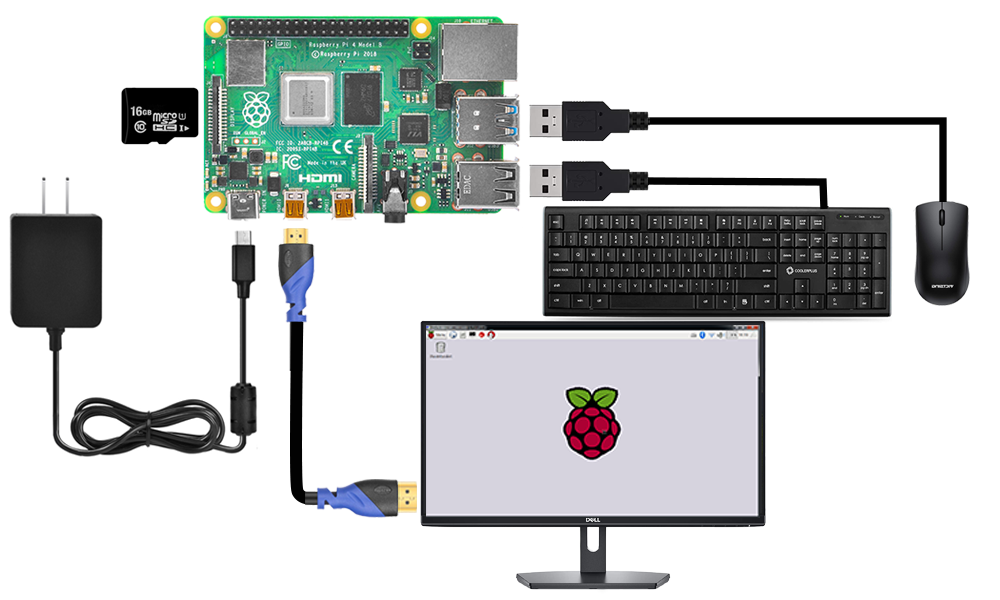
1. Connectez le Raspberry Pi à votre moniteur ou téléviseur HDMI. Branchez un clavier et une souris sur les ports USB du Raspberry Pi. Insérez la carte SD avec le système d’exploitation installé dans le slot de votre Raspberry Pi (Si vous avez déjà installé votre voiture robot Raspberry Pi, veuillez la connecter à un écran pour trouver l’adresse IP.).
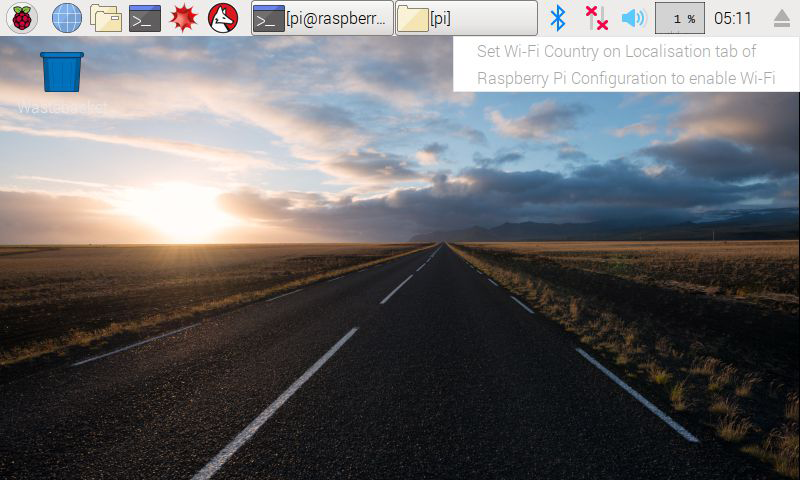
2. Si vous passez la souris sur l’icône LAN, vous pourriez voir une notification comme suit :
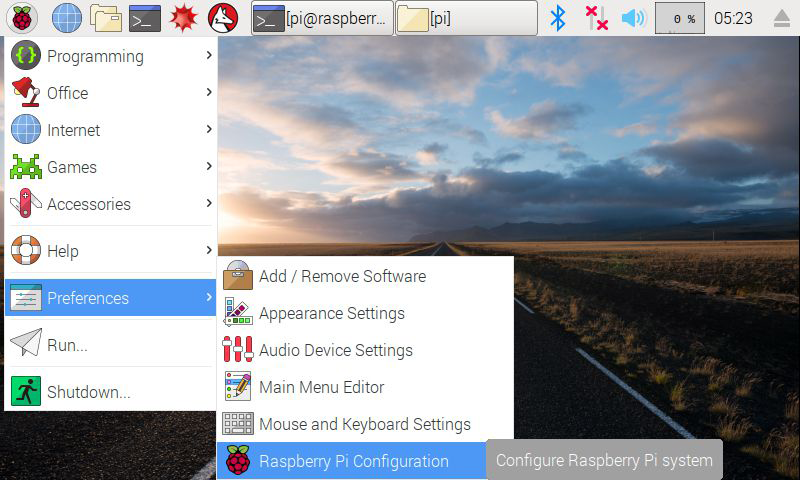
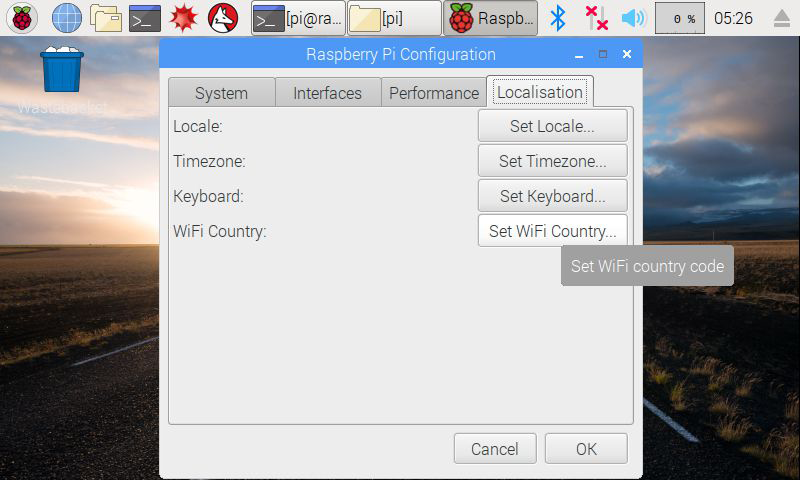
3.Cliquez pour configurer les paramètres Wi-Fi comme suit :
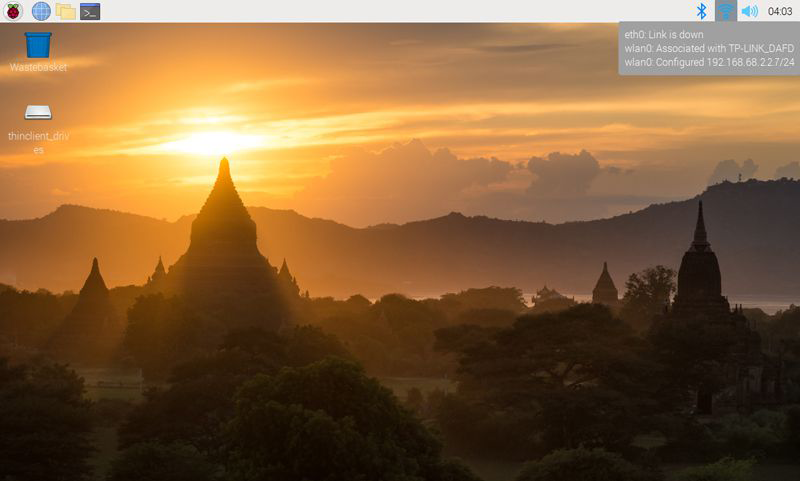
4. Trouvez l’adresse IP du Raspberry Pi. Méthode A: Connectez votre Raspberry Pi à un écran et une souris, cliquez sur l’icône LAN ou Wi-Fi pour obtenir l’adresse IP comme sur la photo suivante.
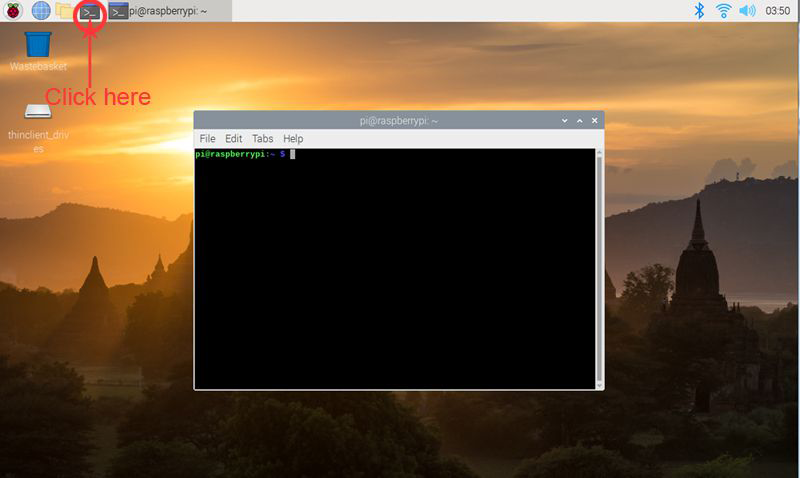
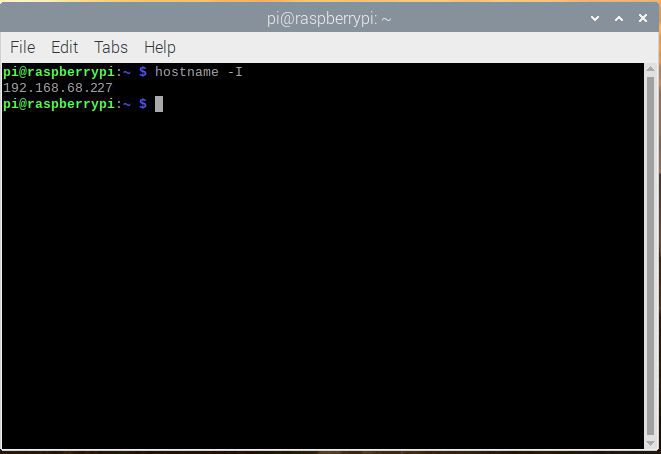
Méthode B: Ouvrez le Terminal sur l’écran, entrez la commande suivante dans la fenêtre du terminal pour obtenir votre adresse IP :
hostname -I
Étape 2 : Utilisez un client SSH pour contrôler le Raspberry Pi à distance.
1. Insérez la carte SD avec le système d’exploitation installé dans la carte Raspberry Pi (avant d’insérer la carte SD, éteignez d’abord le Raspberry Pi), puis allumez la voiture robot.
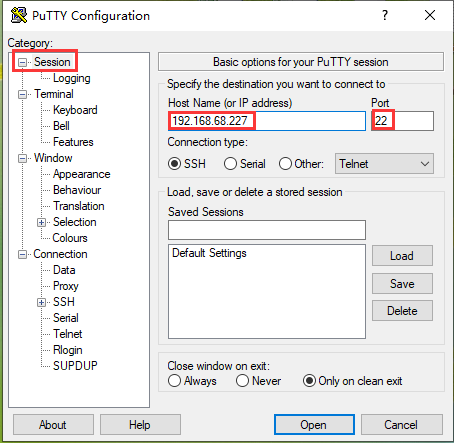
3. Ouvrez PuTTY et cliquez sur Session dans la structure arborescente à gauche (généralement réduite au démarrage de PuTTY), entrez l’adresse IP obtenue dans la zone de texte sous Nom d’hôte pi (ou adresse IP 192.168.68.227) et 22 sous Port (par défaut, c’est 22), puis cliquez sur Ouvrir.
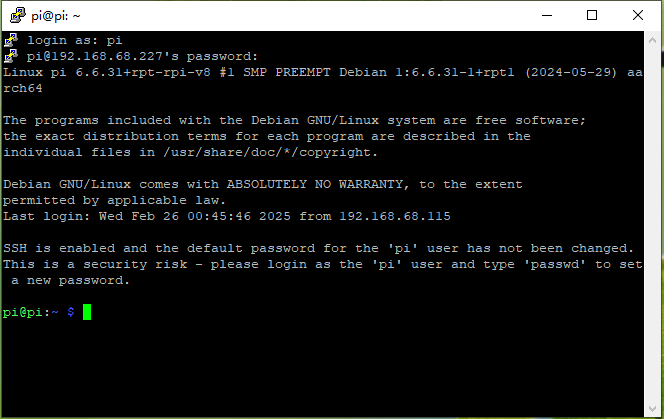
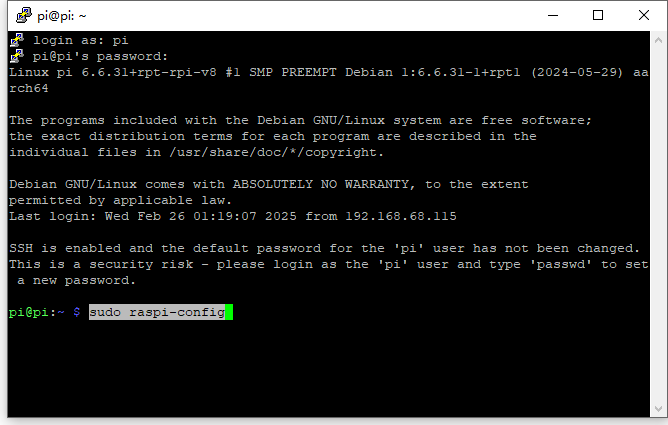
4. Remarque : lorsque vous vous connectez pour la première fois au Raspberry Pi avec l’adresse IP, un rappel de sécurité s’affichera. Cliquez simplement sur Oui. Lorsque la fenêtre PuTTY demande “login as :”, tapez le nom d’utilisateur : pi et le mot de passe : raspberry (celui par défaut, si vous ne l’avez pas changé).
Remarque : lorsque vous tapez le mot de passe, la fenêtre n’affiche rien, mais vous tapez en réalité. Concentrez-vous donc sur une saisie correcte et appuyez sur Entrée. Après vous être connecté avec succès au Raspberry Pi, la fenêtre s’affichera comme suit :
********************Projet Exemple ********************
Étape 1 : Activer I2C
Si vous n’avez pas activé I2C, exécutez la commande suivante pour l’activer.
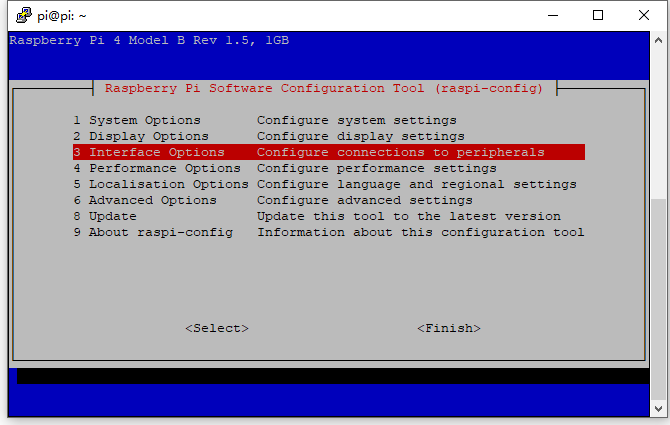
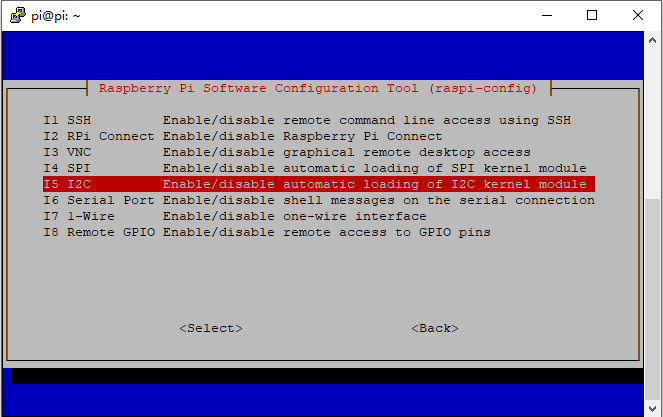
sudo raspi-config
Puis sélectionnez Options d’interface -> I2C -> Oui -> Ok -> Terminer.
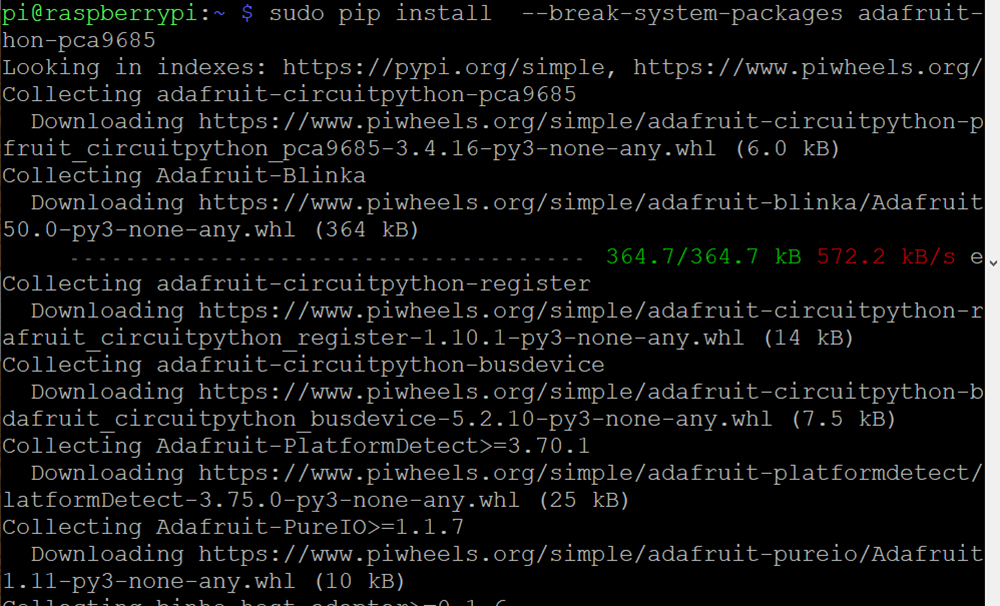
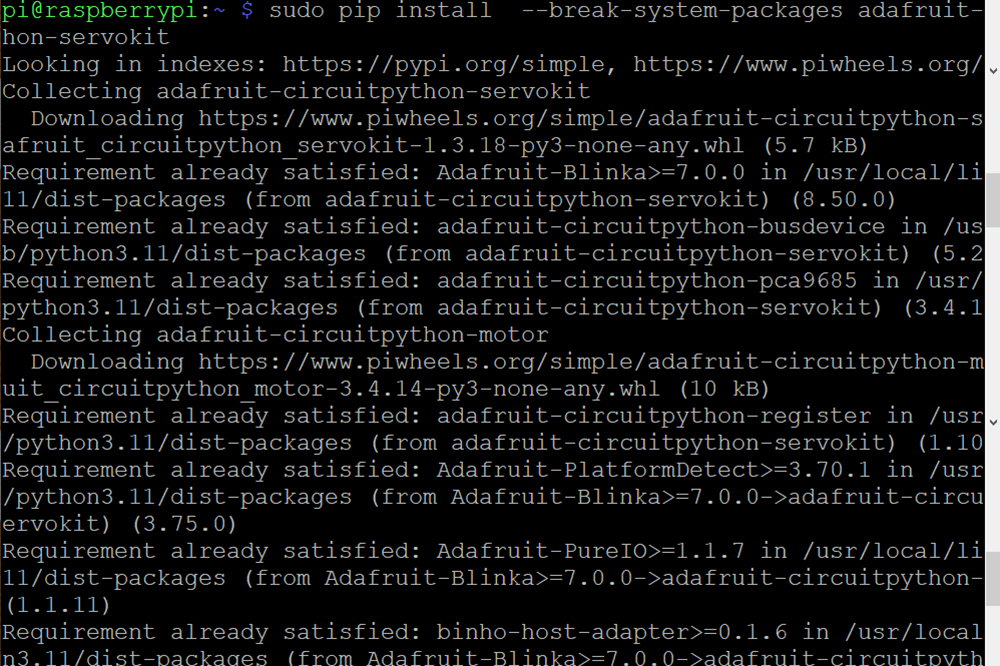
Étape 2 : Si vous n’avez pas les bibliothèques rpi.gpio et adafruit-pca9685, utilisez les commandes suivantes pour les installer.
Étape 5 : Placez la voiture robot au sol et exécutez la commande suivante :
python mecanum5.py
Après l’exécution du script Python ci-dessus, vos moteurs avanceront pendant 0,75 seconde, puis reculeront pendant 0,75 seconde, tourneront à gauche pendant 0,75 seconde, à droite pendant 0,75 seconde, se déplaceront vers la droite, puis vers la gauche, effectueront quelques mouvements omnidirectionnels et s’arrêteront.
À la fin de cette leçon, votre Raspberry Pi sera entièrement configuré et vous pourrez contrôler à distance la voiture robot et exécuter des commandes de mouvement ( python mecanum.py).
La voiture se déplacera dans l’ordre suivant : avant → arrière → déplacement parallèle à droite → déplacement parallèle à gauche → diagonale avant-gauche → retour au point d’origine → diagonale avant-droite → retour au point d’origine → virage à gauche → virage à droite → et enfin s’arrêtera.
Dépannage
Si, après avoir exécuté le code de la Leçon 1, vous remarquez que les roues d’un côté ne tournent pas, ou que les roues d’un côté ne peuvent avancer que mais pas reculer, ou seulement reculer mais pas avancer, le problème est probablement un câble desserré ou cassé dans le câble à 6 broches connectant la carte Model Y.
Voici la solution :
Étape 1 : Débranchez le câble à 6 broches qui connecte la carte Model Y et la carte Arduino.
Étape 2 : Trouvez six (6) câbles de liaison femelle-mâle de rechange dans votre kit (n’importe quelle couleur convient).
Étape 3 : Utilisez ces six câbles de liaison individuels pour reconnecter manuellement les broches de la carte model Y (ENA, IN1, IN2, IN3, IN4, ENB) aux broches correspondantes sur l’Arduino, selon le schéma de câblage précédent de la model Y.
Étape 4 : Retestez le code de la Leçon 1 pour voir si le problème est résolu. Si le problème persiste, vous pouvez envoyer les détails de votre problème à [email protected] et notre équipe d’assistance technique vous aidera.