


- OSOYOO ESP8266 Wifi Module
- OSOYOO W5100 Ethernet IoT learning Kit
- OSOYOO Wifi IoT Learning Kit
- Smart House V2.0 Blynk Control
- Blynk IoT Learning Kit
- LoRa Related
- NodeMCU IoT Kit
- Smart Home Iot Kit
- Smart Home V2.0 UDP APP control
- Project for Raspberry Pi
- FlexiRover Robot Car for Raspberry Pi/Arduino
- IOT kit for raspberry Pi
- Mecanum Wheel Car
- OSOYOO basic kit for Raspberry pi zero
- OSOYOO Robot Car V1 for Raspberry Pi
- OSOYOO Robot Car V2 for Raspberry Pi
- OSOYOO Starter Kit V1 for Raspberry Pi
- OSOYOO Starter Kit V2 for Raspberry Pi
- Screen for Raspberry Pi
- Tank Car for Raspberry Pi
- OSOYOO V4.0 Robot Car for Raspberry Pi
- LilyPad Sewing electronic Kit
- NodeMCU Garden Watering Kit
- OSOYOO 3D Printer Kit
- OSOYOO Advanced Hardware Programming Learning Kit
- OSOYOO Basic Programming Learning Kit
- OSOYOO Cayenne IOT Learning Kit
- OSOYOO Graphical Programming Kit
- Osoyoo Hardware Programming Starter Kit
- OSOYOO IoT Smarthome Kit V0.1
- OSOYOO PNP Programming Learning Kit
- OSOYOO RFID Programming Learning Kit
- Osoyoo Sensor Modules Kit
- OSOYOO Smart Home IoT Kit
- OSOYOO Ultimate Hardware Programming kit
- OSOYOO v3 advanced learning kits
- 16+1 Sensor kit
- Smart Car Kit
- Balance car kit
- Blue Mecanum Wheel Robotic for Arduino Mega2560
- Blue Mecanum Wheel Robotic for Raspberry Pi
- Espro 2WD Robot Car
- M1.0 Mecanum Wheel Metal Chassis Robotic
- M2.0 Mecanum Wheel Metal Chassis Robotic
- Mars Explorer Mecanum Wheel Robot Kit
- Tank Car Kit V1.0
- Tank Car Kit V2.0
- 2WD Robot Car Starter Kit
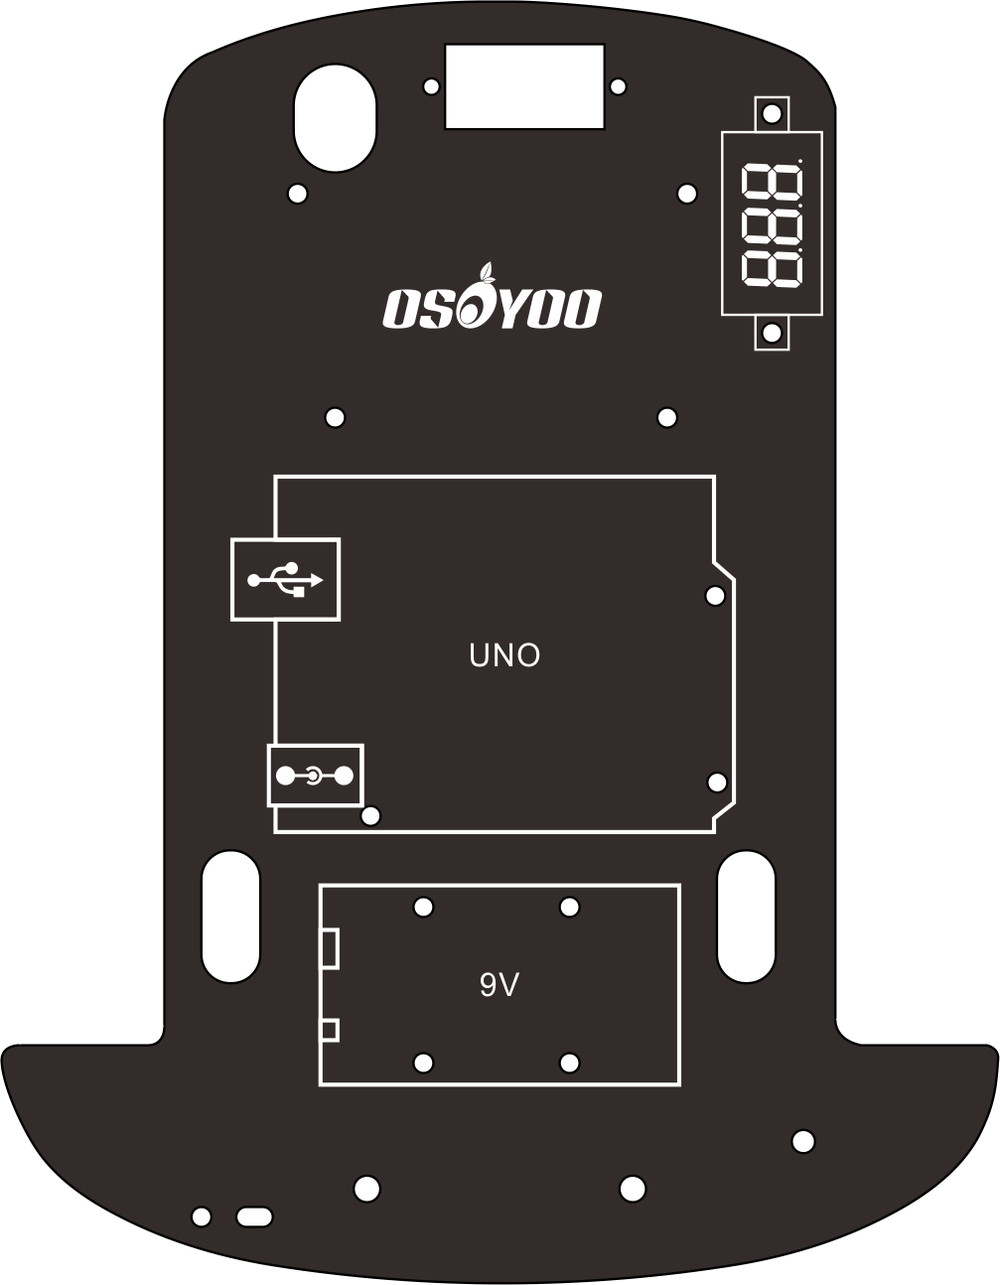
- Model-3 V2.0 Robot Car
- OSOYOO Model-3 Robot Learning Kit
- OSOYOO Model-T Robot Car
- OSOYOO Robot Car Starter Kit Tutorial
- OSOYOO Servo Steering Car V3.0 for Arduino MEGA2560
- OSOYOO V3 Robot car kit
- P3 Servo Steering Robot Car
- SG90 Servo Steering Robot Car
- V2.0 Robot Car kit
- V2.1 Robot car kit
- Sewing eletronic widgets
- Breadboard
- Buzzer
- LED
- Resistor
- Screen
- Sensors
- Temperature sensor
- USB cable
- Wires
- IO-breakout-board-for-ardino-UNO
- IO-breakout-board-for-arduino-nano
- IO-breakout-board-for-arduino-pro-micro
- IO-breakout-board-for-esp32&esp8266
- IO-breakout-board-for-raspberry-pico
- Nano for arduino
- LTG-Nano for Arduino
- Motor driver board
- NodeMCU
- Pro micro for Arduino
- PWM HAT for Rapberry Pi
- Universal-IO-breakout-board


I bought one of the above Model 3 V2.0 robot car kits through Amazon and the instruction disc was missing. Can you send me one?
Thank you in advance for your prompt reply to my request.
Please tell me your order No. and your email address. I need to confirm the version of the car and send the PDF instruction to you.
The PDF instruction link is https://osoyoo.com/picture/V2.0_Model_3_Robot/Model_3_V2.0_instruction.pdf
Osoyoo Model-3 V2.0 Robot Car Lesson 3, the instructions do not make the car move forward, is there any updated code?
Do you test lesson 1 and it works well? Please take photos about the expansion board and send to my email address: [email protected]
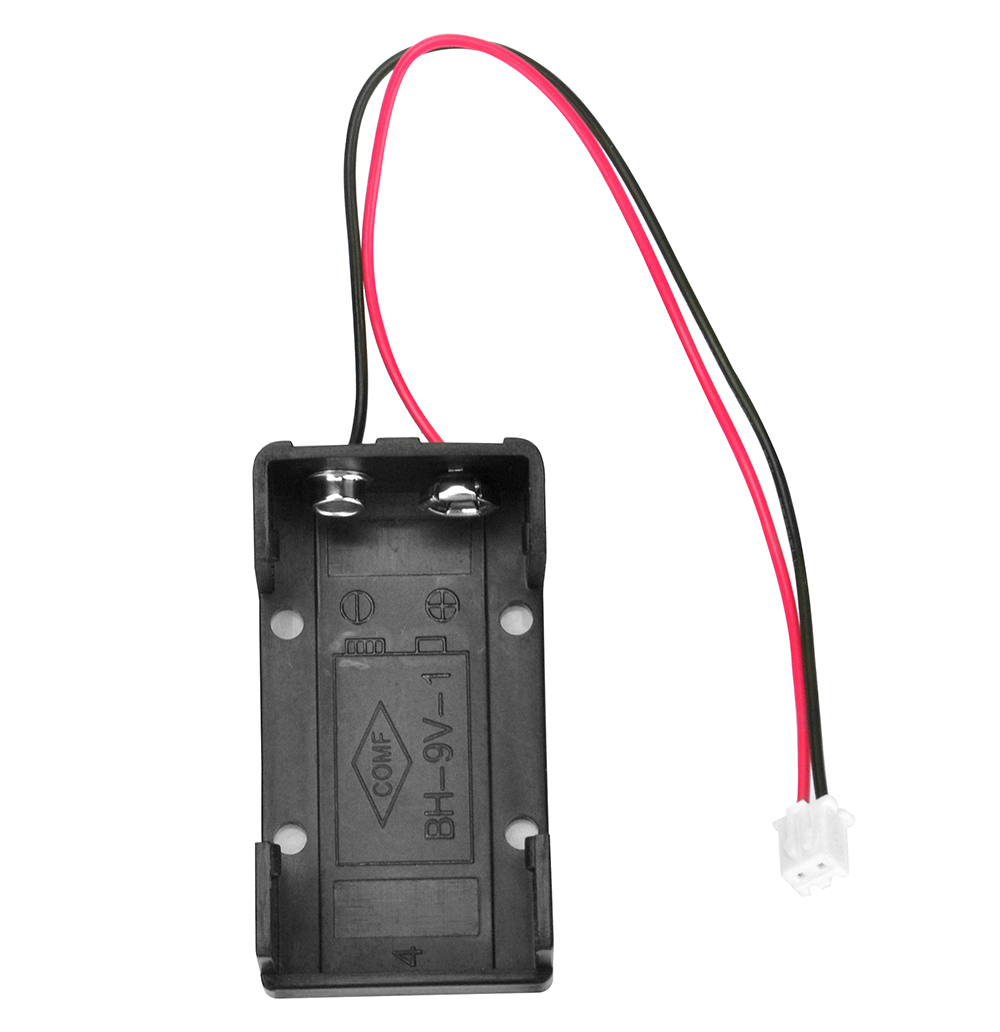
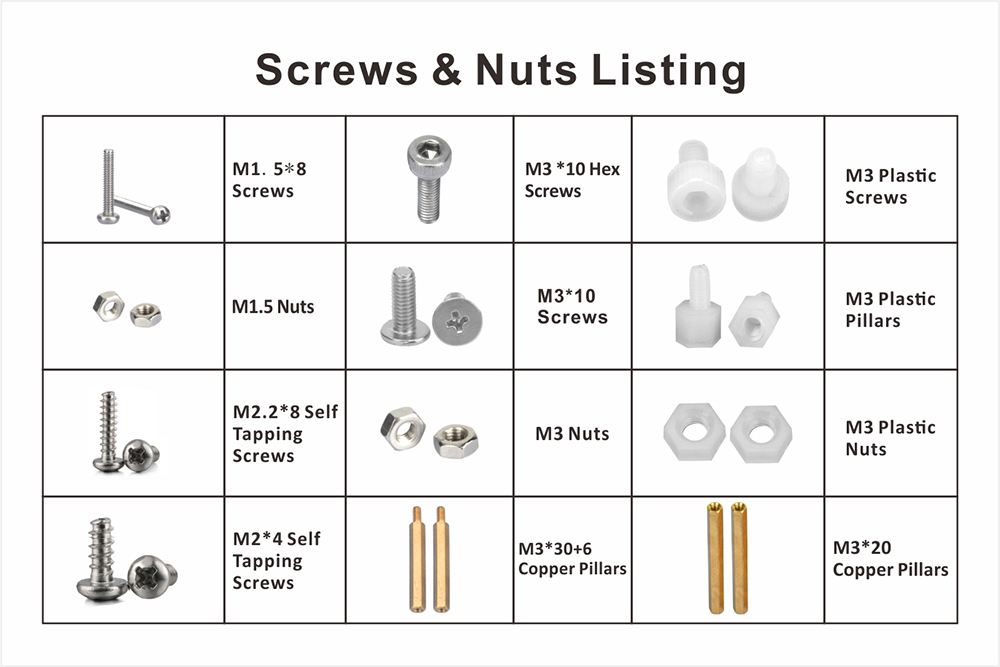
We purchased the Model 3 Robot. Pins on the External Power Connector on the Motor Driver Shield interfere with the Power Jack on the Uno PCB. We received five M3 nuts which is not enough to use four M3 screws to attach the battery box. Do not know if more are required for Lessons 2-6 yet. It would be nice to have the number of nuts and bolts listed so we know how many we will need.
A power schematic would be nice so we can determine how well the power switch on the Motor Driver Board isolates the battery from the Arduino.
I like the robot and the price. More holes on the base plate to mount additional devices would be nice too.
hi, ksanger,
Thanks for purchasing our Model 3 robot car. the M3 nuts are packed in a small screw bags. Maybe it is hidden under the foam. please double check your packing box.
I’m stuck on Lesson 3. I’m out of M3 nuts. Only used two on the battery box and have one left. Two are needed for mounting the IR Line Sensor. Plus the M3-10 hex cap screws bottom out in the m3-30 copper pillars such that the board wonders side to side. There is at least one more turns worth of thread on the bolt when it bottoms out in the copper pillars. Holes in copper pillars were not tapped long enough.
Do you mean you just get 2 PCS M3 nuts? If so, please tell me your order No and your address, I’ll replace M3 nuts to you. My email address is [email protected]
Can I use each lessons code all at once in Arduino, for example, be able to move it with the remote controller and also react with the ultrasonic detection function? If so, can someone show me some instructions how?
Hi, this is a learning robot car kit for Arduino, so we just provide simple code for each sensor module. You can learn the code and create new codes.
lesson5までは問題なく動きましたが、lesson6を書き込むと「スケッチの書き込み中にえらーが発生しました」表示になります。
どうしたらよいでしょうか
田中 様
お問い合わせ、ありがとうございます。
注意:スケッチをArduinoにアップロードする前に、Bluetoothモジュールを取り外して、電源を切りしてください。スケッチを問題なく書き込みましたら、Bluetoothモジュールをインサートしてくださいませ。
どうぞよろしくお願いいたします。
I am having a problem with the bluetooth lesson 6.
The car works OK for lessons 1 to 5.
For lesson 6, I can connect my phone to the car but none of the controls on the app work. I have also tried my iPad but this also does not work.
The car is a model 2 V3.
Any ideas?
Sorry, meant to say Model 3 V2.
Please click speed+ to add speed when you control the APP.
Hello Elaine, thank you for your response.
I’ve tried using the speed+/- control and also the Engine on/off control and also the forward/backward control but the car does not respond to any of these.
Hello, Do you get any error when you control the APP? When you click connect, could you see the bluetooth device? are you willing to take a vedio abou control the APP and send to my email address: [email protected]
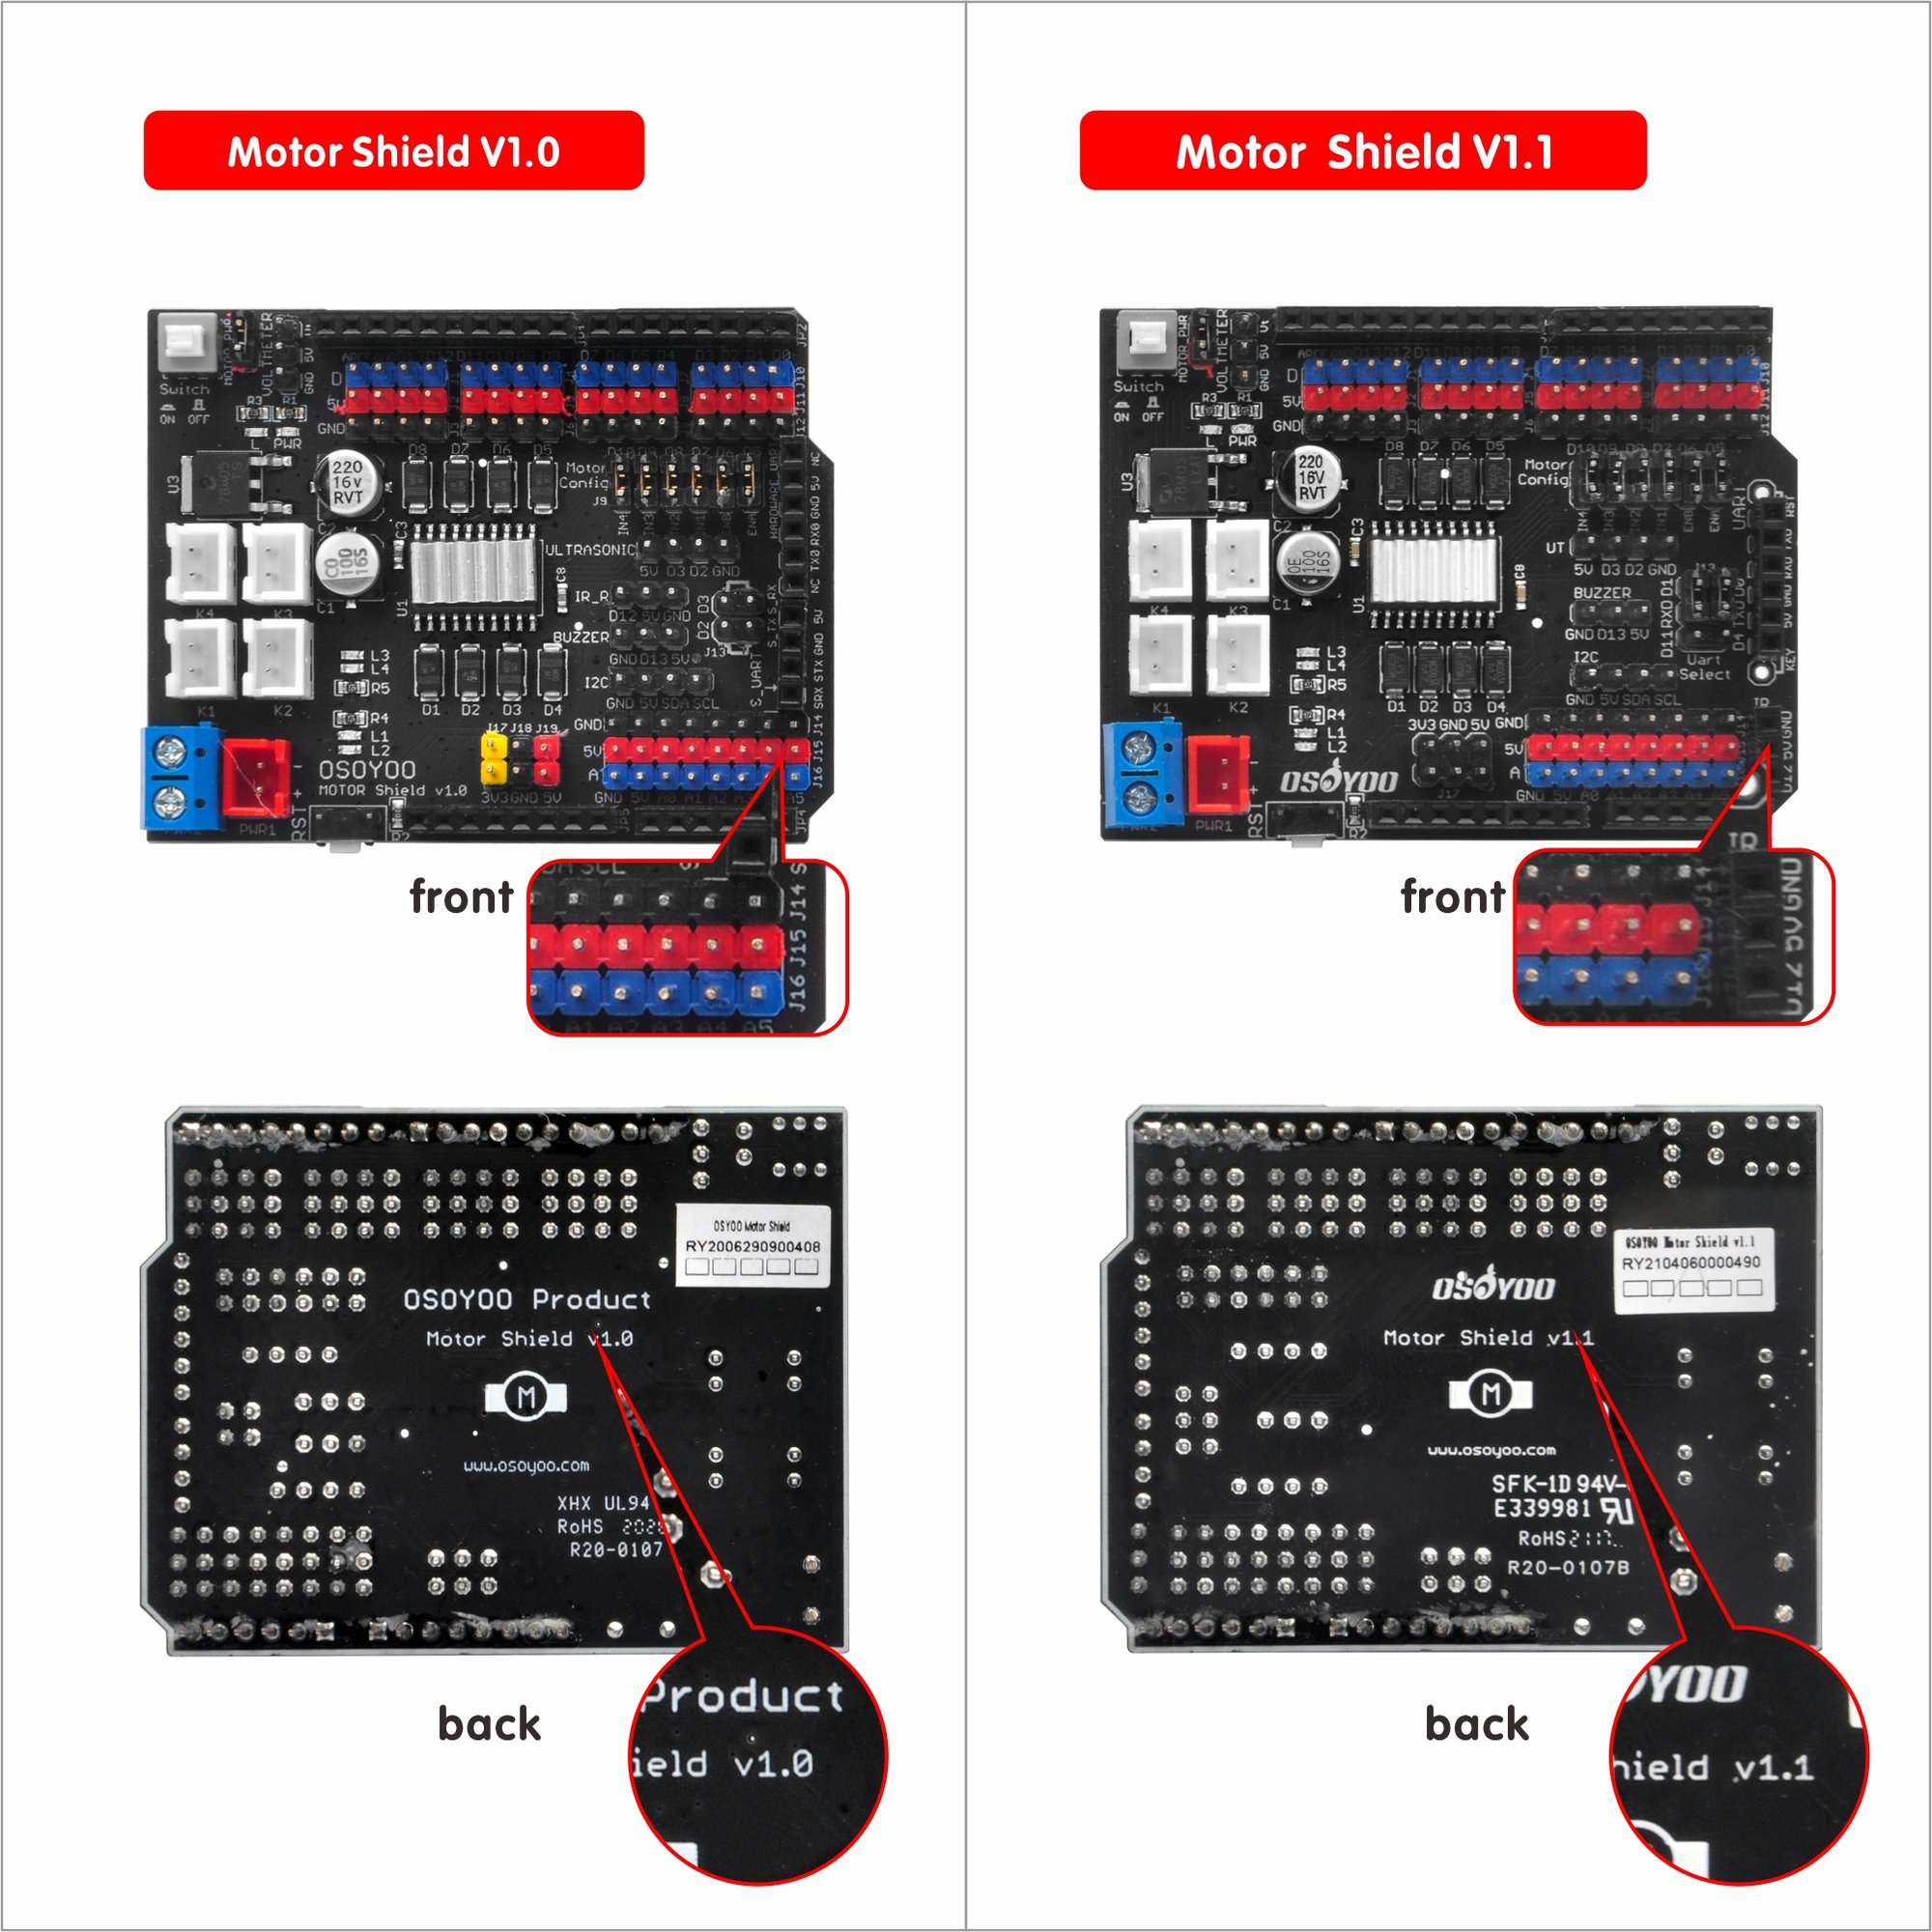
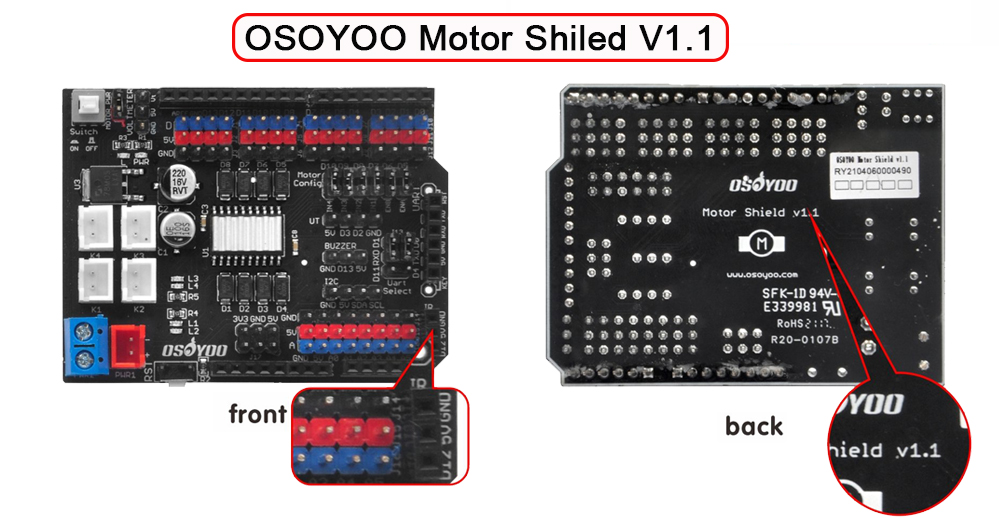
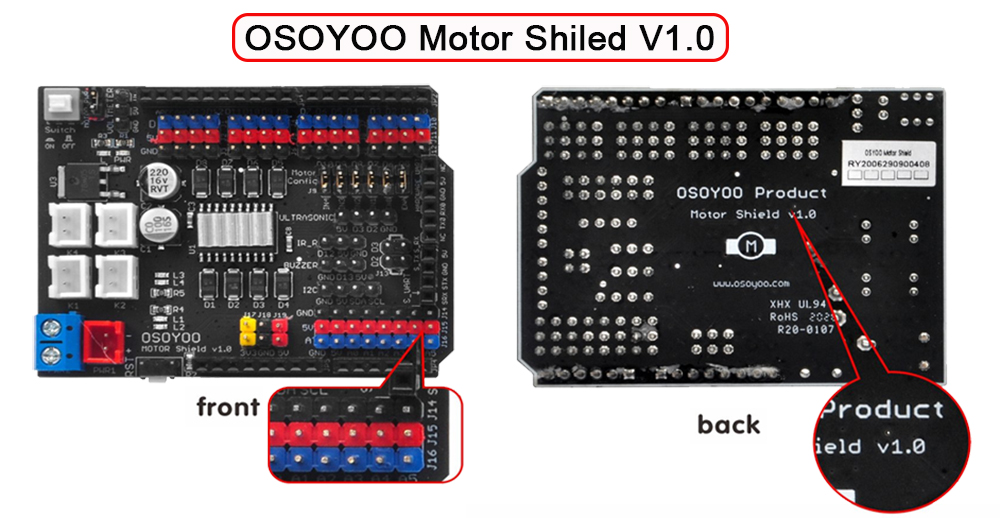
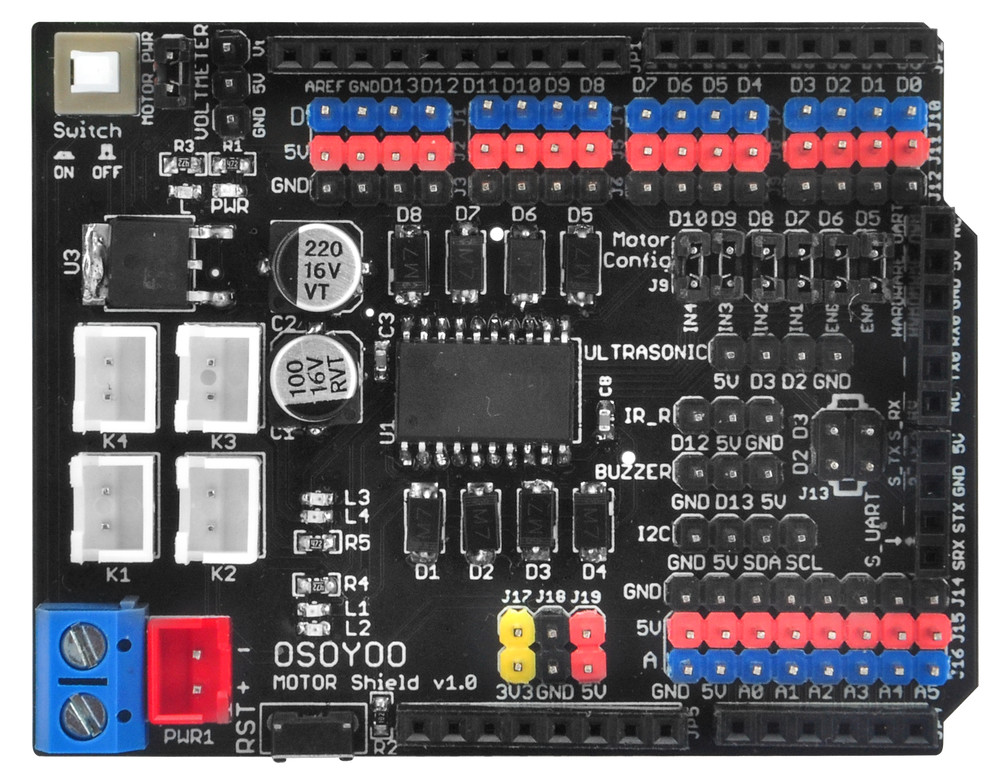
When I looked at the web site instructions (not the pdf), it has different instructions for Motor Shield v1.0 and v1.1 (mine is v1.1). I checked the jumpers for RX0 and TX0 and they were incorrectly set. I’ve now set them to RX0-D11 and TX0-D4.
After searching and connecting, the APP says “Connected”.
When I turn on the Engine I get a constant buzzer noise from the car. Increasing the Speed+ control does make the car move (one wheel only) for a short time but as I further increase the speed I get APP error “Error 516: Unable to write: Broken pipe.
There appears to be 2 lesson samples for the Bluetooth, lesson6 and lesson6a. Which should I use or should they both work?
I’m not sure why but it is now (almost) fully working, using Lesson6a (Lesson6 does not work for me).
I sometimes still get the “Error 516: Unable to write: Broken pipe” error. I assume that this means that the Bluetooth connection has stopped working.
The steering does not work, not sure if this is an APP problem or something to do with my phone, since the steering wheel on the APP does not rotate when I rotate the phone.
Hello, please confirm which version of the osyoo motor shield. I test two versions boards and don’t get the error of Error 516: Unable to write: Broken pipe.
Are you willing to take a video about this and send to my email address: [email protected]?
Or how about sending the HC module as a replacement to you? If so, please provide your order no and full address.
The APP steering problem seems to be something to do with my mobile phone since the APP steering works on another phone.
Even using with the phone which works the steering, I still sometimes get the “Error 516” but I can live with this problem so OK.
For anyone who has a similar problem (maybe user cmbw30), check that the RX0 and TX0 jumpers are correct for the version of motor shield, I had to move mine to get the car to move (see my post February 28, 2022 at 2:45 am above).
Thanks for your help.
Not able to get it to move. It shows connected but when increasing the speed it does not move.
Hello, Do you mean the car can’t move in lesson 1, or when you use APP to control the car, the car don’t move?
are you willing to take a video about the issue and send to my email address: [email protected]?
Whenever I try to use the app on lesson 6a, it comes up with error 516:unable to write:broken pipe. This is on the model 3 with the 1.1 board
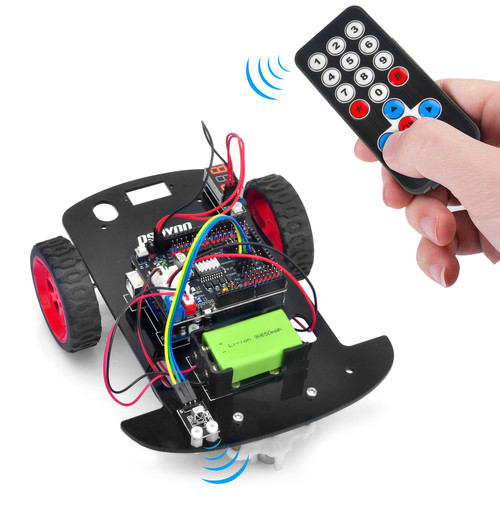
Please scan bluetooth device in your phone setting and connect with HC02 device, then open OSOY0O imitation driving Robot APP, then Click BT Search and scan Bluetooth device, then Choose HC-02 device till device is connected, then Turn on engine toggle, then Click Speed+ to make the car move; click gear switch to control car move forward or backward; rotate mobile phone angle to change car direction.
Please follow the picture about how to set APP step by step, and please don’t skip step.
I have done all of the steps you have listed and it is still coming up with the same error as before
One of customers met this issue before and we find that he mix up the setting steps of bluetooth.
Are you willing to take videos and send to my email address: [email protected]?
Please show the more details about connecting bluetooth and setting APP.
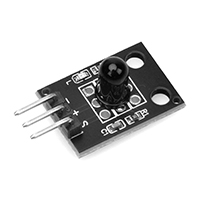
In the lesson 2 after I pressed UPLOAD, I got the message “C:\Users\bigin\AppData\Local\Temp\Temp1_lesson2 (5).zip\lesson2\lesson2.ino:11:10: fatal error: IRremote.h: No such file or directory
#include
^~~~~~~~~~~~
compilation terminated.
exit status 1
Compilation error: IRremote.h: No such file or directory”
What can be the reason of such an error? And how to solve it?
you must go to the Library Editor and search fpr IRremote the first entry. click on install by the way version 4.4.1.
When you’ve installed compile the scetch again and you can see it works
Hi
, I bought the Model 3 robot kit. I got to lesson 2, then my IR receiver didn’t work. I contacted you to resolve this problem. You sent me one, and thank you very much. But between the time I contacted you and when you sent me the part, I didn’t use the robot. I preferred to wait, then when I wanted to test it, I realized that my robot no longer wants to turn on, even with a charged battery.
Sincerely,
Does your lesson 1 work?
Yes the lesson 1 work
Did you see any error message in lesson 2? or simply can not see any movement when you press control key?
Did you run the trouble shooting code?
Hi, I didn’t see any error message when I pressed the control key nothing happened and yes I tried the troubleshooting code but it didn’t work but now that is not the problem since you have already sent me a new ir reciver I received it the day before yesterday now the problem is that my car no longer wants to turn on when I press the white on/off button.
The car doesn’t move in lesson 2, it might be caused by following reasons:
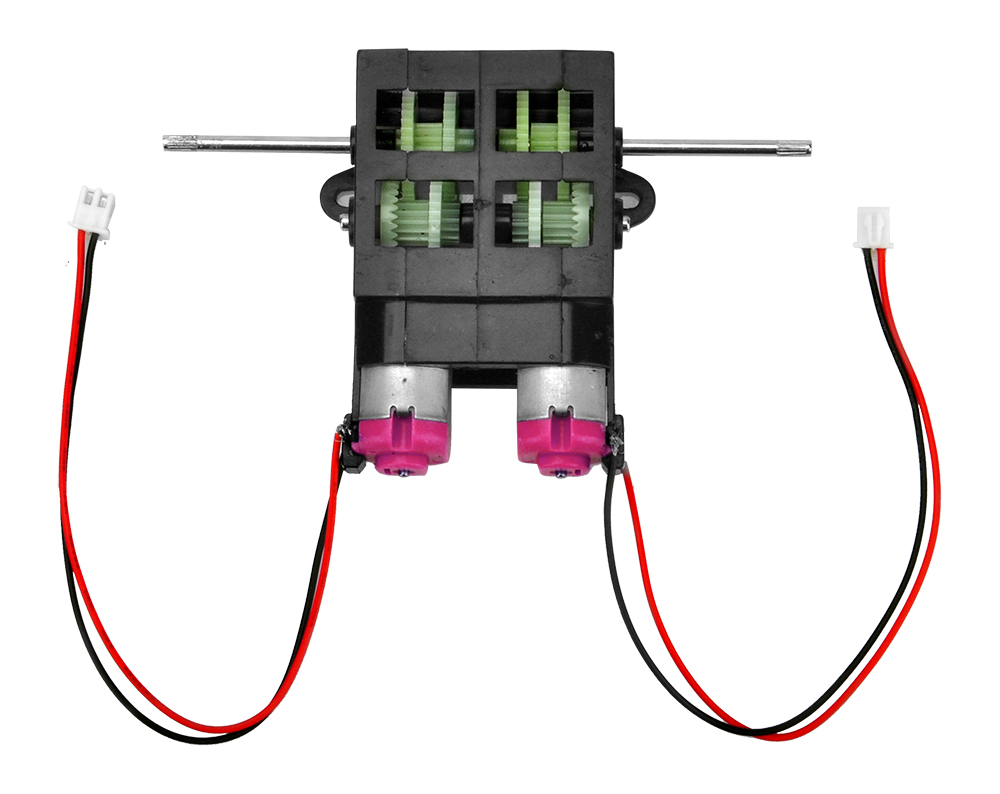
1)the motor wire might broken. please run lesson 1 again and if lesson 1 is still working, that means your motor is ok. Otherwise you need to re-connect motor wires or change battery.
2)the IR receiver might have some problem. To test it, you need to run the troubleshooting code in https://osoyoo.com/driver/2wd/irtest.zip
is there any error message showing up when you upload irtest.ino file? what is the Serial monitor showing when you press the up Arraow key in the remote? we can only help you after you reply these questions. also make sure your IR remote has new battery.
Could you please help me to solve my problem?
The IR receiver doesn’t pose a problem for me since you sent me a new one that I haven’t tested yet because my robot didn’t work. I’m going to try what you told me and I’ll tell you more.
please run lesson 1 again , i feel that your motor or battery has some problem. quite likely that your battery is low. If lesson 1 works, then try to run lesson 2 code. Lesson 1 can test motor and control wires and is the fundamental project for all other lessons.
I re-downloaded lesson 1, the lights come on, but when I want to turn on my car by pressing the on/off button, it doesn’t want to turn on, so lesson 1 and the car don’t work.
what is your battery voltage? make sure it is over 8.5V
My voltage is 5V. I am charging it. Once finished, I will tell you more.
It’s good, I charged my battery but nothing happens, it doesn’t want to work.
my volt is at 8.6
Do you mean that your volt is 8.6 and lesson 1 still does not work? It is strange. Can you turn on your power switch and take a picture of your motor board ? send the picture to [email protected] . We want to make sure if your board is properly connected to UNO board.
Hello, it’s done, I sent you a video on @osoyoo.info
Good mornig, I’ve tried lesson 1 but after one time running Ok, i made some changues to the program (velocity and duration) and now I obtain a continuou beep fro the board ¿some clues about what the problem can be? Thanks.
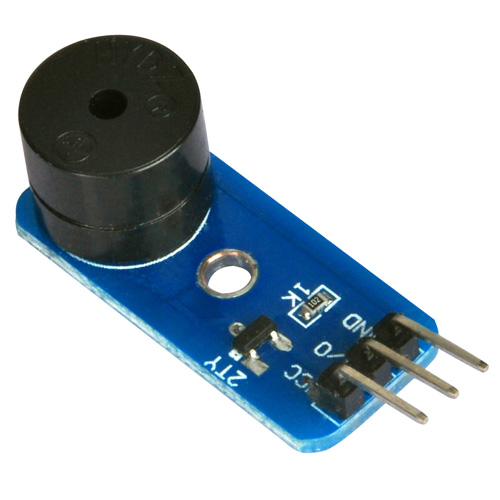
We don’t know how you change the code so not sure what exactly coding problem. If your buzzer is connected D13 as per lesson 5, so you need to make sure your code does not has some I/O operation in D13. If you are not sure if your code has D13 I/O operation, please simply remove the buzzer from the car to stop the beeping.
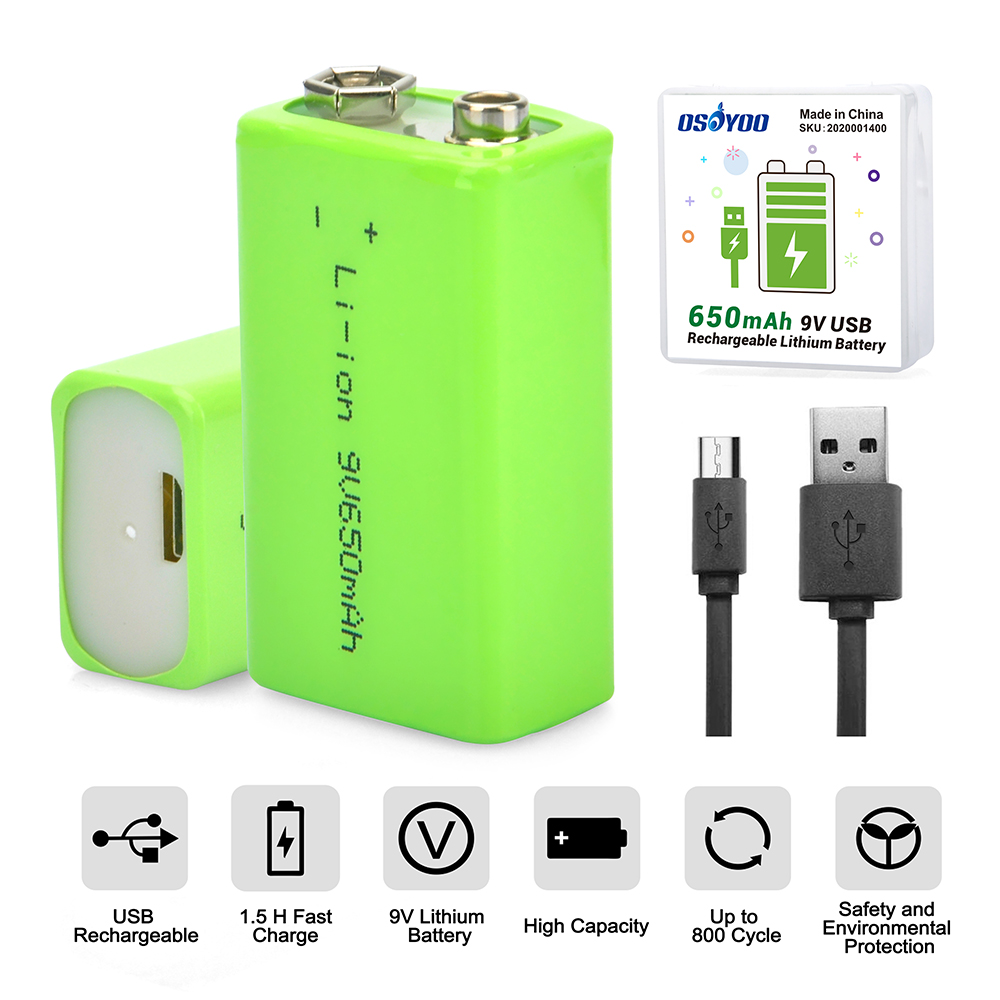
Im having issues with the battery portion. it will work if the USB is hooked up to it.. However stand alone doesnt work.. First I tried with regular battery.. then I purchase a li-ion battery of 1400 mAH 9v.. and that still doesnt work. Please need help.. Im using this to teach high school in stem on how to program and everything.. I notice with the model x you were able to jump to give more battery.. I thinking that motor shield is not drawing enough or drawing to fast. my volts is staying at 9 volts in the beginning of the program it goes all way down to 4.94 v then goes up to 8 which should be more enough to move. I look forward to hearing from you soon .. Trisha
hi,Trisha,
Are you talking about model 3 car which use the motor shield V1.2 to drive the motor or talking about V2.1 car which use Model X to drive the motor? If you are using Model 3 car, do you mean that the car lesson 1 can work only if you put battery + extra power from USB cable from your PC? Please give us a short video to show us the problem. Our email is [email protected].
Thanks
OSOYOO support team