OSOYOO P3 Robot car is a servo steering robot car controlled by Raspberry Pi. Unlike Old version differential steering robot cars. OSOYOO P3 car has a well designed Servo Steering system which allows programmer to precisely control car moving direction like a real car.
The main programming language in this tutorial is Python which comes with Raspbian OS. We will use PCA9685 16-channel PWM module and related Python library to control Motors and Servos.
In this tutorial, we will teach you how to install Raspbian OS onto your SD card, use raspi-config command to enable SSH/I2C protocol and install GPIO and PCA9685 drivers.
We will also teach you to make a small Python program called servo.py which can control servo to make some simple movement. We will this program to position servo arm which will steer car movement.
Software Preparation:
Imager utility: Win32DiskImager utility
OS: Raspbian (Use OS Raspbian 2018-04-18 in the subsequent tutorials,Please download OS Raspbian Version before 2018-10-11 )
Format Tool: SDFormatter (Optional)
SSH Tool: PuTTY (for Windows users)
Step 0:Before connect to Raspberry Pi, you need to install Raspbian Operation System(OS) onto SD card(skip this step if your SD card has pre-installed Osoyoo Robot Image).You can select the latest version of RASPBIAN system on the official website: https://downloads.raspberrypi.org/raspbian/images/. Write the image via Win32DiskImager utility into your microSD/TF card(minimum 16G), then plug the card into the slot on your Raspberry Pi.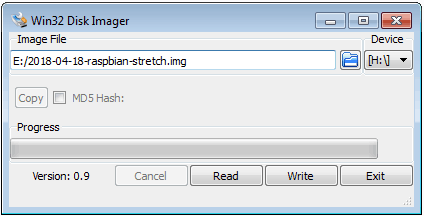 Step 1: Connect Wifi
Firstly, Connect Raspberry Pi to your HDMI monitor or TV. Put a keyboard and mouse into Raspberry Pi USB ports. Insert SD card into the slot on your Raspberry Pi.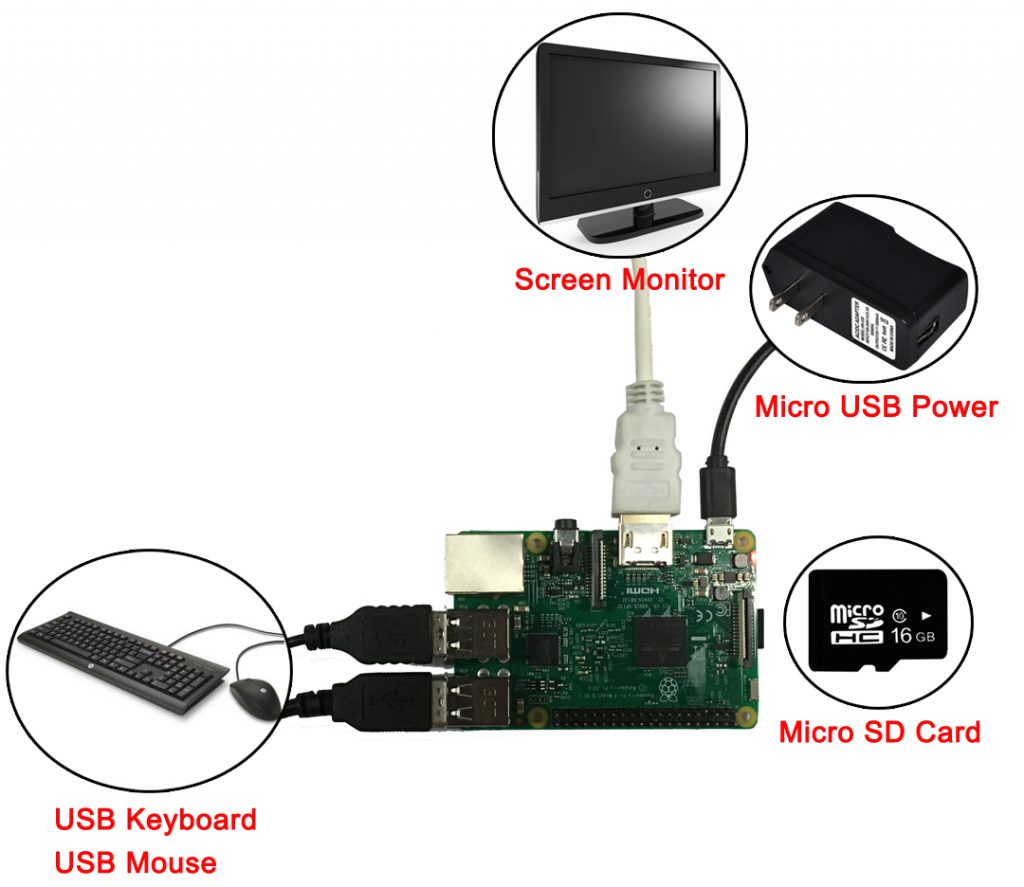 Click on the wireless icon top right on desktop, should give a list of access points, select your wifi ssid and connect it. Once your Pi is connect to Wifi, you can hover your mouse to the wifi icon to see the your IP address.
Or your can type sudo ifconfig wlan0 command in terminal. Your local ip address will show in wlan0 block(right side of the word inet addr:). It will look like 192.168……
Please remember above IP address, it will be used in our next steps.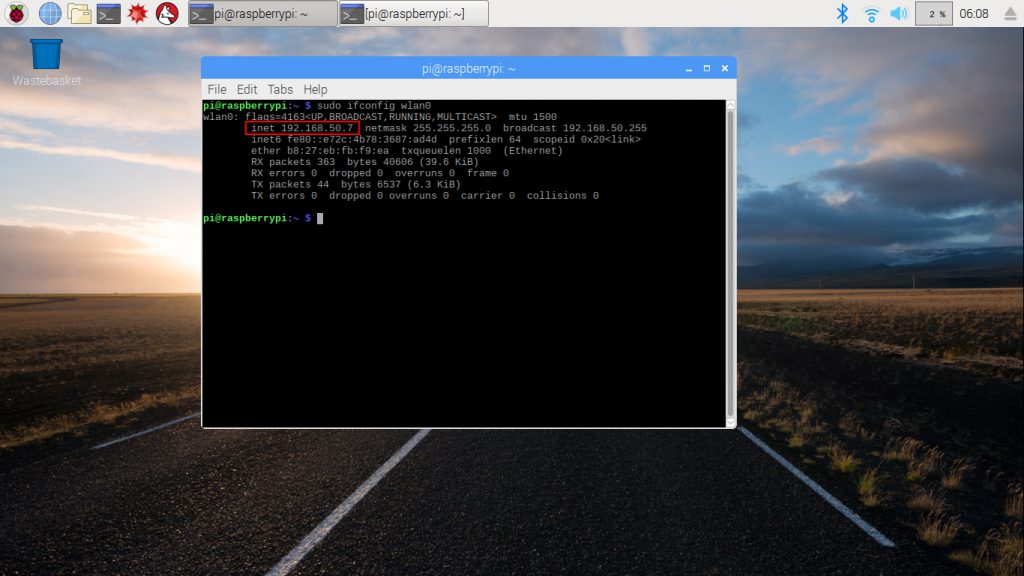
Important Note:As the raspberry pi robot car image was written into SD Card, you just need to follow the step 1 to connect wifi and skip Step 2 to Step 5, directly run the Testing Python code.
Step 2: Open SSH connection
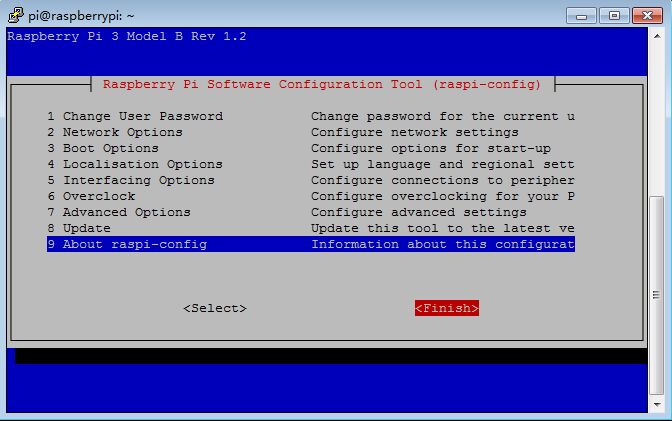
SSH enable user to type shell command remotely from internet so that we can control the car through wifi.In order to enable SSH function, we need type following command from terminal:
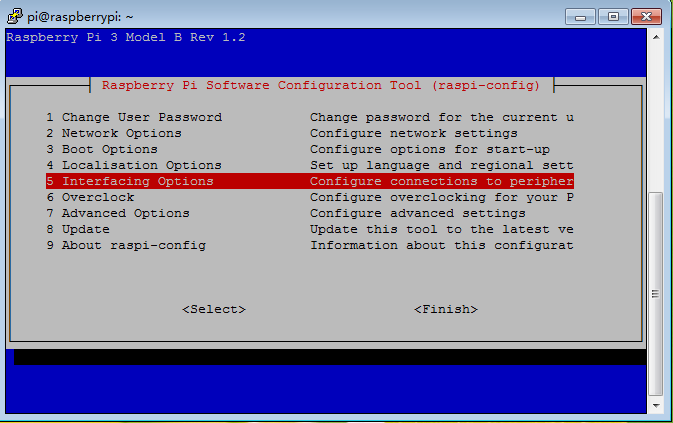
sudo raspi-config
Then select Interfacing Options->SSH->Yes->Ok->Finish


Step 3:Use SSH to connect Raspberry Pi terminal remotely
In order to make the car moving freely, we need disconnect Raspberry Pi from monitor, keyboard/mouse and use SSH to send command to Raspberry Pi terminal remotely.
If you are using Windows to send ssh command. you need download a free software called PuTTy to connect the Raspberry Pi local IP(you got from STEP 1).

If you are using MacBook or other linux computer, please type: ssh [email protected]
ssh your_raspberry_pi_local_ip_address
*your_raspberry_pi_local_ip_address means the wifi IP address you got from STEP 1
When connecting ssh, you need use default user name pi and default password raspberry to login to Raspberry Pi.

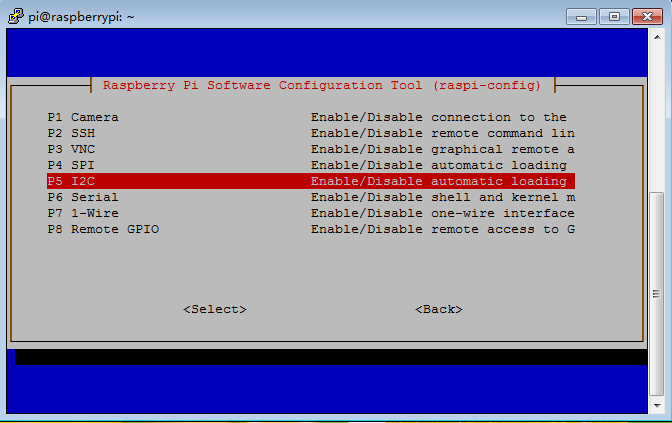
Step 4: Open I2C function(skip this step if your SD card has pre-installed Osoyoo Robot Image)
I2C is a protocol which will be used to exchange data with I2C device. In our project, I2C device is PCA9685 module.In order to use I2C function, we need type following command from terminal:
sudo raspi-config
Then select Interfacing Options->I2C->Yes->Ok->Finish
Step 5: Install GPIO and pca9685 PWM Library
cd ~
sudo apt-get install rpi.gpio
sudo pip install adafruit-pca9685
Step 6: Connect PCA9685 and model X to Raspberry Pi as following:
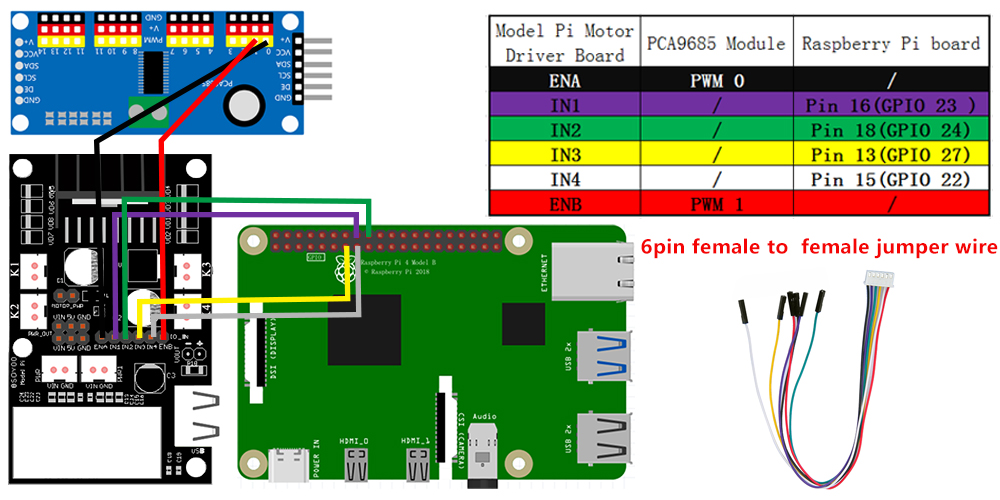
Step 7) Insert MG995 Servo into port 15 of PCA9685 module, make sure wire color must match pin color (yellow wire to yellow pin, red wire to red pin..)
Step 8)Use Putty or SSH terminal to connect Raspberry Pi again, run following commands:
wget http://osoyoo.com/driver/servo-steer-car/servo.py
python servo.py
You will see the servo will rotate from left to right and final stop in the central position. Now you can install the servo arm to the servo as following picture:
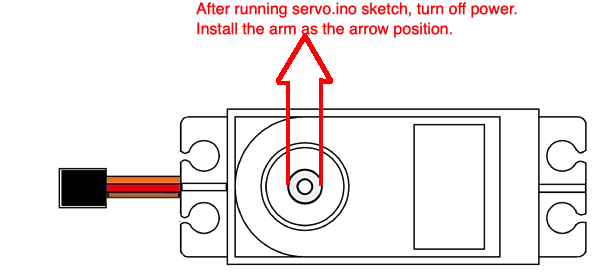
Current Arm location will ensure that steering system will facing front when python PWM value is 380.
380 is the default Front position value in our future servo programming code files.


