Libraries:
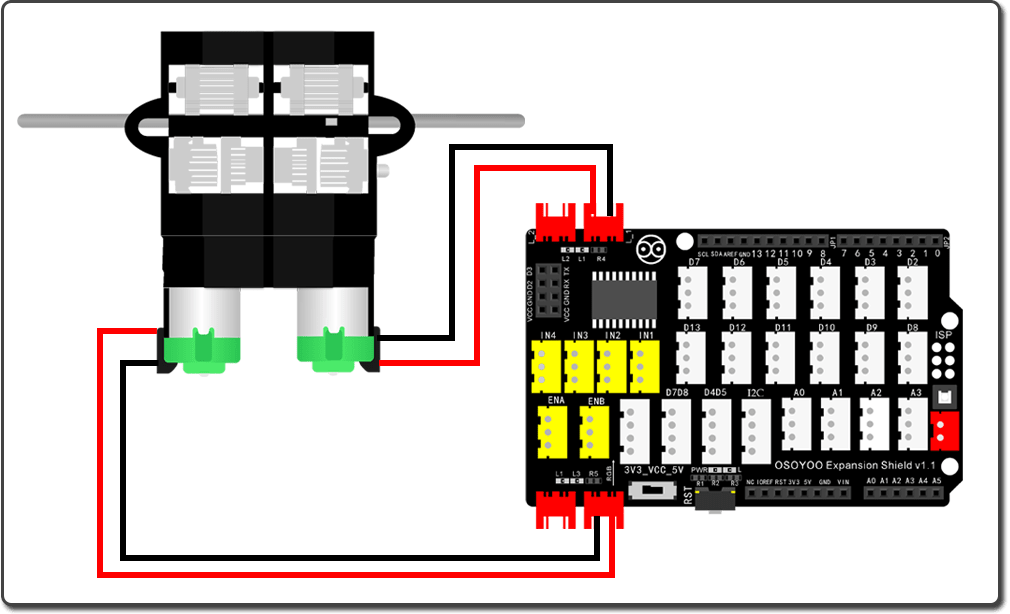
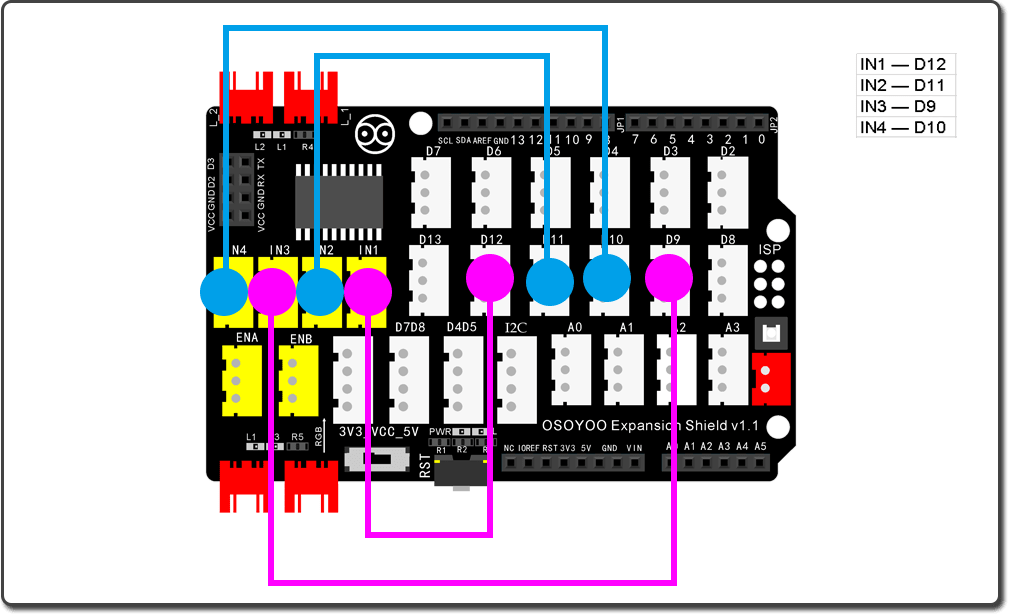
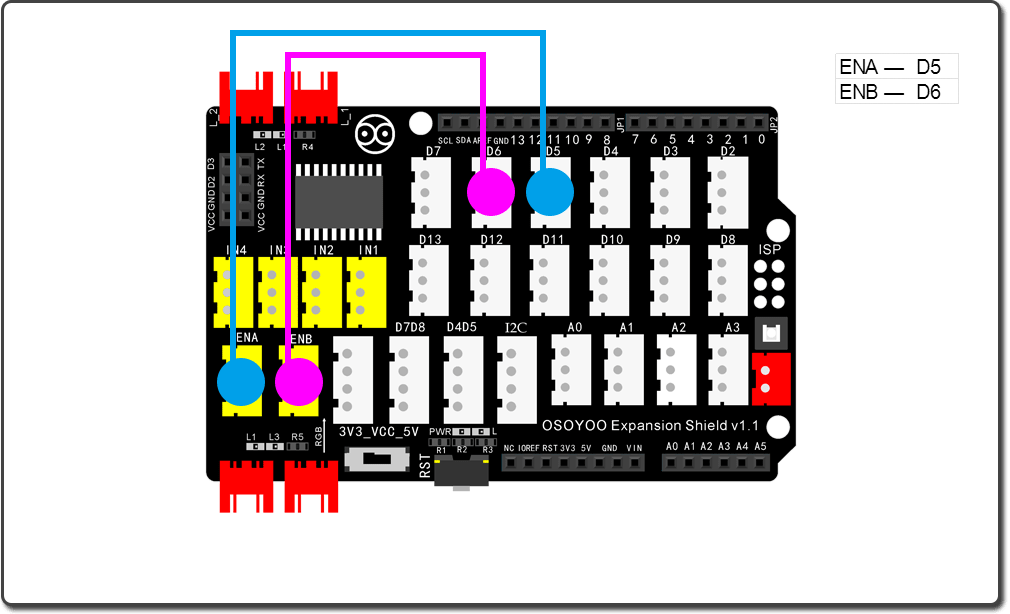
OSOYOO WIFI Module connect to VCC/GDN/D2/D3 slot
DHT11 connect to D4 port
Software Download Link
https://osoyoo.com/driver/mblock/wifi-block-car/wifi-block-car.zip
unzip wifi-block-car.zip, Double click wifi-block-car.ino file , Arduino IDE will open the file automatically
In sketch file, replace *** with your wifi ssid/password
char ssid[] = "***";//replace this line with your wifi ssid
char pass[] = "***"; //replace this line with your wifi password
Upload the sketch to the board. Wait until you see something like this:
Done uploading
Open your serial monitor, you will see Arduino’s IP address as following:
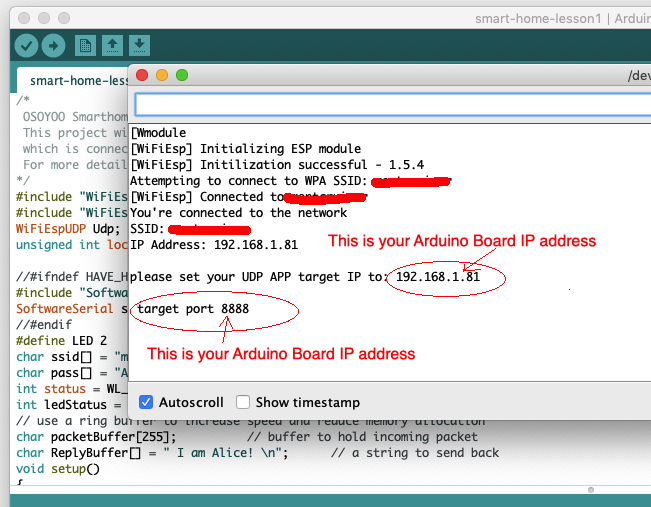
In above example, 192.168.1.81 is the IP address of my IDE, we need to set this IP address in our APP in next step.
APP Installation and Setting:
Step 1) Download OSOYOO IoT APP by searching OSOYOO iot udp robot car app from Apple Store(iPhone/iPad) or Google Play Store(Android device)
Step 2):Make sure your Cell phone is in the same Local Network of Arduino. Open the APP, click Settings, enter your Arduino IP address from Step F and Port to 8888 in settings:
You can also download Android APP from https://osoyoo.com/driver/udp-app.apk if you can’t access Google Play.
Step 7: Set IP Address in APP
1)Open APP, click Setting button in upper right corner
2)Use the Arduino IP address you get in Step 8 to replace default IP 192.168.1.255
3)keep default port number 8888 without changing
4)Click Save button to save the changes you just made
5)Click Back Arrow to go back APP front UI


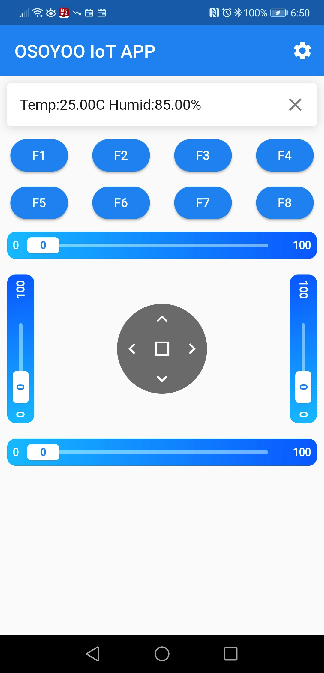
You can use the Arrow keys to control the car movement. In you APP, you can see the temperature and humidity detected by the DHT11 sensor in your car.
