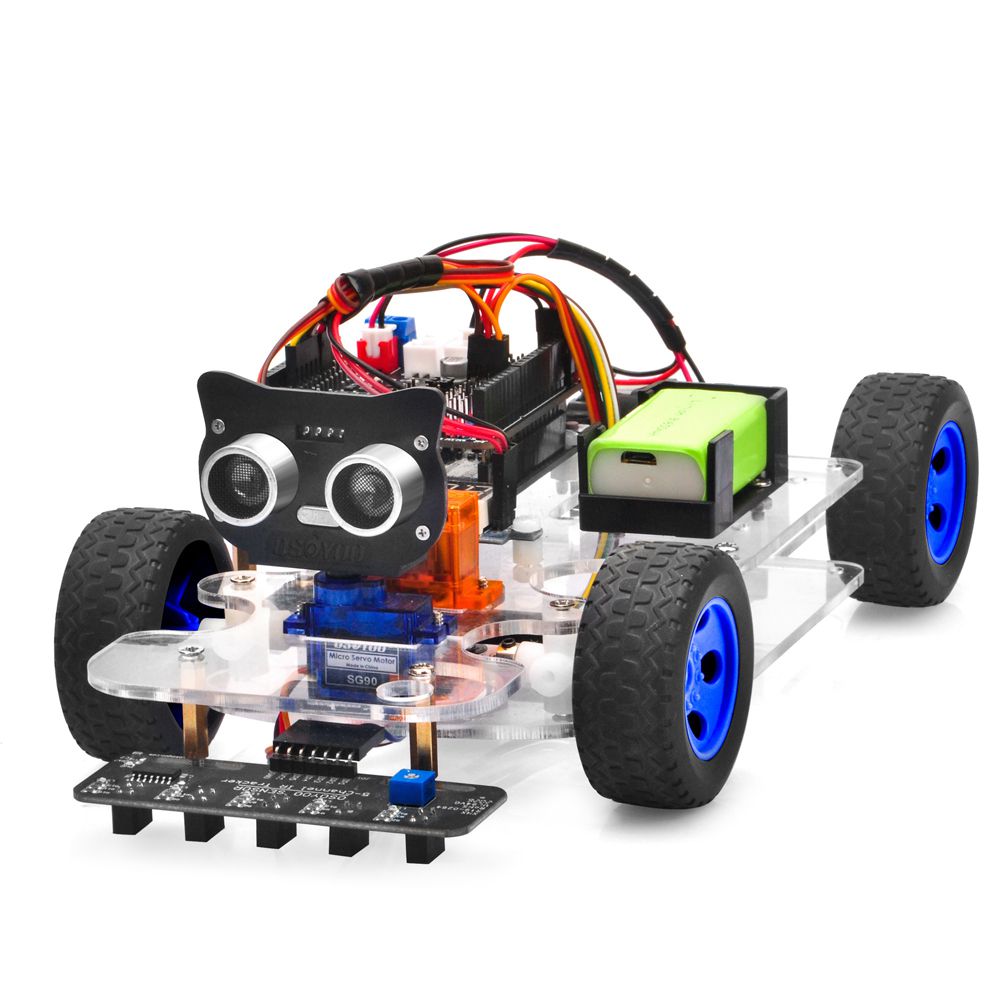
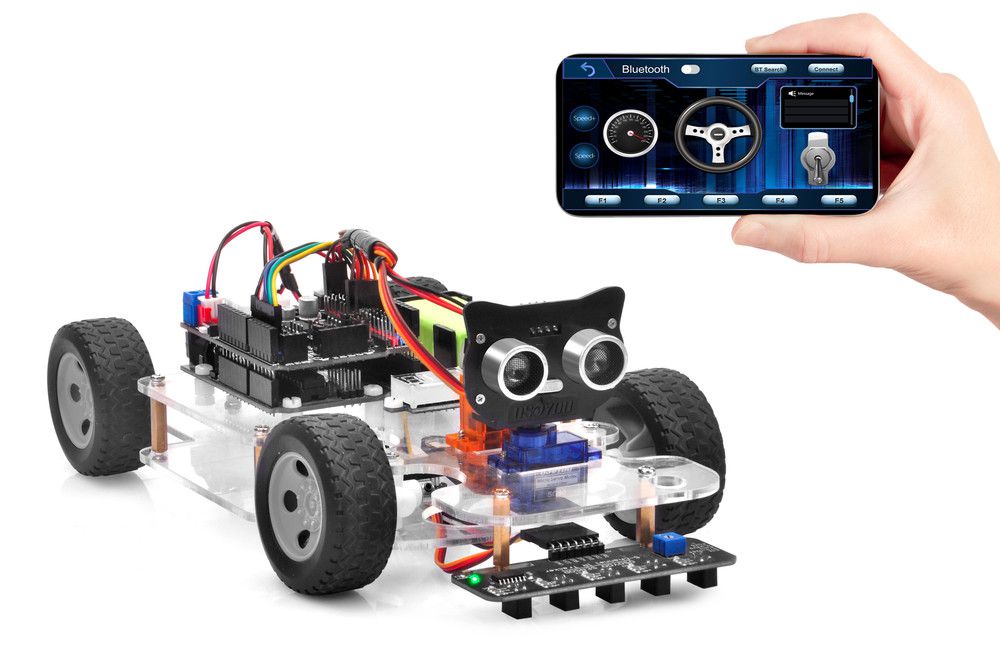
In this lesson, we will use Mobile to control our robot car and make an imitation driving. Since is a mock driving, we will use a virtual steering wheel and gear in our APP to imitate their counterparts in the real car.
Step 1: Install the smart car basic framework as per Lesson 2. If you have already completed installation in Lesson 1, just keep it as is.
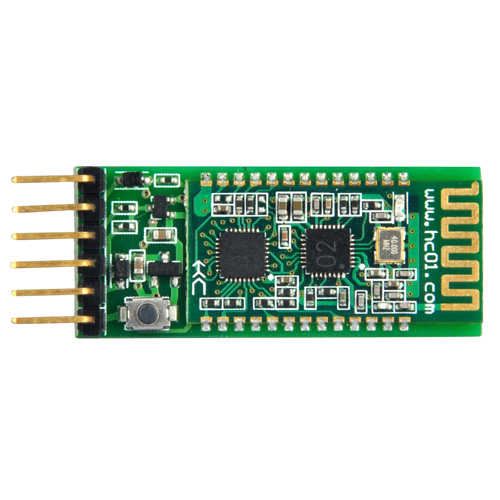
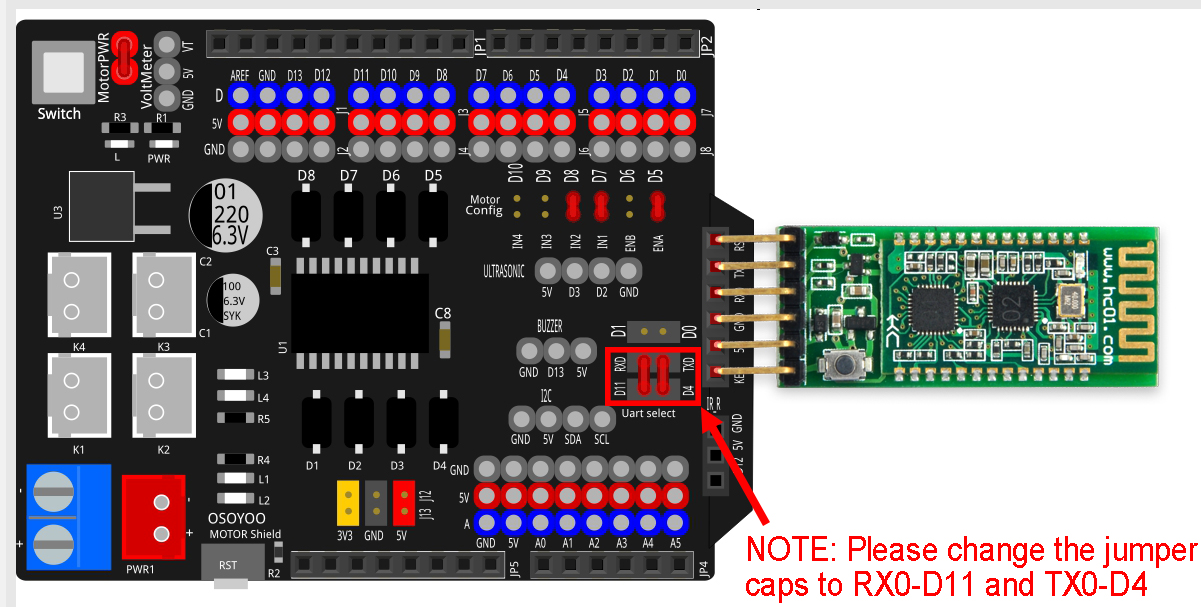
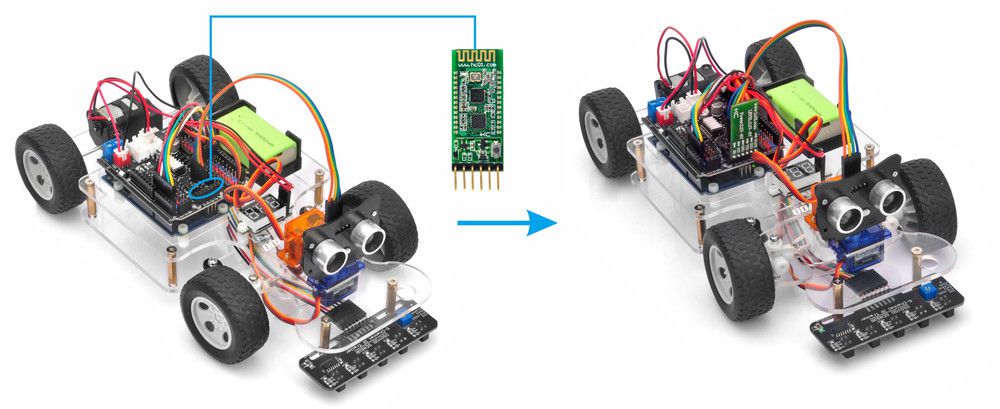
Step 2: Insert Bluetooth Module into OSOYOO motor shield V1.0 Bluetooth slot as following graph (Remember: DO NOT remove any existing wires installed in Lesson 1):
Search “OSOYOO imitation driving” in
Google Play or Apple APP store
(Note: If you can not find this APP in Google Play,
you can directly download the APP from following link: https://osoyoo.com/test/mockdrive.apk)
Step 1: Please download PWMServo library from https://osoyoo.com/driver/sg90car/PWMServo.zip, then import the library into Arduino IDE. If you completed lesson 2, please skip this step.
Step 2:Download Lesson 6 sample code. Unzip the downloaded file, you will see a folder called sg90car-lesson6B.
Step 3: Connect OSOYOO Basic Board for Arduino to PC with USB cable, Open Arduino IDE → click file → click Open → choose code “sg90car-lesson6B.ino” in sg90car-lesson6B folder, load the code into OSOYOO Basic Board for Arduino. (Notice: Remove the Bluetooth module and shut off your battery or unplug your power adapter when upload sketch code to OSOYOO Basic Board for Arduino.)
Step 4: Please change the default value 90 in line 19 as the FRONT value in lesson 1. If you align the wheel direction via the option 1 in Step 5, please skip this step.
#define FRONT 90 //degree when steering facing straight forward
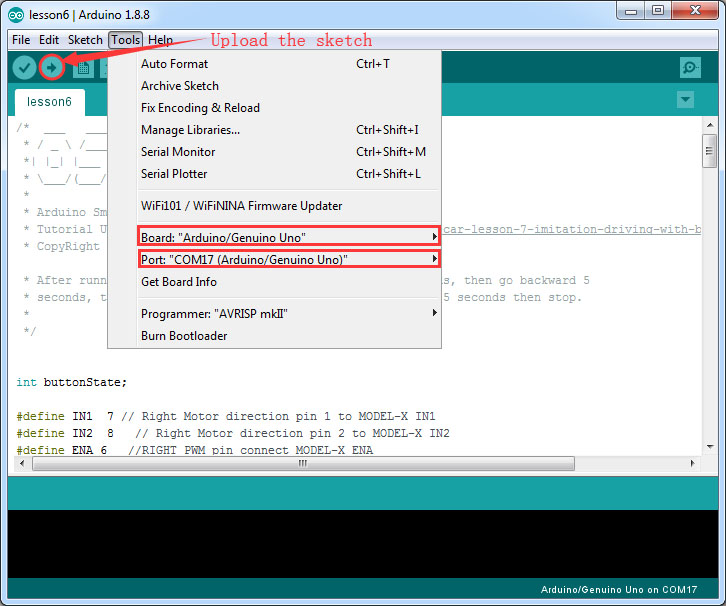
Step 5: Choose corresponding board/port for your project, upload the sketch to the board.
Step 6:Install APP into your mobile phone:
1) Install APP on Android device as following
In Google Play Store search APP name “OSOYOO imitation driving”, download the APP as following and install it in your smartphone
In Apple APP store search APP name “OSOYOO imitation driving”, download the APP as following and install it in your smartphone
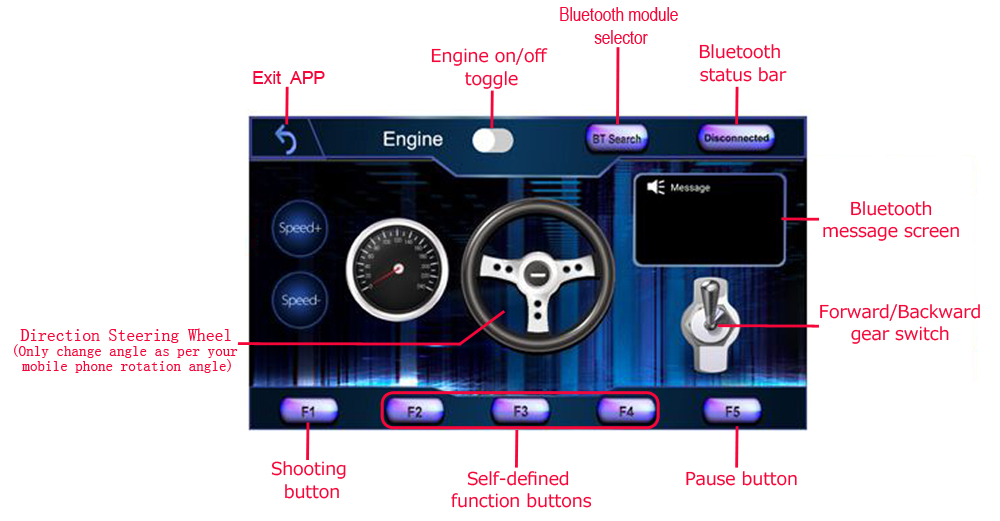
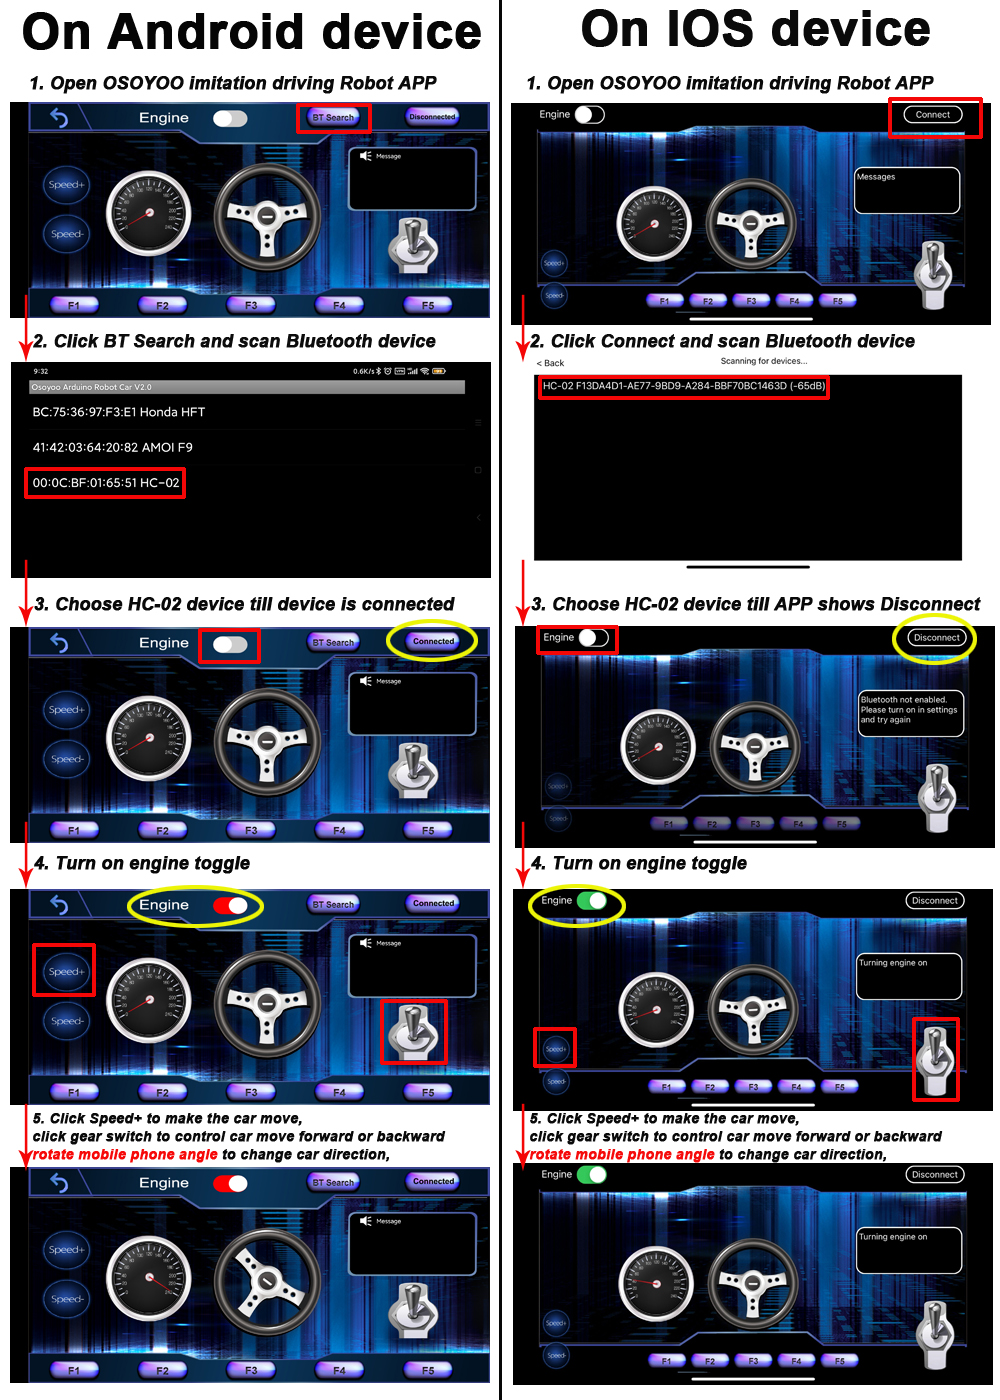
Explanation of APP UI (UI is different between Android and IOS)
Connect HC-02 Bluetooth in Android phone. There is a BT Search button in Android APP: When click this button, you will see a Bluetooth device list which has been paired with your APP. Select HC-02 device to connect the car. Once HC-02 is connected, Bluetooth Status will change from Disconnected to Connected. You can only control your car when Bluetooth is connected.
Connect HC-02 Bluetooth in iPhone/iPad, simply click Connect button, a HC-02 device will show up in a pop-up list. Click that HC-02 device will connect a Bluetooth module to your iPhone. Then the “Connect” button will change name to “Disconnect”.
Engine toggle : When Engine toggle is set to OFF (white), the car will stop and all buttons in the APP will be disabled. When Engine toggle is set to ON (red), the car will start to move. All other movement control buttons will activate.
Forward/Backward gear switch: This gear switch can control the car is moving ahead or reverse like real car gear.
F1,F2,F3,F4,F5 customized button. In this lesson, we only use F5 which pause the car movement. The difference between F5 and Engine OFF button is that Engine OFF button when touched, all other buttons will be disabled. You should toggle Engine button again to enable other button. On the other hand, when F5 is clicked, the car will stop, but all other buttons are still active. Even you do not touch any button just change your cell phone angle position (like you move the steering wheel), the car will move again.
Direction Steering Wheel : When you rotate your mobile phone angle, the steering wheel will change angle as per your mobile phone rotation angle. This will make your car change direction. For example, when the steering wheel makes clockwise rotation, the car will move to the left. Remember, the steering and Forward/Backward gear should work together same as you are driving a real car. For example, when you want to back your car to a right side packing lot, you need to set Gear to R position and rotate your steer to count-clockwise direction.
Speed+: Make the robot car speed up
Speed-: Make the robot car slow down
Connect APP to HC-02 Bluetooth Module
Connect with Android device:
If you use an Android device and have not paired a Bluetooth module with your cell phone, please pair the Bluetooth module first before open the APP. In your cell phone Setting→Bluetooth, find a Bluetooth device called HC02, pair it with password 1234. After Bluetooth HC02 device is paired, open the APP. Click BT Search Button to connect APP to HC02 device.
Connect with iOS device: If you use iOS device, simply open the APP, click Connect button, you will see a Bluetooth list, select the HC02 device.
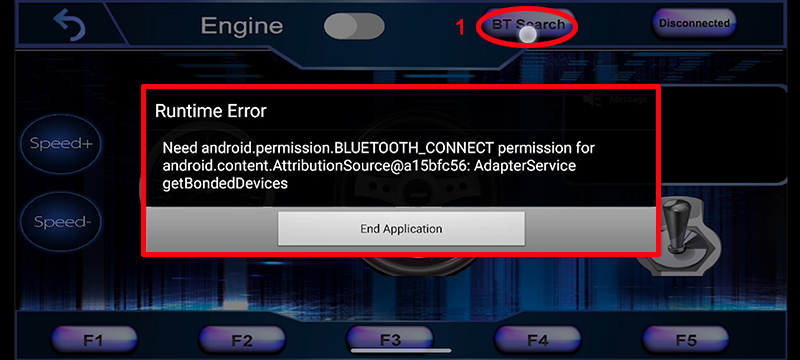
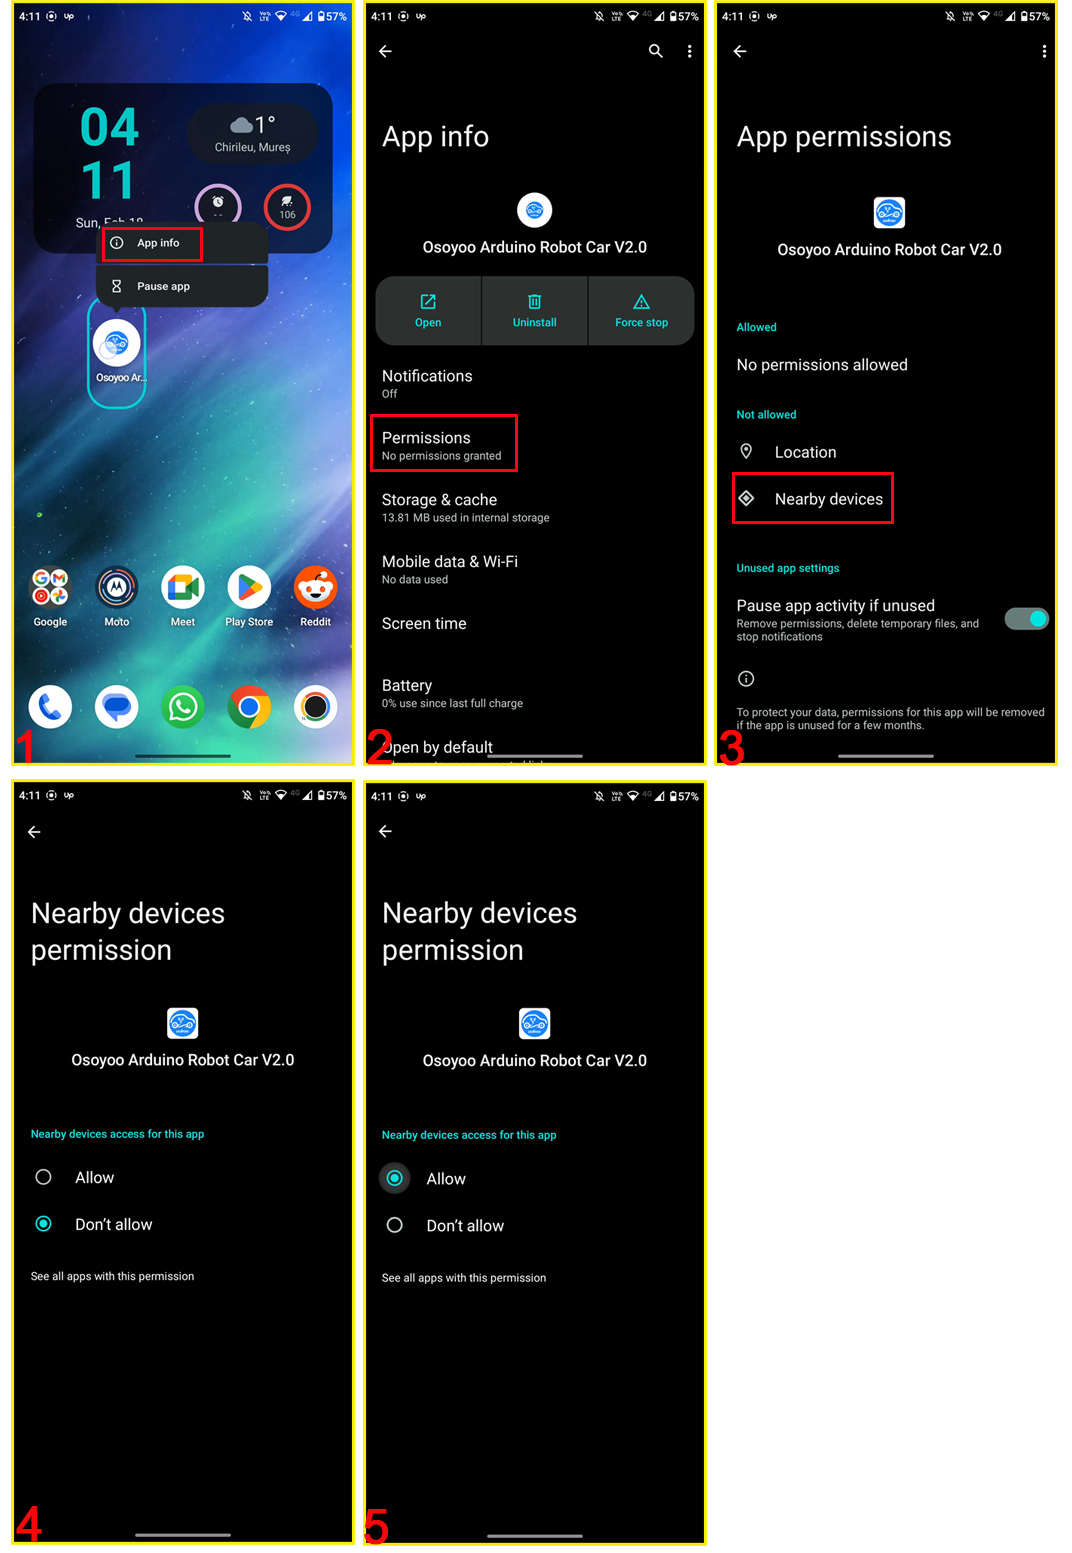
Note: For Android device, when you click BT search button and get the following error pop, Please follow the next steps: 1. long-press the APP inco, then click “APP info” 2. click “Permissions” 3.click “Nearby device”, then change the option as “Allow” (To learn more about settings, you can visit the video: https://osoyoo.com/picture/V2.1_Arduino_Robot_Car/Lesson7/APP.mp4)
Drive your Robot Car
Now you have installed your hardware and software for this lesson, let’s drive our car!
Step 1)Put your robot car onto the ground and turn on the battery switch.
Step 2)Go to your mobile phone →Setting →Bluetooth setting and search a Bluetooth device called HC-02, pair it with code 1234
Step 3)Open OSOYOO imitation driving Robot APP, Click BT Search button and find the Bluetooth you have paired
Step 4)Turn on Engine toggle, click Speed+ to make the robot speed up, as the robot car is very slow at first. When you rotate your mobile phone angle, your car will change direction.
Enjoy your driving!
Trouble Shooting:
We have a group of students, all our robot cars are using same bluetooth name “HC-02” which might conflict with each other in the same room. How to change the HC-02 name to other bluetooth name?
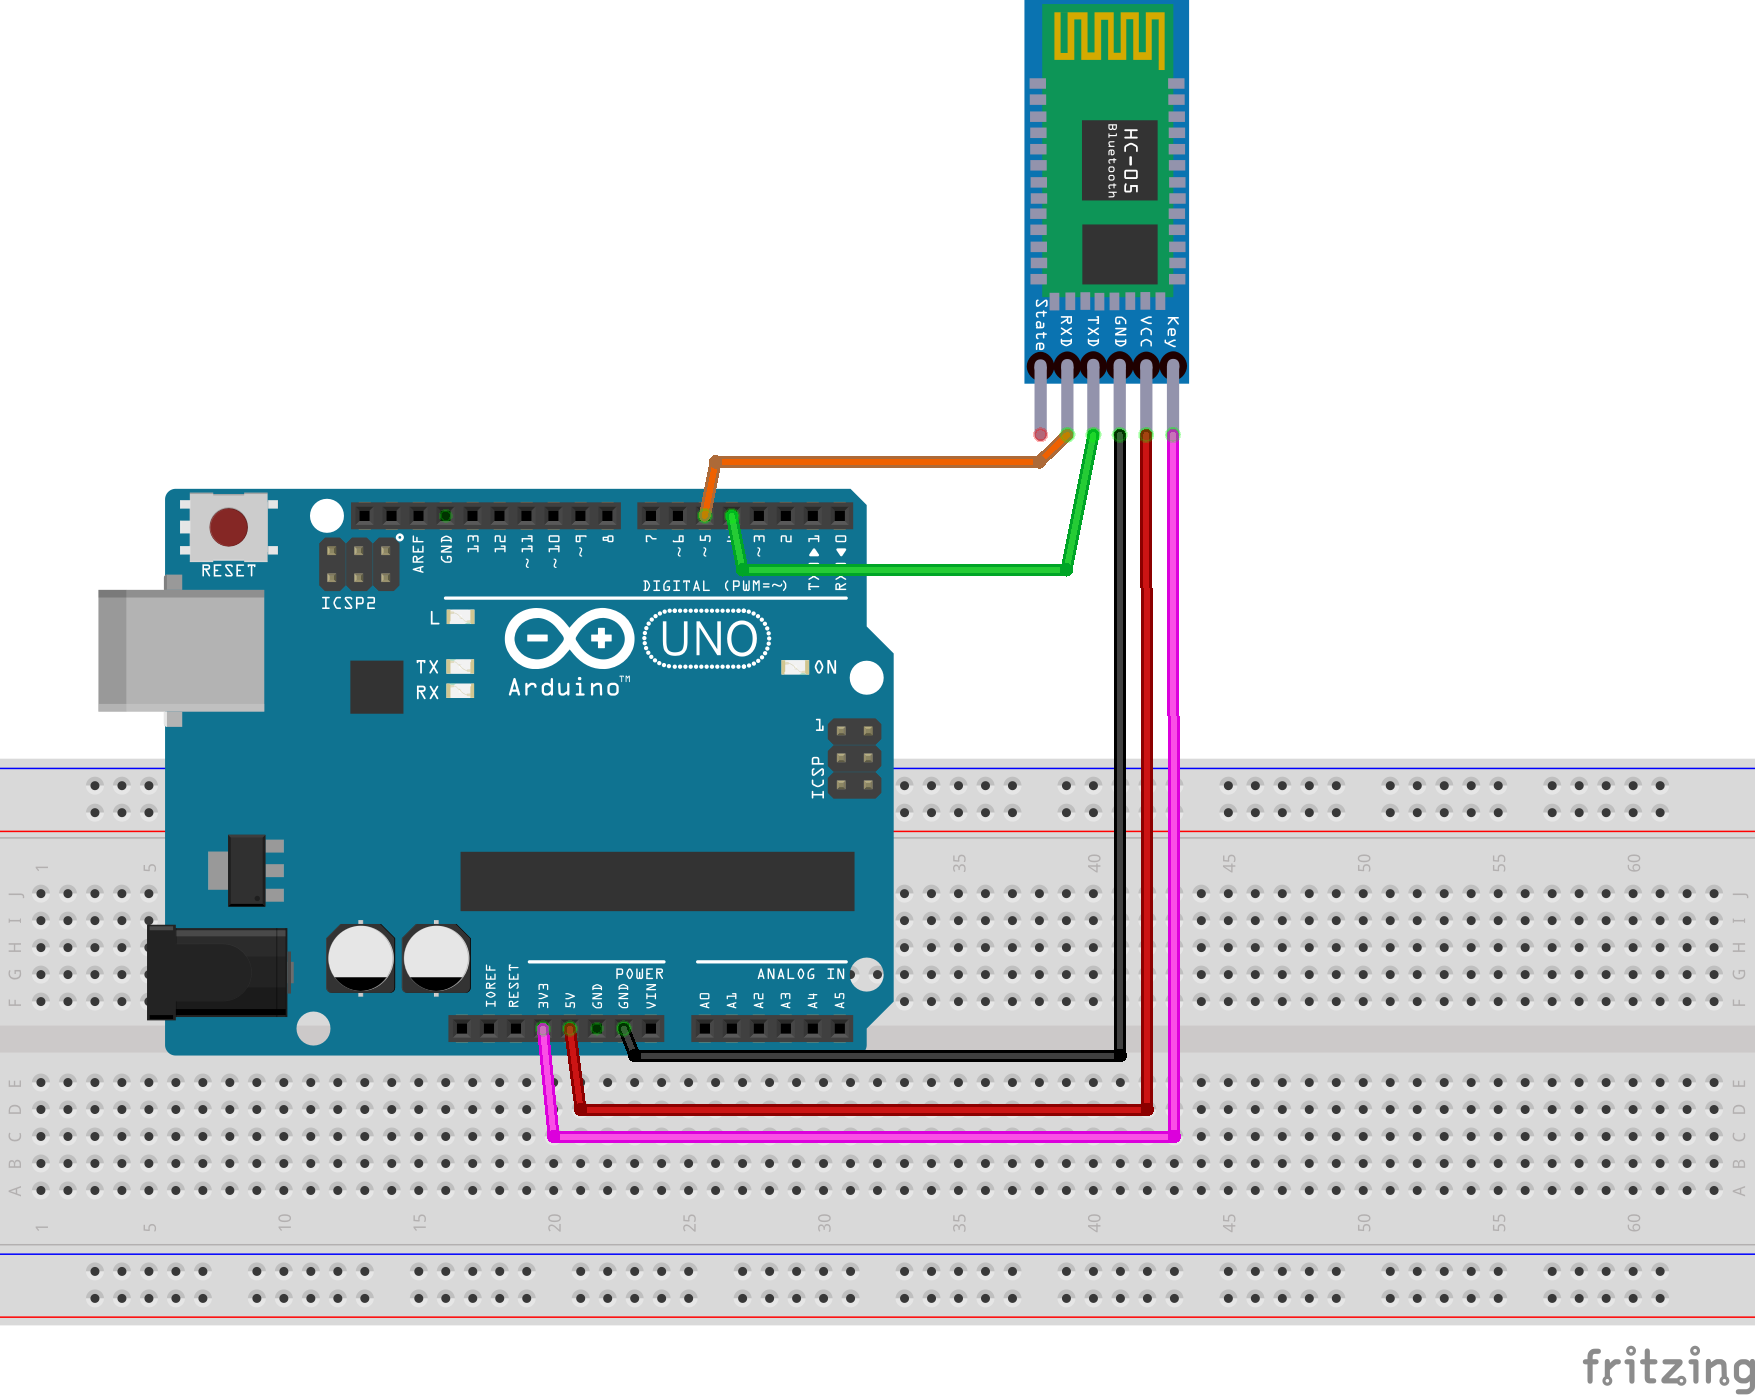
1)Wire Connection
HC-02 TX → Arduino D4 (SoftwareSerial RX)
HC-02 RX ← Arduino D5 (SoftwareSerial TX)
HC-02 VCC → 5V
HC-02 GND → GND
HC-02 KEY / EN / STATE (depending on your module) → HIGH (3.3V or 5V)
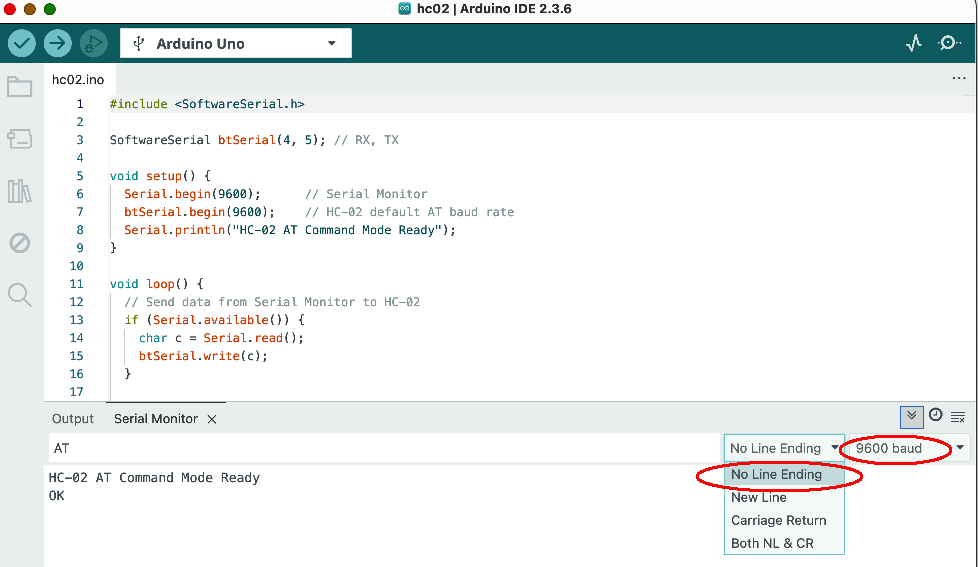
2)Download Arduino AT command sketch from following link: https://osoyoo.com/driver/2wd/hc02.zip
unzip above file , you will see a folder “hc02”, enter that folder and double click hc02.ino file to open it in Arduino IDE.
3)Test AT command in Serial Monitor
After you upload the hc02.ino code to Arduino, open your Arduino IDE Serial monitor, set baud rate to 9600, set line mode to No Line Ending as following:
To test the AT command, you can type AT in output field and press enter, now you should see OK in Serial monitor (see above picture). If you can’t see OK, please double check Step 1 to 3.
4)Now you can use AT command to change your HC-02 bluetooth module.
The format is AT+NAMEnewname
For example, if you want to change your HC-02 module name to osoyoo2025, then type following AT command in Serial monitor :
AT+NAMEosoyoo2025
after you press enter button, your Serial monitor will response:
OKsetname
This means your bluetooth module’s new name has been changed to osoyoo2025