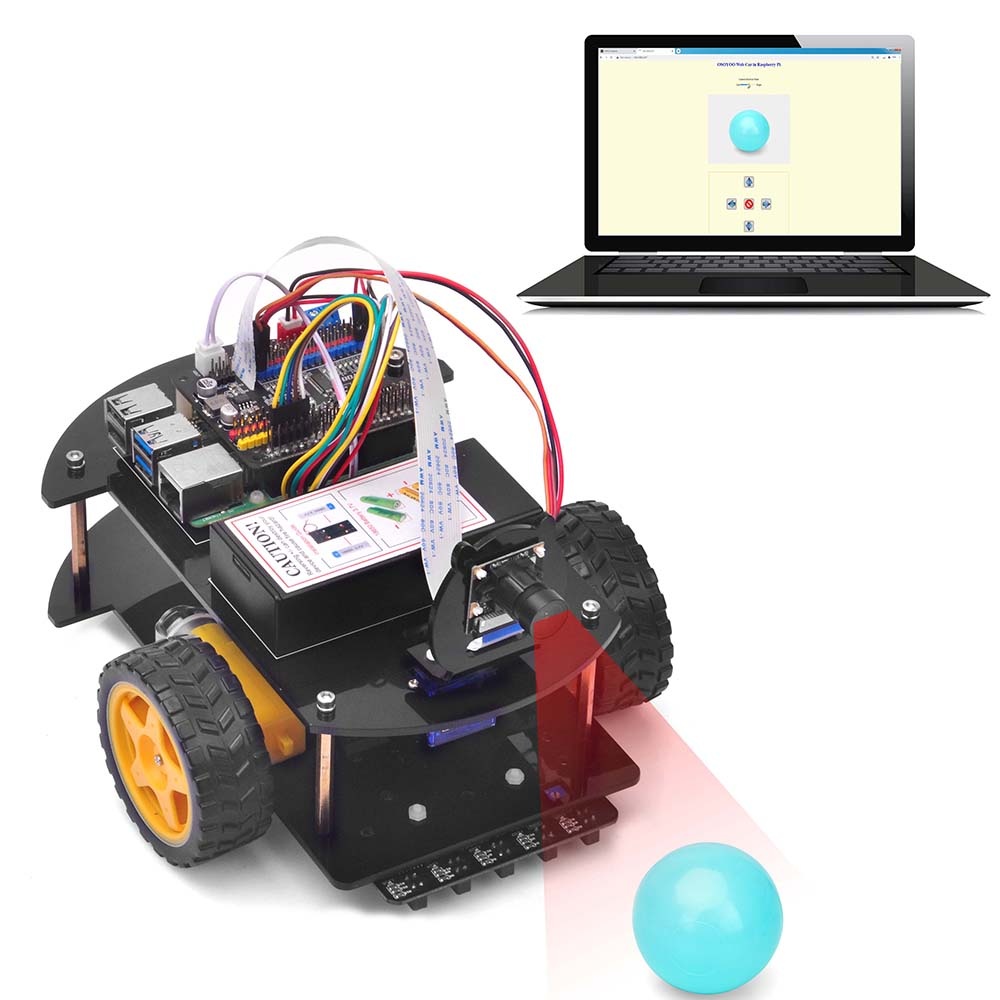
In this lesson, we will show you how to use Python3 Flask and M-Jpeg Streamer software to control a Raspberry Pi Robot Car through the Internet. You will monitor the car’s real-time movement through its eye (front camera).
Step 1: You must complete Lesson 1 basic framework. If You have completed lesson 3 before, please remove the Ultrasonic sensor mount holder from servo motor and wires from Ultrasonic sensor, then continue on with this lesson
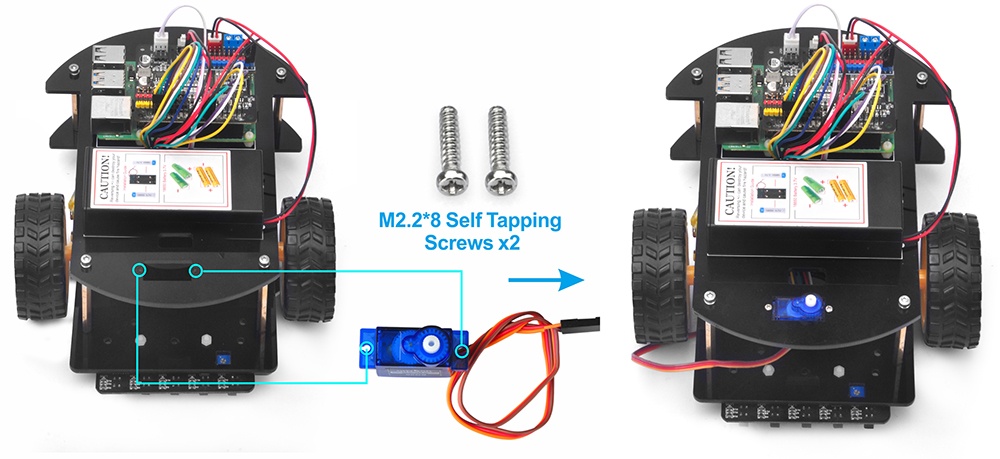
Step 2: Install servo motor at the front of upper car chassis with 2pcs M2.2*8 Self Tapping Screws
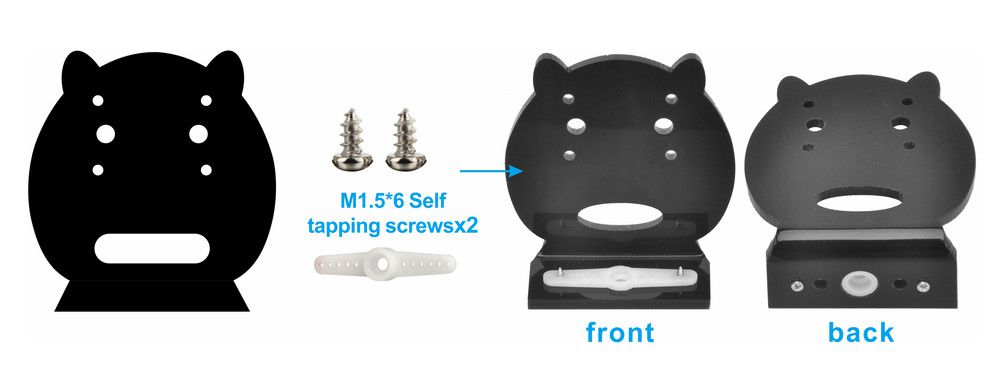
Step 3: Choose slotted bracket in servo motor to cross Camera holder from top to bottom and fix blade with M1.5*6 Self Tapping Screws
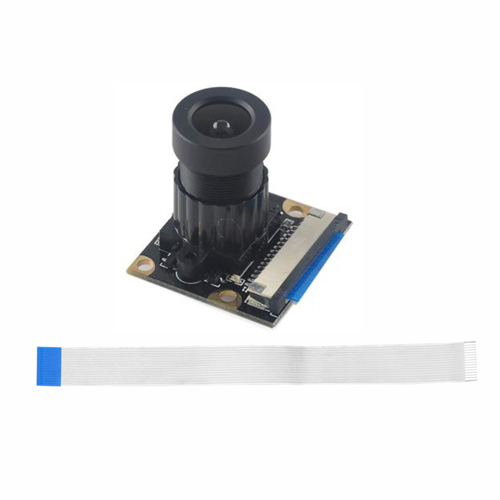
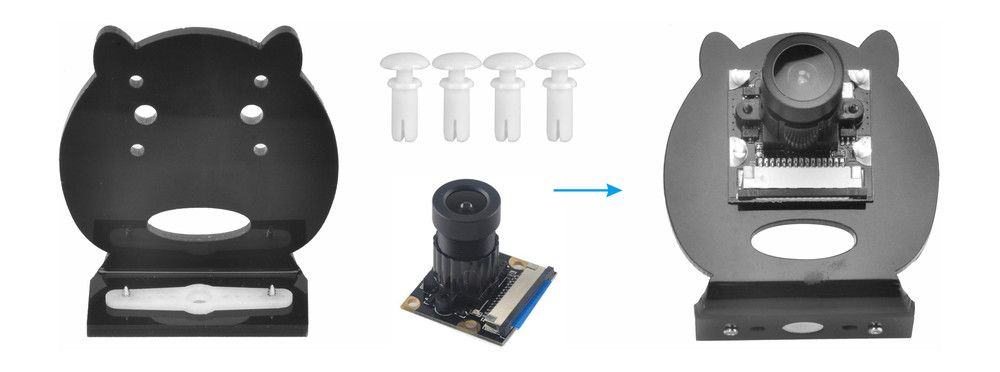
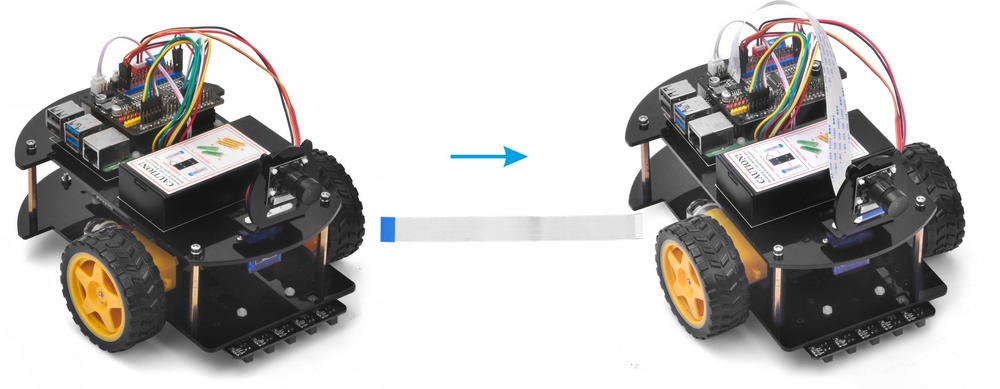
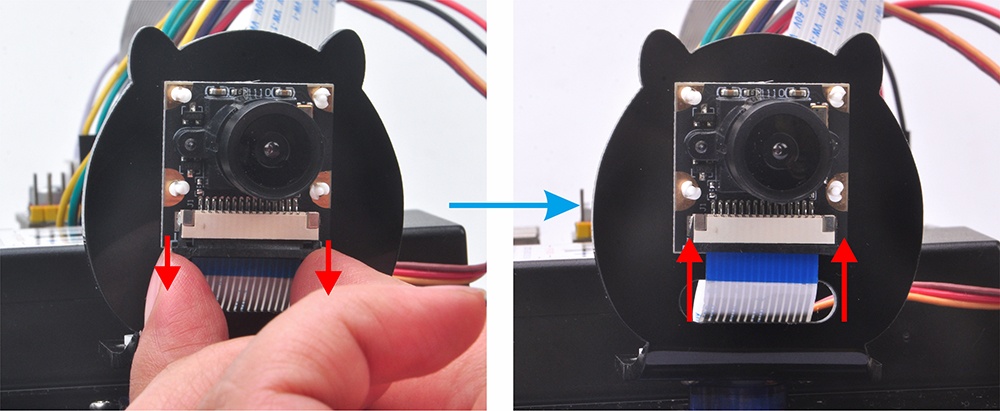
Step 4: Install CSI camera to holder with 4pcs M2 push pin rivets
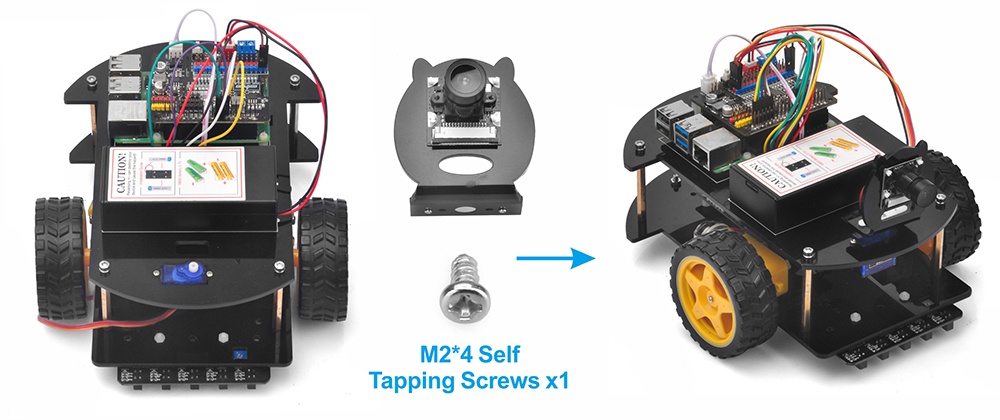
Step 5: Install Camera holder on servo motor with 1pc M2*4 Self Tapping Screws
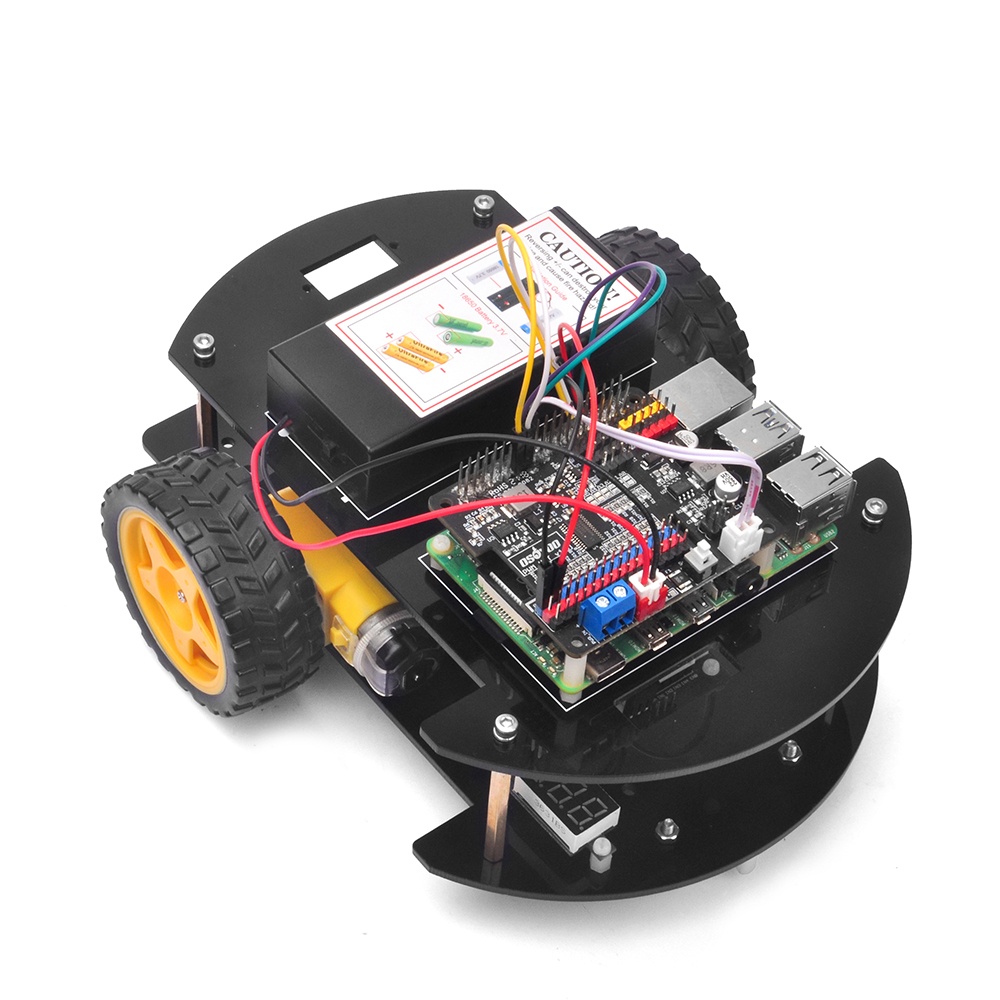
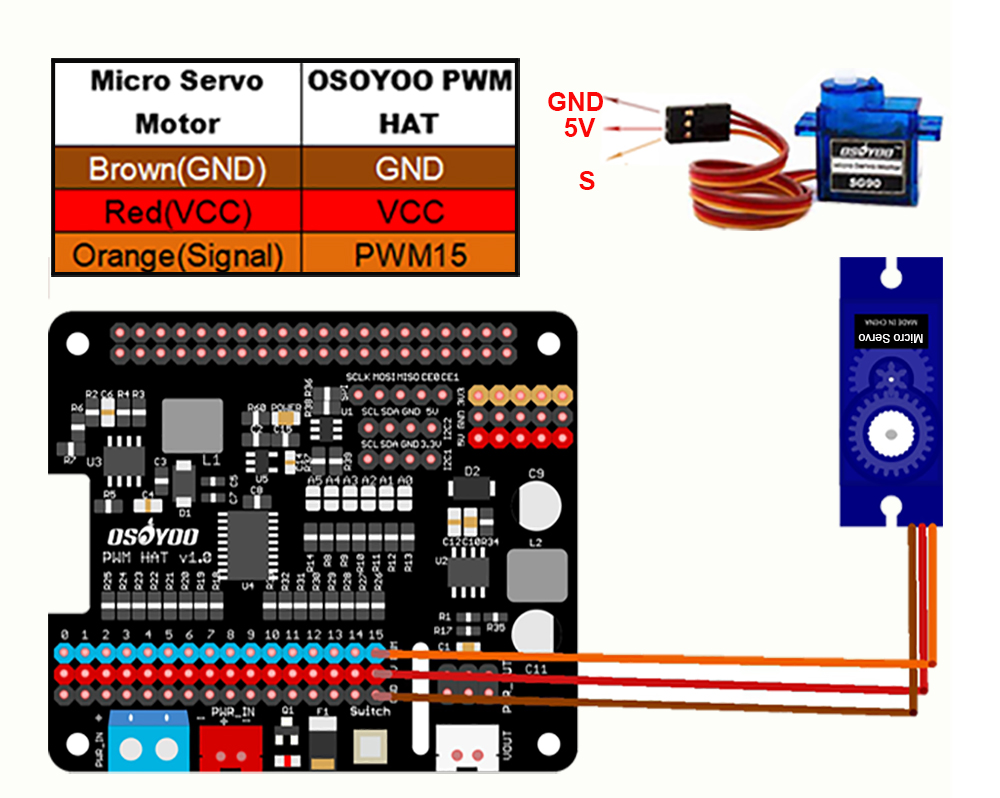
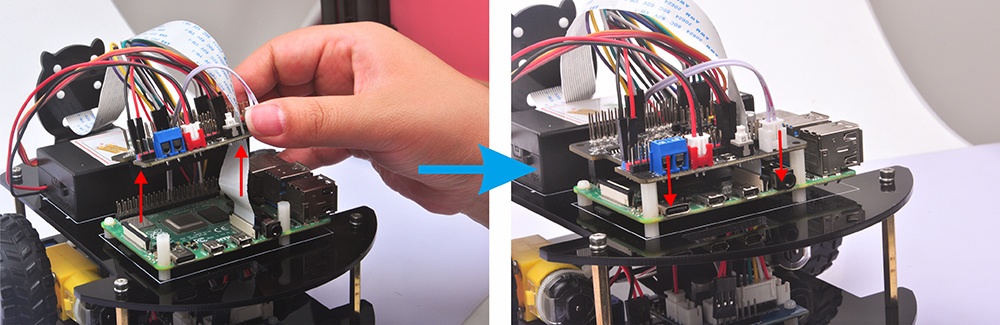
Step 1) Servo Must be installed and connected PWM 15 port
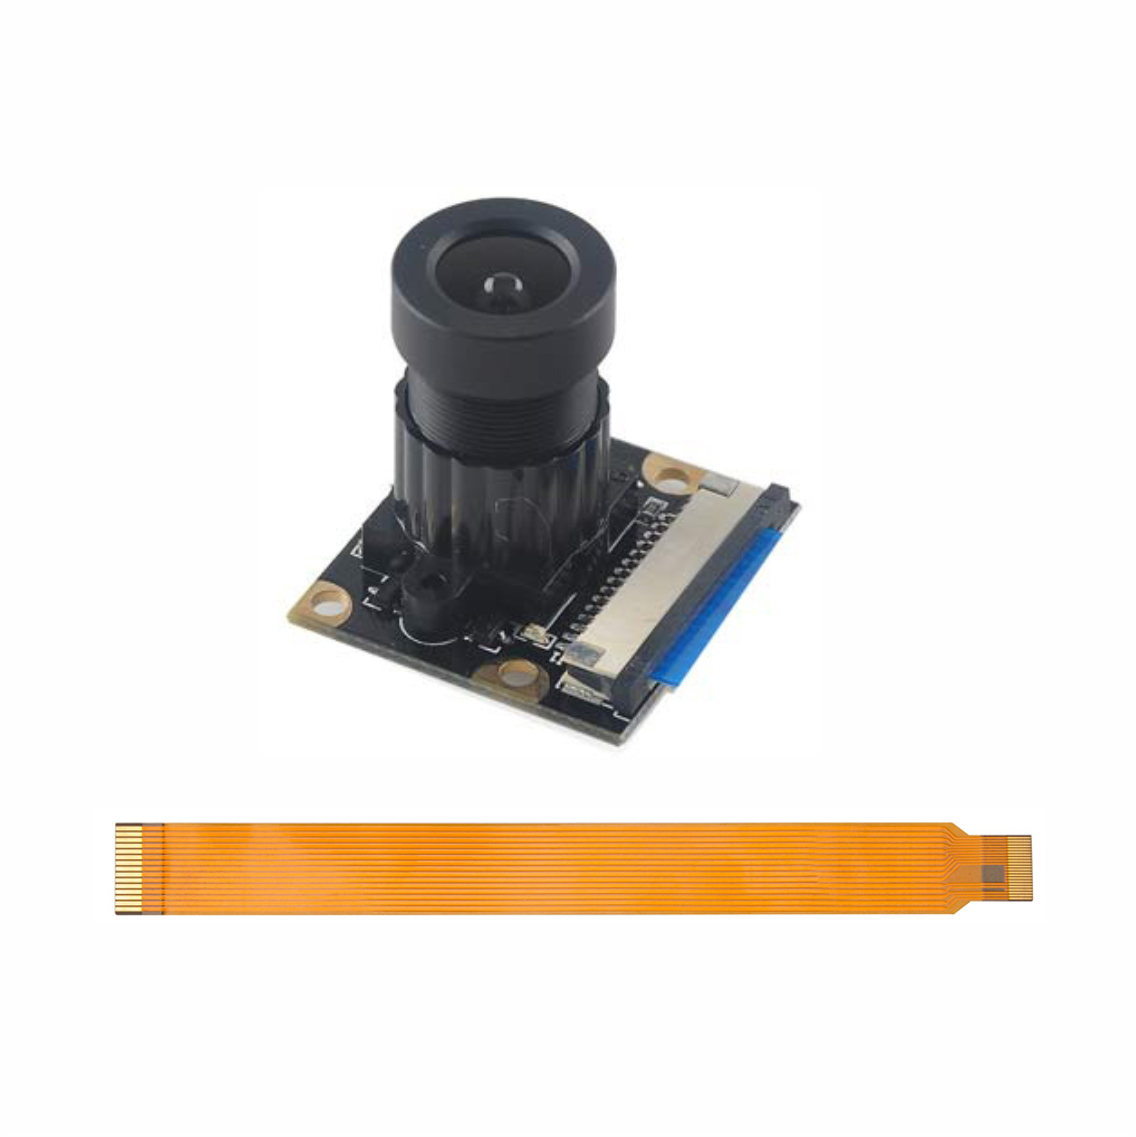
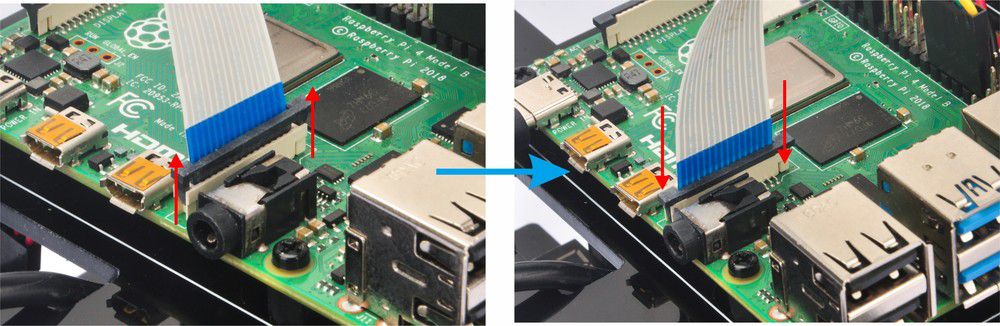
Step 2) Connect CSI camera to CSI Slot of Raspberry Pi with CSI ribbon cable (Please pay attention to the connections of the cable before you install it.)
Make sure you have installed rpi.gpio, adafruit-pca9685 library and enable I2C in lesson 1, and power on the robot car.
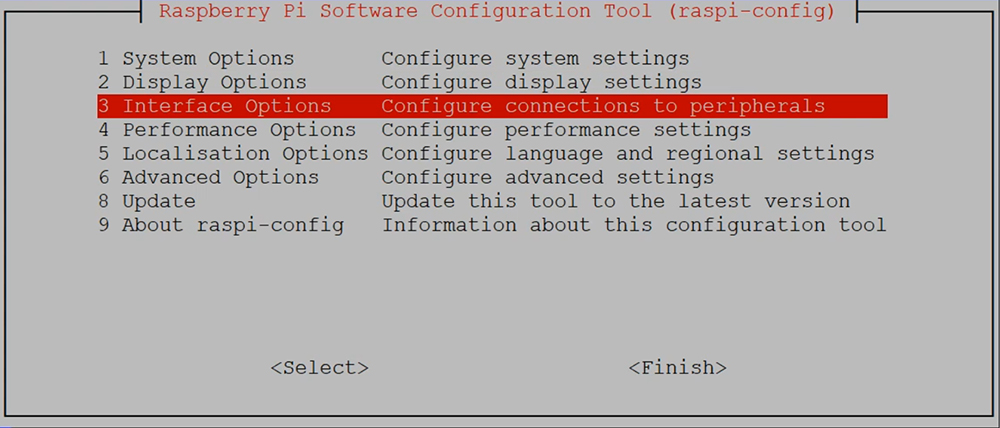
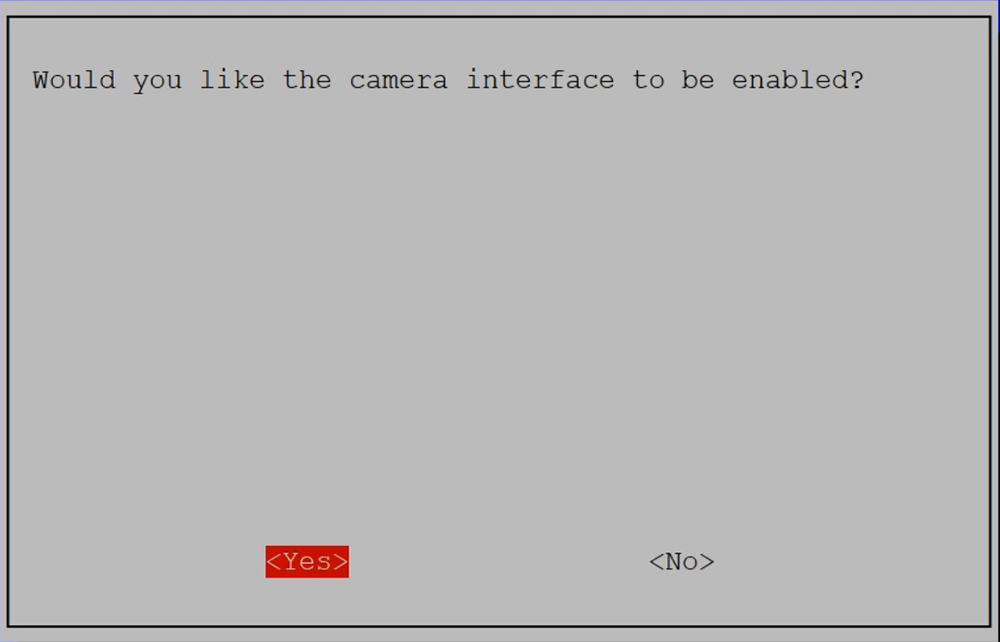
Step 1: Please enable Camera in Raspberry Pi by typing following command (Note: If you burn BOOKWORM and Trixie OS, you needn’t enable Camera)
sudo raspi-config
Then select → Interfacing Options→ Camera→ Yes→ Ok→ Finish (Please reboot the Raspberry Pi according to the notice.)
Step 2: Type following command to download mjpeg-streamer software :
wget https://osoyoo.com/driver/picar/camera.sh
Step 3: Install Osoyoo Camera Stream Software, this is an one-time installation task, you only need to install the software once by typing the following command:
bash camera.sh
After running above commands, Osoyoo Camera Stream software is installed in your Raspberry Pi. So Simple!
NOTE: Camera Stream Software and bash camera.sh only need install and run ONCE! So if you want to run camera stream in future, you just follow next step (STEP 4) and execute python startcam.py file.
Step 4: Start After you have installed camera server, you can start the Camera Server by running following command in your Pi terminal:
python startcam.py
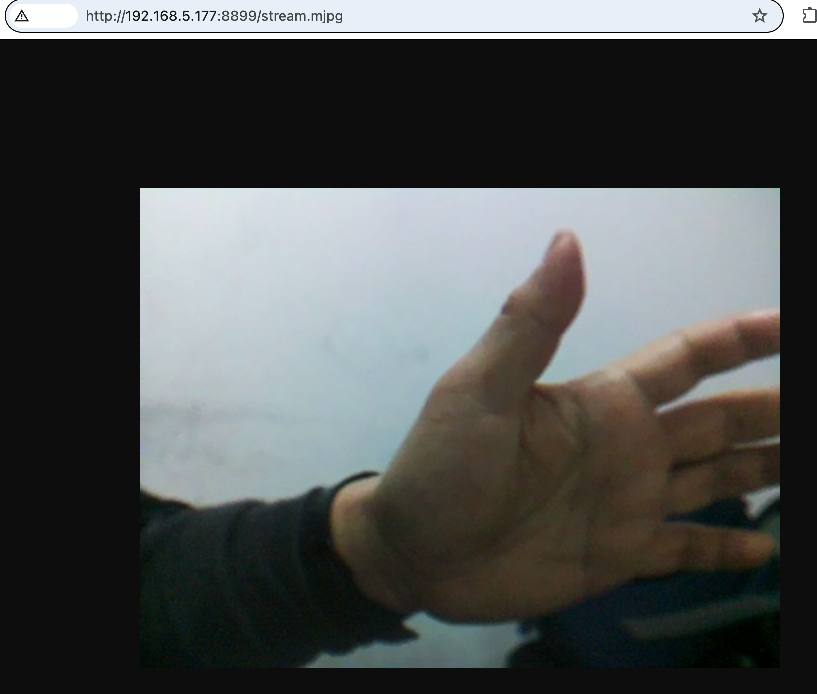
Step 5: Now you can use your browser to test the surveillance video. Now please visit http://your_raspberry_pi_ip:8899/stream.mjpg (in my case http://192.168.68.227:8899/stream.mjpg), you will see the video surveillance.
These message means your video server is running at port 8899 in your Pi.
Now we have installed camera server in Raspberry Pi. Next is to run a Server in robot to get control signal from remote device. We have two methods:
Method 1: Use browser to control a Raspberry Pi Robot Car through the Internet
Step 1: Open a new terminal window and run the following code to install the OSOYOO web camera controlled robot car software
wget https://osoyoo.com/driver/picar/picar4.sh
Step 2: type the following command:
bash picar4.sh
After running above commands, you will automatically create a directory called osoyoowebcar, the structure is as follows:
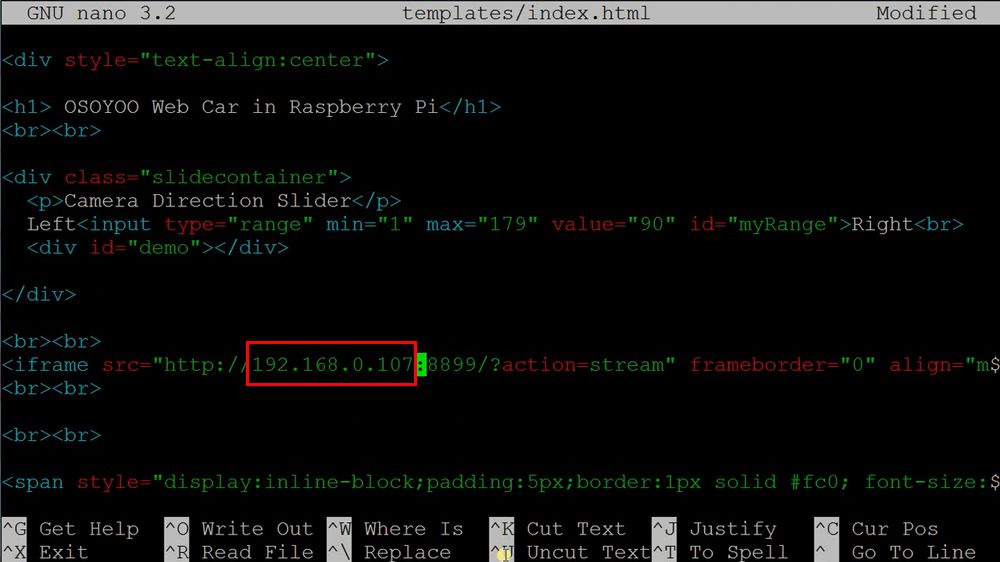
Step 3: Then type the following command to edit the file
nano ~/piwebcar/templates/index.html
Step 4: Please replace 10.0.0.23 with your pi’s IP address, and click “Ctrl“+”X” then “Y” to save the file and then click “enter” to exit the file
Step 5: put the car on the ground and run the code by typing the following command :
sudo python ~/piwebcar/webcar.py
Step 6: In your PC or cell phone which is the same Wi-Fi network of your Raspberry Pi, open the browser and visit http://your_RaspberryPi_ip_address.
The arrows buttons are direction control keys, the red circle button in the middle is the STOP key. There are four speed control buttons in the bottom:
0 key means the slowest speed
— key means the 2nd slow speed
== key means regular speed
++ key means fastest speed
In the top of the page, there is a Camera Direction Slider, you can move the slider in order to rotate the servo and change the camera orientation.
Method 2: Use APP to control a Raspberry Pi Robot Car through the Internet
Step 1: Open a new terminal window and run the udp control code in lesson 4 .
If you haven’t download lesson 4 code, you can download the code by following command:
Step 2: Type the following command to run the sample code :
python picar-udp-control4.py
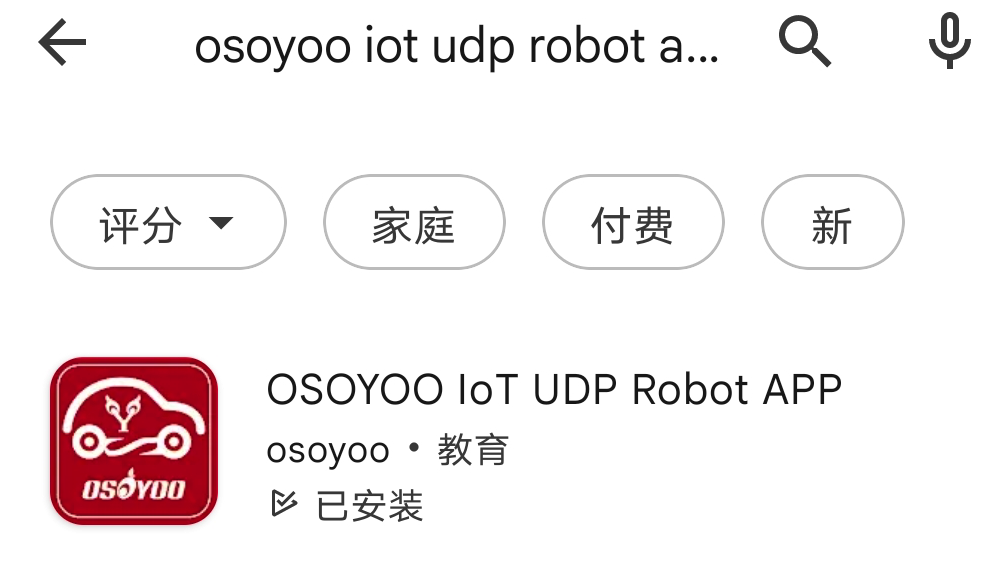
Step 3) Download OSOYOO Wi-Fi UDP Robot Car control APP, (if you have downloaded this APP in lesson 4, please skip this step and go to Step 4).
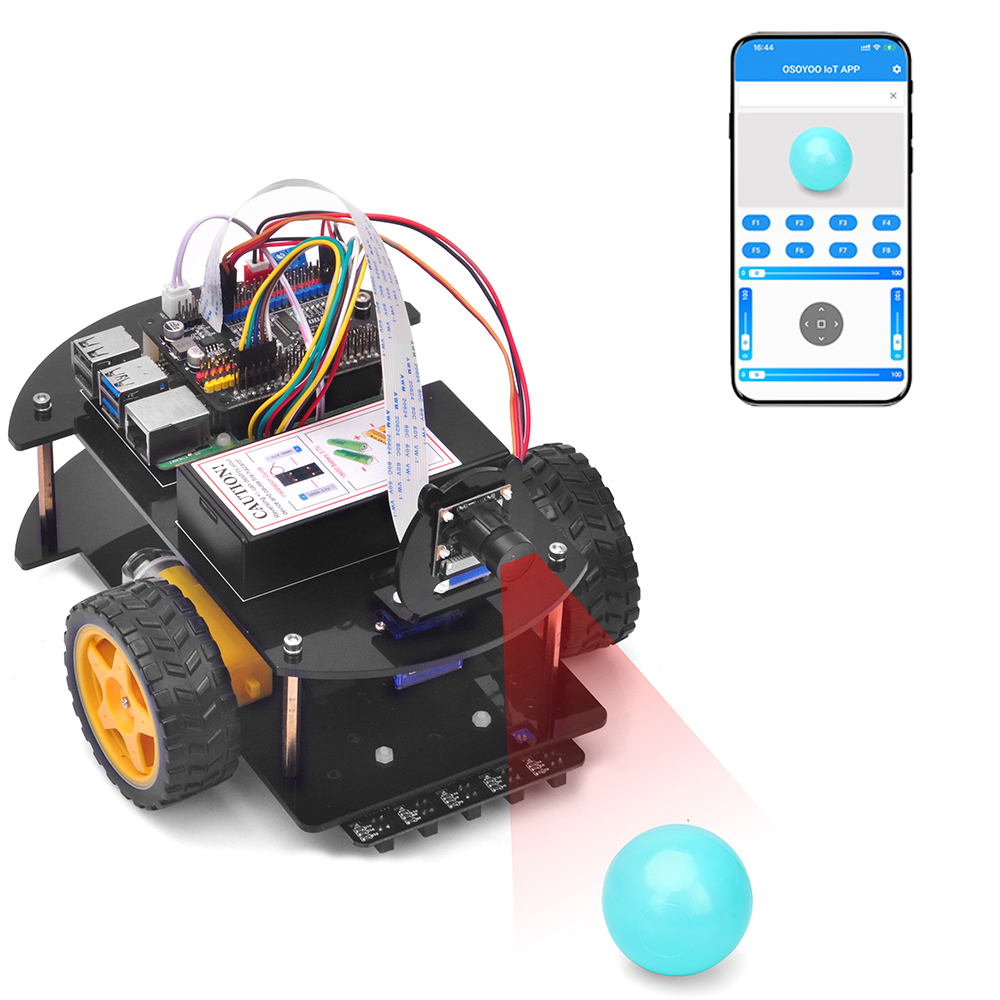
In Google Play or Apple Store, please search keywords “OSOYOO IoT UDP Robot APP”, you will find a red icon APP as following (Note: If you can not find this APP in Google Play, you can directly download the APP from following link: https://osoyoo.com/driver/udp-app.apk):
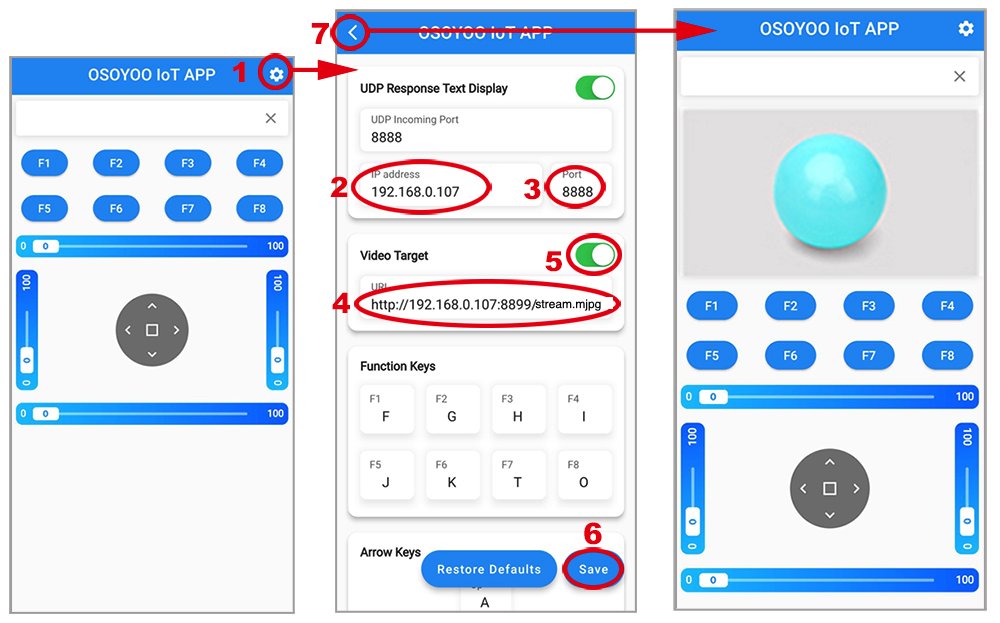
Step 4) Connect your phone with the same router Wi-Fi SSID of Raspberry Pi use. Open the APP, click “setting icon(1)” to enter “setting UI”, enter IP address to your Raspberry Pi IP address and Port to 8888, enter http://your_raspberry_pi_ip:8899/stream.mjpg to video Target, then turn Video Target switch to green, then click save, then click “back icon(7)” to back control UI as following:
Step 5) Now, put the car on the ground, and you can click the < > ^ v direction keys to make the car move. Use || pause key to stop the car movement.
Note: F1~F8, and the sliders are unavailable in this lesson.