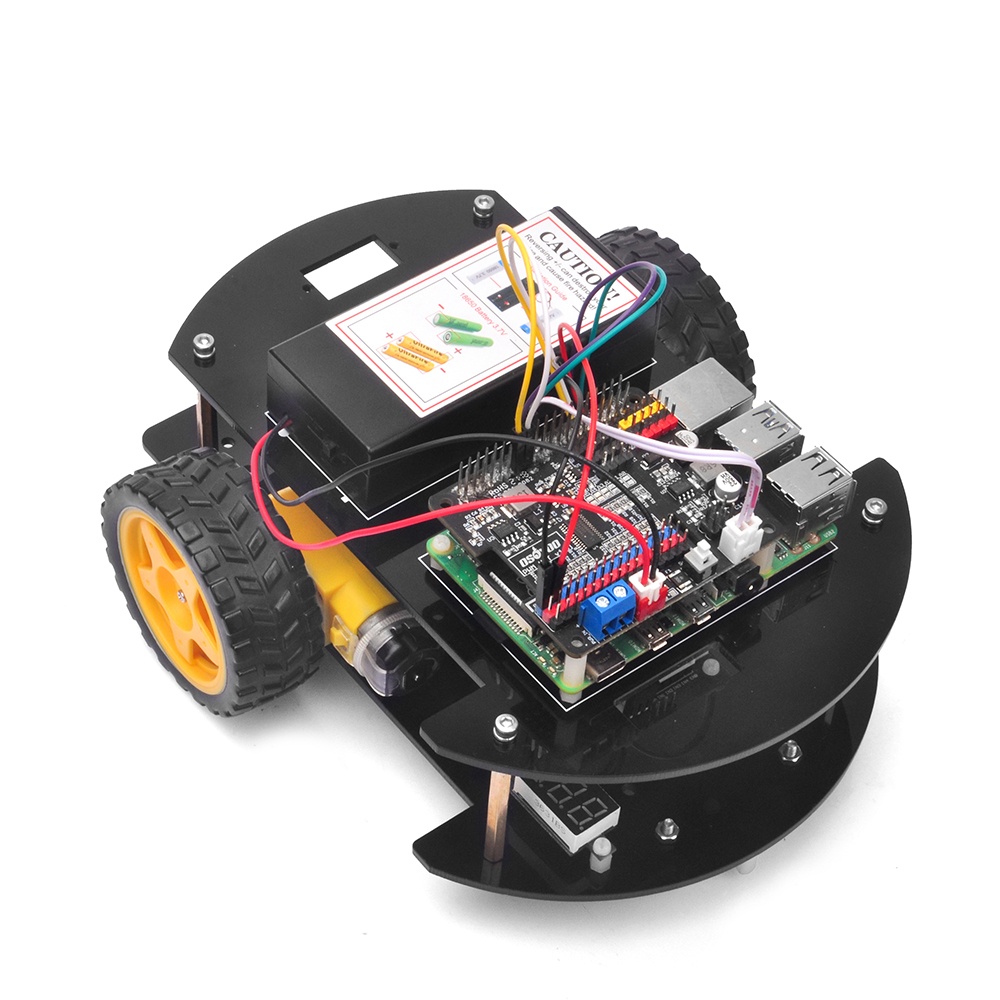
Welcome to the first lesson of OSOYOO Robot Car for Raspberry Pi!
In this lesson, we will introduce how to install the framework of the OSOYOO Robot Car for Raspberry Pi firstly, then we will simply tell you how to install Raspberry Pi OS for the Raspberry Pi and how to use console to control Raspberry Pi. We’ll use OSOYOO Robot Car for Raspberry Pi to do some simple movements.
If you have passed the test movement of this lesson, it means Raspberry Pi, motors, battery, model X board, OSOYOO PWM HAT and wire connections between these parts are all functioning well, and you can move to other sample lessons
All lessons are based on the framework of this lesson. Please follow this lesson carefully.
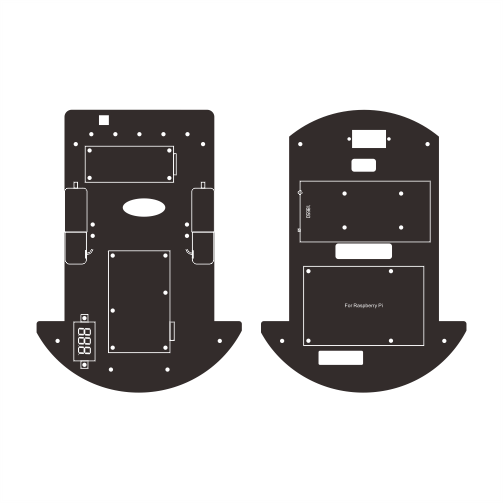
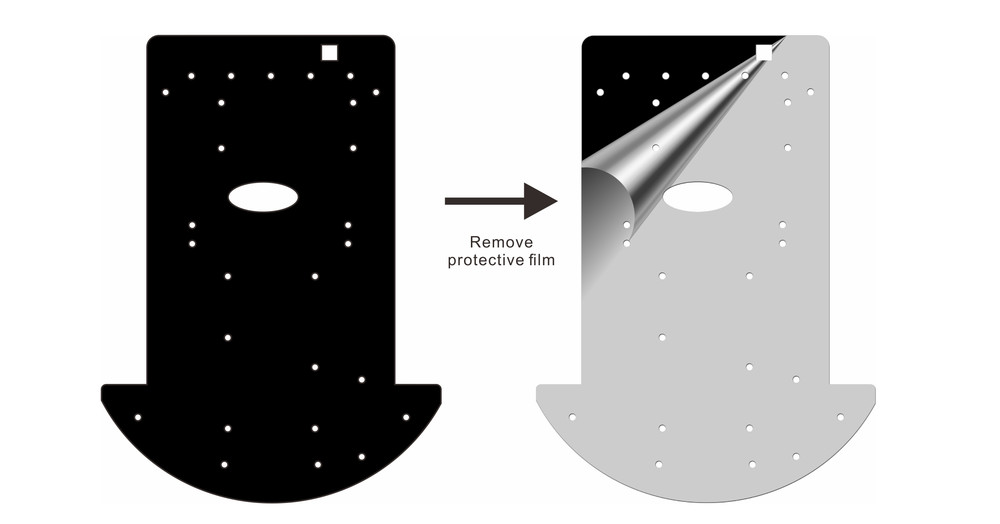
1) Remove the protective film on upper and lower car chassis (Each car chassis has one protective film).
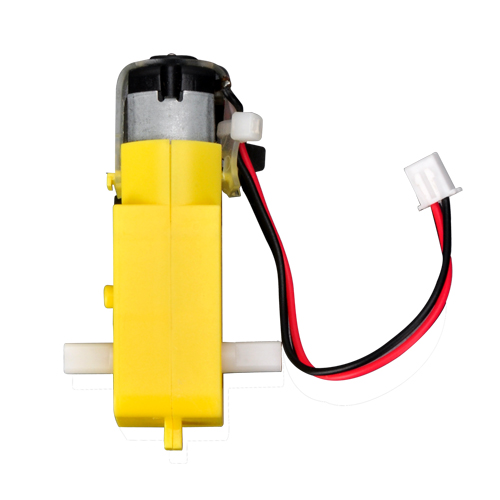
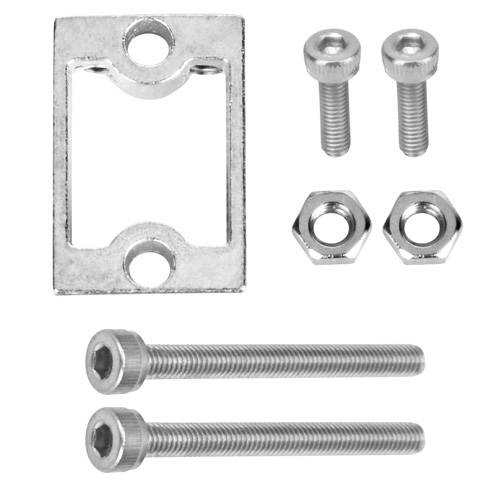
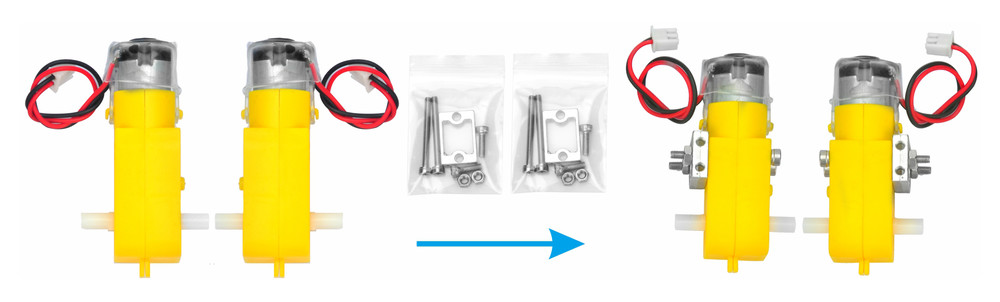
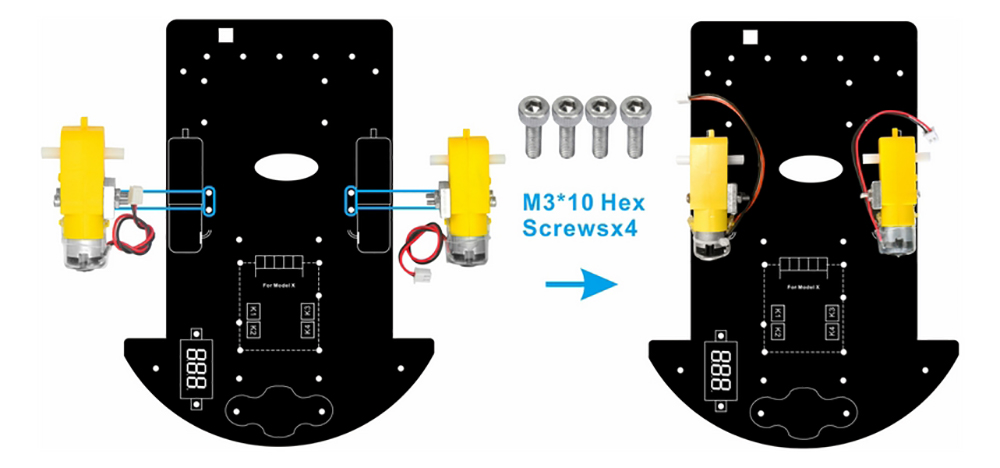
2) Install 2 motors with Metal Motor Holders as follows.
3) Install 2 motors on lower car chassis with screw M3*10. (Screws in metal motor holder package. Please add M3 washers between screws and chassis if the screws come off easily.)
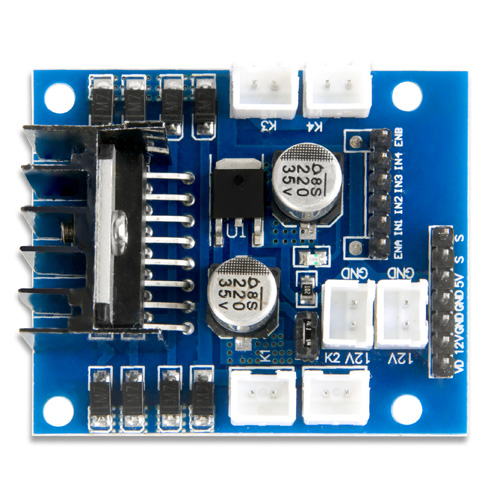
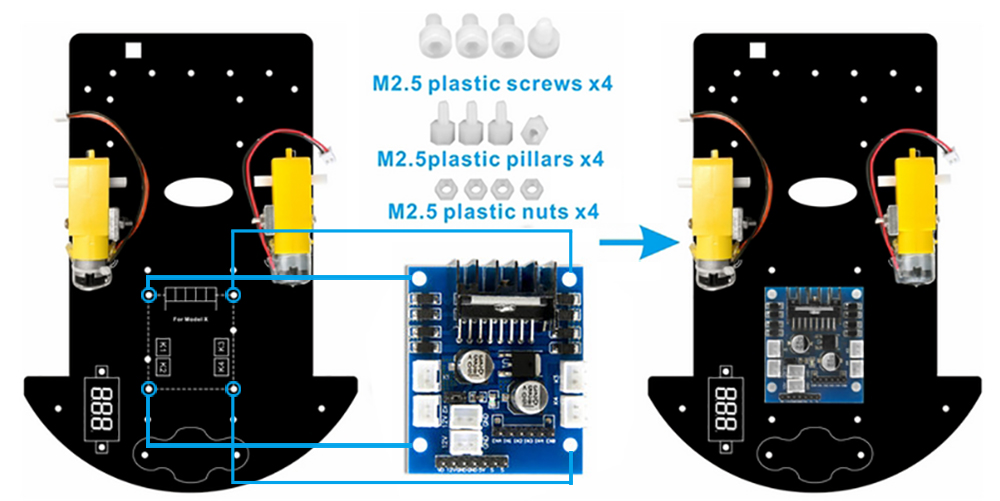
4) Install OSOYOO MODEL X motor driver module to car lower chassis with 4pcs M2.5 plastic screws, plastic pillars and plastic nuts. (Please make sure you install the OSOYOO MODEL X motor driver module in correct direction.)
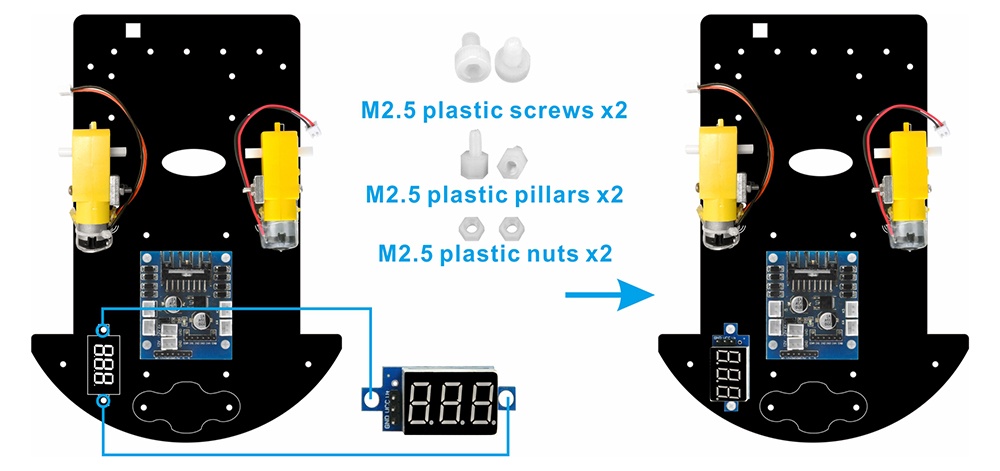
5) Install voltage meter on lower car chassis with 2pcs M2.5 plastic screws, plastic pillars and plastic nuts.
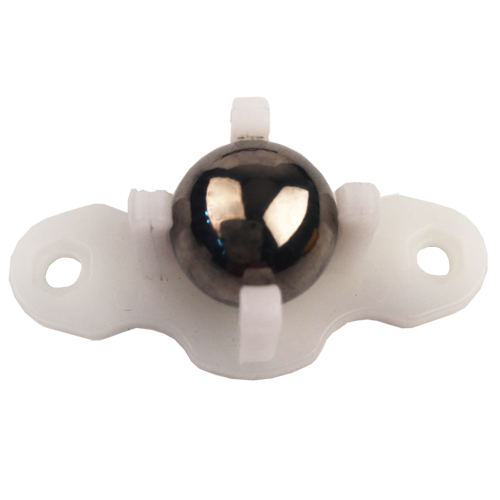
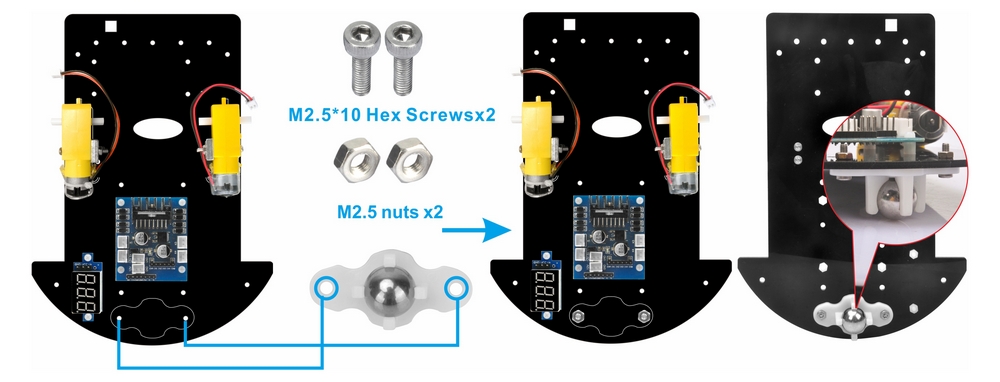
6) Install universal wheel under the lower car chassis with 2pcs M3x10 hex screws and M3 nuts.
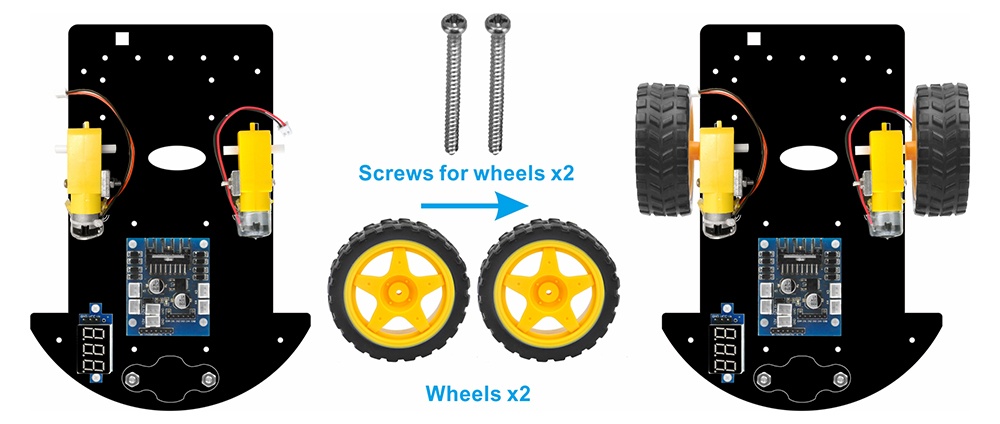
7) Install 2 wheels onto the motors (If you find the wheels install too tightly to move, you can remove the screws on the wheels)
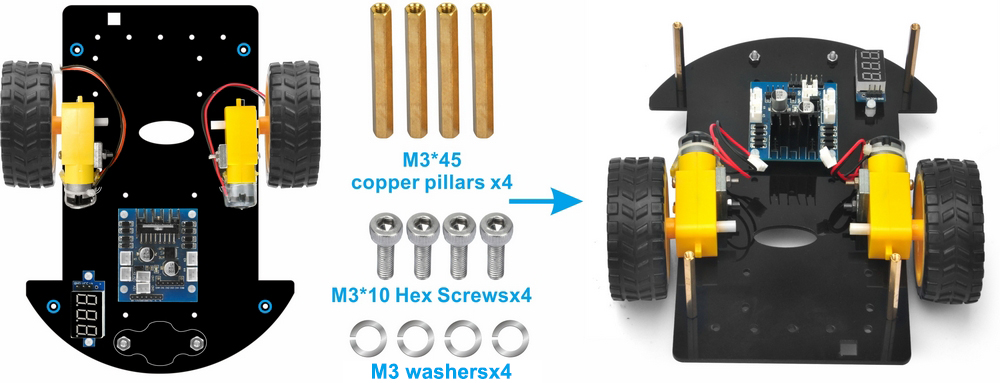
8) Install 4pcs copper pillars on low car chassis with 4pcs M3x10 hex screws.(Please add M3 washes between screws and chassis if the screws come off easily.)
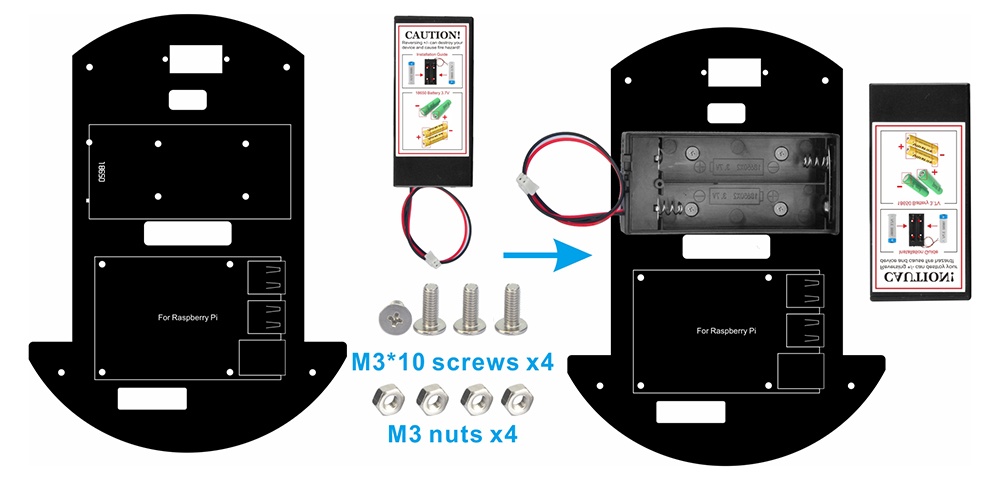
9) Install 18650 battery box on upper car chassis with 4pcs M3x10 screws and M3 nuts.
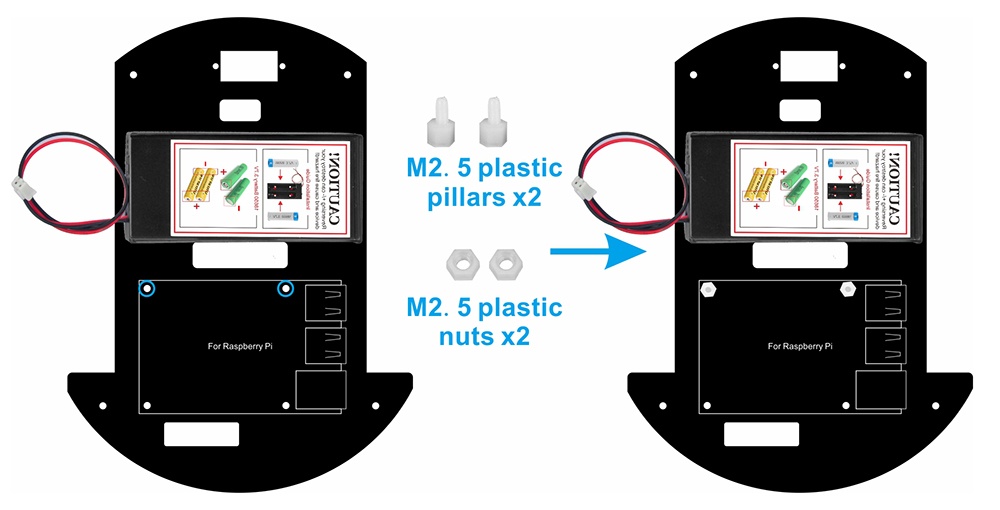
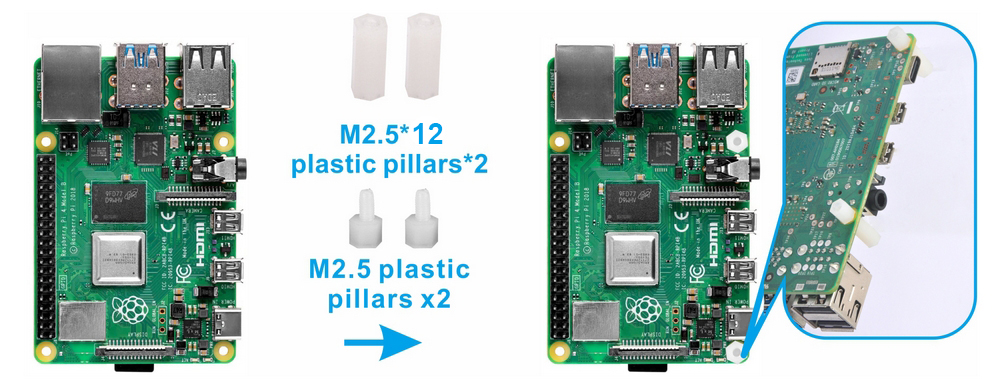
10) Fix 2pcs M2.5 plastic pillars on upper chassis as follows:
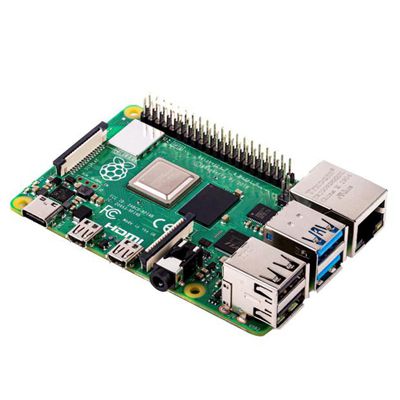
11) Use M2.5 plastic pillar cross Raspberry Pi and M2.5*12 plastic pillar from bottom to top as follows
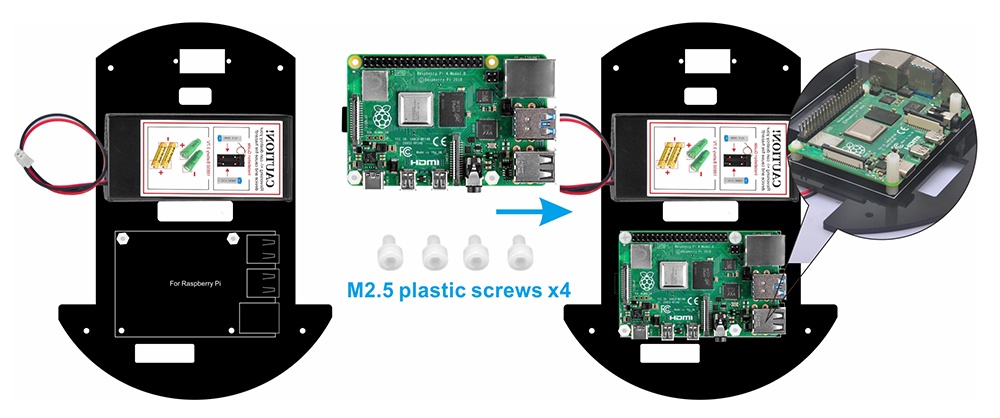
12) Install 2pcs M2.5 plastic screws under the chassis and 2pcs M2.5 plastic screws on Raspberry Pi
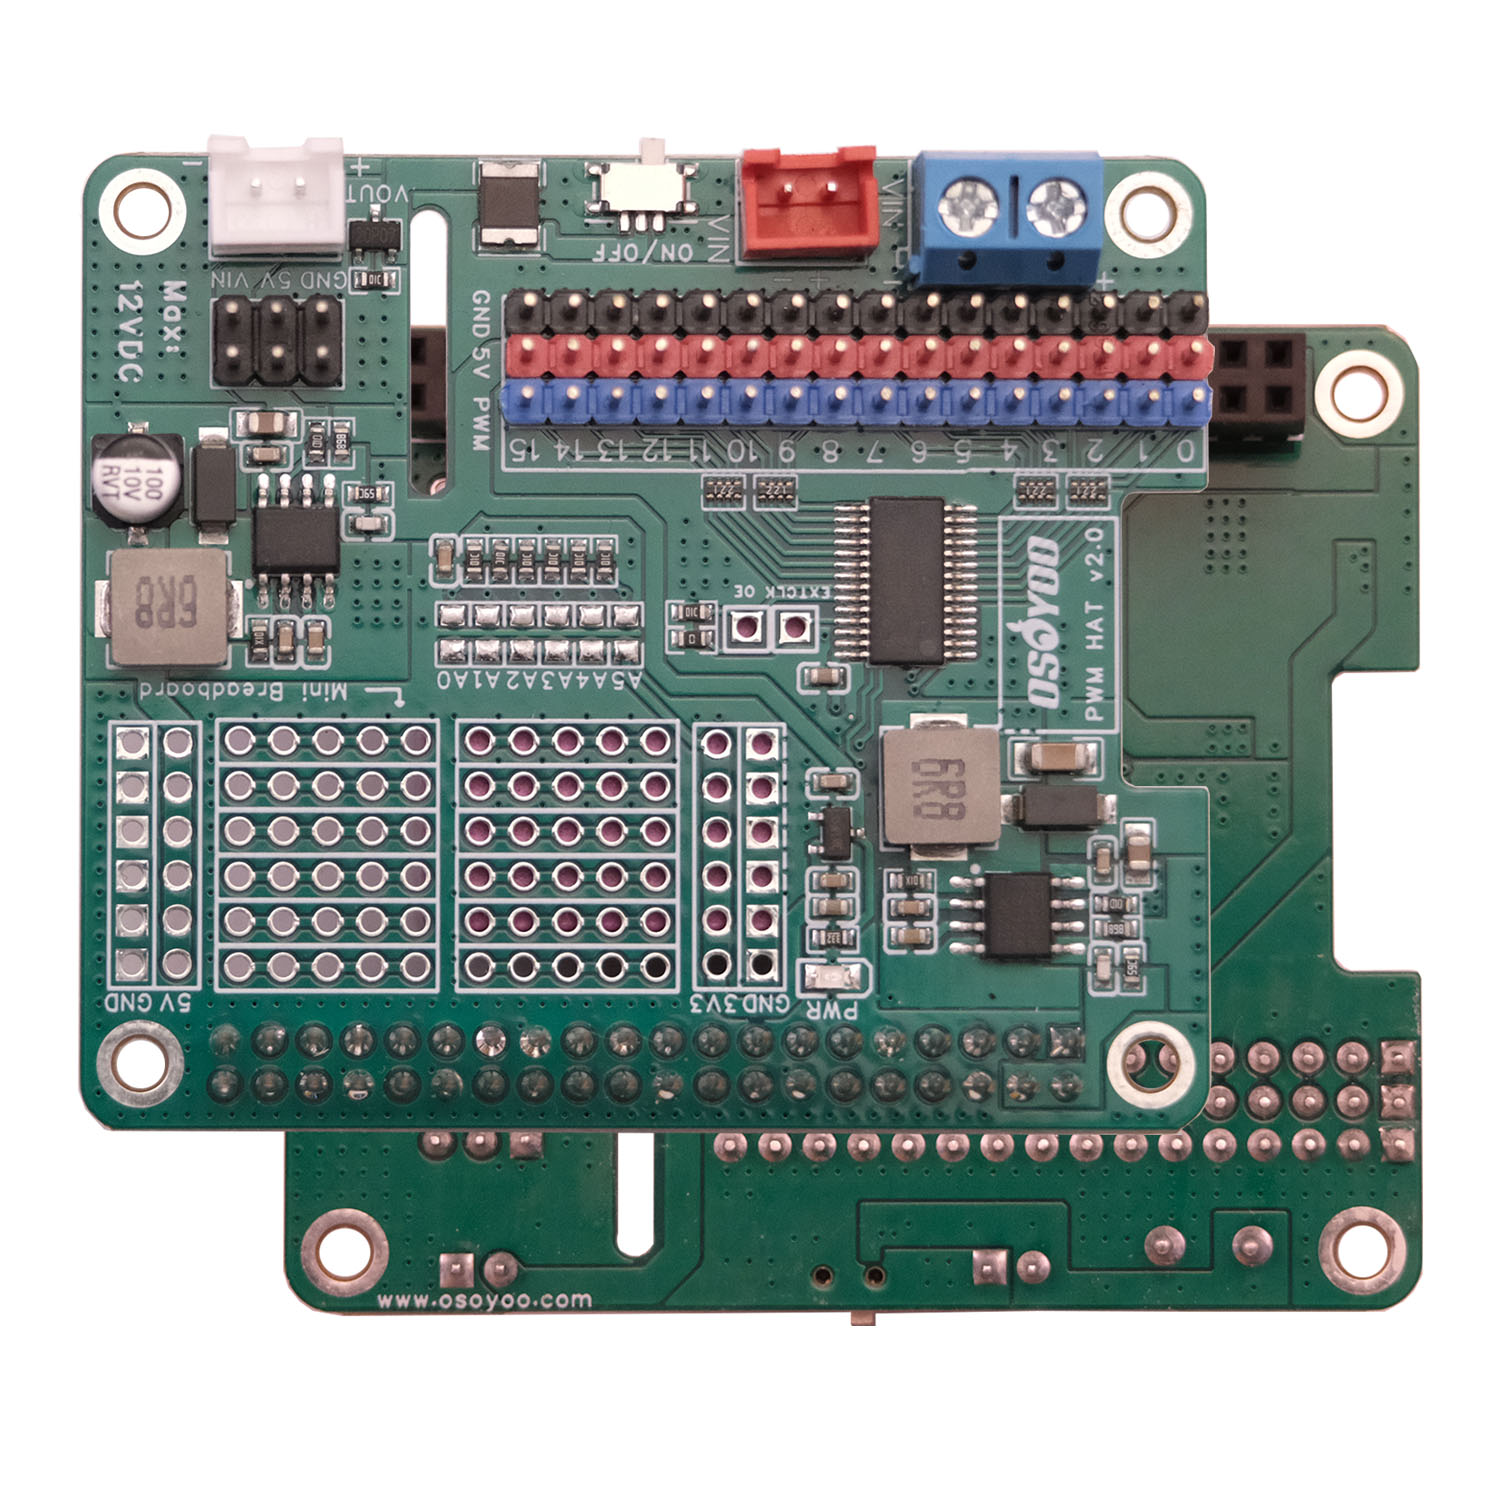
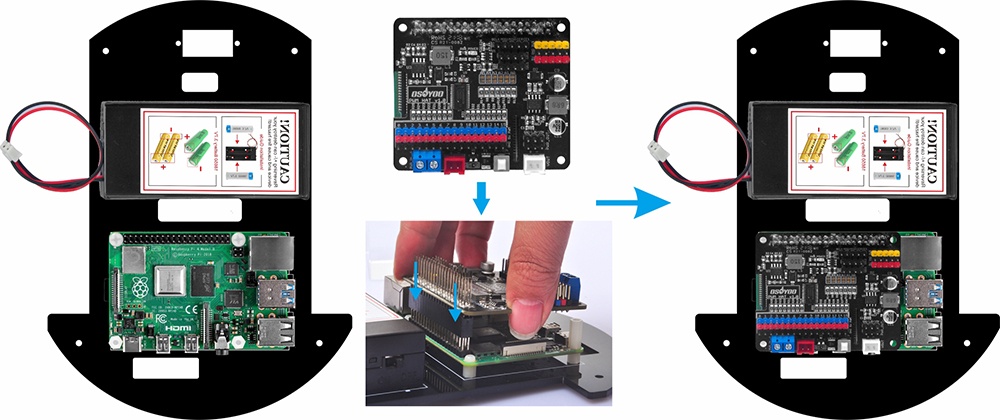
13) Insert OSOYOO PWM Hat on Raspberry Pi as follow:
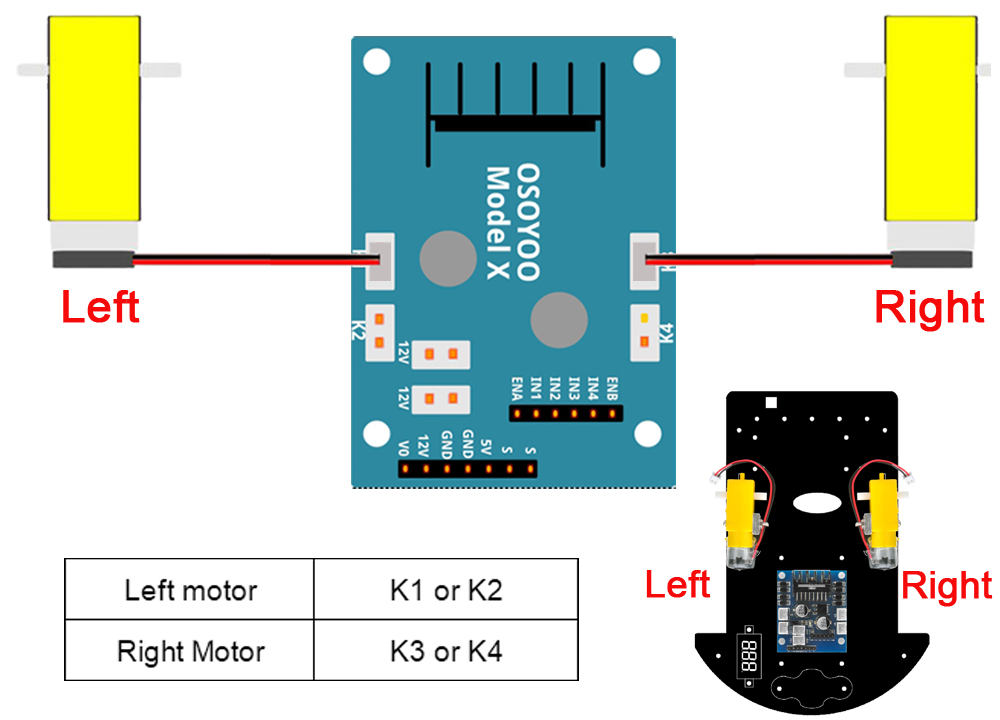
Step 1: CONNECT left motor to K1 or K2 socket of OSOYOO Model X motor driver module , right motor to K3 or K4 socket as per following graph:
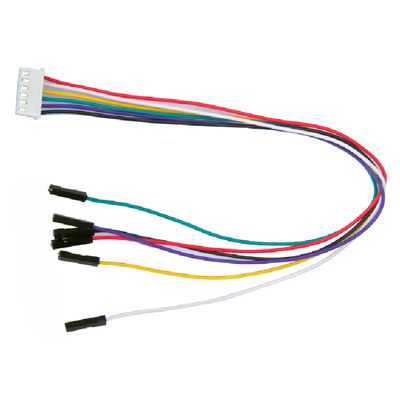
Step 2: Connect Voltage Meter to OSOYOO MODEL X motor driver module with 3pin female to female jumper wires as below connection diagram:
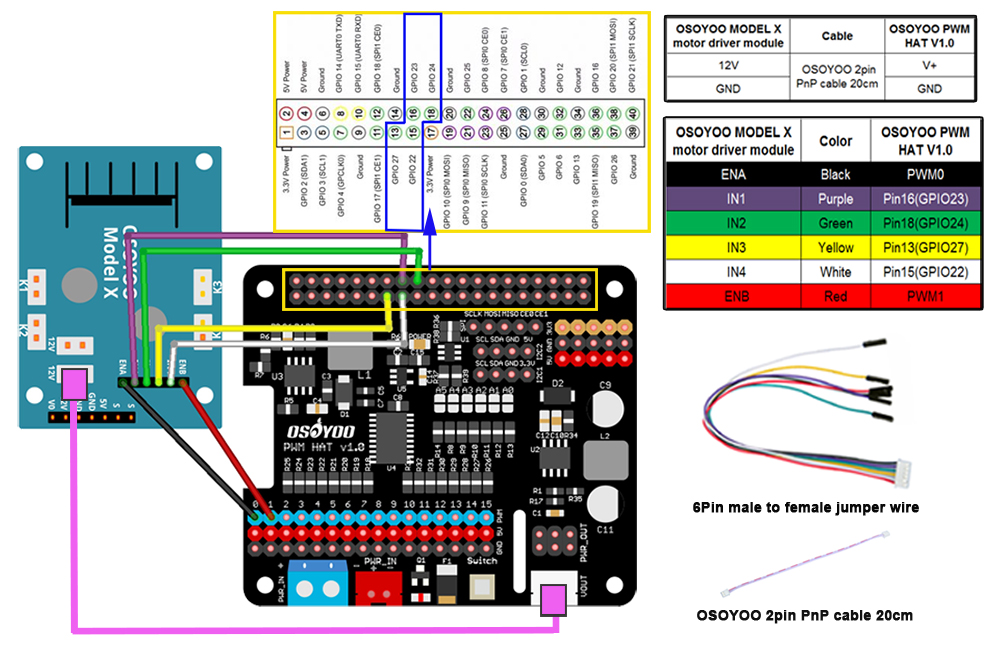
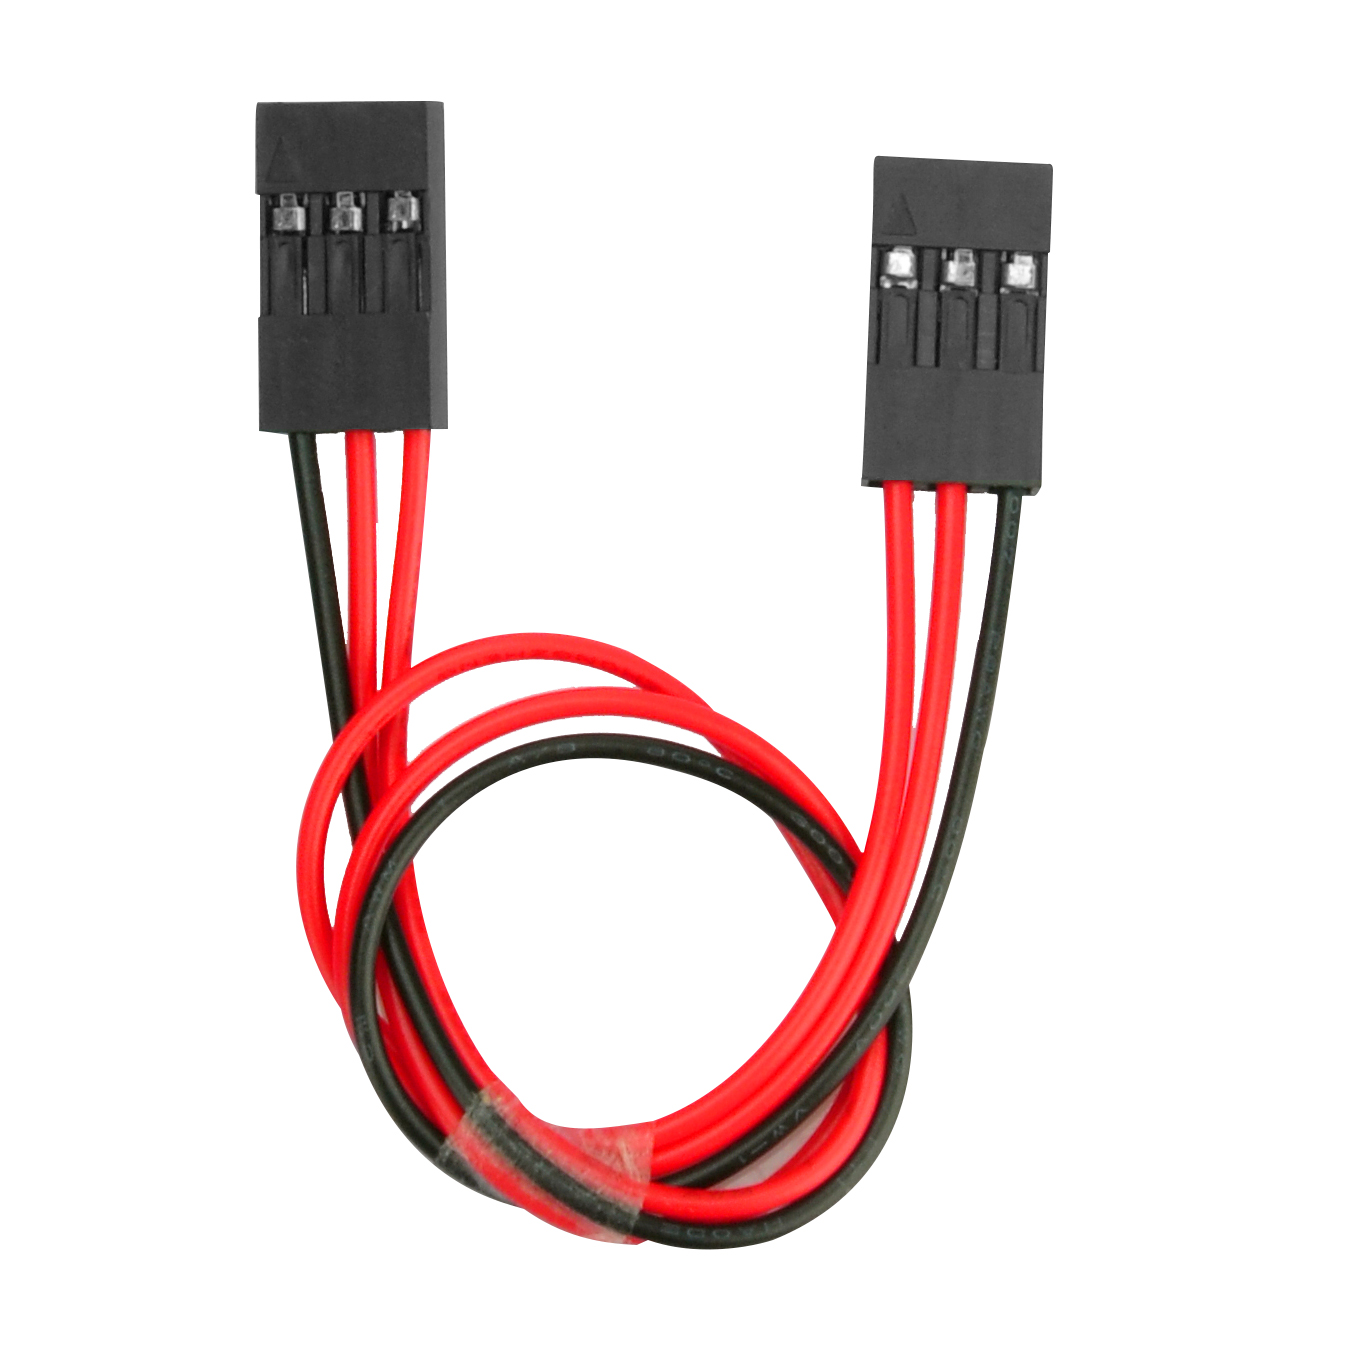
Step 3: Connect OSOYOO MODEL X motor driver module to OSOYOO PWM Hat V1.0 with 6Pin female to female jumper wire, also connect 2pin 20cm cable as following graph:
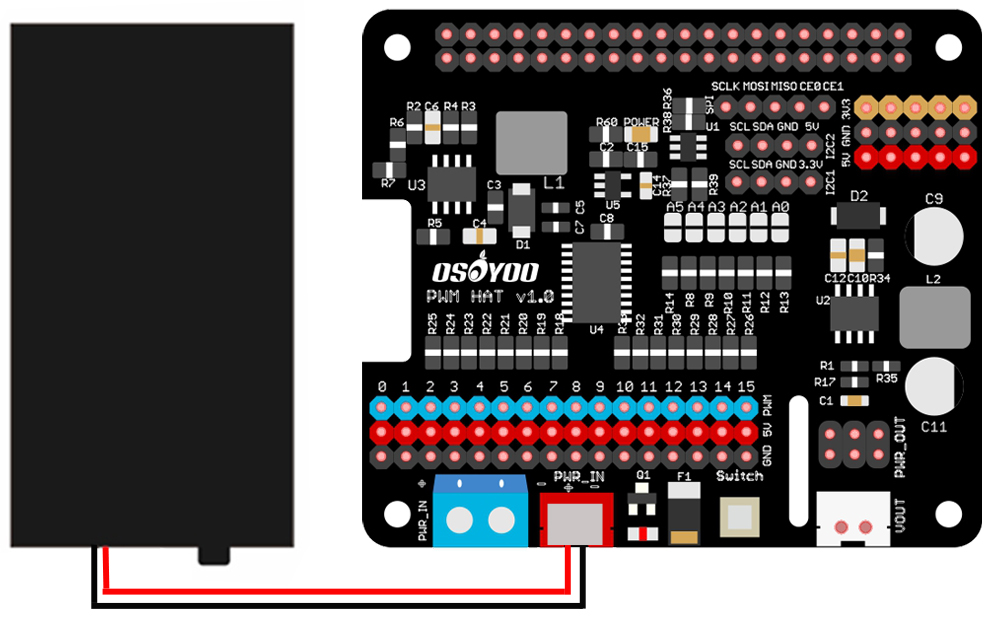
Step 4: Connect 18650 battery box to OSOYOO PWM Hat V1.0 as below connection diagram:
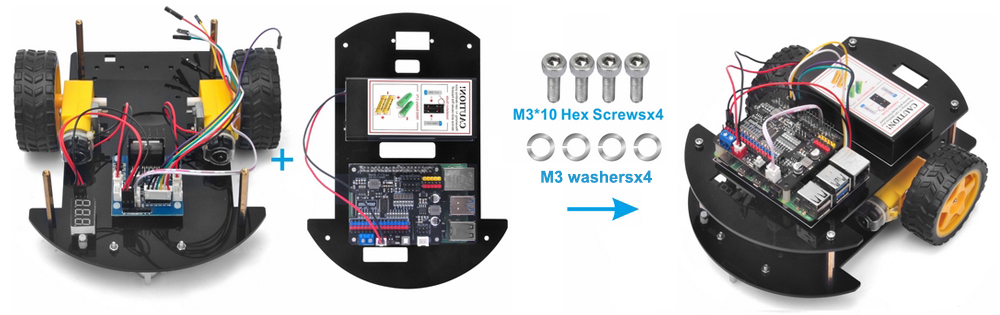
Step 5: Connect upper chassis to lower chassis with 4pcs M3*10 hex screws and 4pcs M3 washers
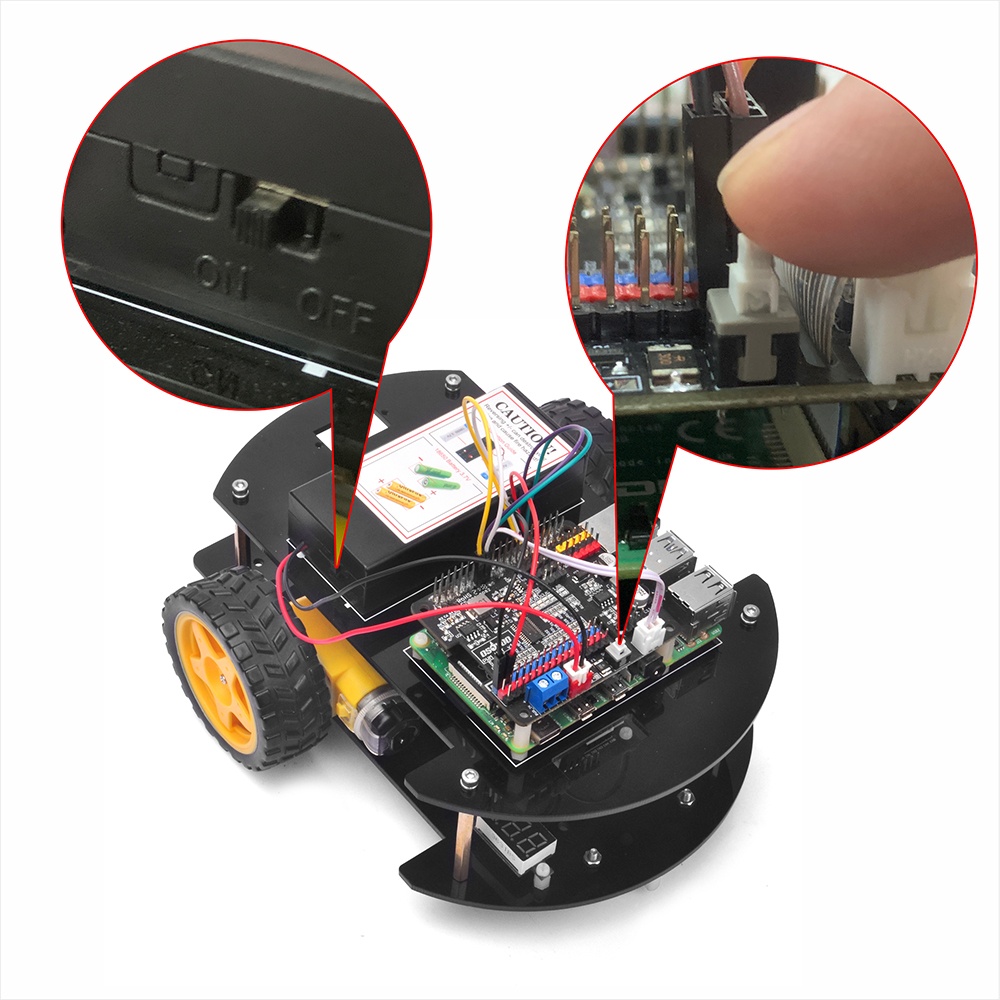
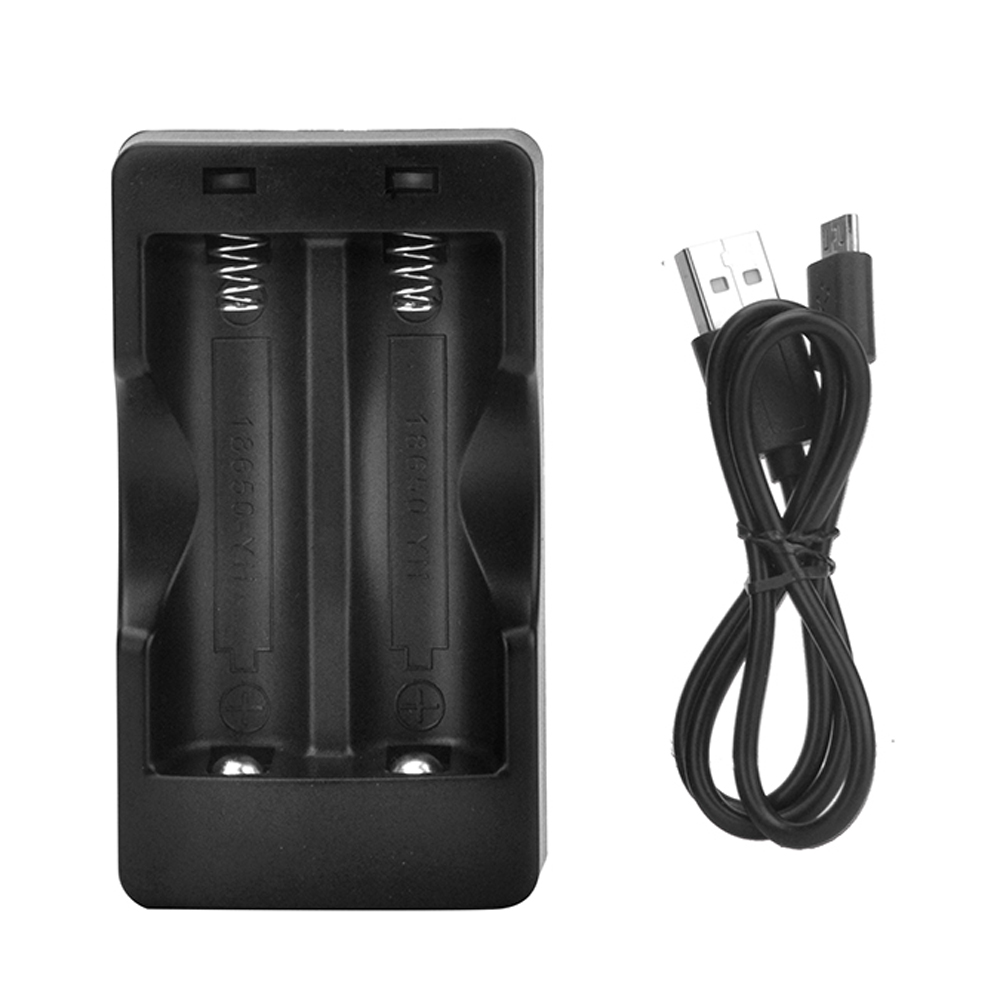
Step 6: Please install your 18650 batteries in battery box for 18650 as per following instruction (Note:Check the box instruction and make sure polar direction is correct, otherwise it can destroy your device and cause fire hazard.)
Operating System : This tutorial has been tested in Raspberry Pi Bookworm and Trixie OS.
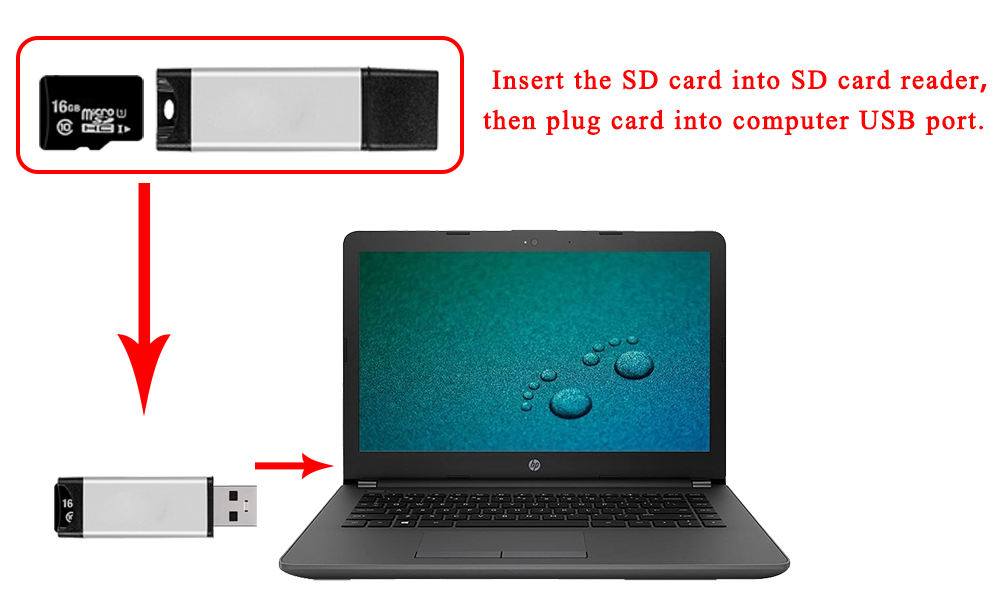
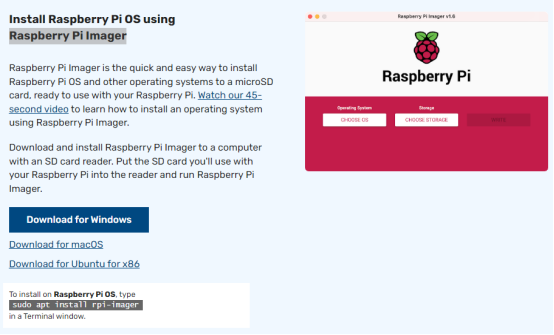
Here are the steps to install the Raspberry Pi OS: Step 1: Burn Raspberry Pi OS onto a newly or formatted SD card (minimum 16G) (skip this step if your SD card has pre-installed Raspberry Pi OS Image).
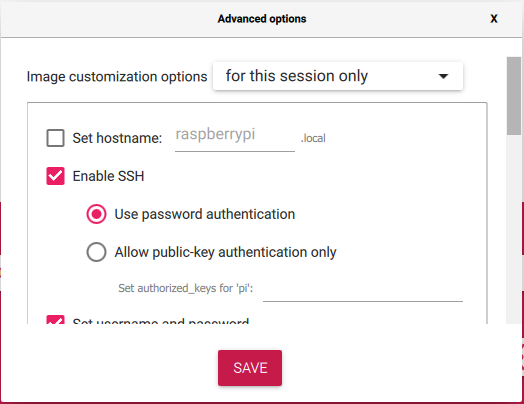
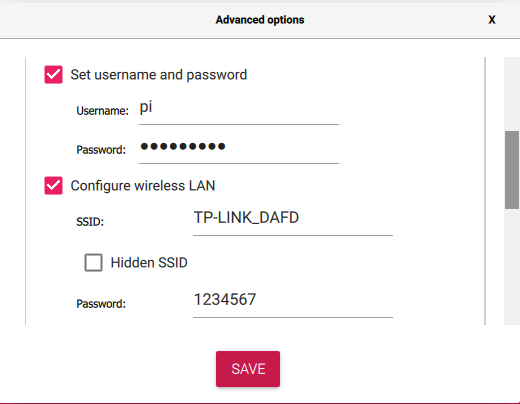
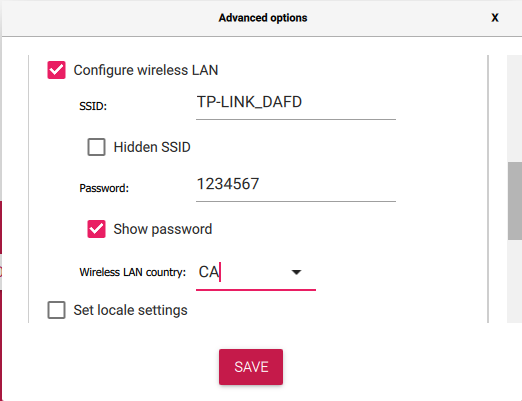
Note: please edit settings to enable SSH, set username and password, and connect WIFI when writing the Raspberry Pi OS
Step 2: Know the IP address
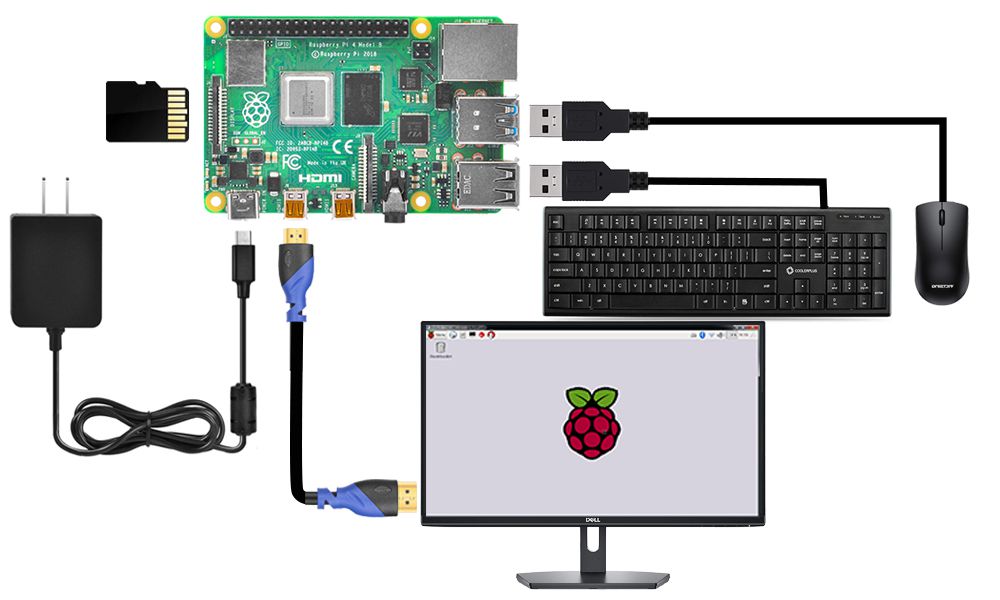
1. Connect Raspberry Pi to your HDMI monitor or TV. Put a keyboard and mouse into Raspberry Pi USB ports. Insert SD card(from Step1) into the slot on your Raspberry Pi (if you have installed your Raspberry Pi robot car, please replace the Raspberry Pi in the following picture with your robot car).
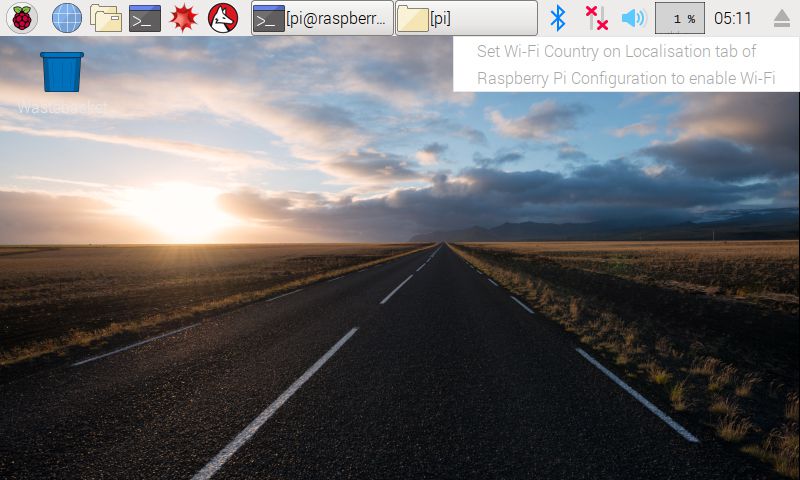
2. If you move over the Lan icon, and get the notice as following:
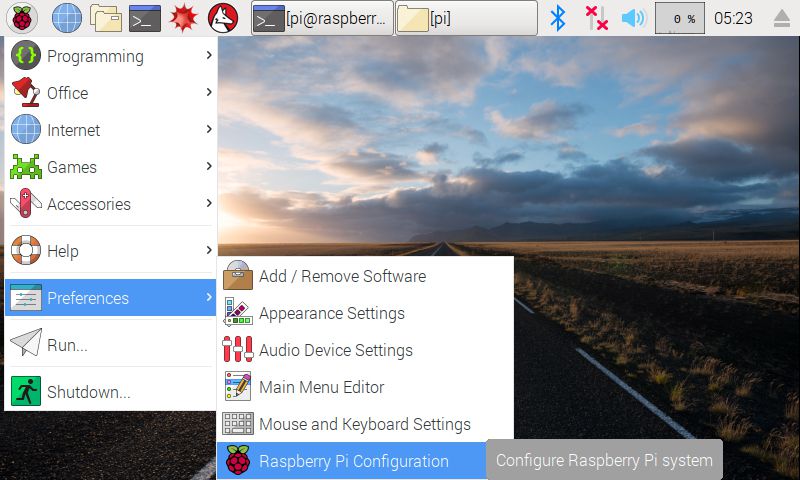
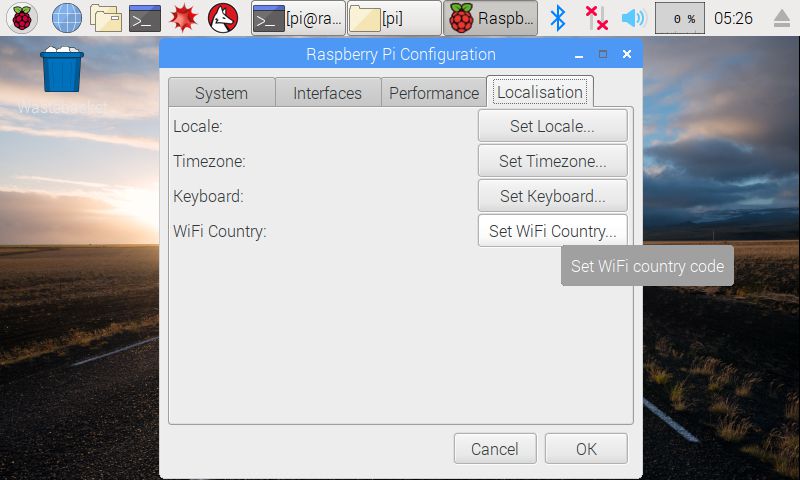
3. Please click configure the WIFI Connection as following:
4. Find out the IP address of the RPi. Method A: Connect your Pi to monitor and mouse, click LAN or WIFI icon to get the IP address as following photo
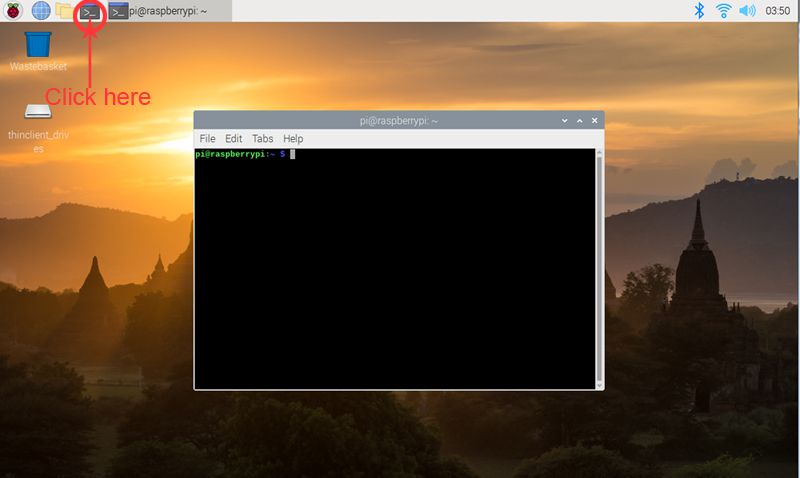
Method B: Click the icon of Terminal on the screen, write the following command in terminal window to get your IP address :
hostname -I
Step 3: Use ssh tools to control Raspberry Pi remotely
Note:
1) To learn more about how to use ssh tool to control Raspberry Pi remotely, Please visit the link: https://osoyoo.com/2017/06/20/raspberry-pi-3-basic-tutorial/#7 2) In our sample lessons, we use Windows PC as the remote console device and PuTTY as the ssh tool
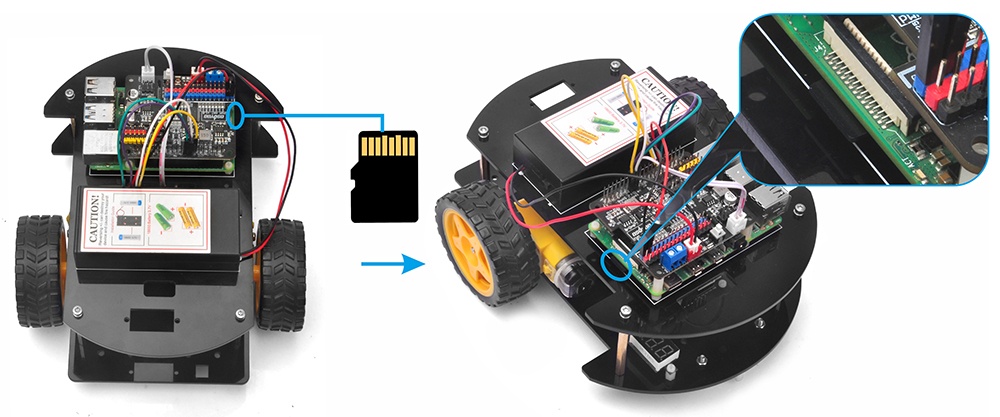
1. Please install the Raspberry Pi with SD card (from step 2) on the robot car (Attention please: you need to power off the Raspberry Pi firstly), and then power on the robot car.
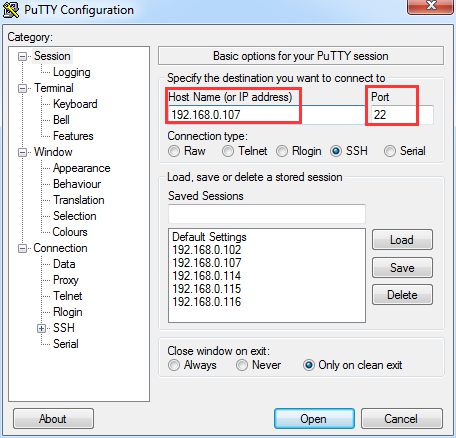
3. Open PuTTY and click Session on the left tree-alike structure (generally it’s collapsed upon PuTTY startup):
4. Enter the IP address you got into the text box under Host Name (or IP address) and 22 under Port (by default it is 22) ,then click open.
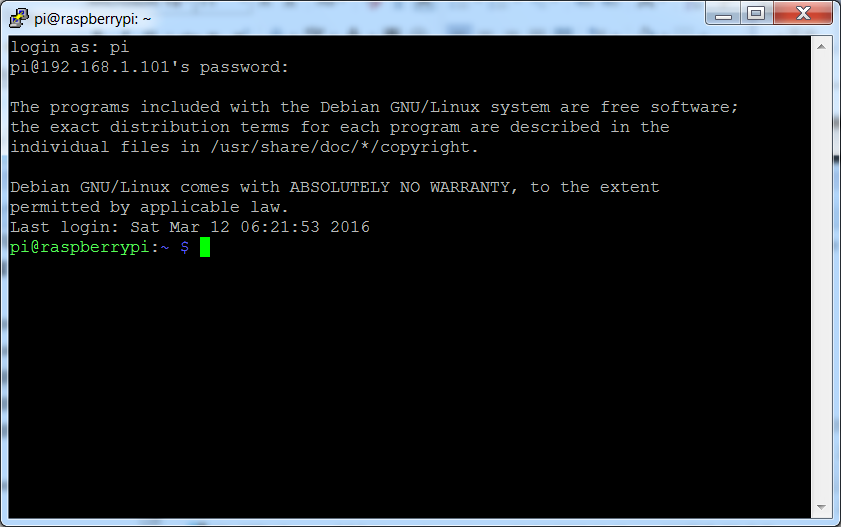
5. Note that when you first log in to the Raspberry Pi with the IP address, you’ll be prompted with a security reminder. Just click Yes. When the PuTTY window prompts, login as: type in the username: pi, and password: raspberry (the default one, if you haven’t changed it). Note: when you’re typing the password in, the window shows nothing just null, but you’re in fact is typing things in. So just focus on typing it right and press Enter. After you log in the RPi successfully, the window will display as follows:
If you are using MacBook or Linux Computer(i.e. another Raspberry Pi), you can directly open a shell terminal instead of Putty and type the following command:
ssh pi@your_robot_car_ip
your_robot_car_ip means your Raspberry Pi robot car IP, which you read by hostname -I command.
For example, if your robot car IP is 192.168.0.111, the correct command to access your car is: ssh pi@192.168.0.111
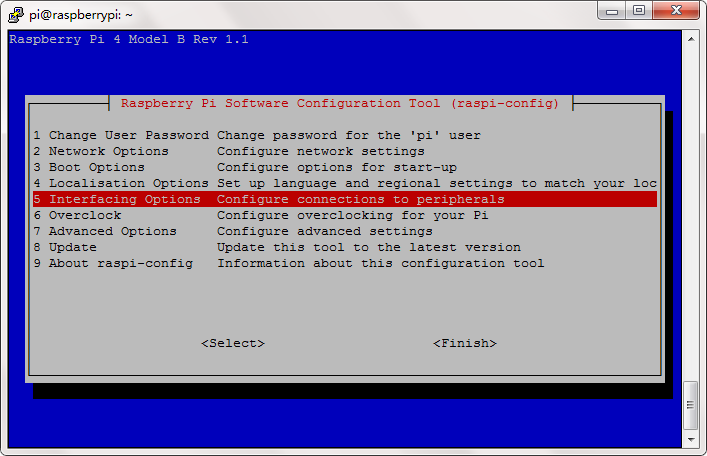
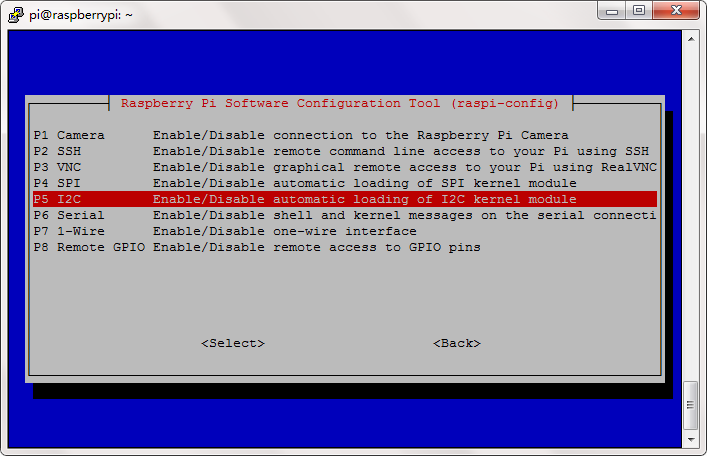
Step 4: Enable I2C
If you have not enable I2C, please run the following command to enable I2C.
sudo raspi-config
Then select Interfacing Options->I2C->Yes->Ok->Finish
Step 5: upgrade your system:
sudo apt-get update
sudo apt-get upgrade

Step 6: Install pca9685 and servokit Library by running the following commands
Step 8: Put the robot car on the ground and then run the basic movement python program by typing the following command in terminal:
python picar-basic4.py
After above python is running, your robot car will move forward for 1 seconds and then move backward for 1 seconds, and turn left for 1 seconds and turn right for 1 seconds then stop. (If the robot car doesn’t move as above, please check your connections firstly)
We have written full comments in the sample python code http://osoyoo.com/driver/picar/picar-basic4.py. If you have some basic python knowledge, you can easily understand how to customize the code for your own application.


 Step 2: Connect Voltage Meter to OSOYOO MODEL X motor driver module with 3pin female to female jumper wires as below connection diagram: