Authorized Retailers
Retailers of OSOYOO 7-inch IPS DSI touch screen
| Buy from OSOYOO |
Buy from US |
Buy from UK |
Buy from DE |
Buy from IT |
Buy from FR |
Buy from ES |
Buy from JP |
 |
 |
 |
 |
 |
 |
 |
 |
Retailers of OSOYOO PiStudio Case for 7-inch IPS DSI screen
| Buy from OSOYOO |
Buy from US |
Buy from UK |
Buy from DE |
Buy from IT |
Buy from FR |
Buy from ES |
Buy from JP |
|
|
|
|
|
|
|
|
Retailers of OSOYOO 7-inch IPS DSI screen with PiStudio Case
| Buy from OSOYOO |
Buy from US |
Buy from UK |
Buy from DE |
Buy from IT |
Buy from FR |
Buy from ES |
Buy from JP |
|
|
|
|
|
|
|
|
Caution
- The DSI port of the OSOYOO 7-inch DSI screen is the same as the official Raspberry Pi 7-inch DSI screen, and this screen is compatible with the DSI cable for the official Raspberry Pi 7-inch DSI screen. Please pay attention to the contact points at the end of the DSI cable.
- Make sure your Micro SD card has enough free space to write the system image.
- Do not touch your Raspberry Pi board when the power is on or when your hand has a static charge. You can discharge static electricity by touching a metal faucet.

Introduction
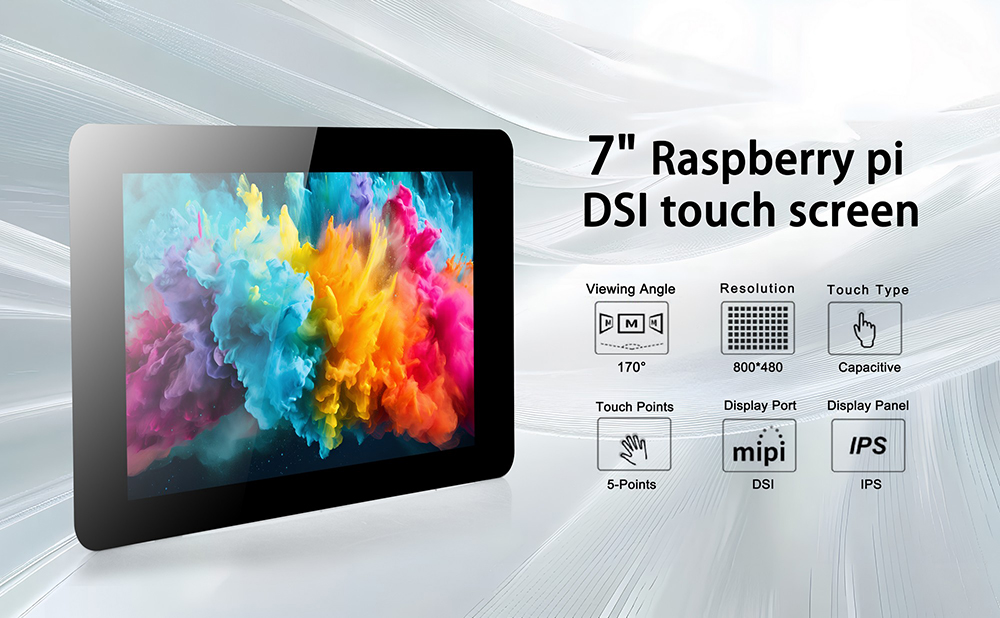
The OSOYOO 7-inch IPS DSI touchscreen connects to your Raspberry Pi through the DSI connector. It is a capacitive touch LCD with a physical resolution of 800×480. It is plug-and-play — no driver installation needed.
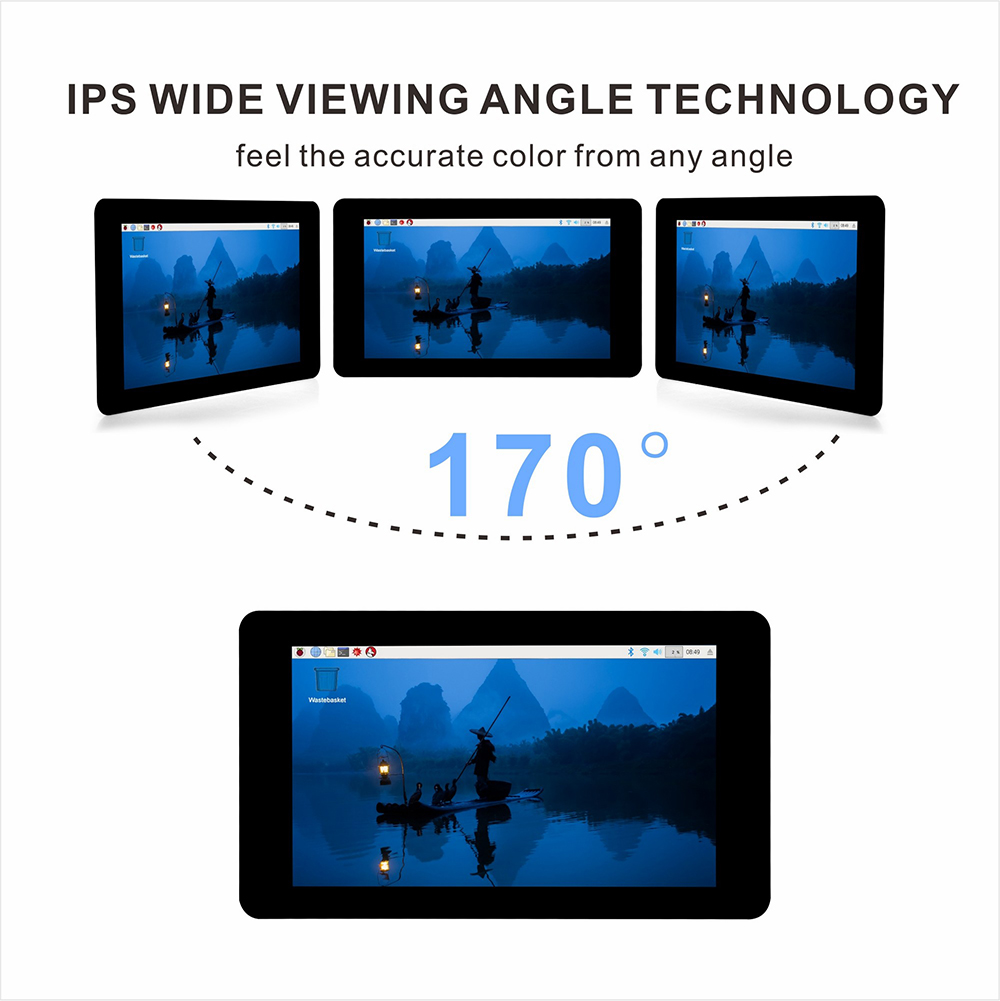
The screen uses IPS panel technology, which provides wide viewing angles and reduces glare and reflections.
Features
- DSI interface — connects directly to the Raspberry Pi board.
- IPS panel for wide viewing angles and vivid colors.
- 60 Hz refresh rate.
- Physical resolution: 800×480, 24-bit color. Virtual resolution adjustable from 800×480 up to 1920×1080.
- 5-finger capacitive touch (note: Raspbian currently supports only 1 finger at a time).
- Plug-and-play. No driver needed.
- Compatible with Raspberry Pi OS, Ubuntu MATE, Kali, RetroPie, OctoPrint, and more.
- Strong anti-interference design.
- Ultra-low power consumption and ultra-long-distance lossless signal transmission.
- Auto-sleep function.
- Viewing angle: 85°/85°/85°/85°
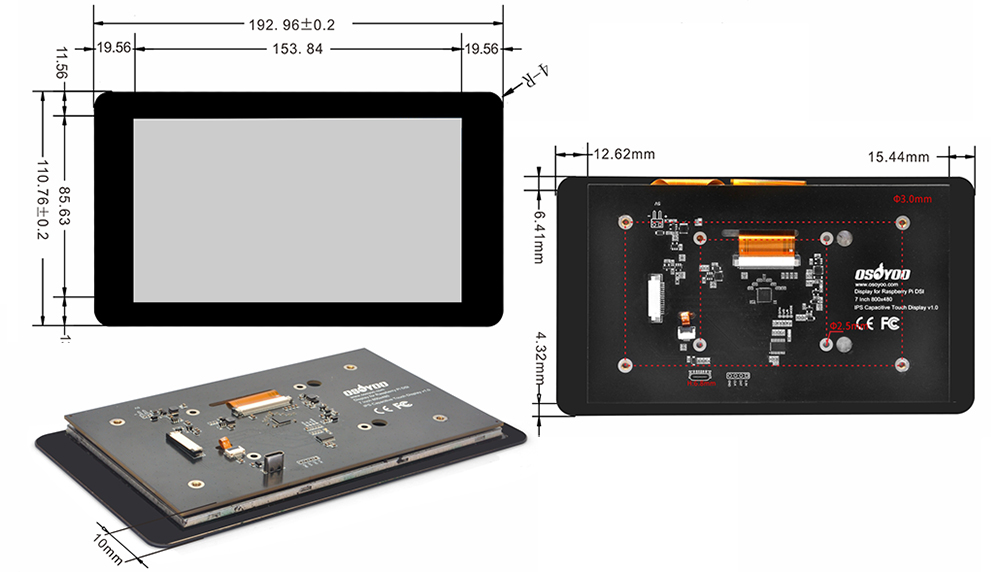
Datasheet
Download the dimension datasheet from:
https://osoyoo.com/picture/7in_IPS/7in_IPS_datasheet.pdf
Setup Guide
Parts Needed
You will need the following parts:
- 1× Raspberry Pi board
- 1× USB power adapter
- 1× USB power cable
- 1× 7-inch DSI touchscreen with DSI cable
- 1× Micro SD card (16 GB or larger)
- 1× TF card reader
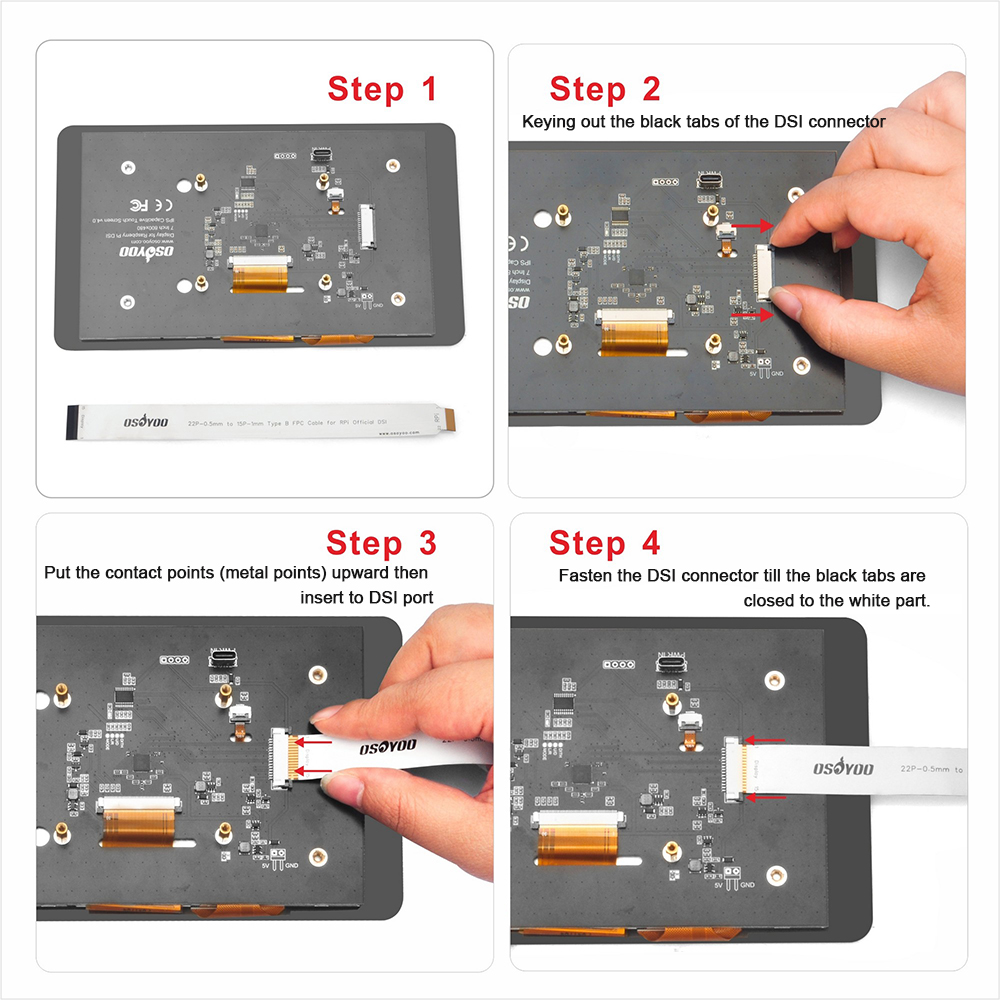
How to Install the DSI Cable
Note:
1. The DSI port of the OSOYOO 7-inch DSI screen is the same as the official Raspberry Pi 7-inch DSI screen. This screen is compatible with the DSI cable for the official Raspberry Pi 7-inch DSI screen. Pay attention to the contact points at the end of the DSI cable.
2. The 15-pin 1 mm end is for the DSI port of the OSOYOO 7-inch DSI screen. Insert it with the contact points (metal contacts) facing upward.
How to Install the OS
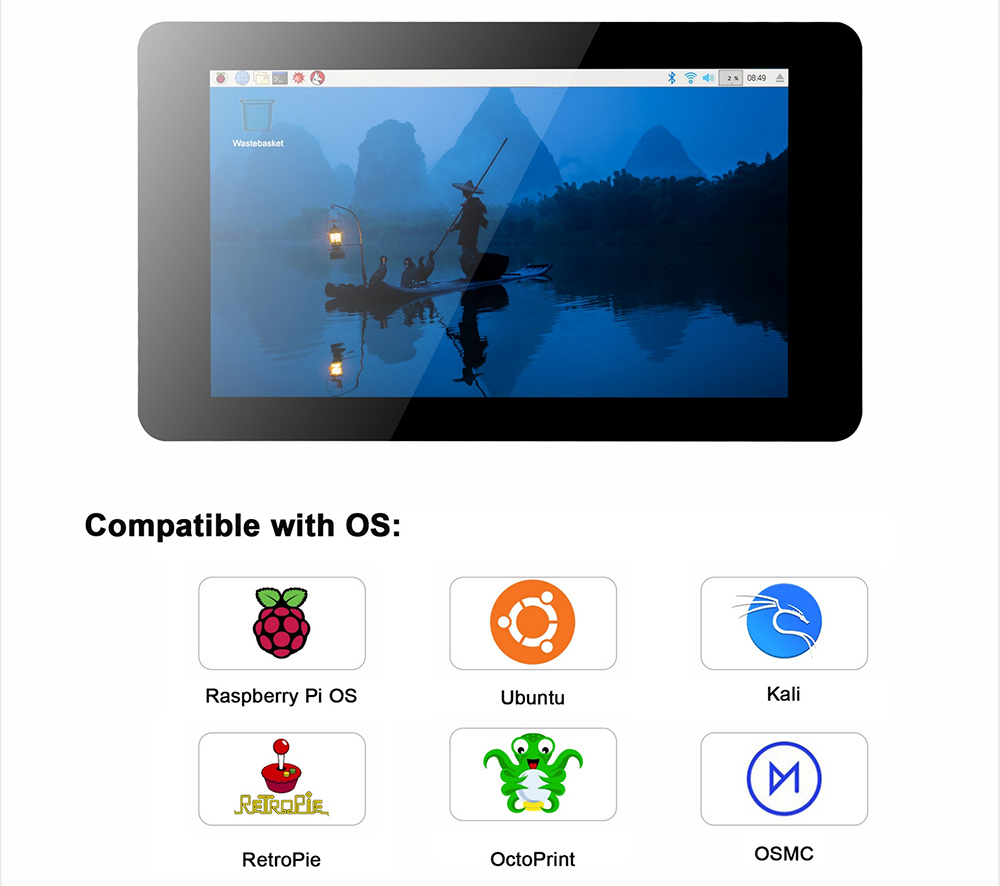
The 7-inch DSI LCD supports operating systems such as Raspberry Pi OS, Ubuntu MATE, Kali, RetroPie, OctoPrint, and more.
To install an OS on your Raspberry Pi, please follow the steps below (for more details on flashing the image, visit: https://osoyoo.com/?p=56660/#1):
Step 1: Download the OS image to your computer from the official Raspberry Pi website: https://www.raspberrypi.org/downloads/
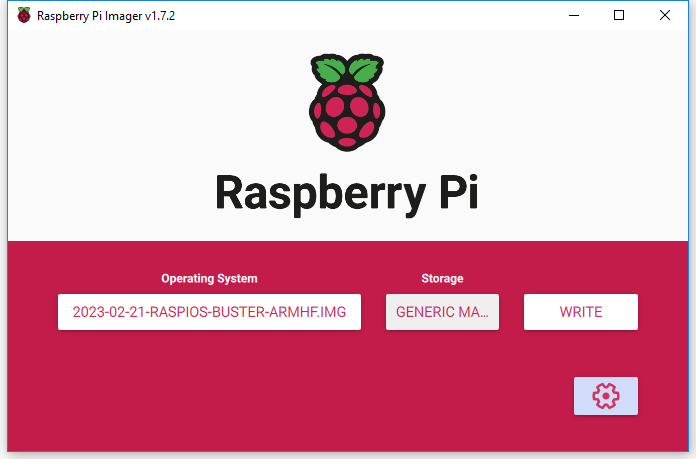
Step 2: Unzip the image file and open your image writer. We recommend the Raspberry Pi Imager tool from: https://www.raspberrypi.com/software/
Step 3: Insert the SD card into the card reader and connect it to your computer. Open Raspberry Pi Imager, select the OS image and your device, then click Write:
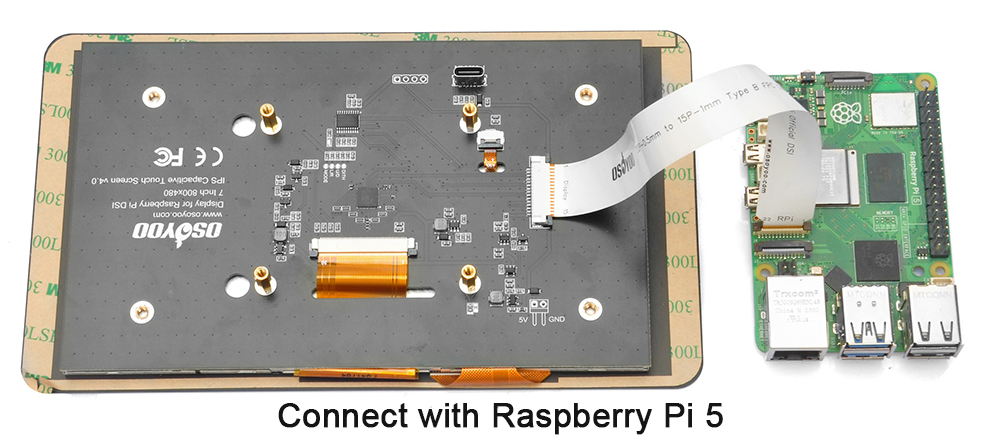
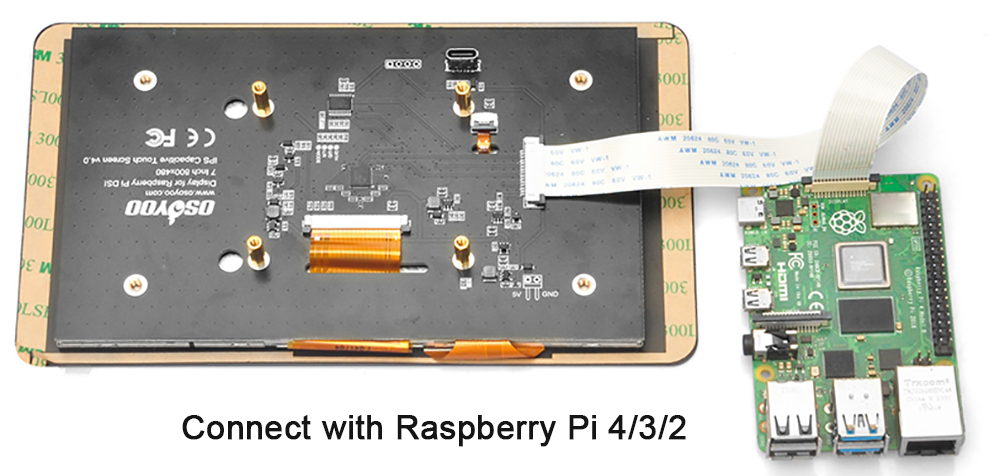
Step 4: Insert the SD card into the Raspberry Pi board and connect the 7-inch DSI touchscreen:
Step 5: Power up the Raspberry Pi and wait for the system to boot. (Do not touch the board while the power is on or if your hands carry a static charge.)
Advanced Settings
How to add a virtual keyboard?
The touchscreen can be used as a mouse input device. When you need to type text on your Raspberry Pi, you normally have to connect a USB keyboard, which is inconvenient.
You can instead install a virtual keyboard so the screen itself acts as a text input device, just like a smartphone.
Here are the steps:
Step 1) Install matchbox-keyboard by running the following commands in the Raspberry Pi terminal:
sudo apt update
sudo apt upgrade
sudo apt install matchbox-keyboard
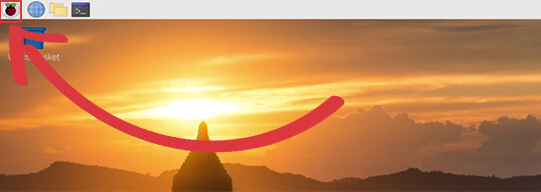
Step 2) Click the Raspberry Pi icon in the top-left corner:
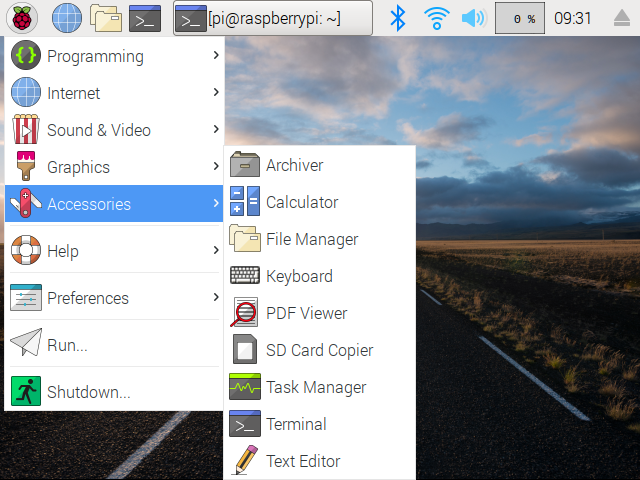
Step 3) Click Accessories → Keyboard:
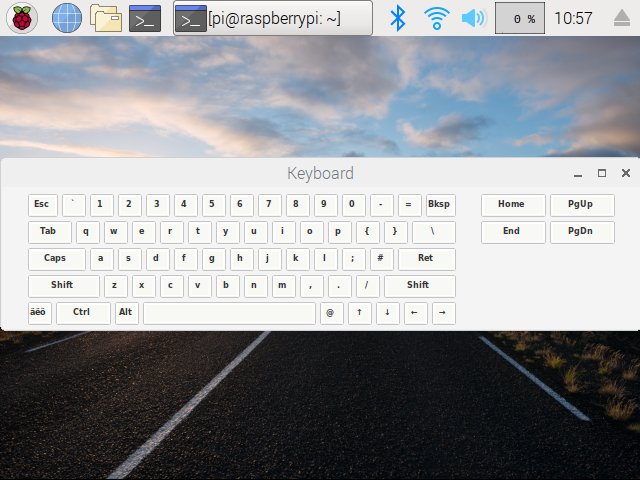
A pop-up virtual keyboard will appear:
For more details about matchbox-keyboard installation, visit:
https://osoyoo.com/2019/04/09/osoyoo-7inch-hdmi-touchscreen-keyboard-matchbox-keyboard/
How to adjust the virtual resolution
Note: This method only works with Raspberry Pi Legacy OS. If you are using Raspberry Pi Bookworm OS, the DSI screen does not support resolution adjustment.
The physical resolution is 800×480, but you can set a virtual resolution from 800×480 up to 1920×1080. Open the Micro SD card that has the OS installed and open /boot/config.txt with Notepad++ (or any text editor), then find the following lines:

To use 1920×1080, change those values as shown below and save the file:
framebuffer_width=1920
framebuffer_height=1080
Note: If you are using Raspberry Pi 4, you also need to comment out the following line in /boot/config.txt: #dtoverlay=vc4-kms-v3d
How to adjust the display orientation
Note: This method works with Raspberry Pi Legacy OS only.
LCD displays have an optimal viewing angle. Depending on how the screen is mounted, you may need to rotate the display for the best results. By default, the Raspberry Pi display is set up for viewing from slightly above (such as on a desk). If you need to view it from below, you can physically rotate the display and tell the software to compensate.
To flip the display, first run:
sudo nano /boot/config.txt
Choose the lines to add based on the rotation you want:
1) For 0° rotation (default — no extra lines needed)
2) For 90° rotation (top to the right):
display_lcd_rotate=1
dtoverlay=rpi-ft5406,touchscreen-swapped-x-y=1,touchscreen-inverted-x=1
3) For 180° rotation (upside down):
display_lcd_rotate=2
dtoverlay=rpi-ft5406,touchscreen-inverted-x=1,touchscreen-inverted-y=1
4) For 270° rotation (top to the left):
display_lcd_rotate=3
dtoverlay=rpi-ft5406,touchscreen-swapped-x-y=1,touchscreen-inverted-y=1
After adding the lines, press Ctrl+X, then Y, then Enter to save the file. Then type sudo reboot to restart the Raspberry Pi. This rotates both the display and the touchscreen together.
How to adjust the brightness
The following steps are based on Raspbian.
(1) Run the following command in the terminal to switch to administrator (root) permissions:
sudo su root
(2) Run the following command to adjust the display brightness (replace 100 with any value from 0 to 255):
echo 100 > /sys/class/backlight/rpi_backlight/brightness
Note: If brightness adjustment fails, check whether the line disable_touchscreen=1 exists in /boot/config.txt and comment it out: #disable_touchscreen=1



