You can download the user manual from:

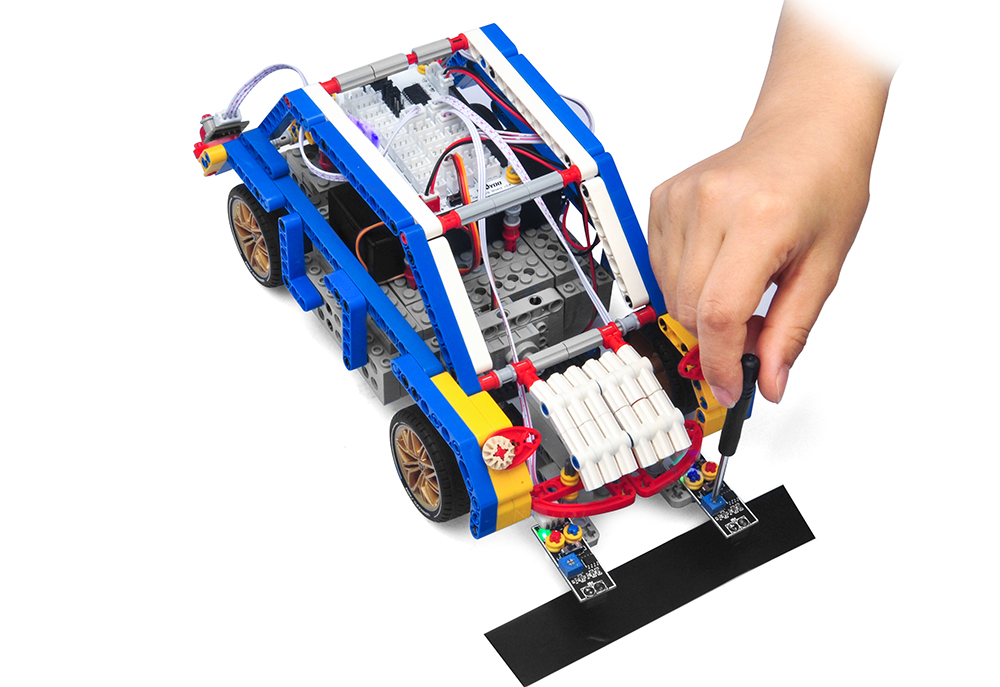
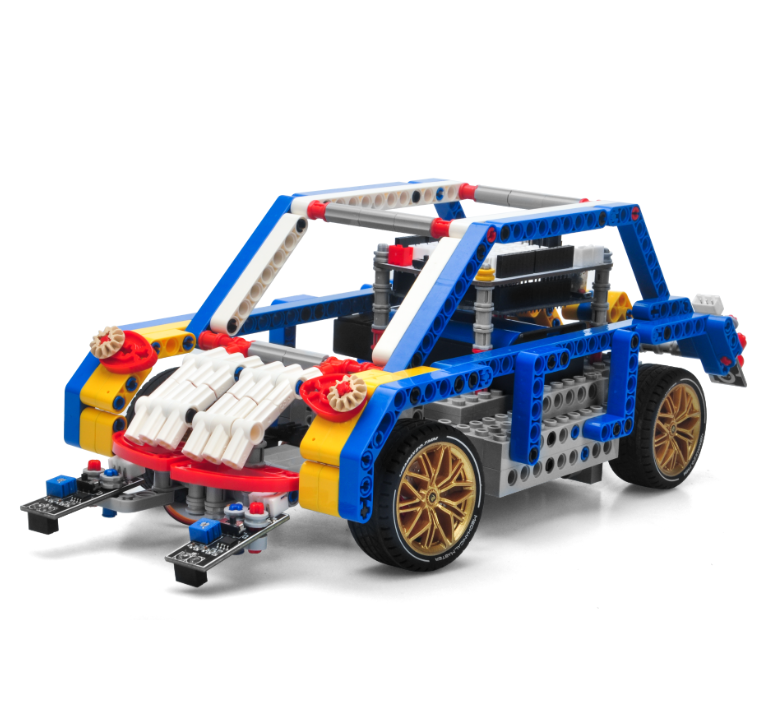
In this tutorial, we will use two OSOYOO tracking sensors to guide the car to move along the black track line in the white ground automatically. The software in this lesson will read data from the tracking sensors and automatically guide the car to move along the black track line in the white ground.
A Line Follower Robot, as the name suggests, is an auto-driving vehicle which follows a black track line printed in white ground. Tracking sensors in the robot keeps checking if the current car location is out of the track. If yes, then car will make a negative movement to draw the robot car back to track.
If you don’t complete the frame of car, please review lesson 1

If you don’t complete the basic wire connection, please review lesson 2
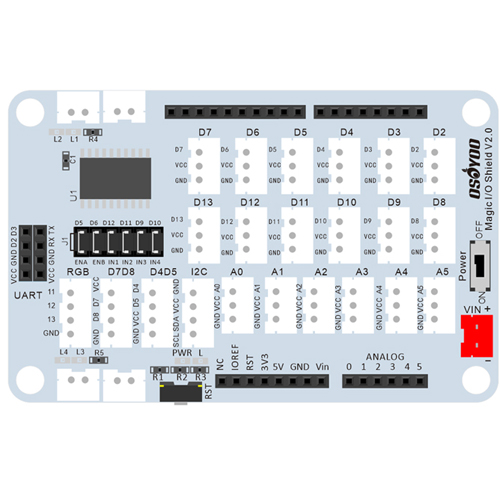
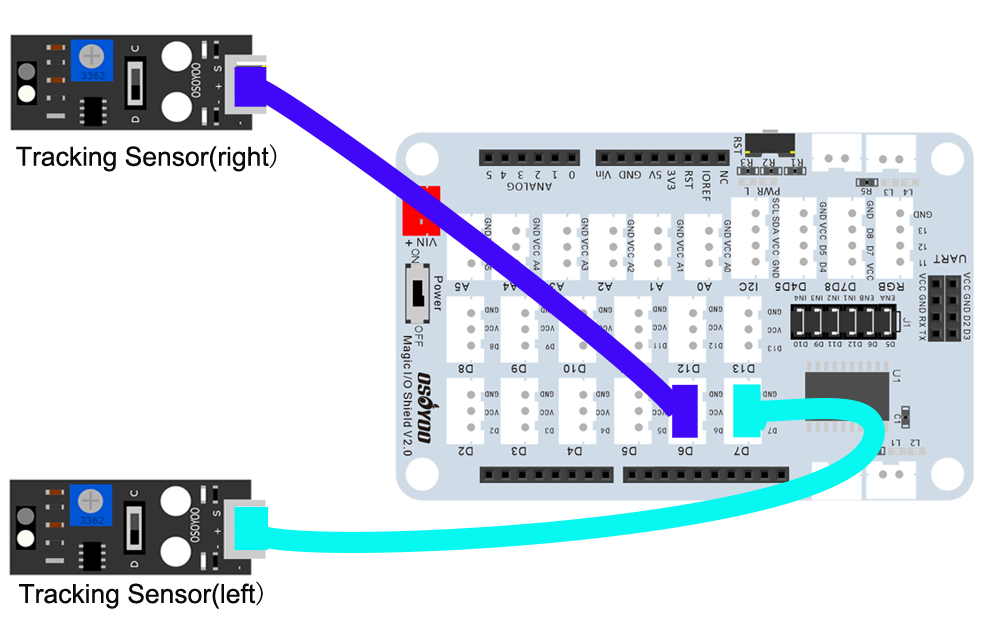
Connection:
Left Tracking Sensor to D7
Right Tracking Sensor to D6

STEP 1:
Download https://osoyoo.com/driver/2022008400/lesson3.zip , unzip it, you will see a folder called lesson3
STEP 2:
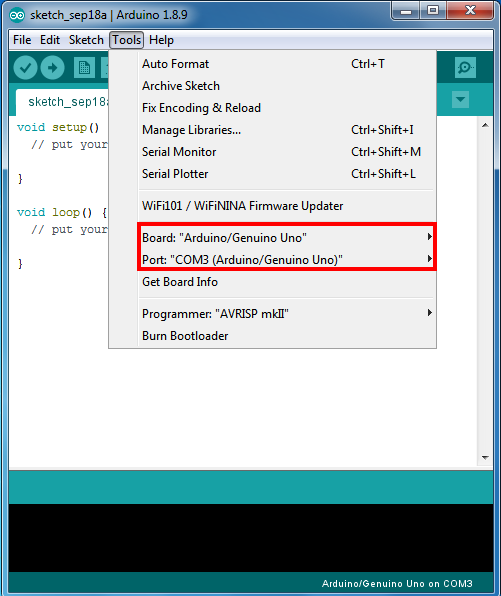
Connect UNO R3 board to PC with USB cable, open IDE, choose corresponding board/port for your project.
Notice: Shut off your battery or Unplug your power adapter when upload sketch code to OSOYOO Basic Board for Arduino.
STEP 3:
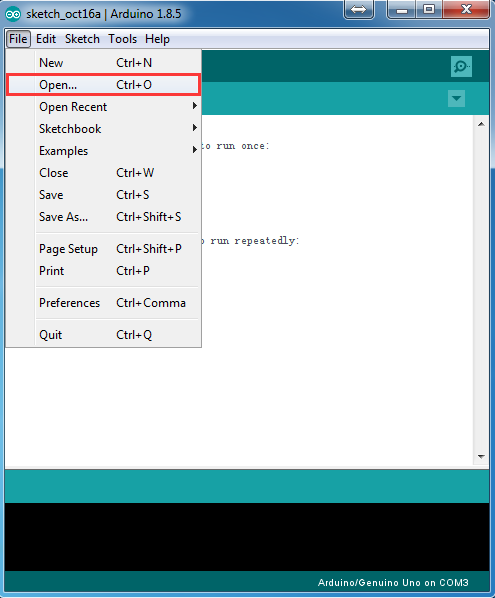
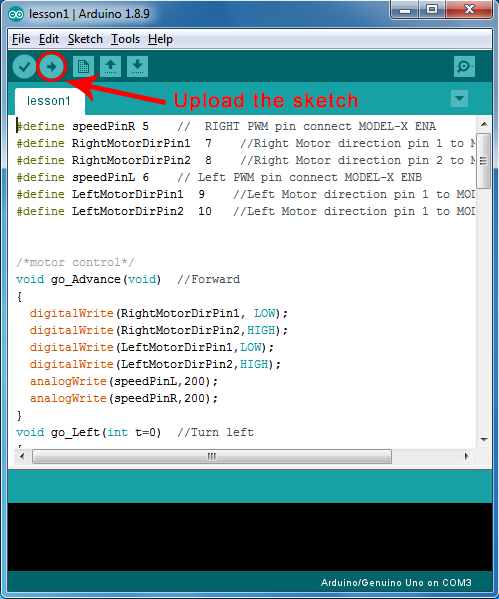
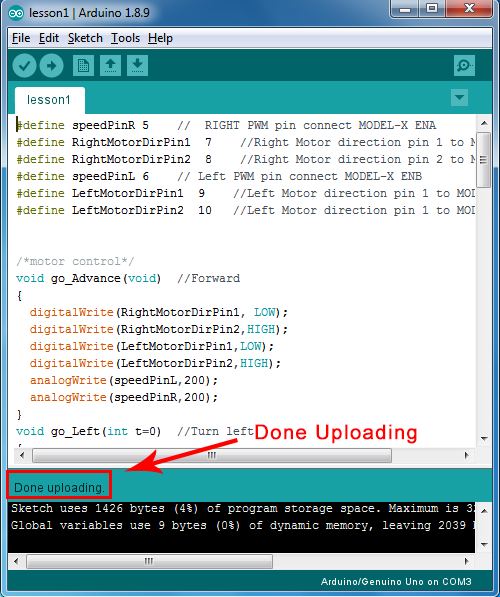
Click file -> click Open -> choose code “lesson3.ino”, load the code into OSOYOO Basic Board for Arduino, and then upload the sketch to the board.
Notice: Servo Alignment
Please change the default value 90 in the following line as the FRONT value in the option 2 in Step 5 of lesson2. If you align the wheel direction manually as the option 1 in Step 5 of lesson2, please skip this step.
#define FRONT 90 // steering to front
STEP 4:
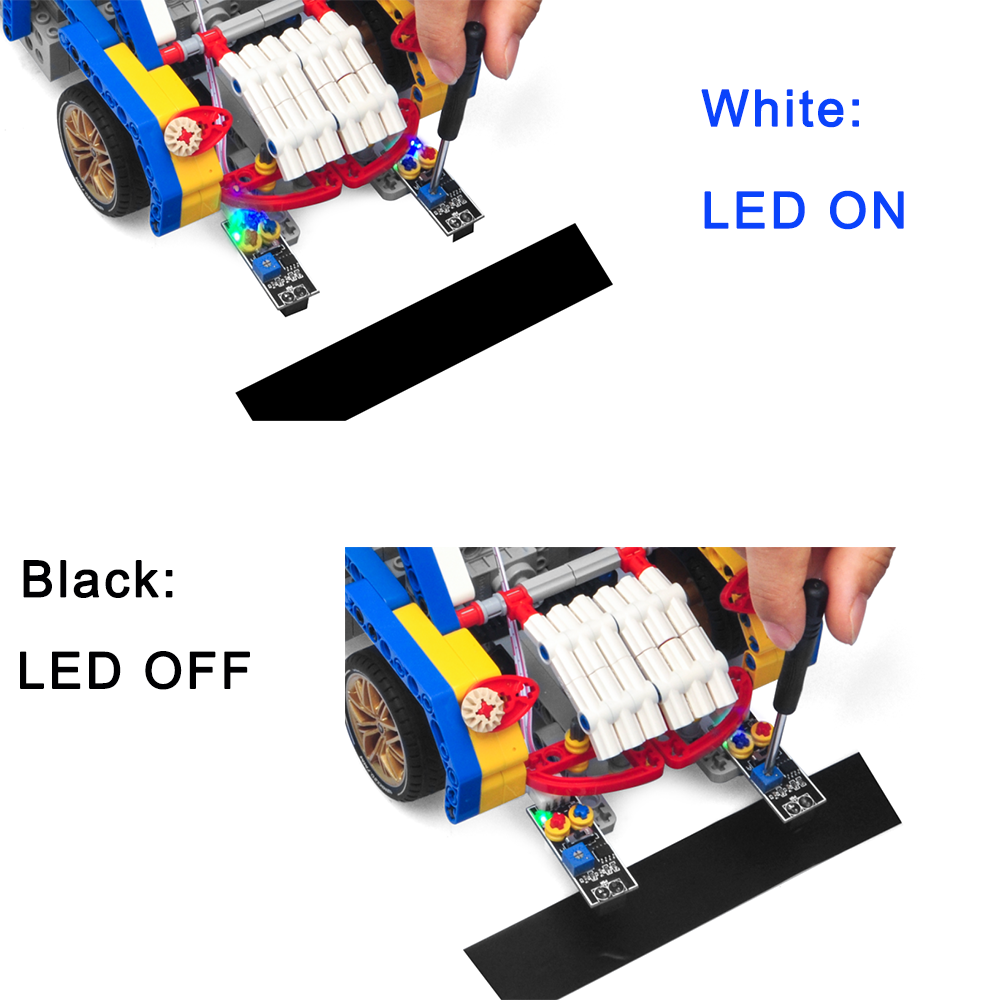
Adjust the sensitivity of tracking sensor modules.
Turn on and hold the car and adjust the potentiometer on the tracking sensor with cross screwdriver until you get the best sensitivity status: the signal indicate LED light will turn off when sensor is above white ground, and the signal LED will turn on when the sensor is above black track.

1.Prepare a black track (the width of the black track is more than 20mm and less than 30mm) in white ground. Please note, the bend angle of track can’t be larger than 30 degree. If the angle is too large, the car will move out of the track.
2. Put the car on the track, turn on the switch of OSOYOO Motor Shield and the switch of the batter box, the car will move along the black track.
Note: If the car does not move as per above mentioned result, you should check your wire connection of tracking sensor, battery voltage (must over 7.2v).
3. If you want to change the angel of the right or left, please edit the following line of the code and upload the sketch again:
int RIGHT=FRONT-70;
int LEFT=FRONT+70;
5. If you want to change the speed of the car, please revise the following code of the sketch (Note: the max value is 255)
#define SPEED 190
#define HI_SPEED 220