| Buy from OSOYOO |
Buy from US |
Buy from UK |
Buy from DE |
Buy from IT |
Buy from FR |
Buy from ES |
Buy from JP |
 |
 |
 |
 |
 |
 |
 |
 |
Compatibility Notice
Hardware: Raspberry Pi 5/4/3, Compute Module 5
Screen:OSOYOO 10.1″ DSI touchscreen (Model No.: 2025002500)
System:This tutorial is ONLY compatible with OS: Raspberry Pi OS 64bit desktop, Kernels: 6.12 and newer
Hardward Install
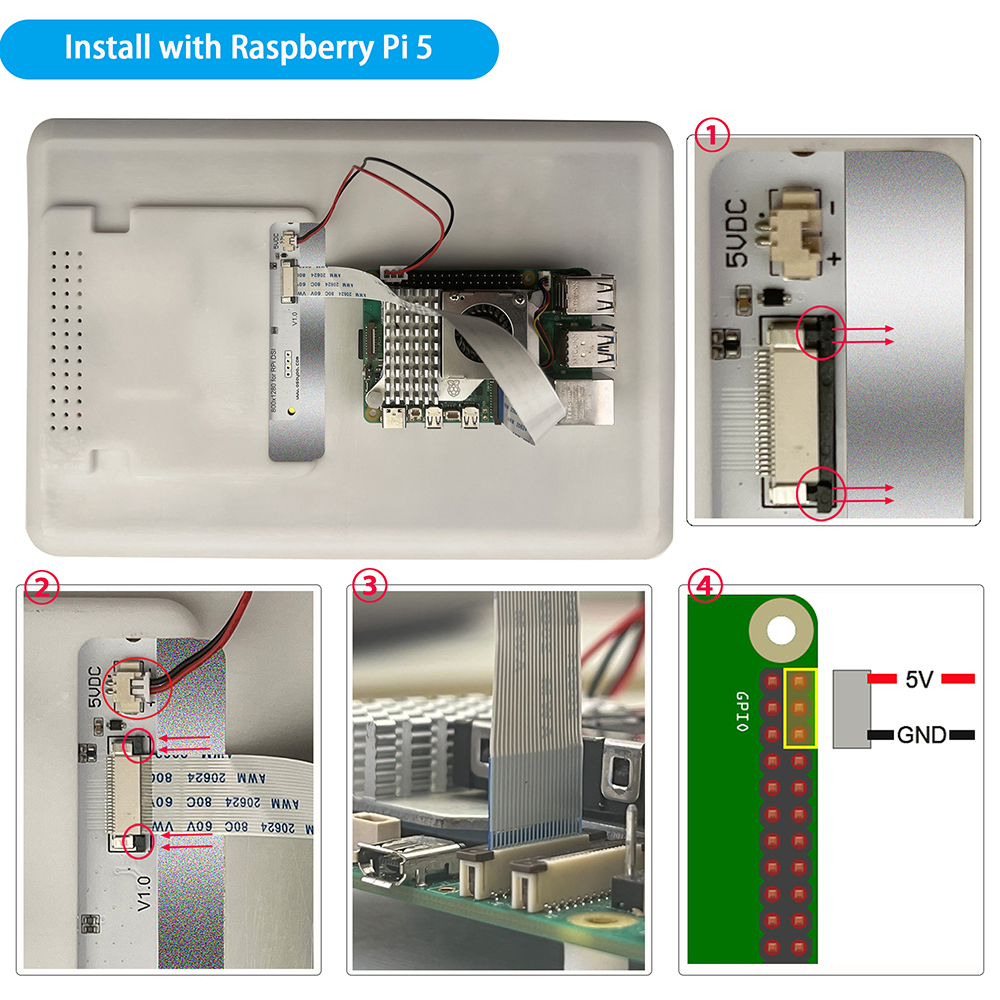
Hardware Connection with Raspberry Pi 5
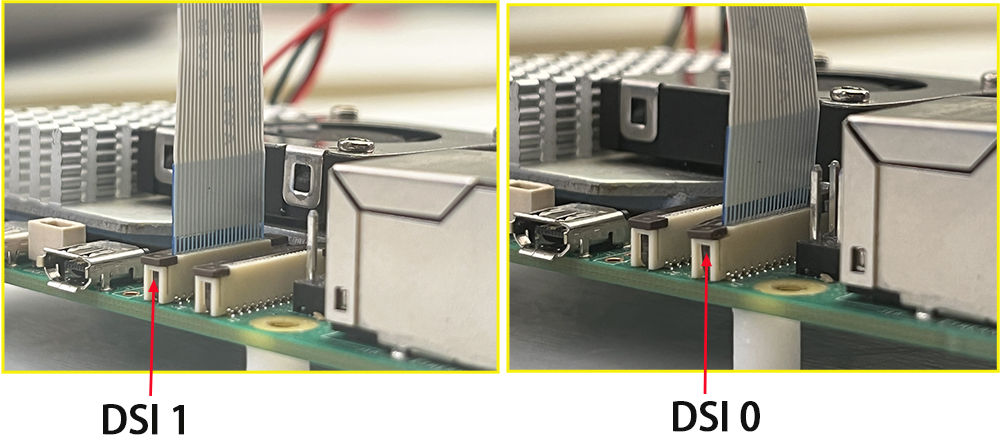
1. Use the 22pin-0.5mm to 22pin-0.5mm DSI cable (for Pi5) to connect the DSI port of the display to the 22PIN DSI1 or DSI0 port of the Raspberry Pi motherboard.
2. Use 2pin connector to connect the power connector of the display to the 5V GND pin header of the Raspberry Pi motherboard.
3. Secure the Raspberry Pi to the display with M2.5 screws.
Note: Make sure that the DSI cable is connected in correct direction and 5V power is supplied through the GPIO pins.
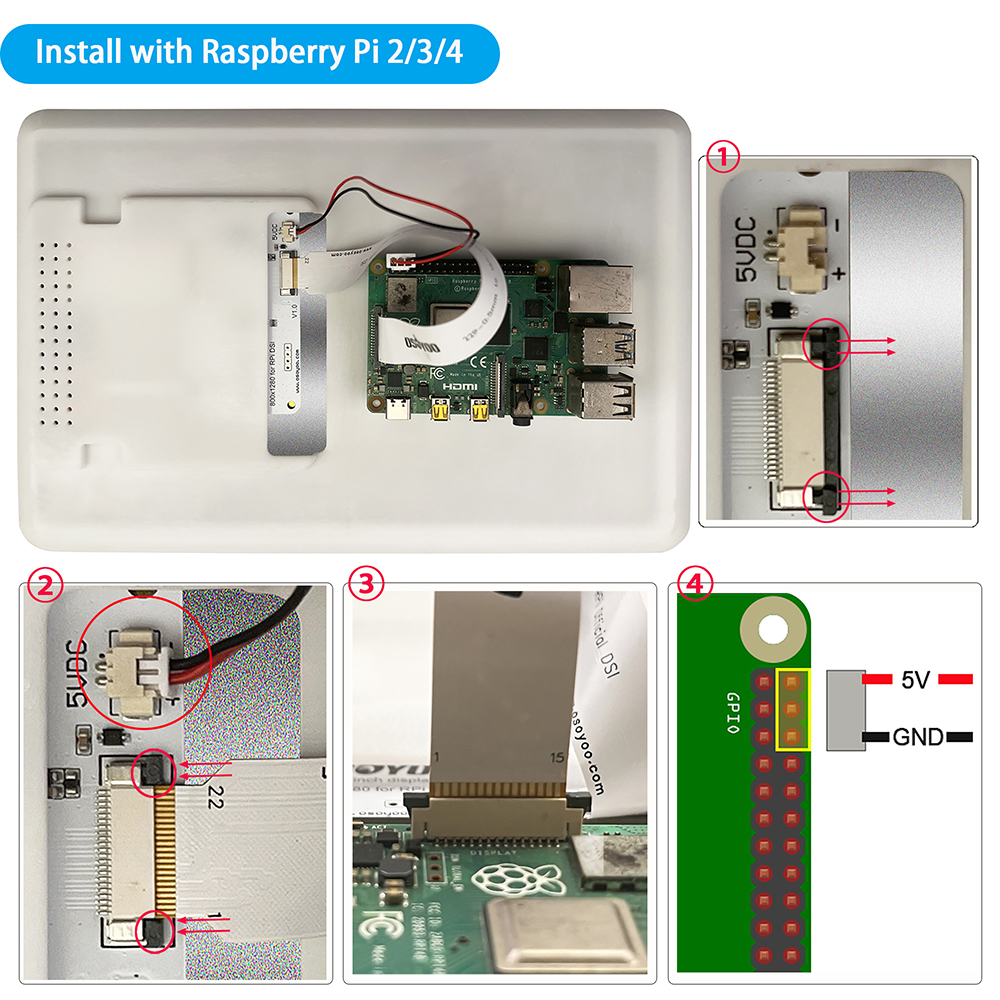
 Hardware Connection with Pi4B/3B+/3B/3A+
1. Use the 15pin-1mm to 22pin-0.5mm DSI cable (for Pi3/4) to connect the DSI port of the display to the 15PIN DSI port of the Raspberry Pi motherboard.
2. Use the 2pin connector to connect the power connector of the display to the 5V GND pin header of the Raspberry Pi motherboard.
3. Secure the Raspberry Pi to the display with M2.5 screws.
Note: Make sure that the DSI cable is connected in correct direction and 5V power is supplied through the GPIO pins.
Software Settings
Step 1: Insert a TF card installing Raspberry Pi OS into your raspberry pi, and then power on your Raspberry Pi.(Note: About how to install OS and control Raspberry Pi remotely, please visit: https://osoyoo.com/?p=60151)
Step 2: install script, open your PC terminal and run the following commends:
sudo apt update

# Clone the repository
git clone https://github.com/osoyoo/osoyoo-dsi-panel.git
cd osoyoo-dsi-panel

# Run direct installation script
./install-direct.sh display10inch
Note: The script will:
- Auto-detect your Pi model (Pi 3/4/5)
- Install dependencies
- Build and install the driver using DKMS
- Install device tree overlays
- Automatically update /boot/firmware/config.txt with correct dtoverlay value
If your screen is 7″ 720×1280 DSI screen, please replace display10inch with display7inch
If your screen is 3.5″ 480×800 DSI screen, please replace display10inch with display3.5inch
For Raspberry Pi 5, default dsi port is dsi1, if you insert the screen to dsi0 port, please add ” dsi0″ in the install command as following:
./install-direct.sh display10inch dsi0
or you can use sudo nano /boot/firmware/config.txt command to add dsi0 to the last line( dtoverlay setting):
dtoverlay=osoyoo-panel-dsi-10inch,4lane
after changing
dtoverlay=osoyoo-panel-dsi-10inch,4lane,dsi0
3) Reboot your Raspberry Pi
sudo reboot

Adjust orientation
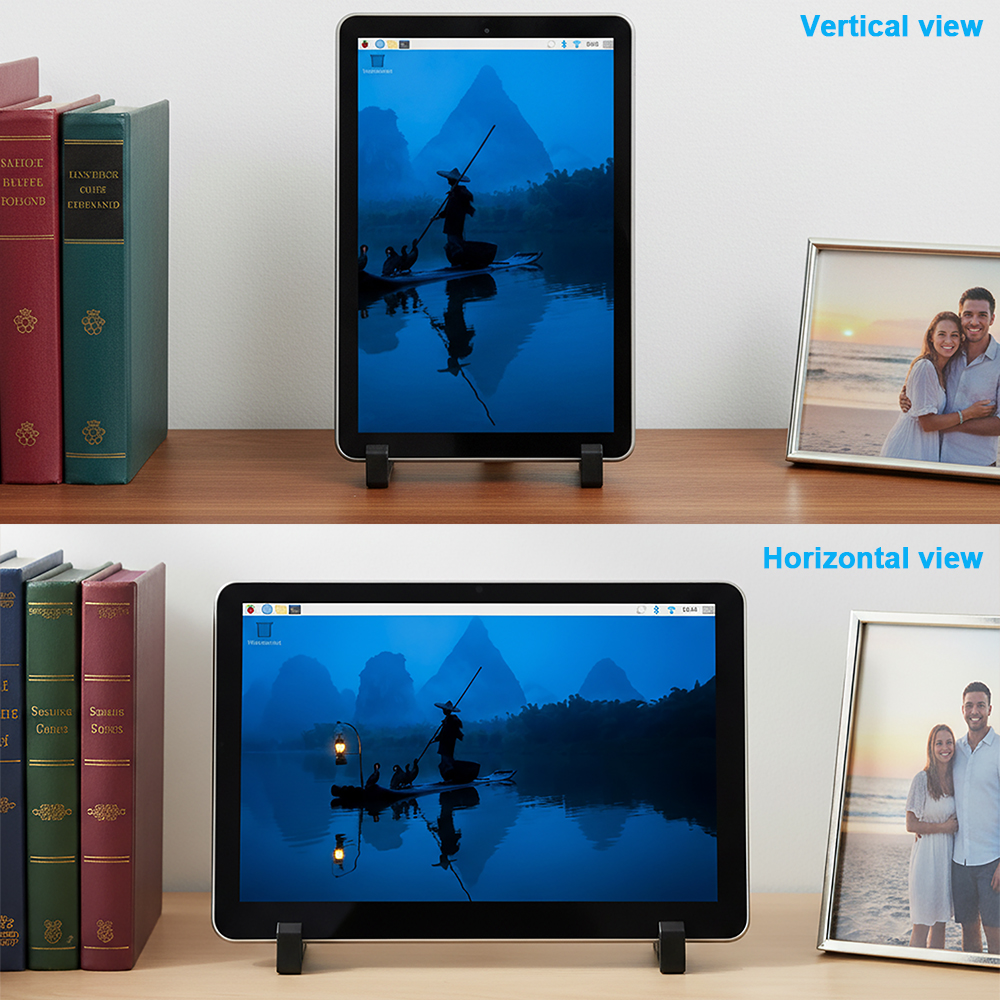
This screen support vertical view and horizontal view. Please run following command to change orientation:
wlr-randr --output DSI-1 --transform position
position has 4 options values:
normal | 90| 180 | 270
normal means portrait position.
90 means rotate to left side(landscape)
180 means screen rotate 180 degree(portrait)
270 means screen rotate right side(landscape)
For example, terminal command ” wlr-randr –output DSI-1 –transform 90 ” will rotate the screen to left and make the screen in landscape orientation. If you input command
wlr-randr --output DSI-1 --transform normal
, then screen will be back to default portrait orientation.
Above command only temperarily change the screen orientation which can not be saved after reboot. You can run
sudo nano ~/.config/labwc/autostart and save the orientation command in the file , for example, if you want make landscape orientation, write following line in ~/.config/labwc/autostart:
wlr-randr --output DSI-1 --transform 90
Then your default screen orientation will be changed to new value.
Adjusting Backlight Brightness
- 1. Open the “Screen Configuration” application;
- 2. Go to “Screen” -> “DSI-2” -> “Brightness”, check the backlight brightness you need to set, and finally click “Apply” to complete the backlight setting.



