1. 7inch TN DSI screen for Raspberry Pi
| Buy from OSOYOO |
Buy from US |
Buy from UK |
Buy from DE |
Buy from IT |
Buy from FR |
Buy from ES |
Buy from JP |
 |
 |
 |
 |
 |
 |
 |
 |
2. DSI cable for Raspberry Pi 5
| Buy from OSOYOO |
Buy from US |
Buy from UK |
Buy from DE |
Buy from IT |
Buy from FR |
Buy from ES |
Buy from JP |
|
|
|
|
|
|
|
|
3. DSI cable for Raspberry Pi 4
| Buy from OSOYOO |
Buy from US |
Buy from UK |
Buy from DE |
Buy from IT |
Buy from FR |
Buy from ES |
Buy from JP |
|
|
|
|
|
|
|
|
Caution
- This LCD display supports Raspberry Pi OS, Ubuntu and so on. Please download your system image with desktop
- Please make sure that your TF card (Micro SD) has enough space to write system image
- Do not even touch your raspberry pi board when power is on.
Introduction
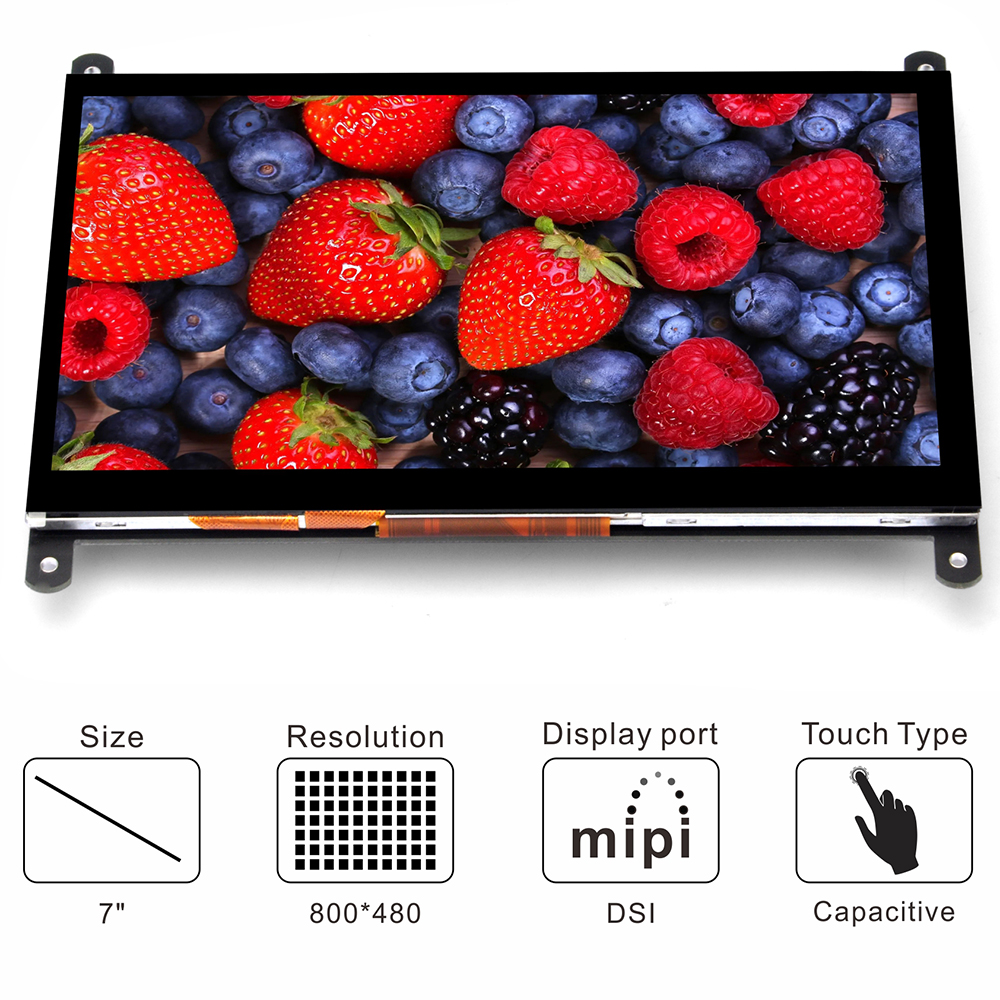
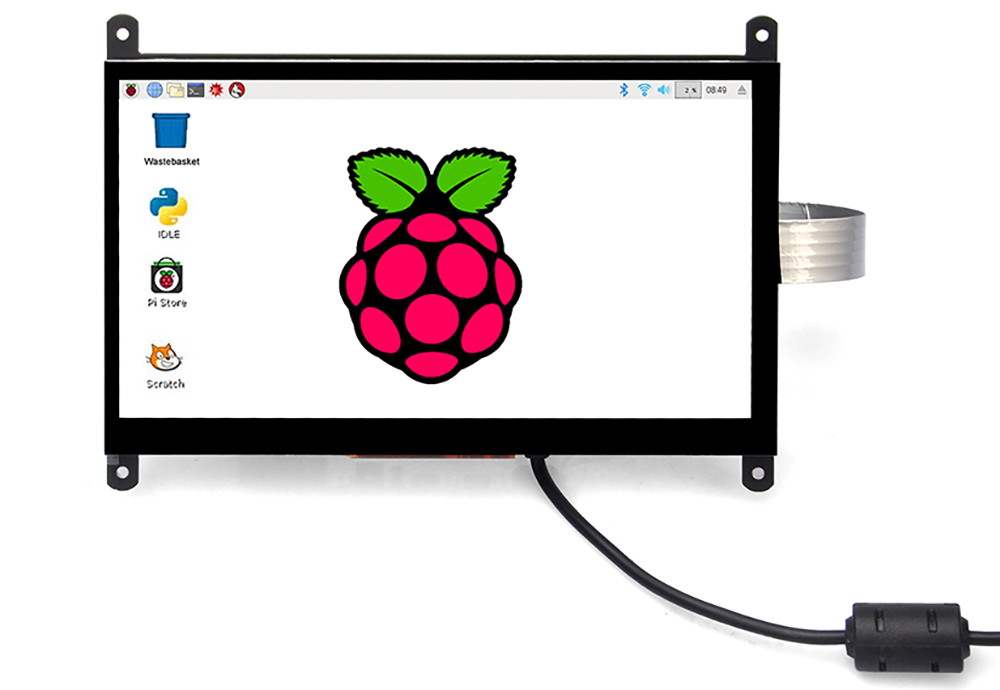
The 7″ LCD display is an LCD display which connects to the Raspberry Pi through the DSI connector. It is capacitive touch LCD. It doesn’t need install driver, and you can plug and play. The Physical resolution of LCD display is 800*480.
Feature
- Only Use DSI interface Connects to the Raspberry Pi board include power;
- The refresh frequency about 60HZ;
- Physical resolution 800*480, 24-bit color;
- 5 finger Capacitive touch (touch points according to OS and needed to setting for multi-touch)
- Touch panel: TN (Note: TN panel designs for direct viewing and provides a clear and sharp image with fast response. Best suited for applications where the display is viewed primarily from the front.)
- 60/60/60/60 degree viewing angle;
- Free drive support Raspberry ,Ubuntu MATE, Kali, RetroPie, OpenElec, OSMC, Archsystem and so on;
- Strong anti-interference;
- Ultra low power ,ultra-long distance lossless transmission, The screen will automatically sleep when it is not in use;
- The display size have changed from 800×480 to 1920×1080;
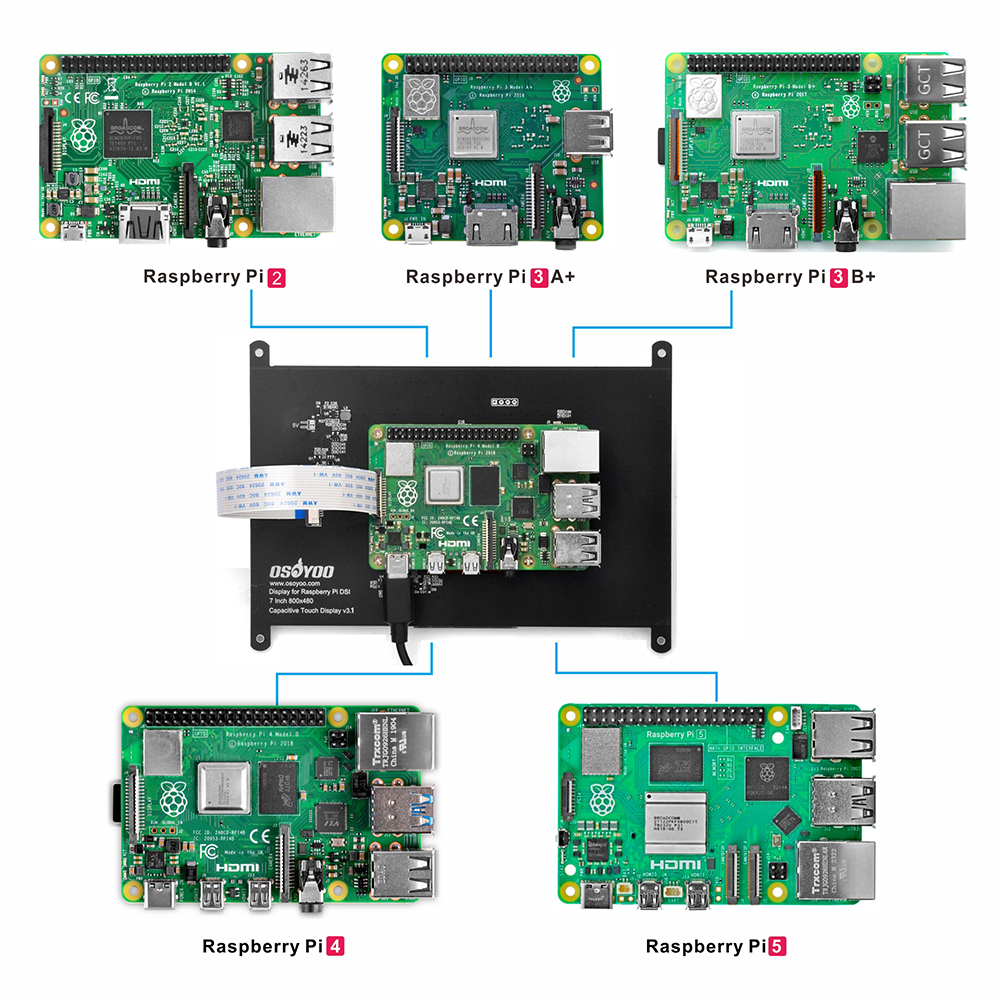
- It supports Raspberry Pi 2/3/3B+/4/3A+/5
- Working temperature -5° C to 38° C . Not suggest to work in high humid or extreme temperature environment.
Parameter
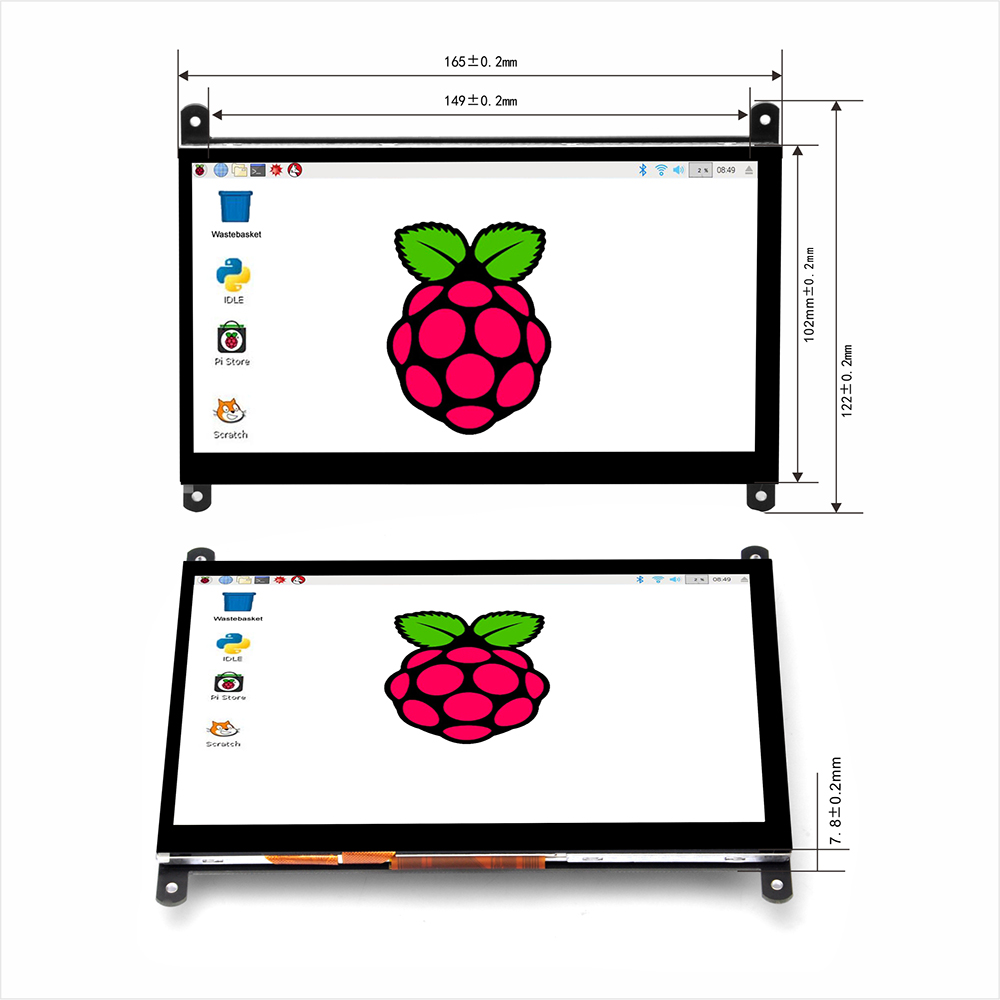
7″ screen V3.1 datasheet: https://osoyoo.com/picture/Elaine_Old_Tutorial/7inch_V3/datasheet.pdf
7″ DSI screen 3D file: https://osoyoo.com/picture/Elaine_Old_Tutorial/7inch_V3/3D-OSOYOO-7INCH-V3.1-Display.step
Using guide
Parts Needed
You will need the following parts:
- 1x Raspberry Pi 2/3/3B+/4/3A+/5
- 1x Power USB adapter
- 1x Power USB cable
- 1x 7″ DSI touch screen
- 1x Micro SD card (new and 16GB up)
- 1x TF card reader
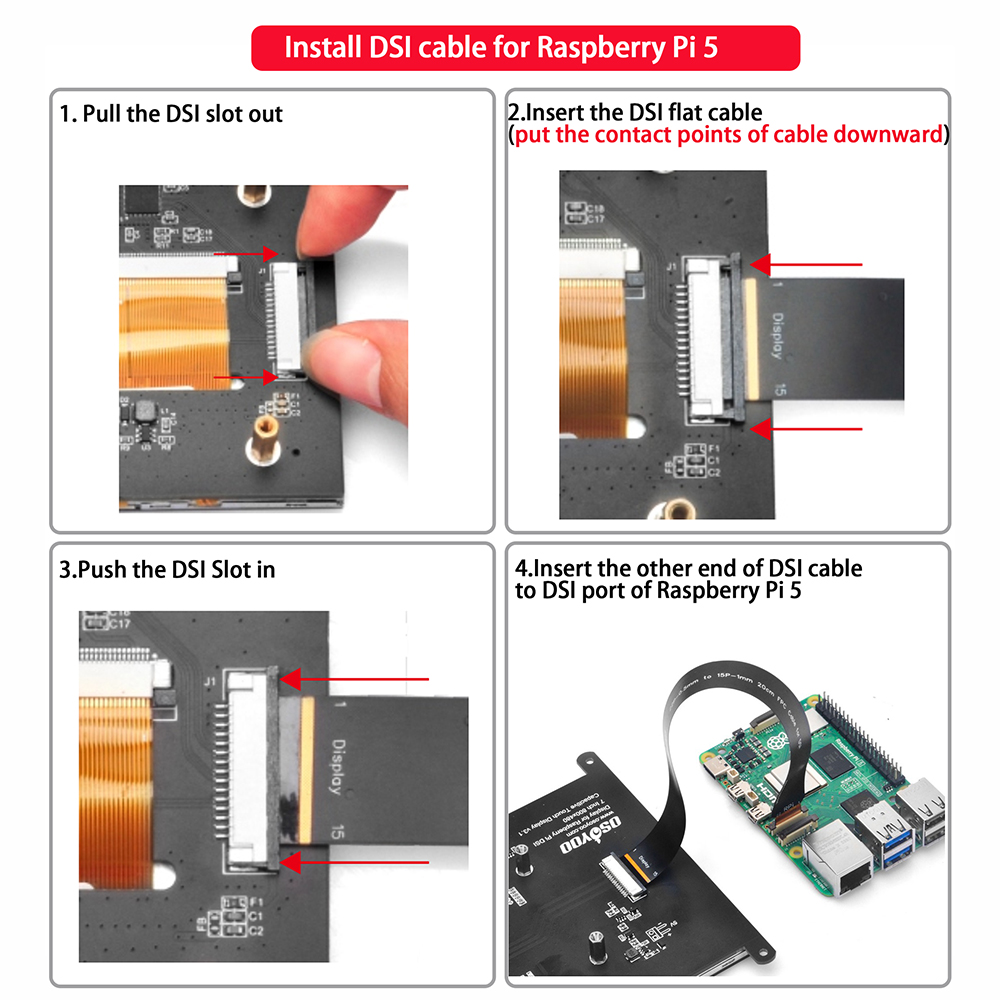
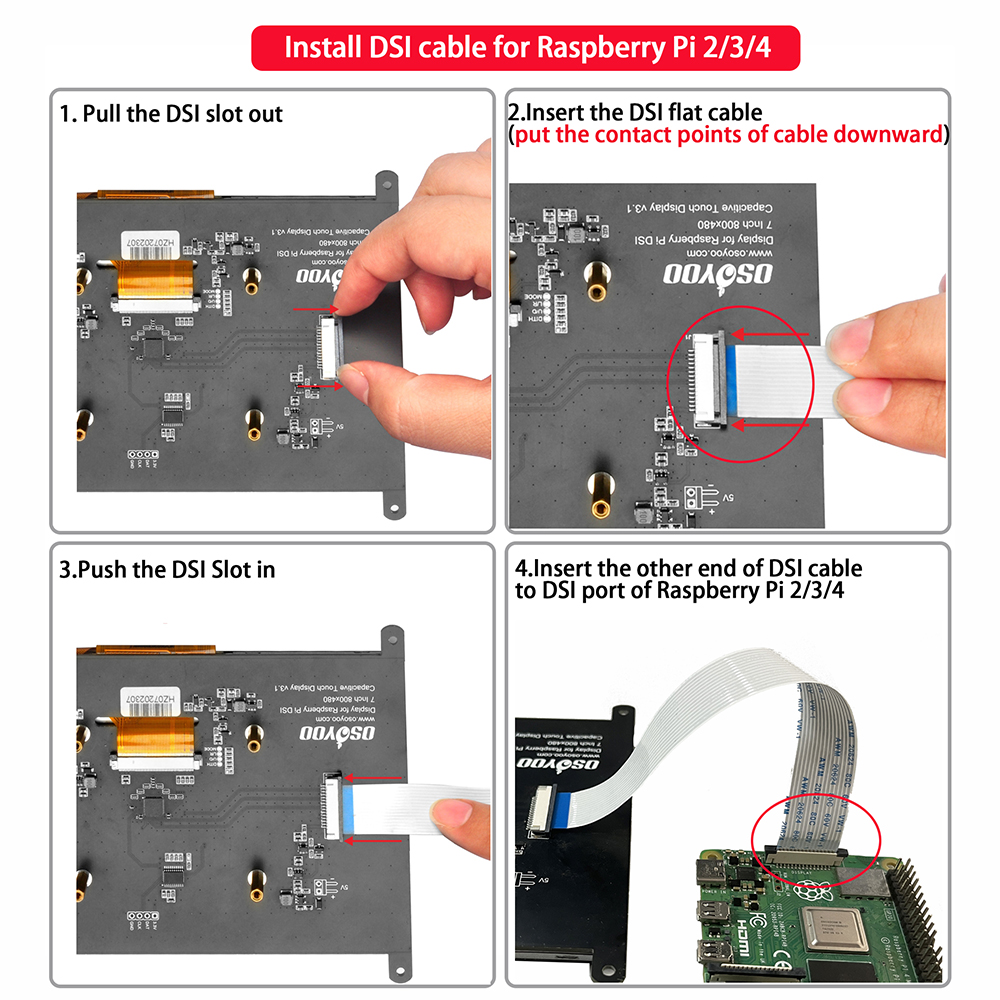
How to install DSI cable?
How to install OS?
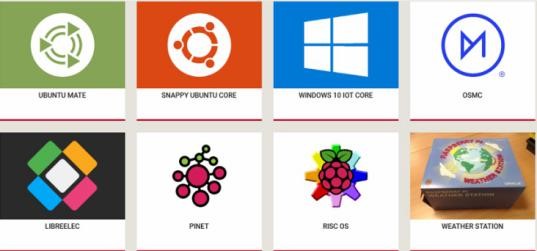
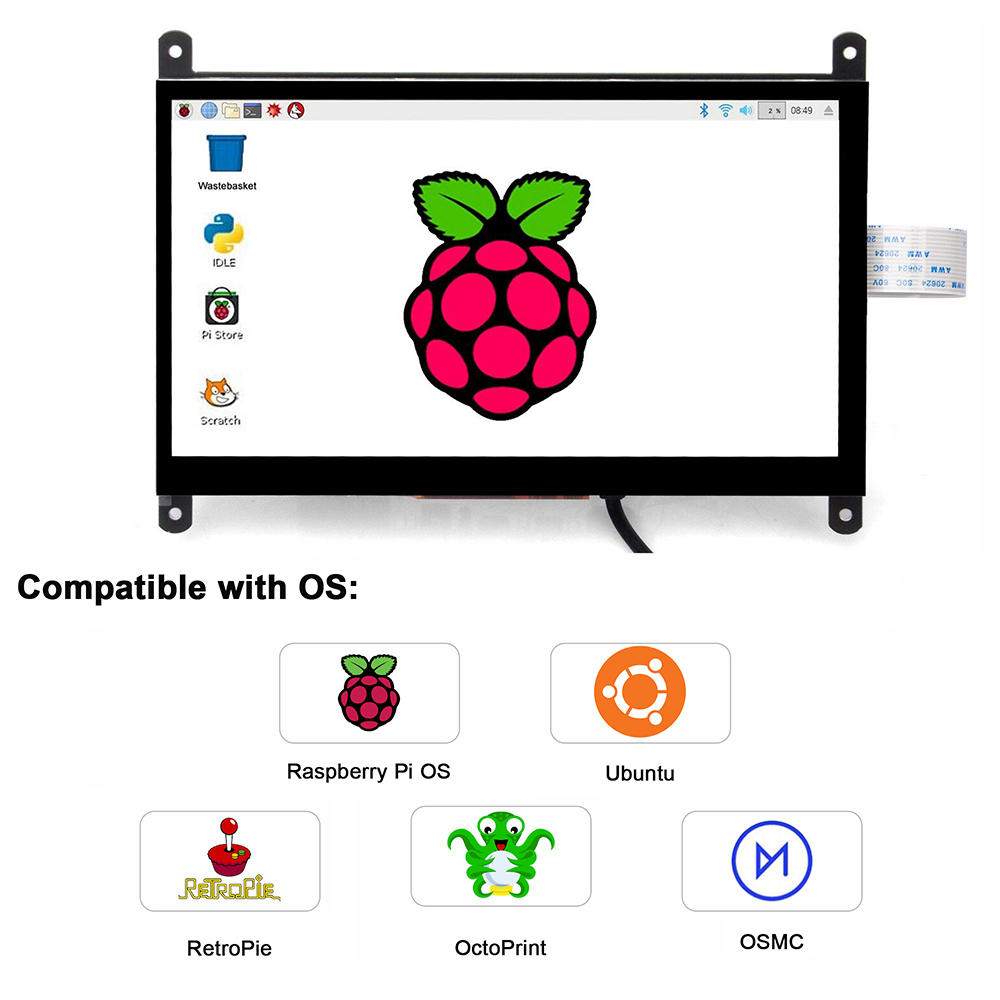 7″ DSI LCD supports IMG system such as Raspbian, Ubuntu MATE, Snappy Ubuntu Core, OSMC, and Windows 10 IOT Core and so on. Please follow as below:
Firstly, Download IMG system in your computer from the raspberry pi official website: https://www.raspberrypi.org/downloads/
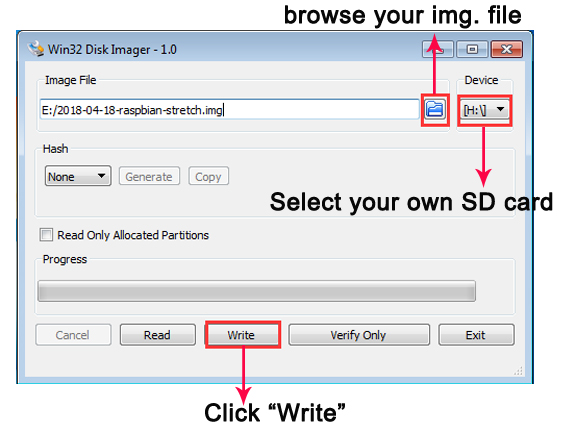
Secondly, Unzip the IMG system, and open your imager writer (recommend win32diskimager from: https://sourceforge.net/projects/win32diskimager/);
Thirdly, Insert the SD card into the card reader, and connect with computer, and select the image system and the device, and then click “write”, as below:
Fourthly, Insert the SD card into raspberry pi board and assemble 7″ DSI touch screen as below:
At last, Power up wait for the system to start (Note: Do not even touch your raspberry pi board when power is on or your hand has static charge):
Trixie/Bookworm DSI Display Rotation and Adjust Backlight Brightness
1. Adjust Backlight Brightness
The following steps are based on the Trixie system:
-
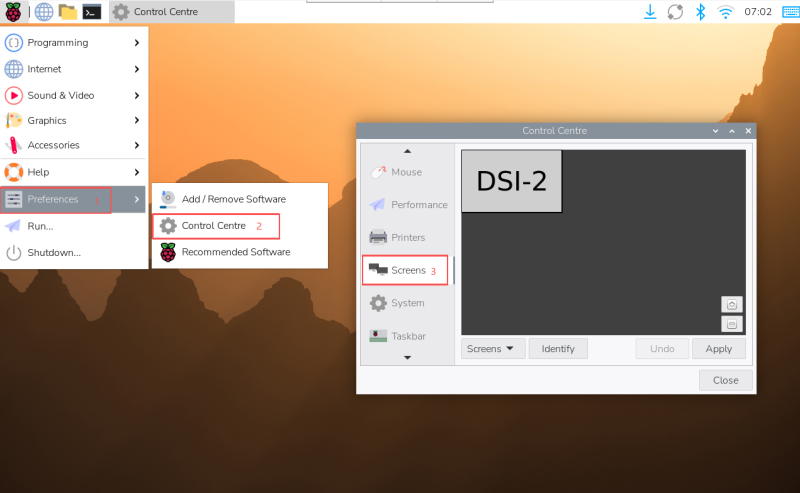
- 1. Click the menu in the upper left corner, then go to “Preferences” → “Control Center”, and select “Screens”;
-
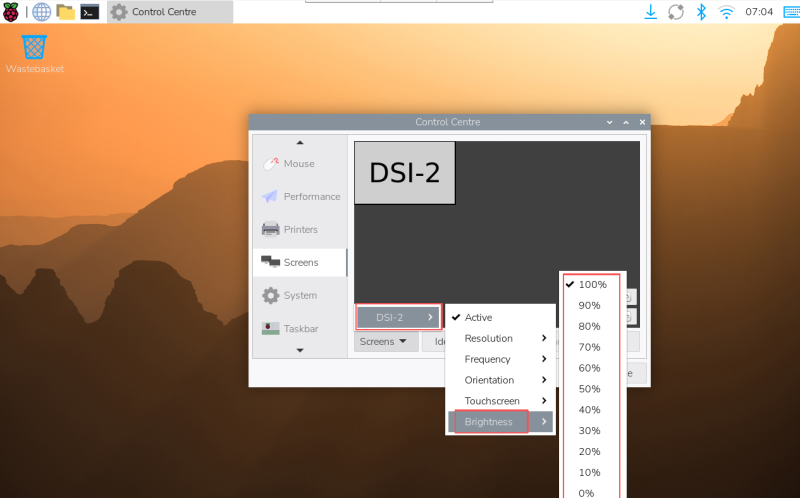
- 2. Go to “Screen” -> “DSI-2” -> “Brightness”, select and adjust the desired backlight brightness, and finally click “Apply” to save the settings.
2. Trixie/Bookworm Display Rotation
-
- 1. Click the menu in the upper left corner, then go to “Preferences” -> “Control Center”, and select “Screens”;
-
- 2. Go to “Screen” -> “DSI-2” -> “Orientation”, check the direction you need to rotate, and finally click “Apply” to complete the display and touch synchronous rotation.
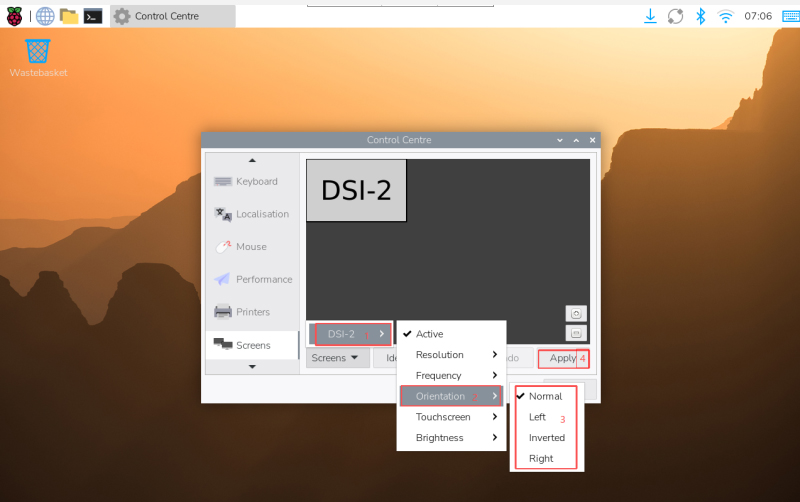
In the Bookworm system, this setting entry is located at “Screen Configuration” -> “Screen”.



